

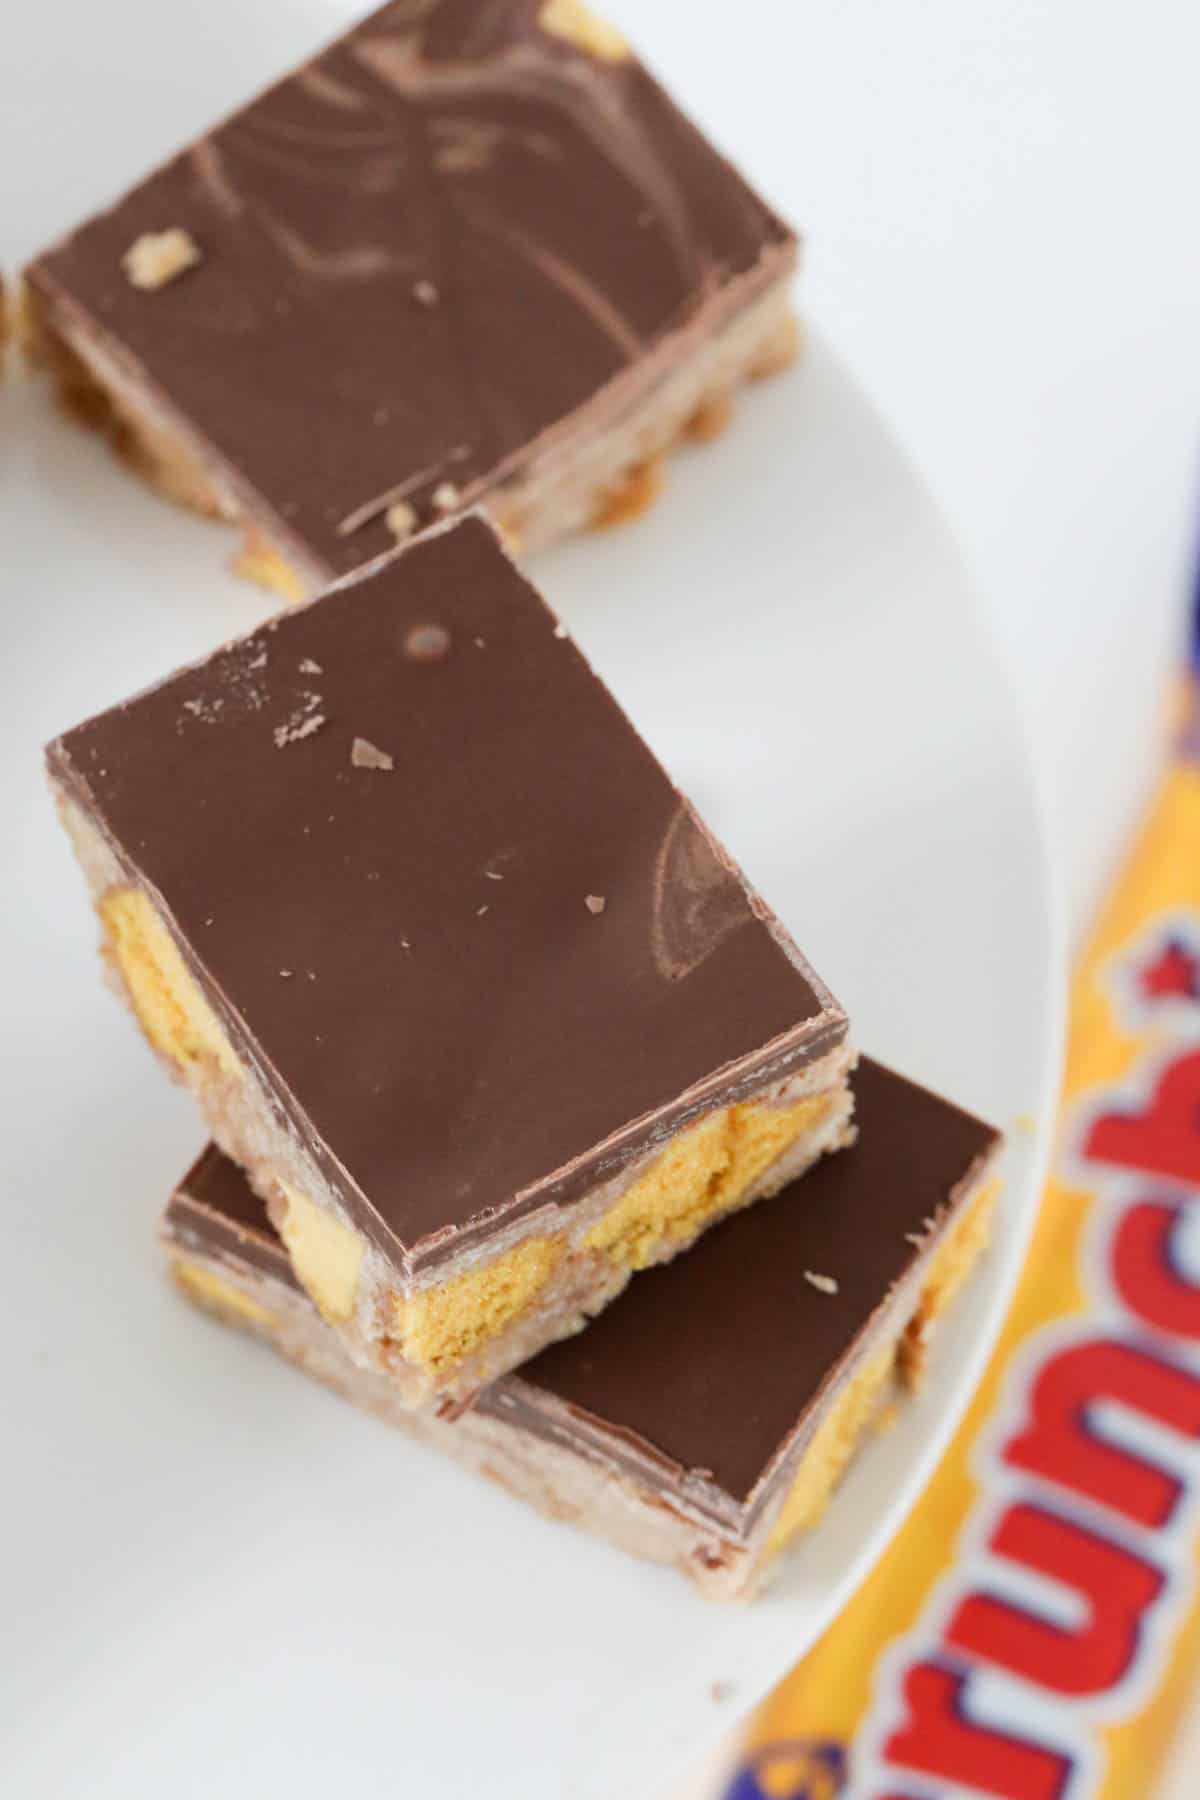
Everyone's favourite no-bake Chocolate Crunchie Slice takes just 10 minutes to make and tastes AMAZING!
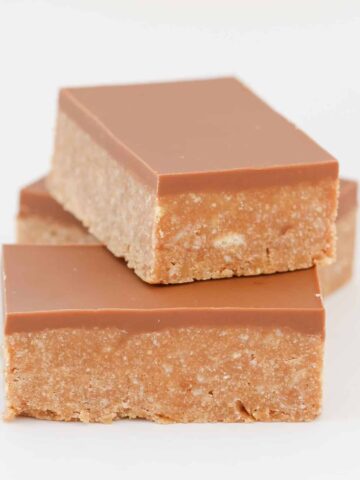
Chunks of crunchy honeycomb mixed through a crushed biscuit and sweetened condensed milk base, then topped with a layer of creamy milk chocolate. Divine!
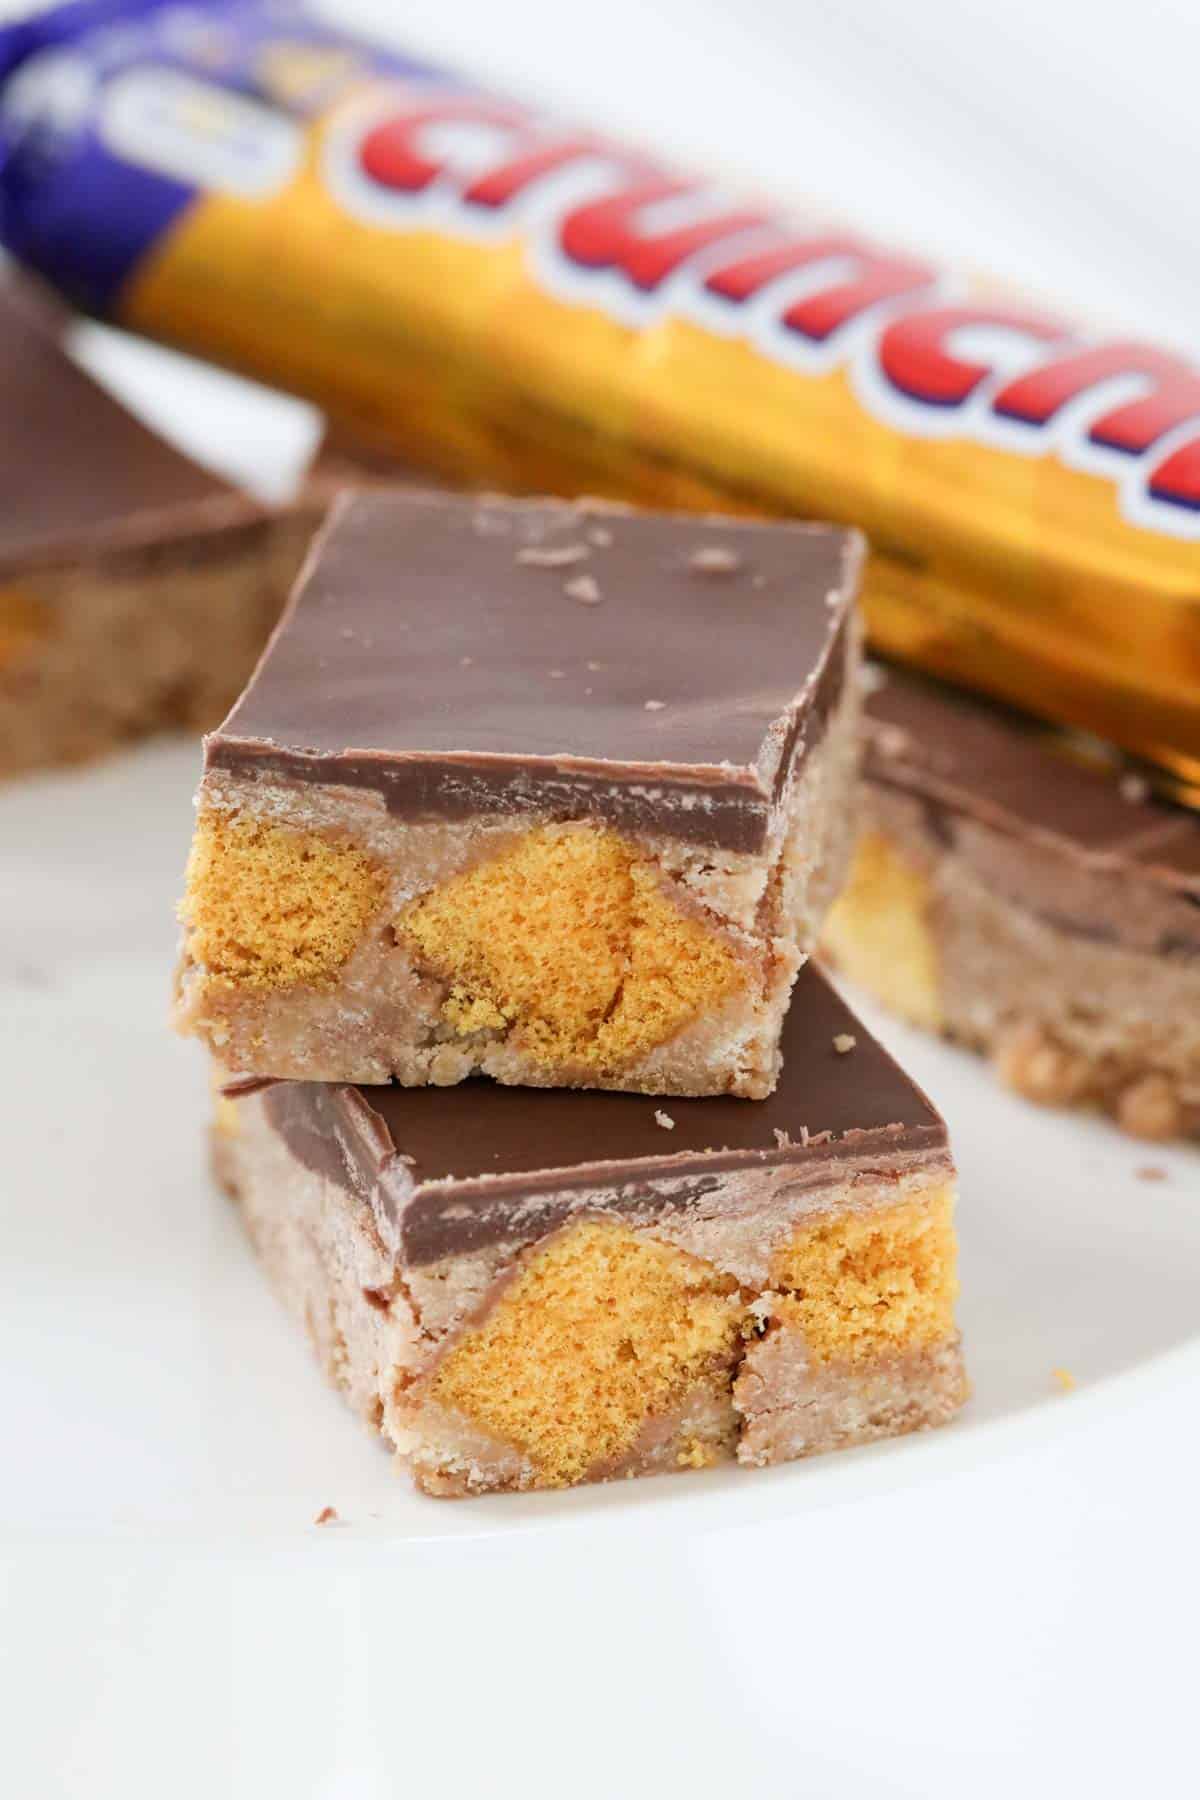
This Crunchie Honeycomb Slice is the ultimate no-bake slice recipe - it's quick and easy to make, it's freezer-friendly and makes a great lunch box treat!
Just like our delicious Malteser Slice, Mars Bar Slice and Snickers Slice, this Chocolate Crunchie Slice, with bursts of honeycomb throughout, is sure to become a popular family favourite.
Why You're Going To Love Chocolate Crunchie Slice
Using a food processor or Thermomix, this Chocolate Honeycomb Slice can be prepped in just 10 minutes! The hard part is waiting for it to chill...
- No-bake - just crush and mix the base ingredients, press into a tin and top with a layer of chocolate - chill for an hour and you're ready to go!
- Great for beginner bakers - this recipe is perfect for young bakers because it's quick and easy with just a couple of straightforward steps!
- Perfect for kids parties - cut into little squares for a crunchy honeycomb and chocolate treat at parties.
- Conventional and Thermomix - both simple methods for making chocolate crunchie slice are included in the post and the recipe card below.
What You Need
Our simple no-bake chocolate crunchie slice needs just 5 basic ingredients that you can easily pick up at the supermarket.
Note: Scroll to the recipe card at the bottom for the ingredients quantities and full detailed method!
- Plain sweet biscuits - known as biscuits in Australia (cookies in the US). I generally use Arnott's Marie biscuits, however you can use any kind of plain sweet biscuits/cookies you like.
- Sweetened condensed milk - choose full-fat sweetened condensed milk (not skim). I use Nestle brand, however any brand is fine. The amount of sweetened condensed milk you need will depend on the type/brand of biscuits you use. I recommend starting with 200g and add a little more if the mix is too dry and crumbly.
- Butter - either salted or unsalted is fine to use in this slice recipe.
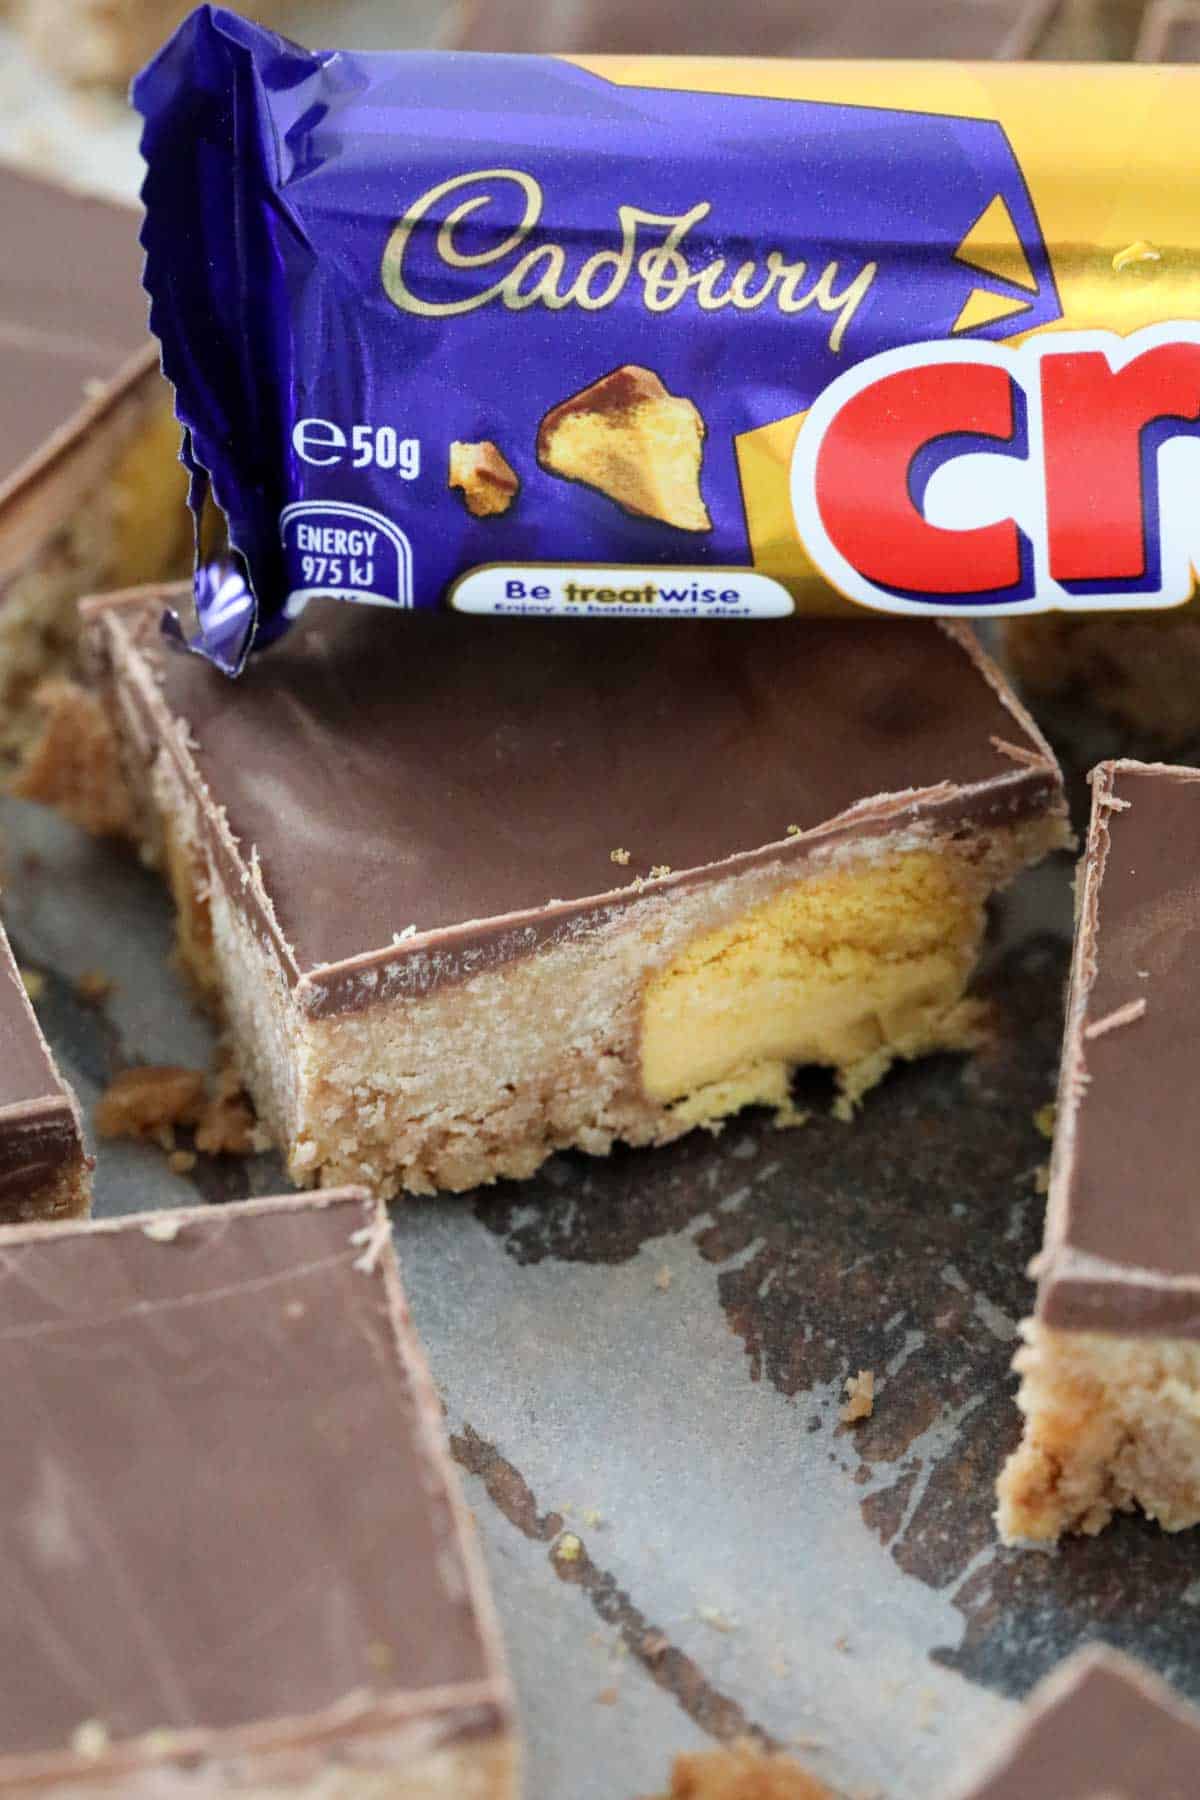
- Chocolate honeycomb bars - you can use any brand of chocolate coated honeycomb you like. I generally use Cadbury Crunchie bars which are most popular here in Australia.
- Milk chocolate - use either a block or chocolate melts. I recommend using milk chocolate, however you can substitute with dark chocolate if you prefer.

Equipment Required
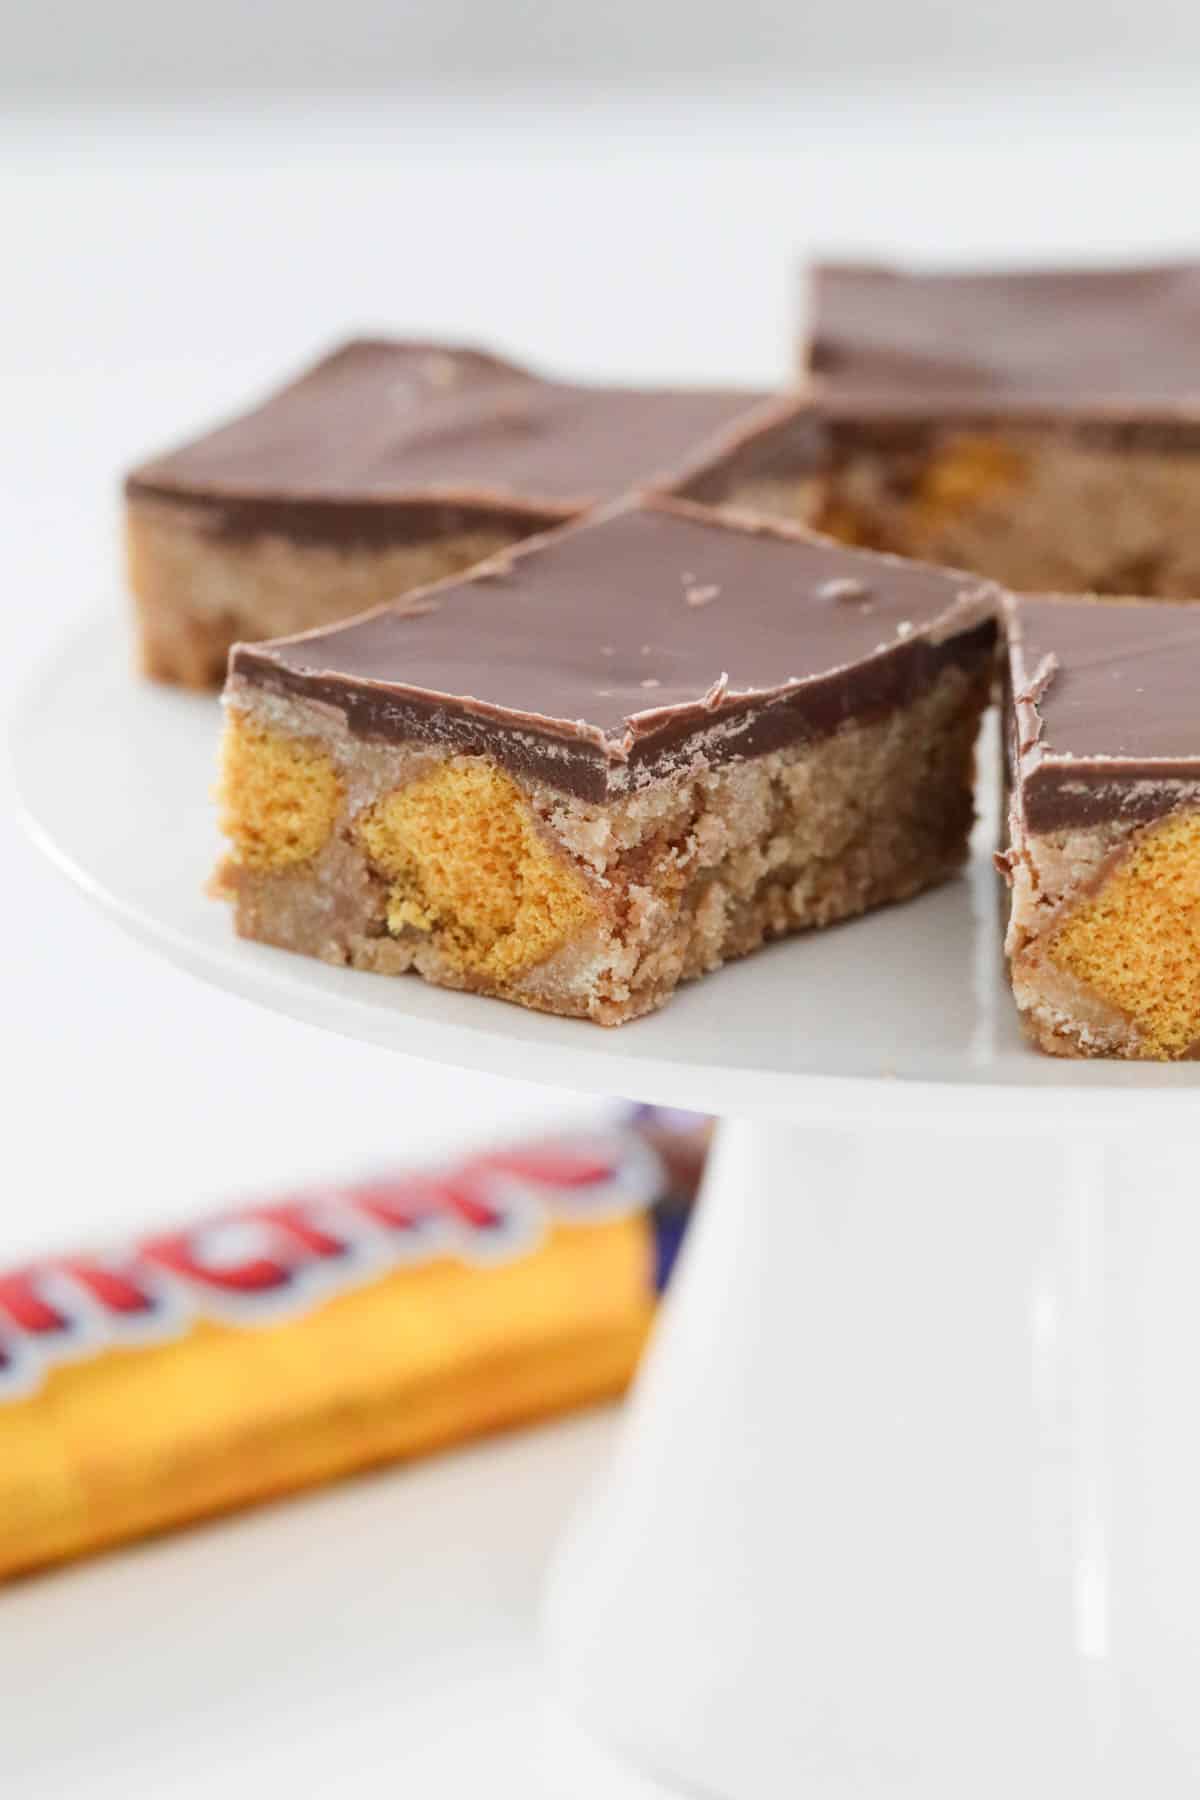
This easy biscuit based slice is irresistible with its bursts of honeycomb throughout!
- Food processor or Thermomix (optional), or you can use a rolling pin - to crush the biscuits.
- Mixing bowls.
- Rectangular slice tin - greased and lined with baking paper.
- Microwave or stovetop - to melt the chocolate.
Step By Step Instructions
Chocolate crunchie slice is just perfect for kids parties, cut into cute little squares for a crunchy treat!
Note: Scroll to the recipe card at the bottom for the ingredients quantities and full detailed method!
Step 1 - Prepare The Biscuit Base
Lightly grease and line an 18cm x 28cm rectangular slice tin with baking paper.
Crush the biscuits in a food processor, Thermomix or with a rolling pin. Place the biscuit crumbs in to a mixing bowl.
If using a Thermomix: Place the biscuits into the Thermomix bowl and crush for 8 seconds, Speed 8. Set aside in a bowl.
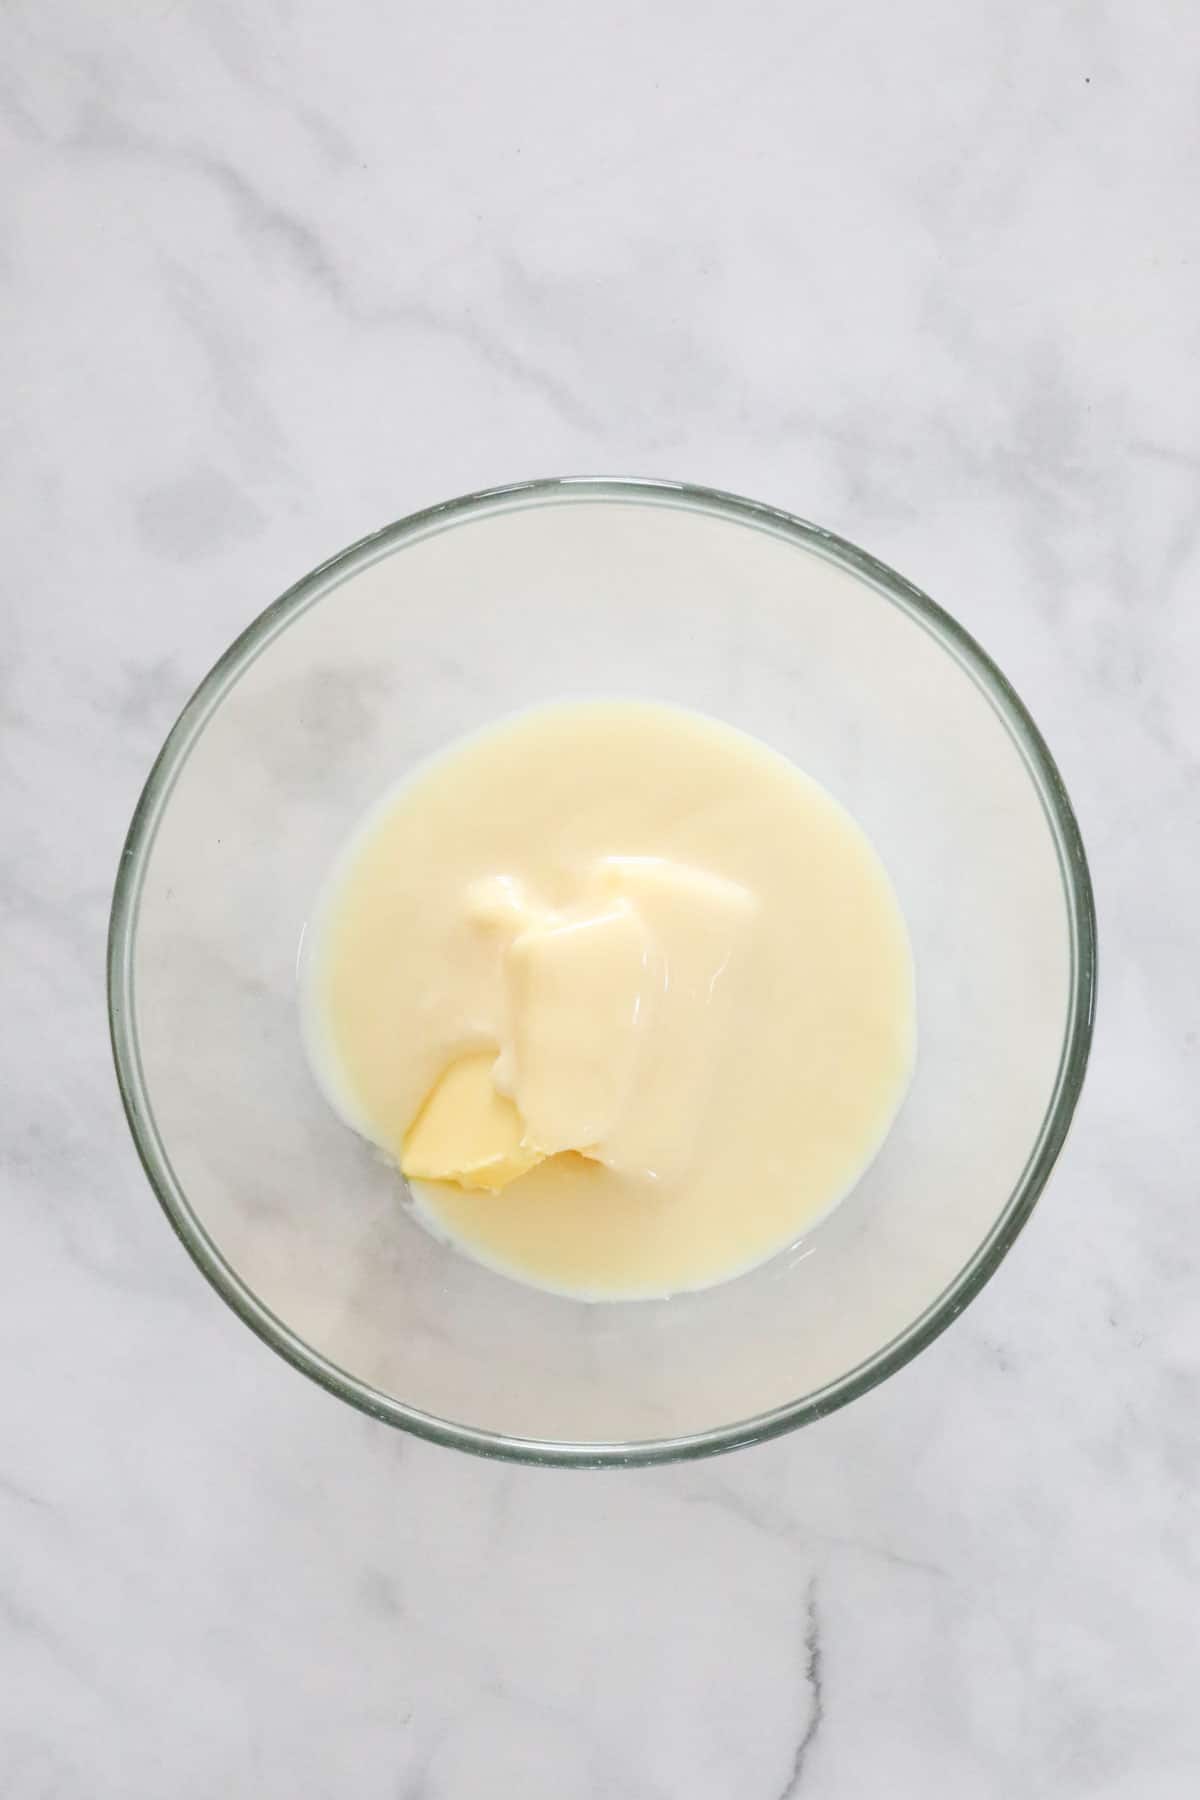
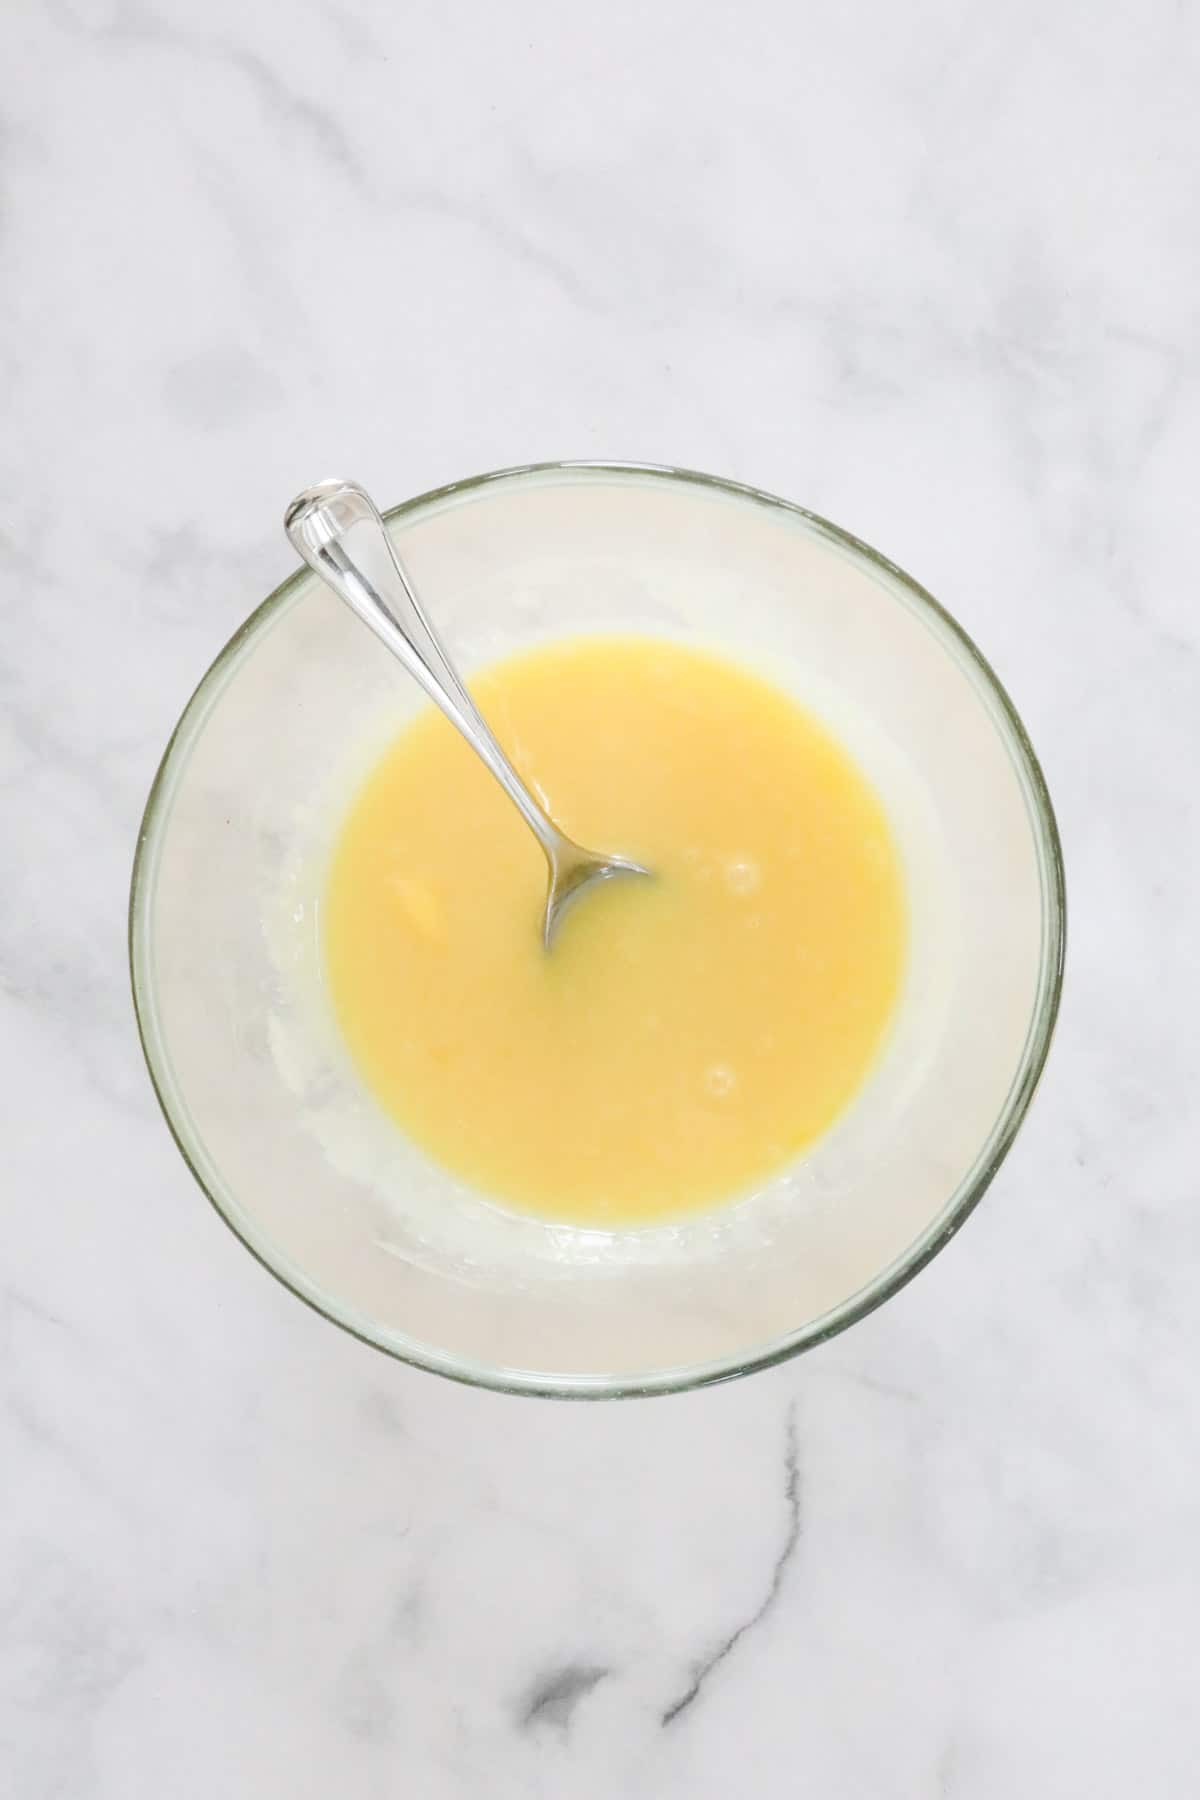
In another mixing bowl, melt butter and condensed milk in the microwave on 50% power for 2-3 minutes, stirring every 30 seconds until melted. Mix until smooth.
If using a Thermomix: Place the cubed butter and sweetened condensed milk into the Thermomix bowl. Melt for 4 minutes on 50 degrees, Speed 2.
Add the biscuit crumbs to the melted butter and condensed milk mixture.
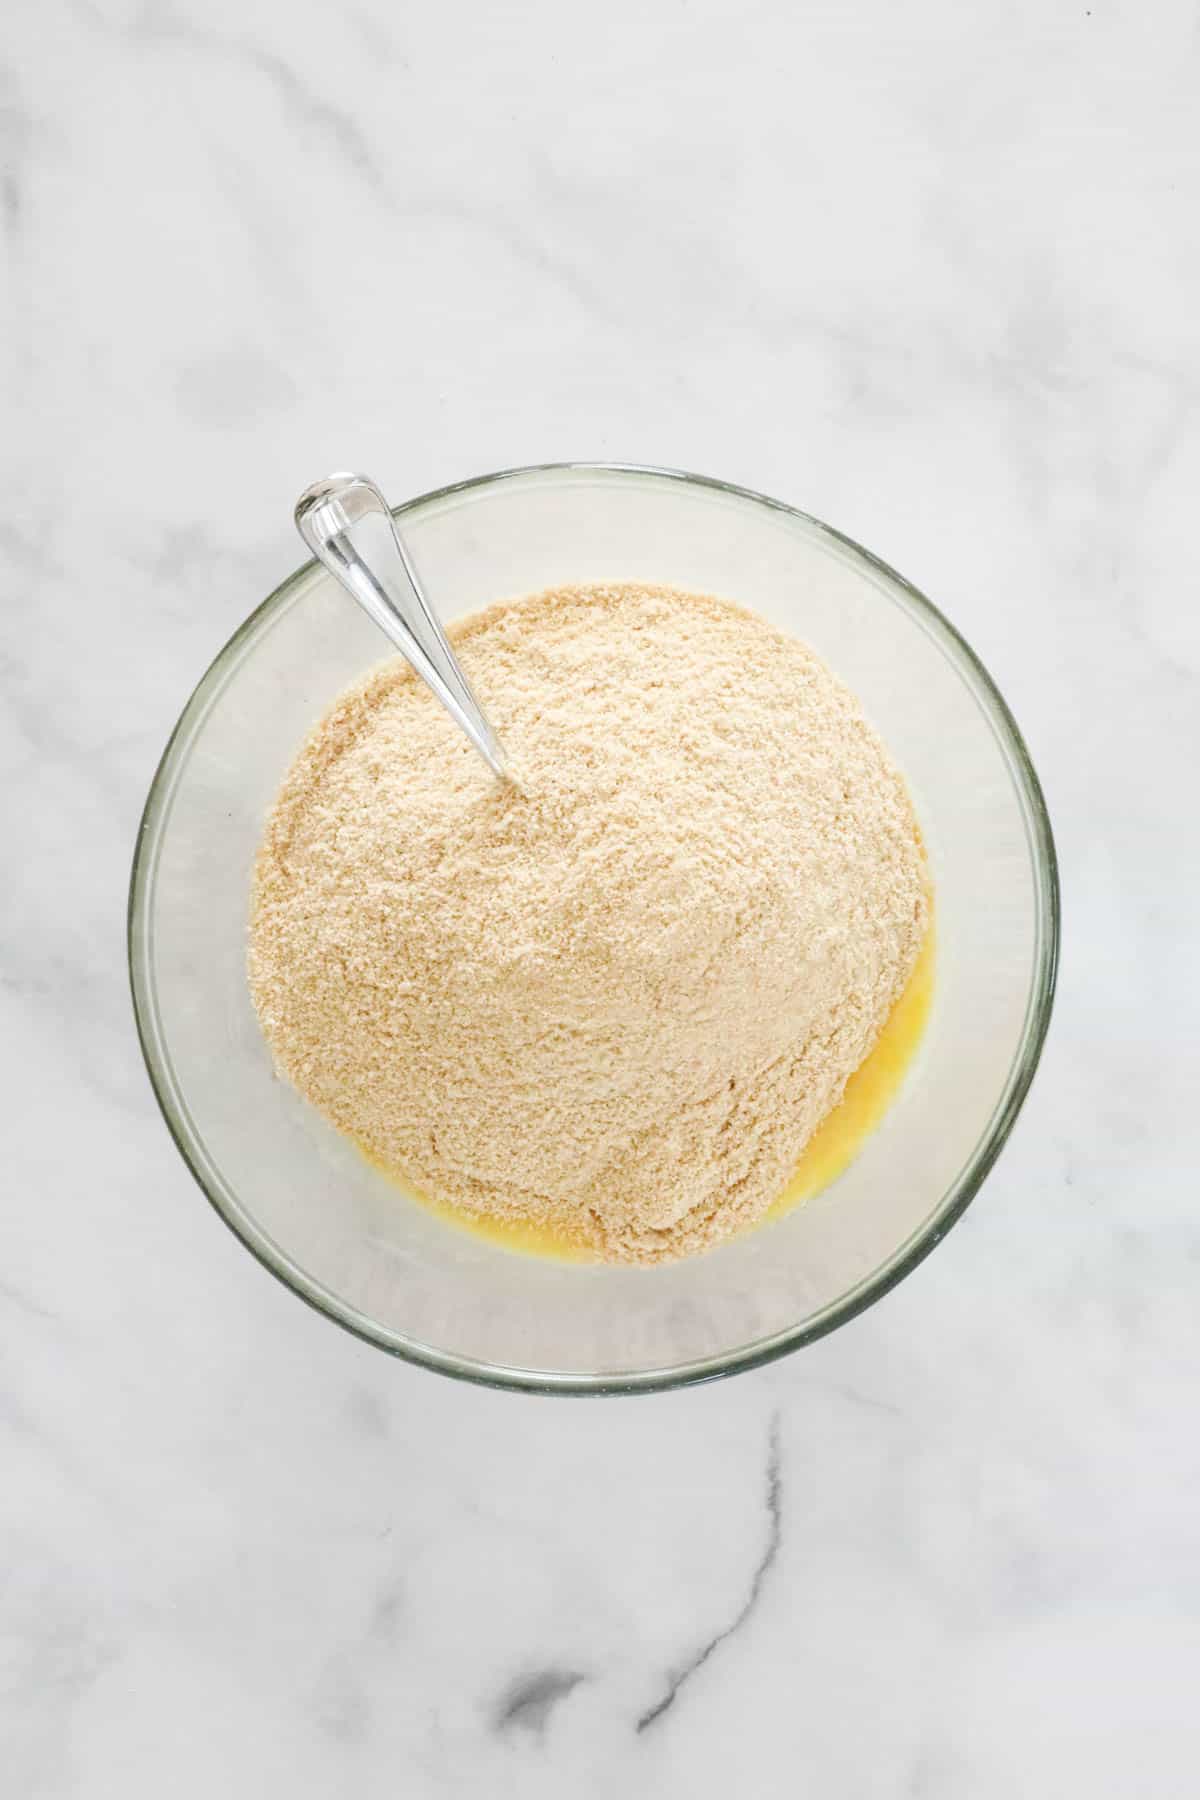
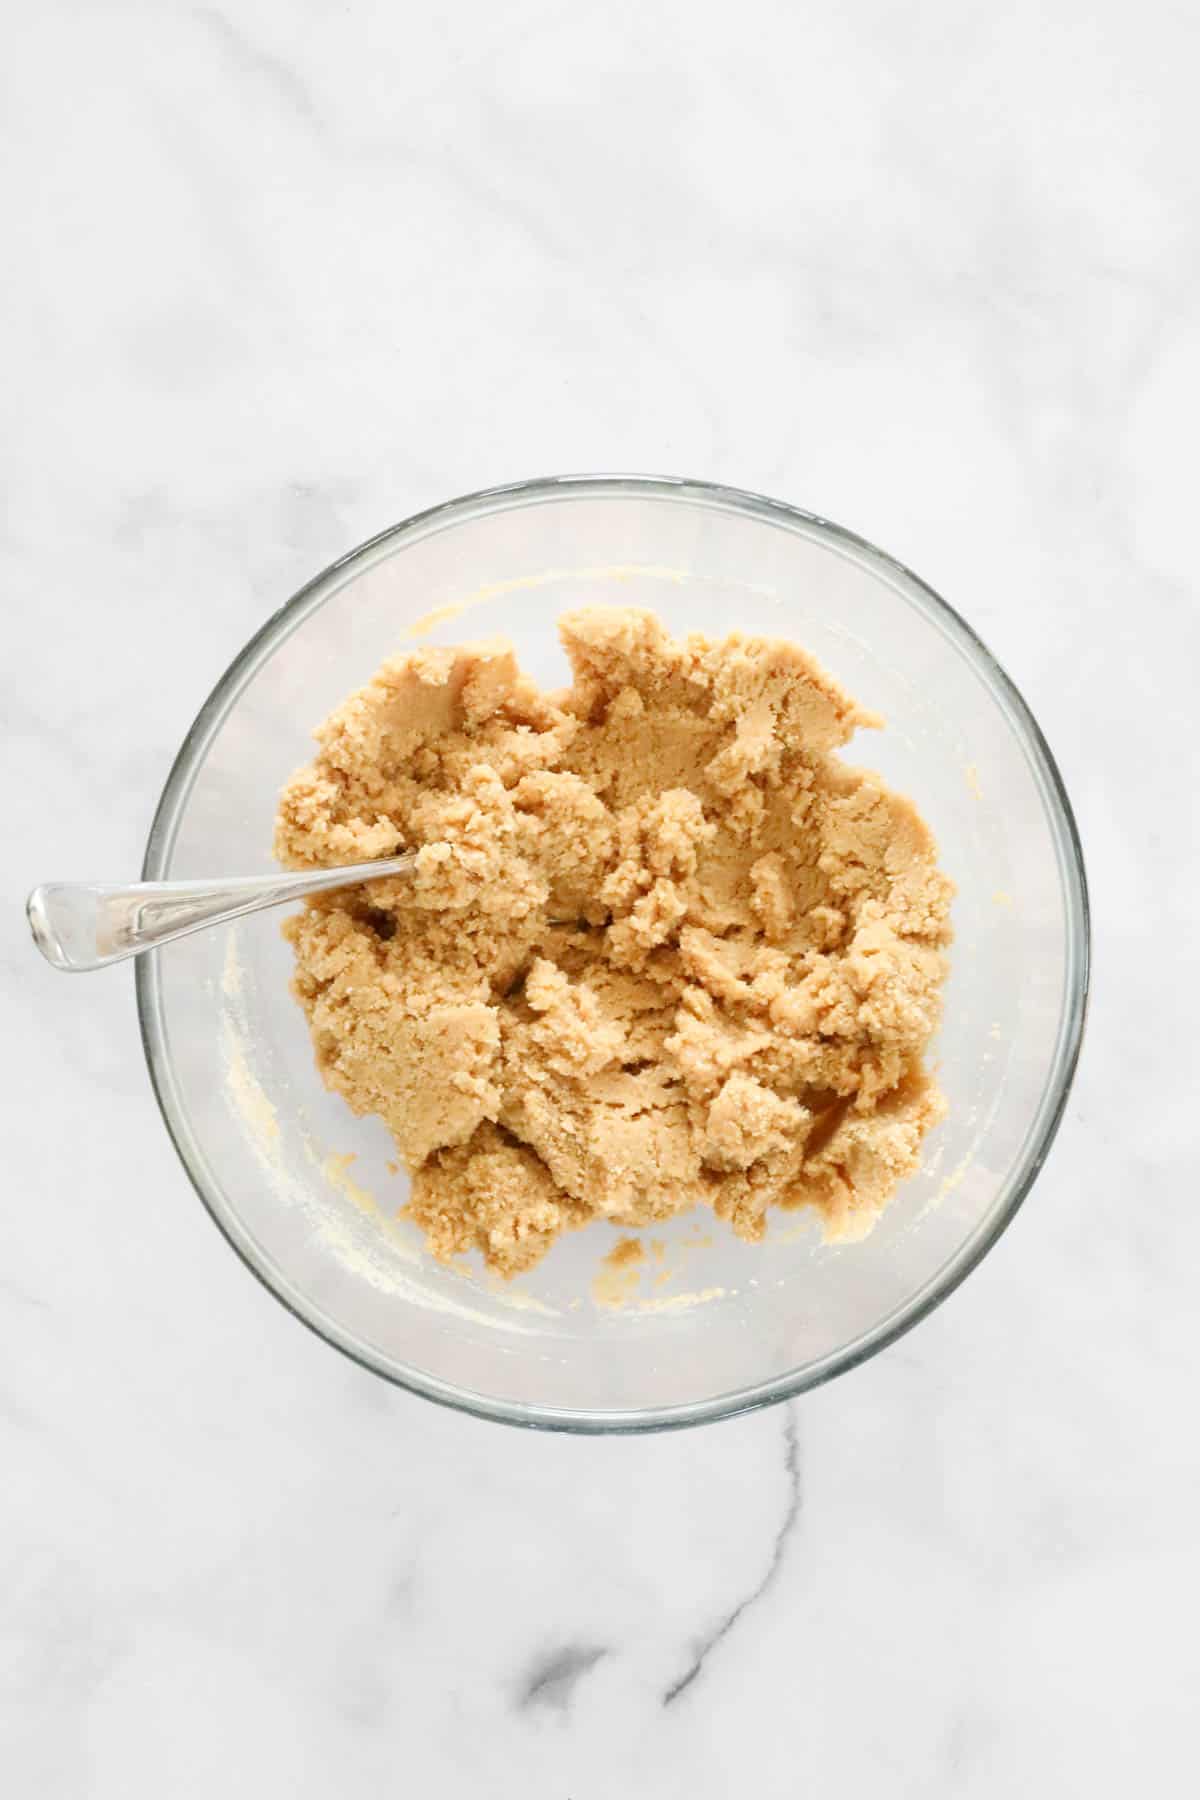
Mix crushed biscuits with the wet mixture until well combined.
Step 2 - Add Chunks Of Honeycomb
Chop honeycomb into small chunks.
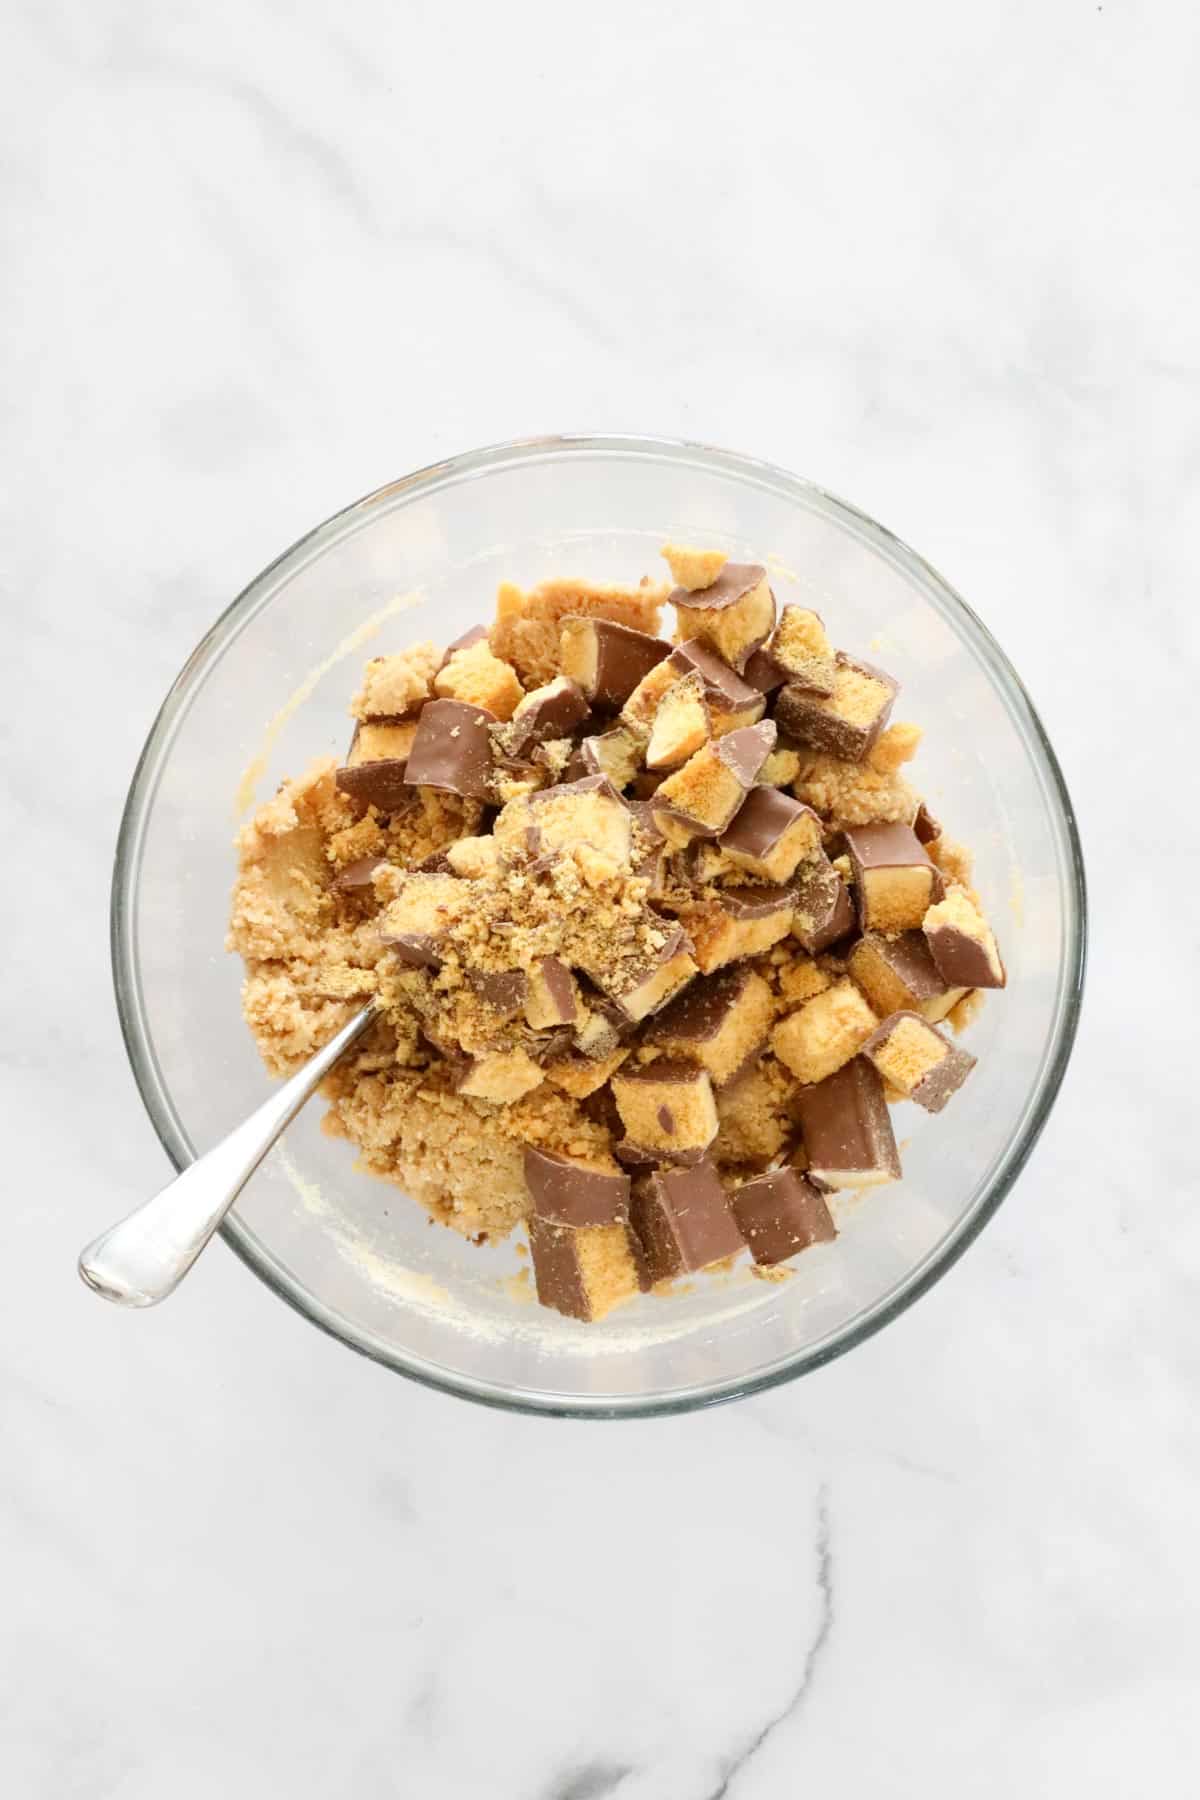
Mix the chunks through the biscuit base mixture.
If using a Thermomix: Add the crushed biscuits and Crunchie bar chunks and mix for 20 seconds, REVERSE, Speed 2 (using the spatula to help mix). Spread mixture into your slice tin and press it down firmly using the back of a spoon.
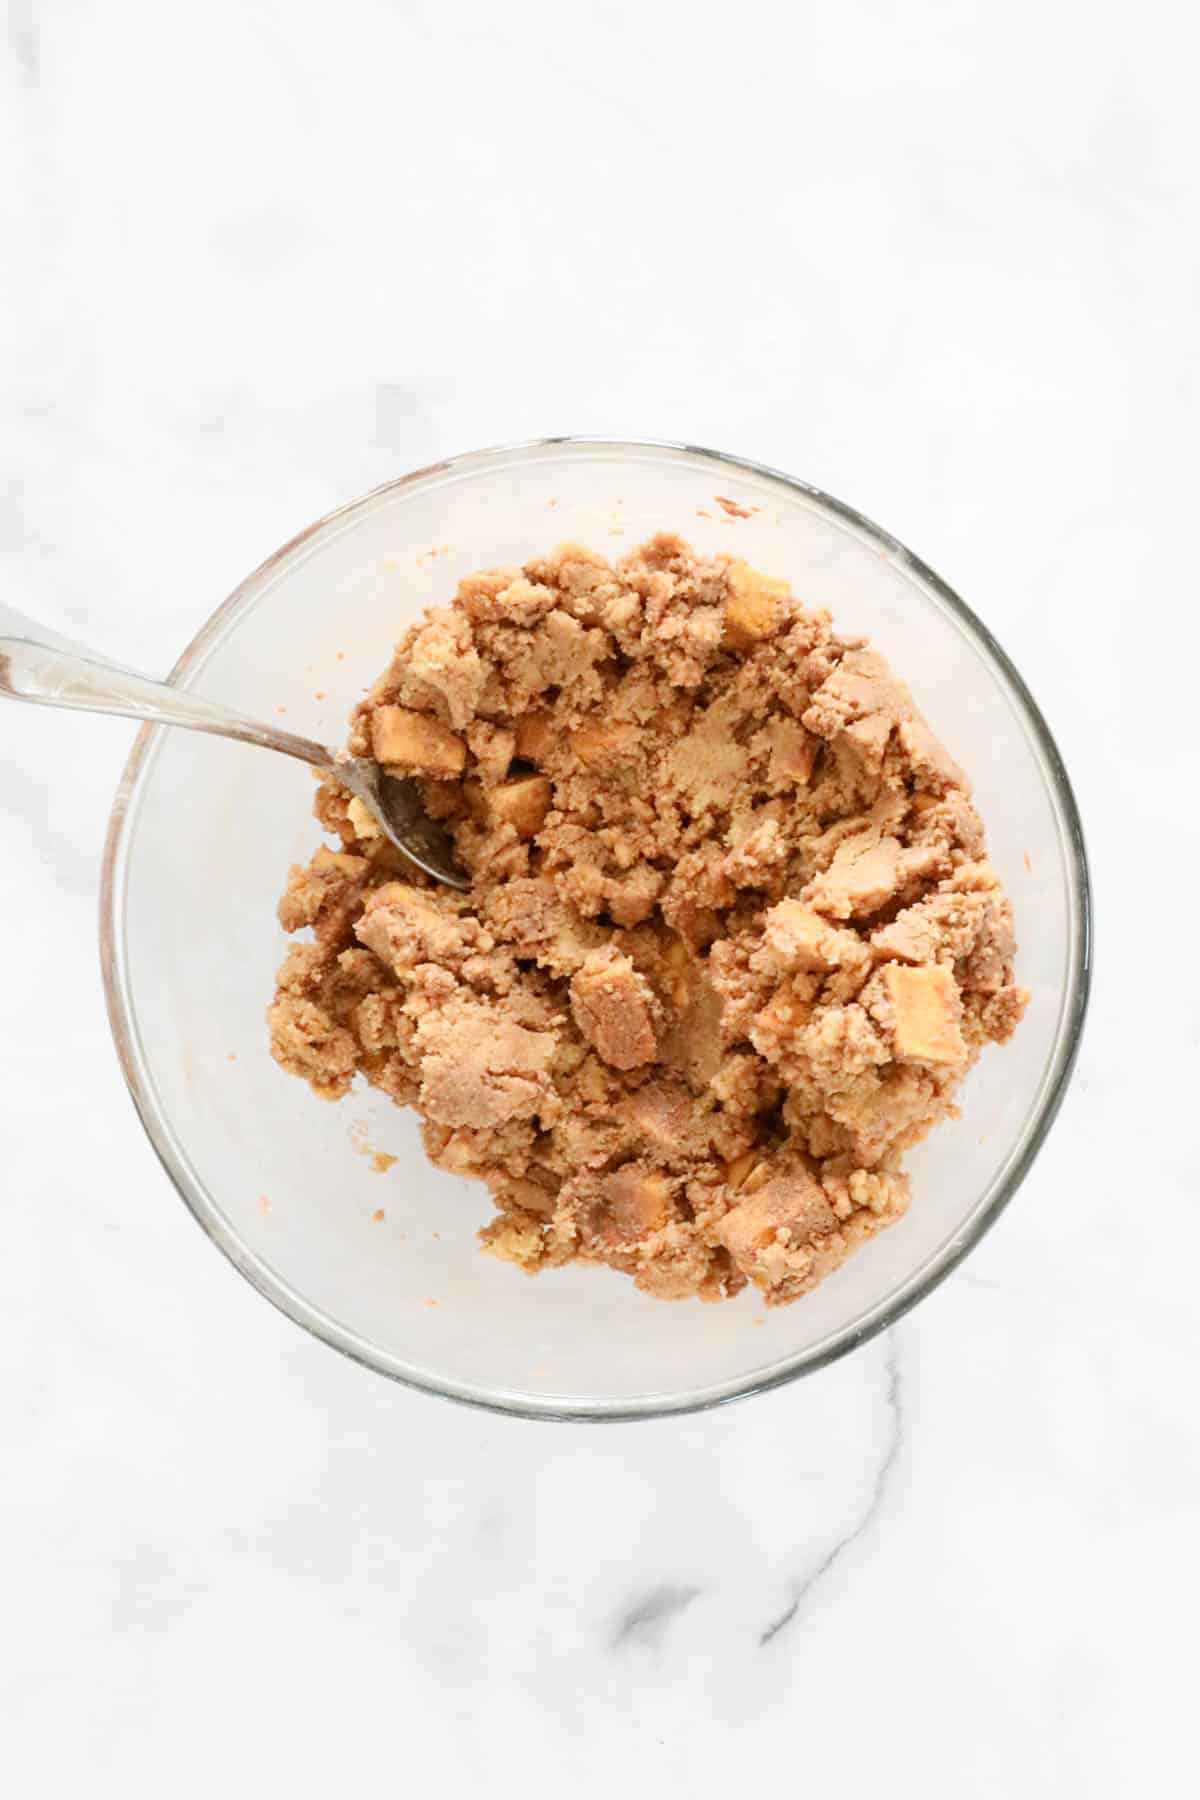
Spread mixture into your slice tin and press it down firmly using the back of a spoon.
Step 3 - Add The Chocolate Topping
Melt the chocolate in the microwave on 50% power for 3-4 minutes (stirring every 30 seconds) and pour over the slice.
Refrigerate for 1 hour minimum (overnight is best).
If using a Thermomix: Grate the milk chocolate for 10 seconds on Speed 5. Scrape down the bowl and melt for 3 minutes on 50 degrees, Speed 2. Pour chocolate over the slice and refrigerate for 1 hour minimum (overnight is best).
Note: you can add a little coconut oil or vegetable oil to the chocolate to help prevent it from cracking when cut - see my notes below.

Expert Tips
Chocolate Crunchie slice is such an easy slice to make - and such a winner!
- Crushing the biscuits - a food processor, Thermomix or a rolling pin all work great!
- Sweetened condensed milk - ensure you use a full-fat sweetened condensed milk for best results. Depending on the type of biscuits used, you may need a little more than 200g. If the mixture seems too dry and crumbly add a little more (you want it to hold together well but certainly not be too soft).
- Chocolate - I prefer to use milk chocolate on this chocolate crunchie slice. You can use either a block of cooking chocolate or chocolate melts - see my notes below for tips on preventing the chocolate from cracking when cut.
- Line your baking tin - line your slice tin with baking paper to allow for easy removal once the slice has been chilled and is ready to be cut into pieces.
- Storing - store chocolate honeycomb slice in an airtight container in the fridge for up to 5 days.
- Freezing - store the slice in an airtight container in the freezer for up to 3 months.
How To Cut Chocolate Crunchie Slice Without Cracking
- Add a small amount coconut oil or vegetable oil to the melted chocolate before pouring over the slice. This helps to stop the chocolate from cracking when sliced.
- Allow the slice to set in the fridge (preferably overnight before cutting).
- Remove the slice from the fridge and place onto a chopping board 30 minutes before cutting. This will allow the chocolate to soften slightly which also helps prevent it from cracking.
- Use a knife to gently 'score' through the chocolate layer first. This involves gently cutting lines in the chocolate until you've cut through the entire chocolate layer.
- Then use a large flat knife and press down through the rest of the slice.
- If you attempt to cut through both the chocolate layer and the slice underneath in one go, the chocolate is likely to crack and break. Cutting through the chocolate layer first solves this problem.
*For more tips on how to cut slices perfectly, check out all of my tips here

FAQs
For a kids party, or a lunch box treat, chocolate Crunchie slice is quick and easy, and a great recipe for kids to make too!
If you can't find Marie Biscuits for chocolate crunchie slice, no problem. Other suggestions include Arrowroot (Australia), Rich Tea (UK), Malted Milk (UK), Digestives, Graham Crackers (USA) or any other sweet plain biscuits for the biscuit base.
You can either use a microwave, Thermomix or stove top.
Microwave - heat cubed butter and condensed milk on 50% power for 3-4 minutes, stirring in 30 second intervals until the mixture is smooth.
Thermomix - place the cubed butter and sweetened condensed milk into the Thermomix bowl. Melt for 4 minutes on 50 degrees, Speed 2.
Stove top - heat cubed butter and condensed milk gently in a saucepan on a low heat, stirring regularly, until butter has melted and the mixture is smooth.
More No-Bake Slices Using Favourite Chocolate Bars
As with this chocolate Crunchie slice, many of my no-bake slices are most popular recipes!
Here's some other favourite chocolate bar slice recipes:

WANT EVEN MORE DELICIOUS RECIPES? Subscribe to my newsletter or follow along on Facebook or Instagram. And if you love baking, then please come and join my Facebook cooking club group or subscribe to my YouTube channel.

Chocolate Crunchie Slice
Ingredients
- 250 g plain sweet biscuits like Arnotts Marie
- 200 g sweetened condensed milk add a little more if needed
- 100 g butter chopped
- 150 g honeycomb chocolate bars Crunchie bars or similar
- 250 g milk chocolate block or melts
Instructions
Conventional Method
- Melt butter and condensed milk in the microwave on 50% power for 2-3 minutes stirring every 30 seconds until melted. Mix until smooth. Pour warm mixture onto the biscuits and mix well.
- Stir through the chopped honeycomb.
- Spread mixture into an 18cm x 28cm rectangular slice tin lined with baking paper.
- Meanwhile, melt the chocolate in the microwave on 50% power for 3-4 minutes (stirring regularly) and pour over the slice.
- Refrigerate for 1 hour minimum (overnight is best).
Thermomix Method
- Place the biscuits into the Thermomix bowl and crush for 8 seconds, Speed 8. Set aside in a separate bowl.
- Place the cubed butter and sweetened condensed milk into the Thermomix bowl. Melt for 4 minutes on 50 degrees, Speed 2.
- Add the crushed biscuits and Crunchie bar chunks and mix for 20 seconds, REVERSE, Speed 2 (using the spatula to help mix).
- Spread mixture into an 18cm x 28cm rectangular slice tin lined with baking paper.
- Grate the milk chocolate for 10 seconds, Speed 5. Scrape down the bowl and melt for 3 minutes on 50 degrees, Speed 2. Pour chocolate over the slice.
- Refrigerate for 1 hour minimum (overnight is best).
Notes
- Biscuits/Cookies - you can use any brand of plain sweet biscuits (known as cookies in the US) you like. I generally use Arnott's Marie biscuits.
- Crushing the biscuits - a food processor, Thermomix or a rolling pin all work great!
- Sweetened condensed milk - ensure you use a full-fat sweetened condensed milk for best results. Depending on the type of biscuits used, you may need a little more than 200g. If the mixture seems too dry and crumbly add a little more (you want it to hold together well but certainly not be too soft).
- Chocolate - I prefer to use milk chocolate on this slice. You can use either a block of cooking chocolate or chocolate melts - see my notes below for tips on preventing the chocolate from cracking when cut.
- Line your baking tin - line your slice tin with baking paper to allow for easy removal once the slice has been chilled and is ready to be cut into pieces.
- Storing - store chocolate honeycomb slice in an airtight container in the fridge for up to 5 days.
- Freezing - store the slice in an airtight container in the freezer for up to 3 months.
- Cutting the slice - add a small amount coconut oil or vegetable oil to the melted chocolate before pouring over the slice. This helps to stop the chocolate from cracking when sliced. Allow the slice to set in the fridge (preferably overnight before cutting). Remove the slice from the fridge and place onto a chopping board 30 minutes before cutting. This will allow the chocolate to soften slightly which prevents it from cracking. Use a knife to gently 'score' through the chocolate layer first. This involves gently cutting lines in the chocolate until you've cut through the entire chocolate layer. Then use a large flat knife and press down through the rest of the slice. If you attempt to cut through both the chocolate layer and the slice underneath in one go, the chocolate is likely to crack and break. Cutting through the chocolate layer first solves this problem.


Nicole says
Hi, how do you think chocolate ripple biscuits will work? School cake stall coming up and I'd love to use up crunchier bars we have as they are not this family favourites thanks!
Lucy says
Hi Nicole, hmm I haven't tried that sorry! My only worry is that they might soften too much?
Chandler says
Could you use the base and then use any chocolate other than crunchie?
Lucy says
Absolutely!
Tracy James says
This recipe sounds delish but I can't seem to find a link to the video? 🙂
Lucy says
Hi Tracy, the video will be up near the top (maybe one or two paragraphs down) xx
Joan MacLennan says
Just found your recipe! I am going to try it. Just wanted to say do t be apologising for your photos they look great.
Lucy says
Hi Joan, thank you! This is a a very old (but yummy!) recipe that I hope to re-do the photos for at some stage! xx