

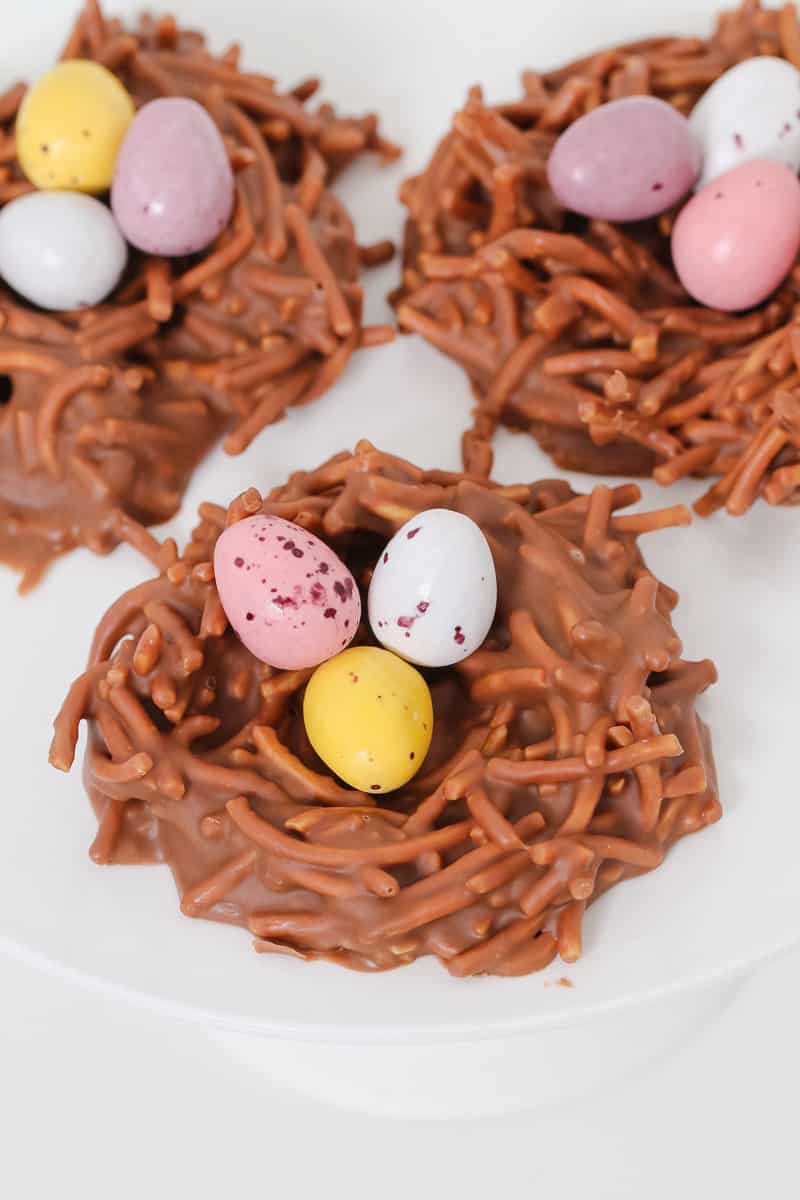
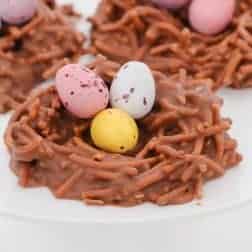
These Chocolate Easter Nests are the kind of no-bake Easter treat kids go wild for - crunchy, chocolatey and almost too cute to eat.
Made with just 4 ingredients, they're perfect for school holidays, Easter parties, or when you need a quick win like my Cadbury Creme Egg Fudge and Chocolate Easter Bark.

A Quick Look At The Recipe
✅ Recipe Name: Chocolate Easter Nests
🕒 Ready In: 40 minutes
👪 Serves: 8
🍽 Calories: 286 kcal
🥣 Main Ingredients: milk chocolate, peanut butter, fried noodles, mini Easter eggs
📖 Dietary Info: vegetarian
⭐ Why You'll Love It: These cute little no-bake nests need just 4 ingredients, take hardly any effort, and make the sweetest Easter treat for kids, parties or gifting.
SUMMARIZE & SAVE THIS CONTENT ON
So easy and delicious! Failproof!
- Phyllis
If you grew up making these, you already know the hype - and if not, you're in for a treat.
They're quick, foolproof and ridiculously fun, just like my Microwave Malteser Fudge and White Chocolate Tim Tam Balls.
Why You're Going To Love This Recipe
These cute little nests are a total Easter favourite in our house!
- Only 4 ingredients - Simple budget-friendly pantry ingredients you can grab at any supermarket.
- No baking required - Just melt, mix and chill.
- Perfect for kids to help make - Little hands love shaping the nests and adding the eggs.
- Ready in under 40 minutes - including chill time.
- Great for Easter parties and gifting - They look adorable on a platter or wrapped up in cellophane.
Jump to:
Easter Nests Ingredients
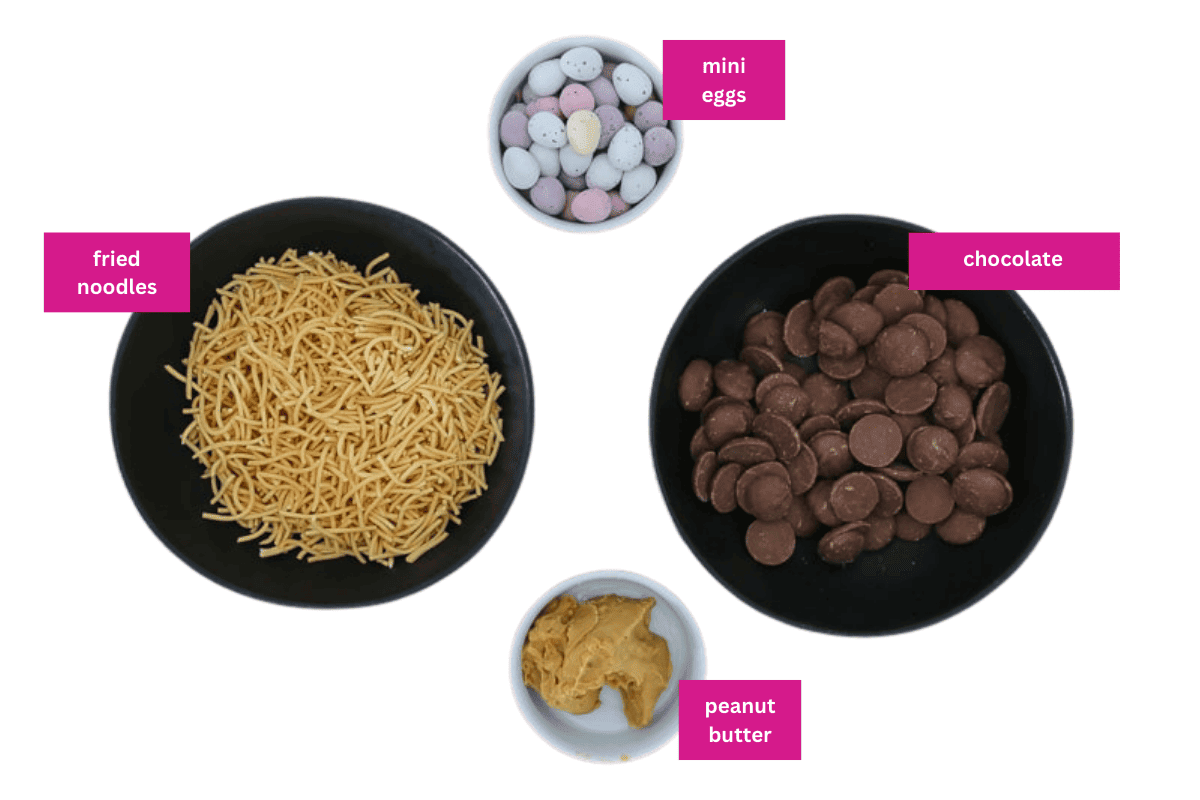
Note: Scroll to the recipe card at the bottom for the ingredients quantities and full detailed method.
To make these super crunchy chocolate treats, you'll need:
- Milk Chocolate - choose a good quality chocolate - it melts smoother and the taste is worth it!
- Peanut butter - Use a smooth, creamy store-bought peanut butter. Natural peanut butter can separate and make the chocolate mixture oily.
- Fried noodles - Chang's fried noodles are the classic choice in Australia and give the nests their signature crunchy texture. Other brands of fried noodles work too.
- Mini Easter eggs - Speckled mini eggs are perfect for decorating and really make the nests look like little bird nests.
Variations
One of the best things about Chocolate Easter Nests is how easy they are to customise.
- Nut-free version - Simply replace the peanut butter with Biscoff spread, Nutella or extra melted chocolate.
- Gluten-free option - Use gluten-free fried noodles or swap them for gluten-free cornflakes or rice bubbles.
- White chocolate nests - Swap milk chocolate for white chocolate for a fun pastel Easter look.
- Extra chocolatey nests - Stir through mini chocolate chips or chopped Easter eggs before shaping the nests.
How To Make Chocolate Easter Nests
Just a few quick steps and you'll have little Easter nests ready to fill with eggs. 🐣🍫
Note: Scroll to the recipe card at the bottom for the ingredients quantities and full detailed method.
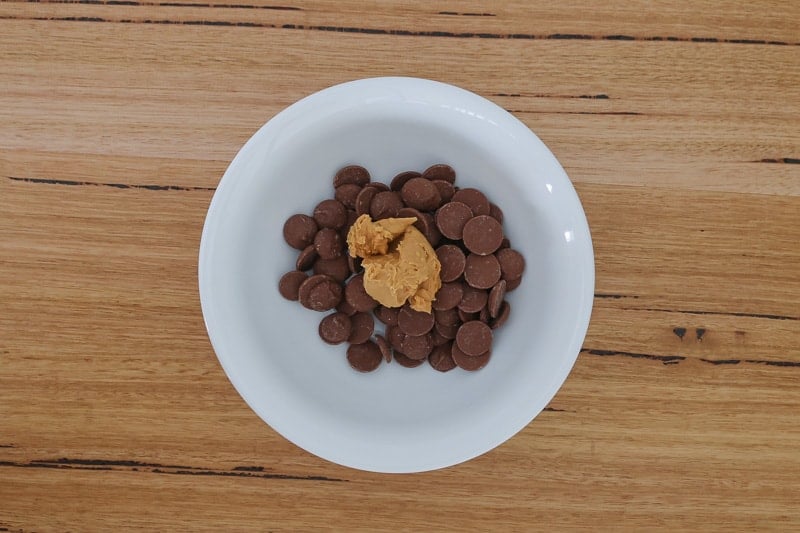
- Prepare: Line a baking tin with baking paper. Place the chocolate and peanut butter into a microwave-safe bowl.
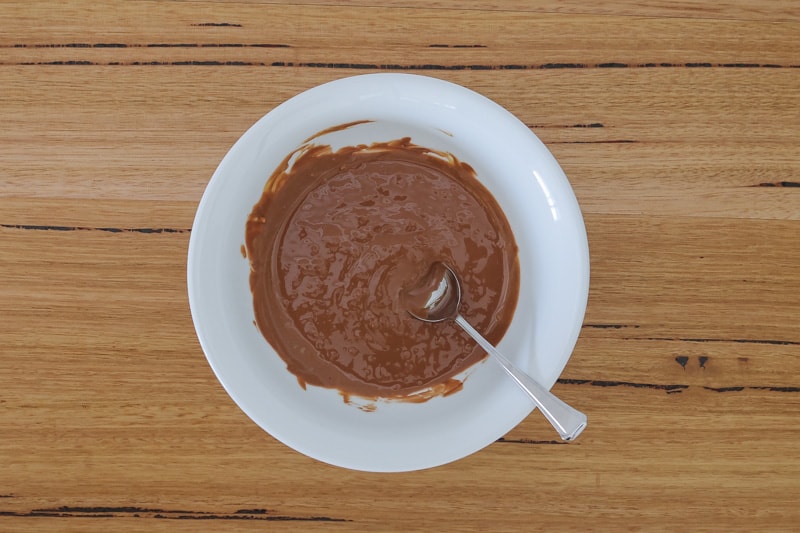
- Melt chocolate: Heat in microwave on 50% power in 30-second bursts, stirring between each burst, until smooth and fully melted.
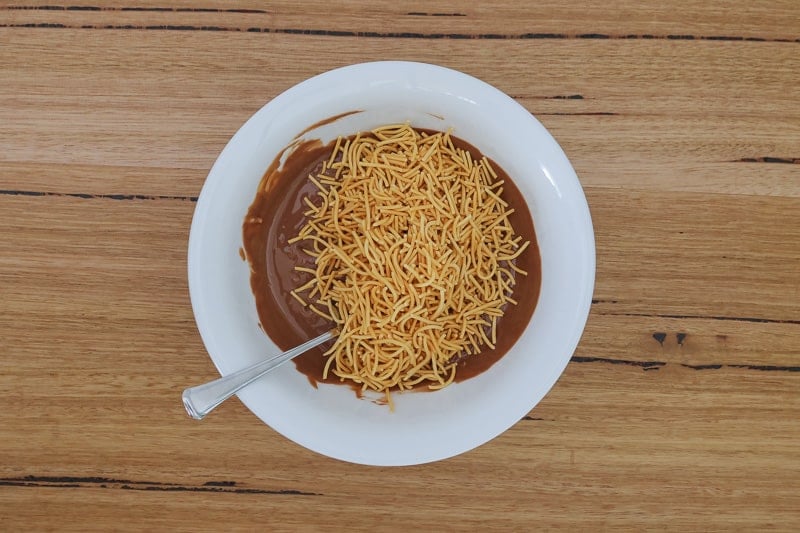
- Add noodles: Add the fried noodles to the melted chocolate mixture.
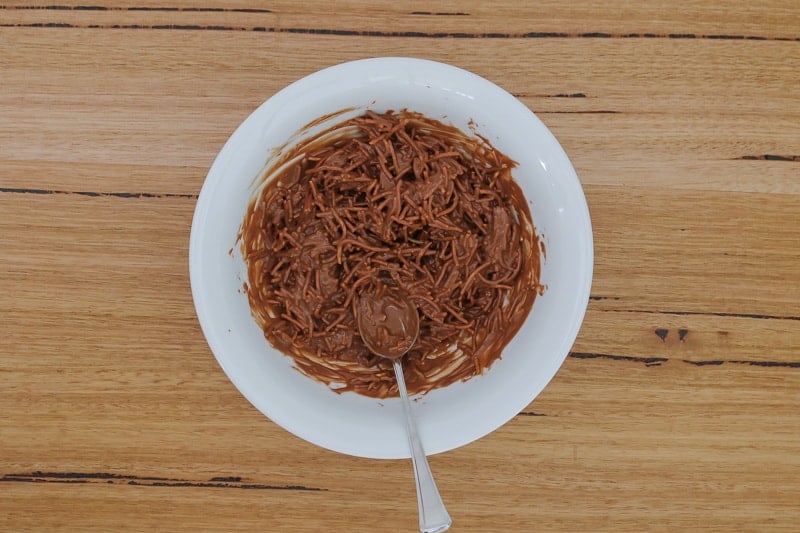
- Mix: Gently stir until all the noodles are evenly coated.
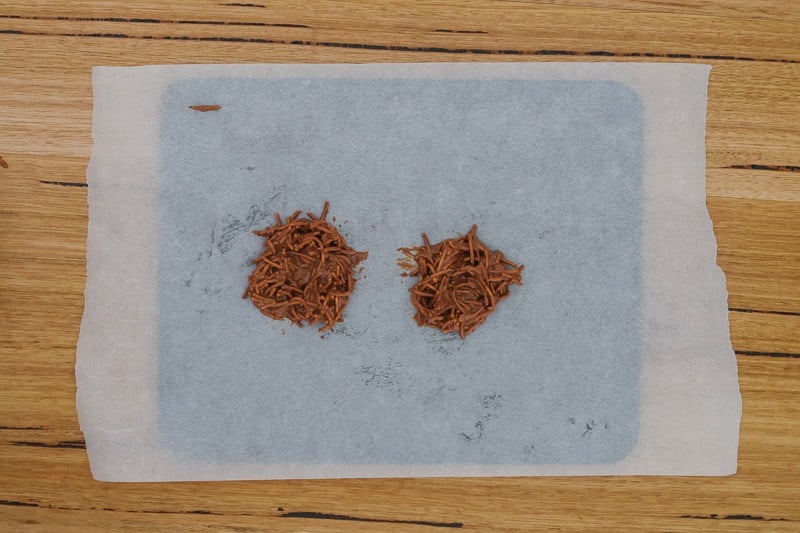
- Form nests: Spoon mounds of the mixture onto a lined tray. Using the back of a spoon, gently shape each mound into a nest by creating a small hollow in the centre.
- Chill and fill: Place the tray in the fridge for around 30 minutes until the nests are set, then decorate with mini Easter eggs.
Recipe Tips
- Use good quality chocolate - Better chocolate melts more smoothly and gives the best flavour.
- Melt chocolate gently - Always use low power (50% power) in the microwave to avoid overheating or burning.
- Use store-bought smooth peanut butter - homemade can be too oily.
- Work quickly - The chocolate mixture will start setting as it cools, so shape the nests soon after mixing.
- Use a spoon or small ice cream scoop - This helps keep the nests evenly sized.
- Press the centre while still soft - If the mixture sets before shaping properly, it can be harder to create the nest shape.
- Storage - Store in an airtight container in the fridge for up to 1 week.
- Freezing - Freeze in an airtight container for up to 1 month. Allow nests to thaw in the fridge before serving.
Chocolate Easter Nests FAQs
This usually happens if there isn't enough melted chocolate to coat the noodles. Make sure the noodles are fully coated before shaping.
Absolutely. You can replace it with Biscoff spread, Nutella, or simply add a little extra melted chocolate.
Milk chocolate is the traditional option, but choose your favourite - dark or white chocolate nests also work beautifully.
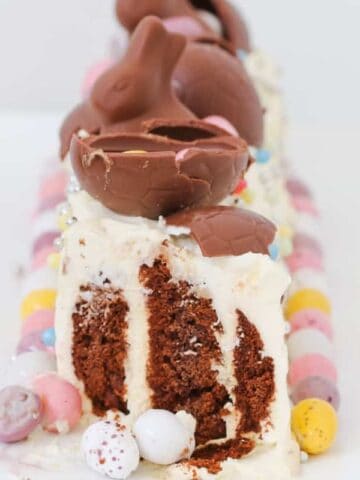
More Easter Recipes
There's no doubt that Easter is the BEST time of the year for all of us chocoholics! So whether you're looking for an easy dessert, a boozy Easter cocktail, a batch of classic hot cross buns, or something chocolatey sweet... my collection of Easter recipes has it covered!

WANT EVEN MORE DELICIOUS RECIPES? Subscribe to my newsletter or follow along on Facebook or Instagram. And if you love baking, then please come and join my Facebook cooking club group or subscribe to my YouTube channel.
Chocolate Easter Nests
Ingredients
- 225 g milk chocolate
- 40 g (2 tbs) smooth peanut butter
- 100 g fried noodles see notes
- 125 g mini Easter eggs to decorate
Instructions
Conventional Method
- Place the chocolate and peanut butter into a microwave safe bowl. Melt on 50% power for 2-3 minutes (stirring every 30 seconds) or until just melted.
- Stir through the fried noodles.
- Place spoonfuls of the mixture onto a baking paper lined tray and arrange into birds nest shapes (with a little hole in the middle).
- Place into the fridge for 30 minutes or until set.
- Add mini Easter eggs to decorate and serve.
- Store in an airtight container in the fridge for up to 1 week.
Thermomix Method
- Place the chocolate and peanut butter into the Thermomix bowl. Melt for 3-4 minutes, 50 degrees, Speed 2.
- Add the fried noodles and mix for 5-10 seconds, Reverse, Speed 3 (or until combined). Use the spatula to help mix.
- Place spoonfuls of the mixture onto a baking paper lined tray and arrange into birds nest shapes (with a little hole in the middle).
- Place into the fridge for 30 minutes or until set.
- Add mini Easter eggs to decorate and serve. Store in an airtight container in the fridge for up to 1 week.
Notes
- Use good quality chocolate - Better chocolate melts more smoothly and gives the best flavour.
- Melt chocolate gently - Always use low power (50% power) in the microwave to avoid overheating or burning.
- Use store-bought smooth peanut butter - homemade can be too oily.
- Work quickly - The chocolate mixture will start setting as it cools, so shape the nests soon after mixing.
- Use a spoon or small ice cream scoop - This helps keep the nests evenly sized.
- Press the centre while still soft - If the mixture sets before shaping properly, it can be harder to create the nest shape.
- Storage - Store in an airtight container in the fridge for up to 1 week.
- Freezing - Freeze in an airtight container for up to 1 month. Allow nests to thaw in the fridge before serving.

Phyllis says
So easy and delicious! Failproof!
Lucy says
Thank you!
NickiDE says
I tried switching to the US customary measures, but it doesn't seem to work. Can you help?
A says
Can use coconut oil... I always use it when melting chocolate
Thérèse says
These look delicious. What could the peanut butter be substituted for in the case of a nut allergy? Thought Nutella but worried this may make them too sweet.
Thanks
Lucy says
You could definitely try Nutella! Or just leave out the peanut butter and add a little more melted chocolate.
fe says
hi