
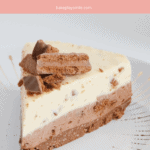
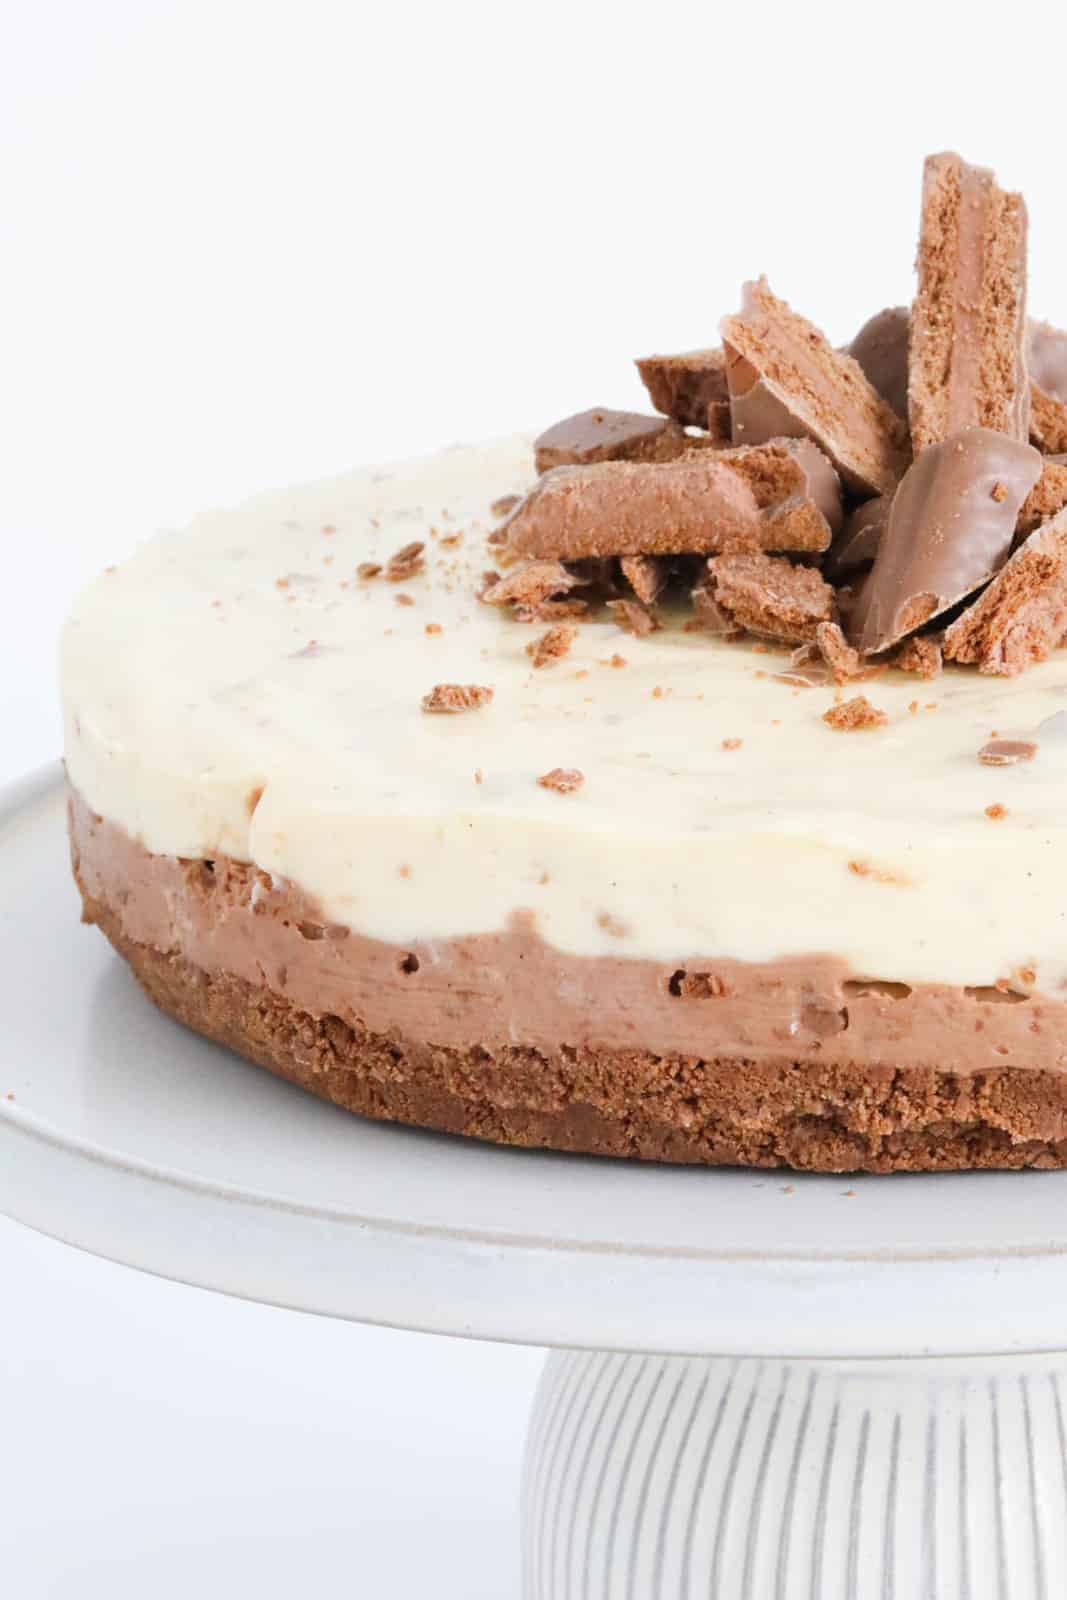
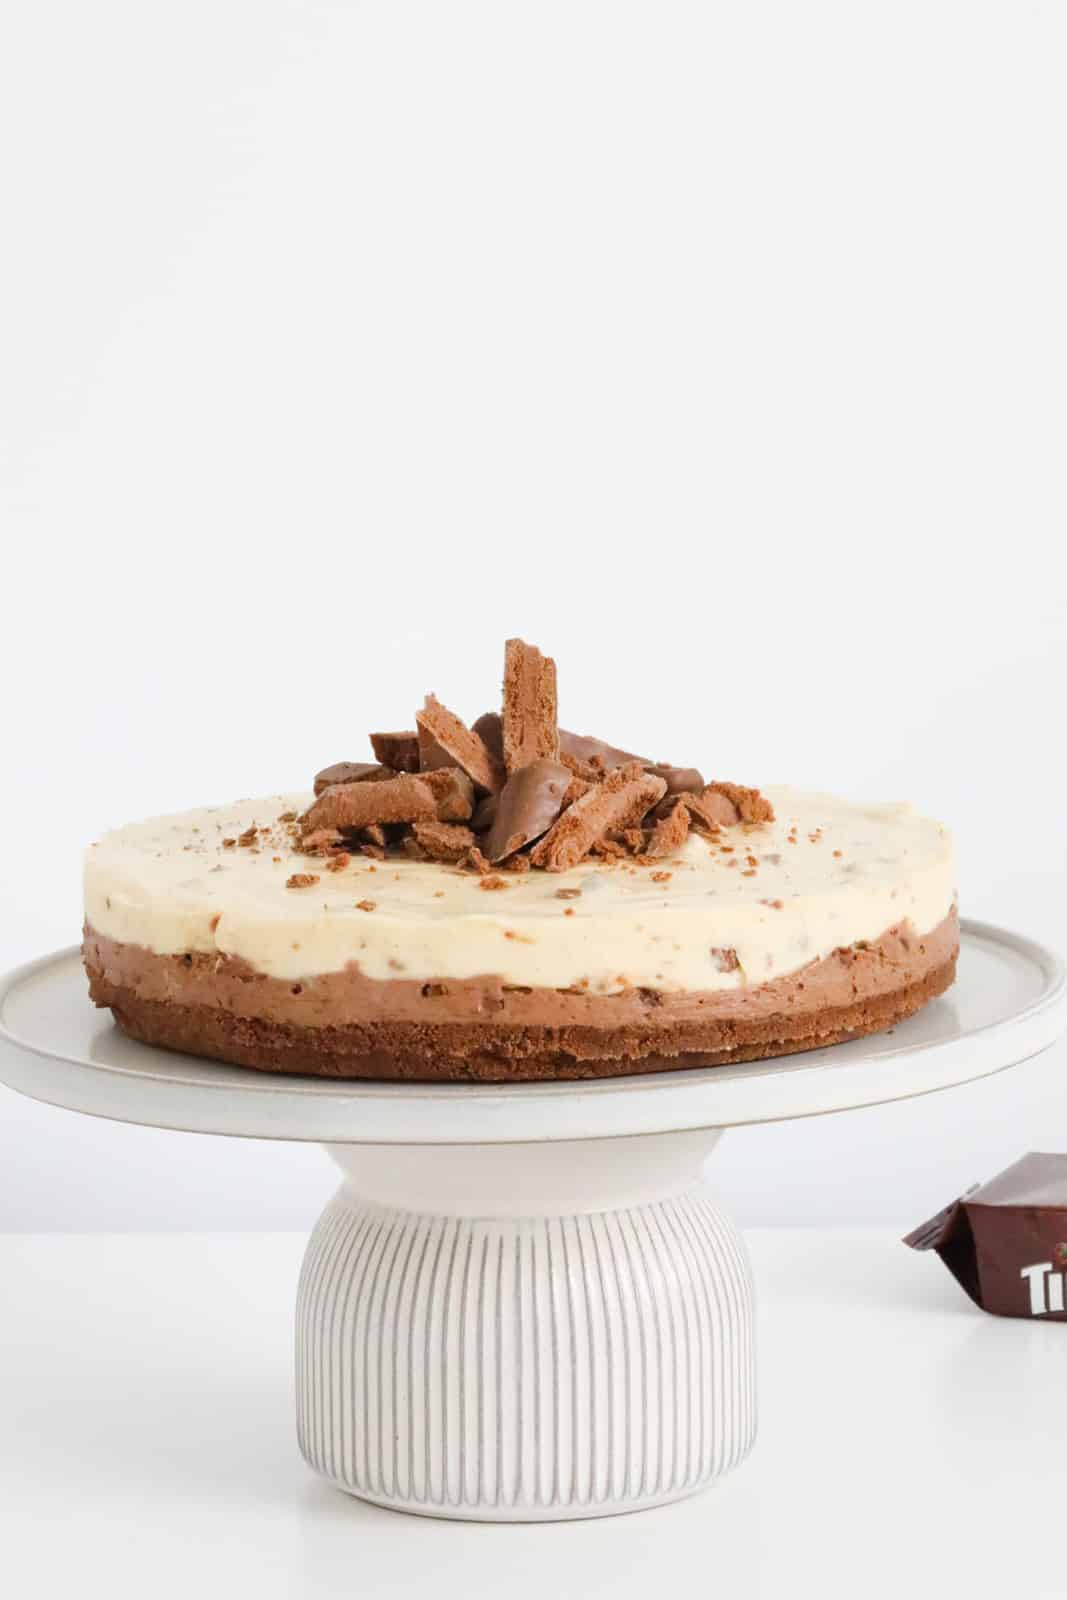
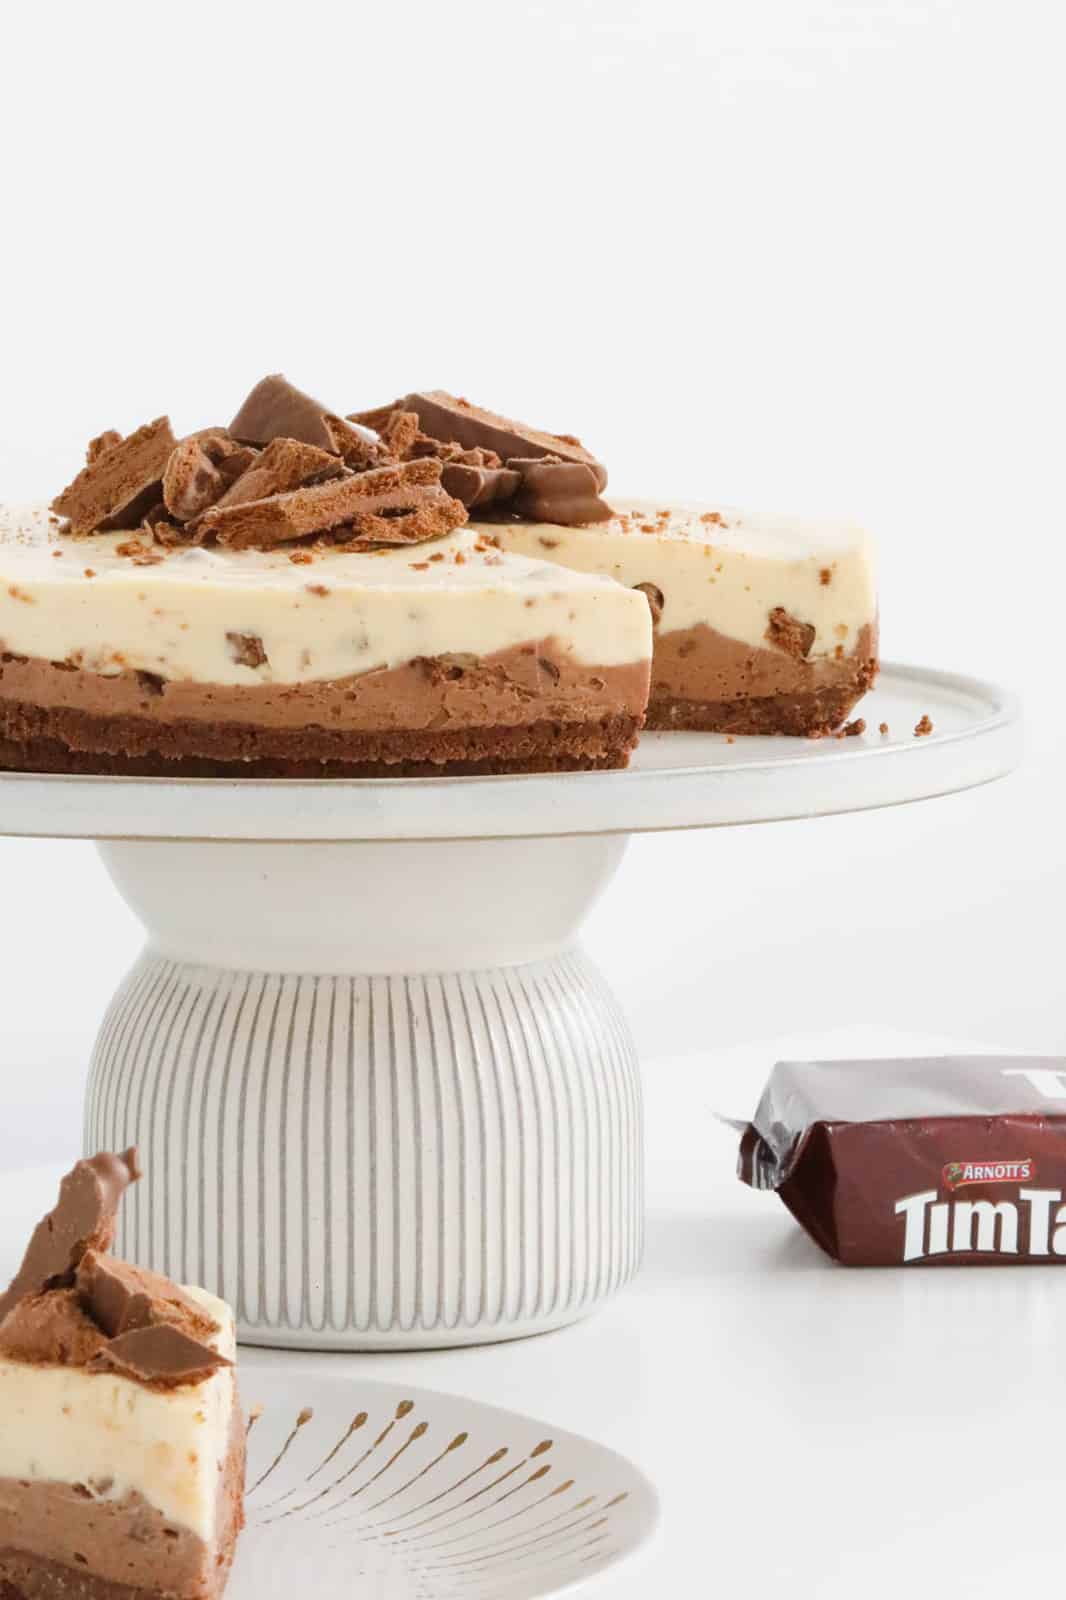
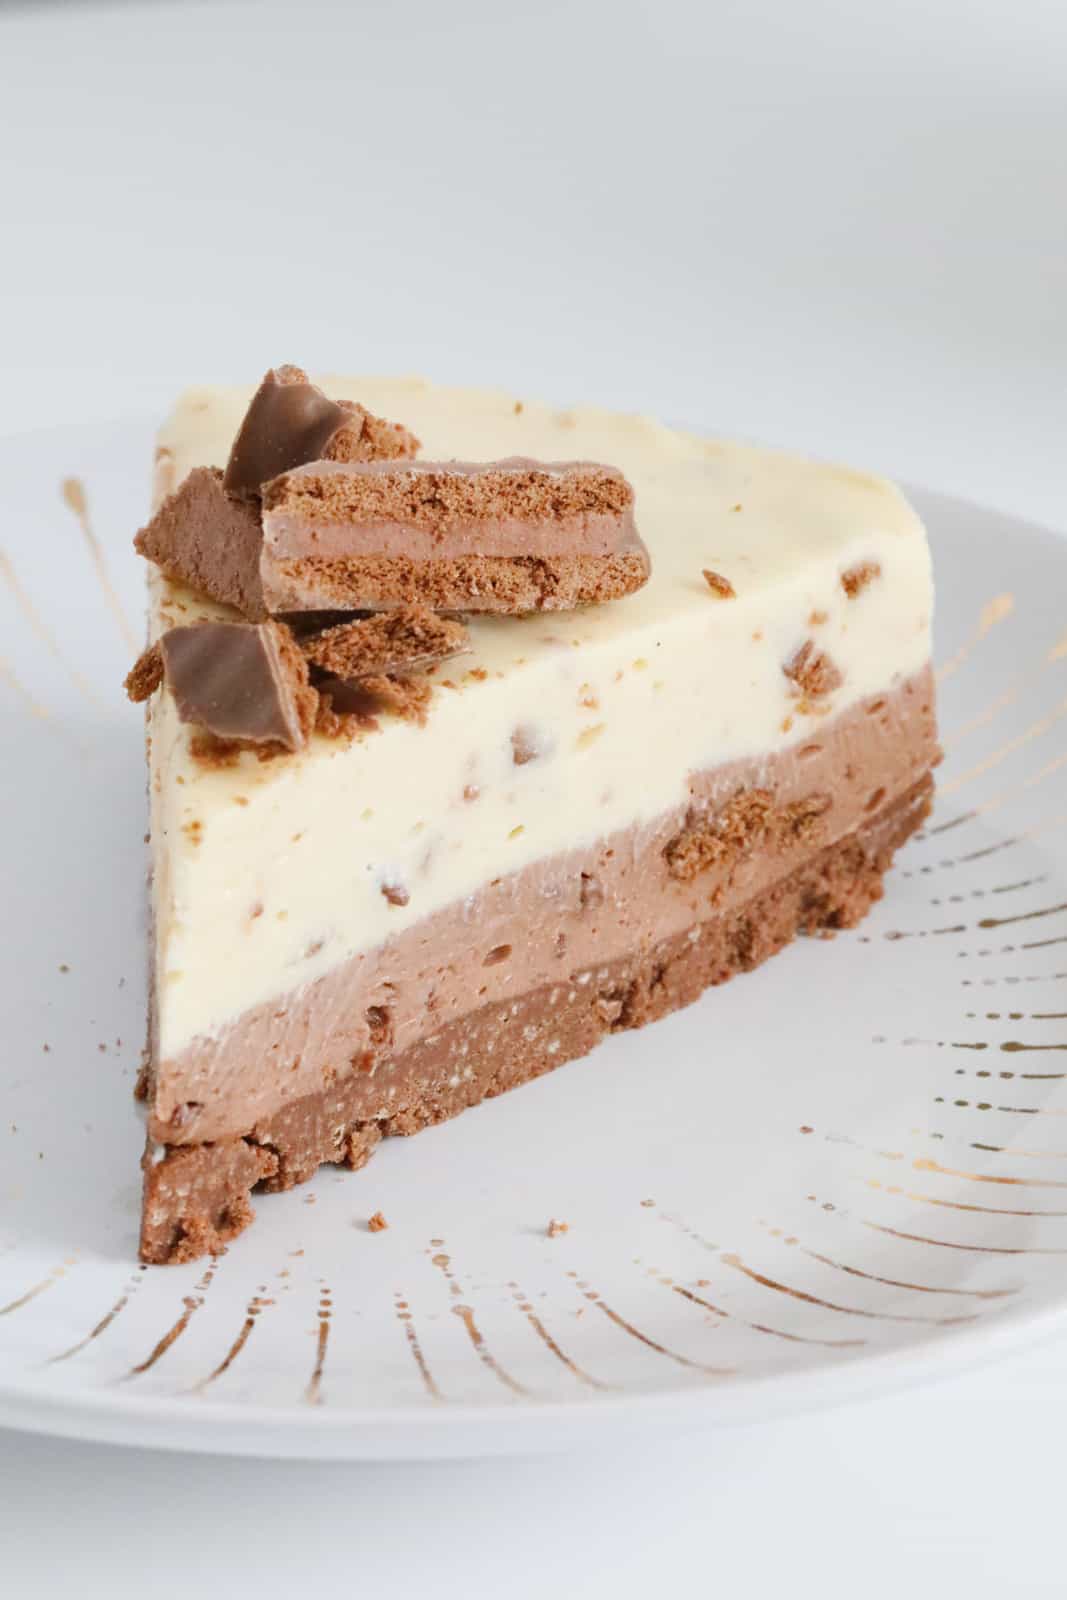
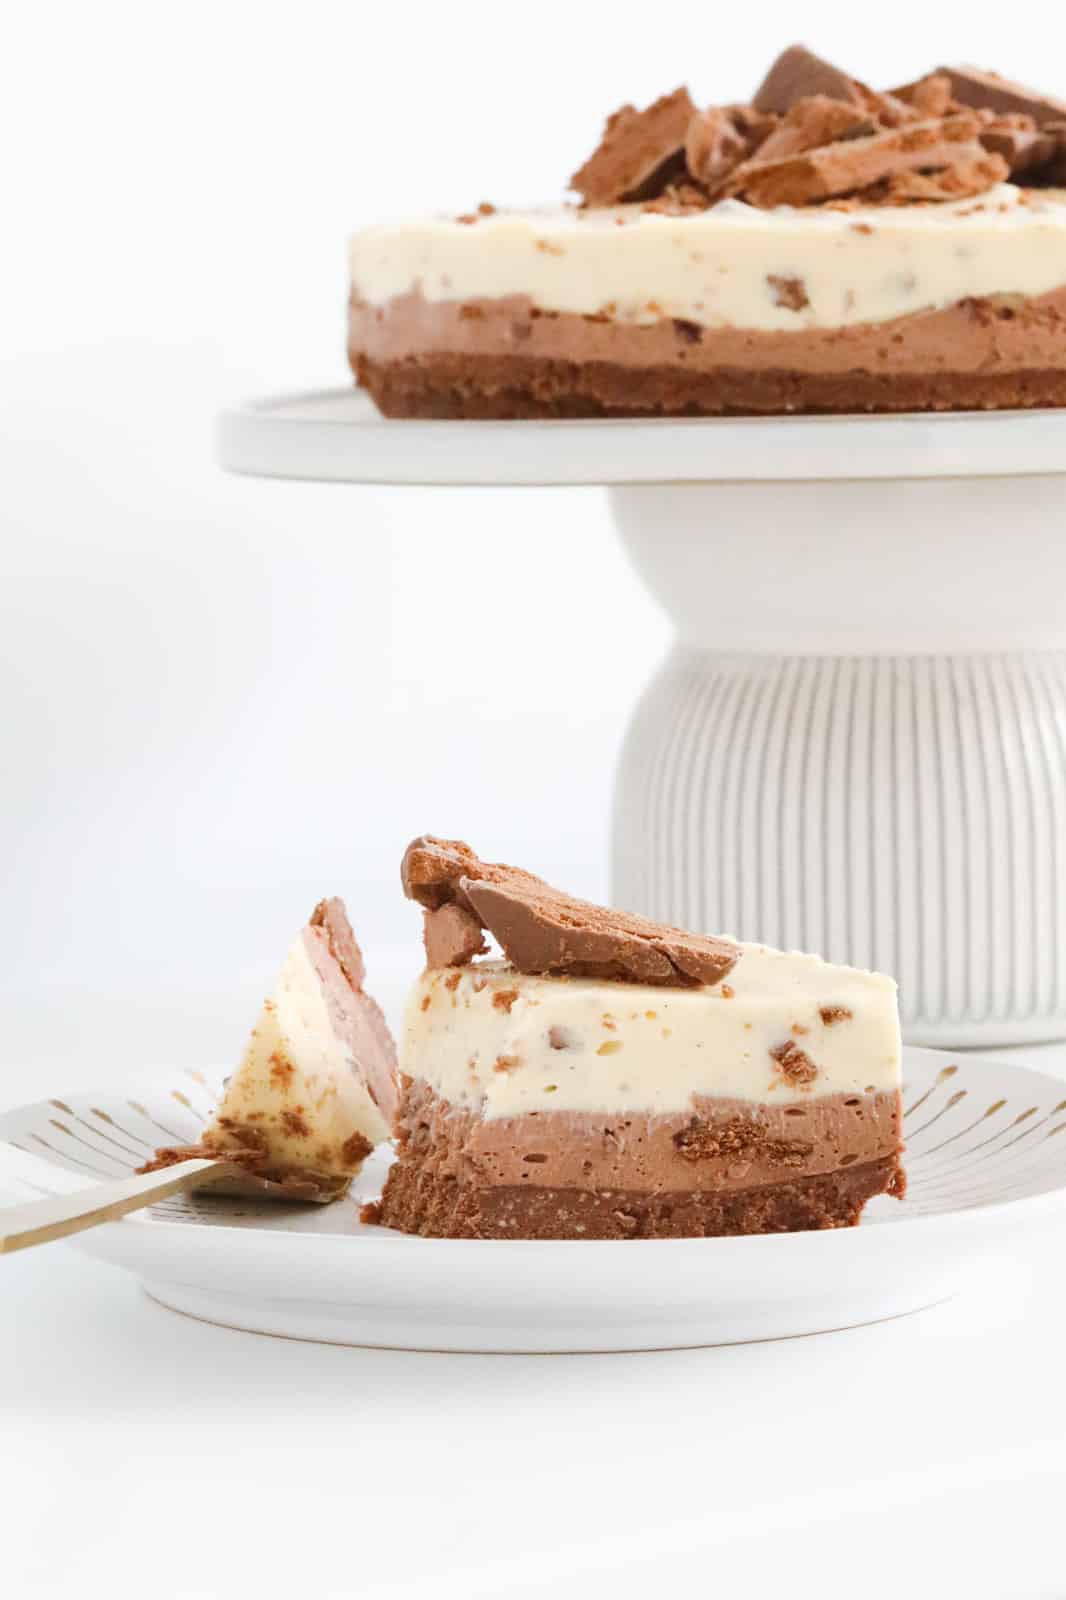
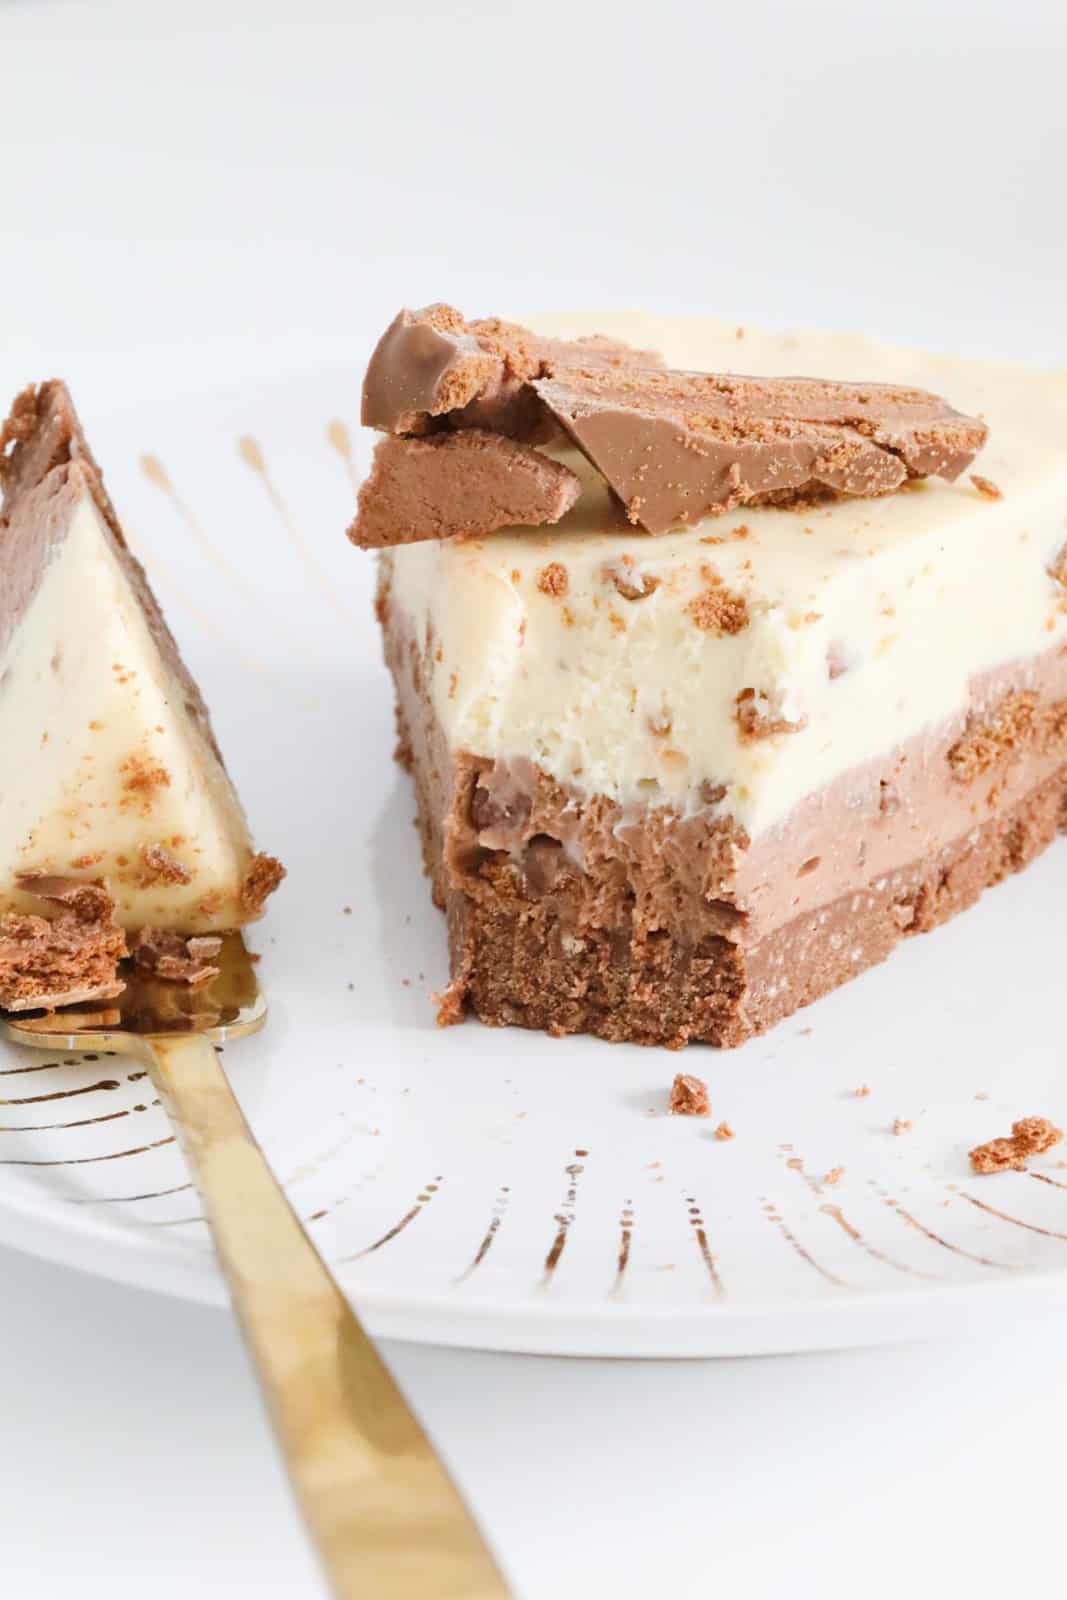
Hands down this is the most EPIC no-bake Tim Tam Cheesecake you'll ever make! A crunchy Tim Tam base is topped with two layers of chocolate cheesecake and filled with chunks of Tim Tams throughout. This decadent dessert takes just 30 minutes to prepare and is perfect for any special occasions, Christmas get-togethers, or parties.
As an Aussie girl, one of my favourite ingredients to use in my baking recipes is a packet of delicious Tim Tams!
Whether it's a batch of adults-only Baileys Tim Tam Cheesecake Balls, Tim Tam Fudge, Peppermint Crisp Tim Tam Balls, my classic 3 Ingredient Tim Tam Balls or this over-the-top double layered cheesecake, if there's Tim Tams involved... I am ALL IN!
What Are Tim Tams?
Tim Tams are an iconic Australian cookie made by Arnott's.
They're long rectangular crunchy chocolate biscuits with a creamy filling, then fully coated in chocolate.
Arnott's Tim Tams come in a variety of luscious flavours such as milk, dark, caramel, mint, white, double coated and more.
Most often enjoyed as a snack with a cup of tea or coffee, Tim Tams are also delicious when used as an ingredient in baking and dessert recipes.
Tim Tam Substitutes
You can substitute Tim Tams with any other chocolate coated cookie if they are unavailable.
For those living in the UK, McVitie's Penguin biscuits are a great substitution.
Alternatively, you could use Oreos in place of the Tim Tams.
Why You're Going To Love This Recipe
This is one of my most popular cheesecake recipes EVER!!!
Here's why you're going to love it too:
- No-bake - this chilled dessert requires absolutely NO baking at all. It's the perfect recipe for summer entertaining, BBQs or Christmas!
- Make ahead dessert - this Tim Tam cheesecake requires a minimum of 6 hours chilling time, so it's a great option for when you'd like a dessert prepared ahead of time (ideal for taking the stress out of Christmas day or special occasions).
- Perfect for feeding a crowd - just like all cheesecakes, this Tim Tam version is so deliciously rich - so you only need a small slice. This recipe can easily serve 16 people.
- A favourite with chocoholics - if you're a self-confessed chocoholic (like me!), then you're going to LOVE this cheesecake! A chocolate Tim Tam base topped with milk chocolate and white chocolate cheesecake layers... with plenty of Tim Tams scattered throughout.
What You Need
Everyone needs an over-the-top chocolate Tim Tam Cheesecake in their life!
Note: please scroll to the recipe card for the ingredient quantities and full detailed method.
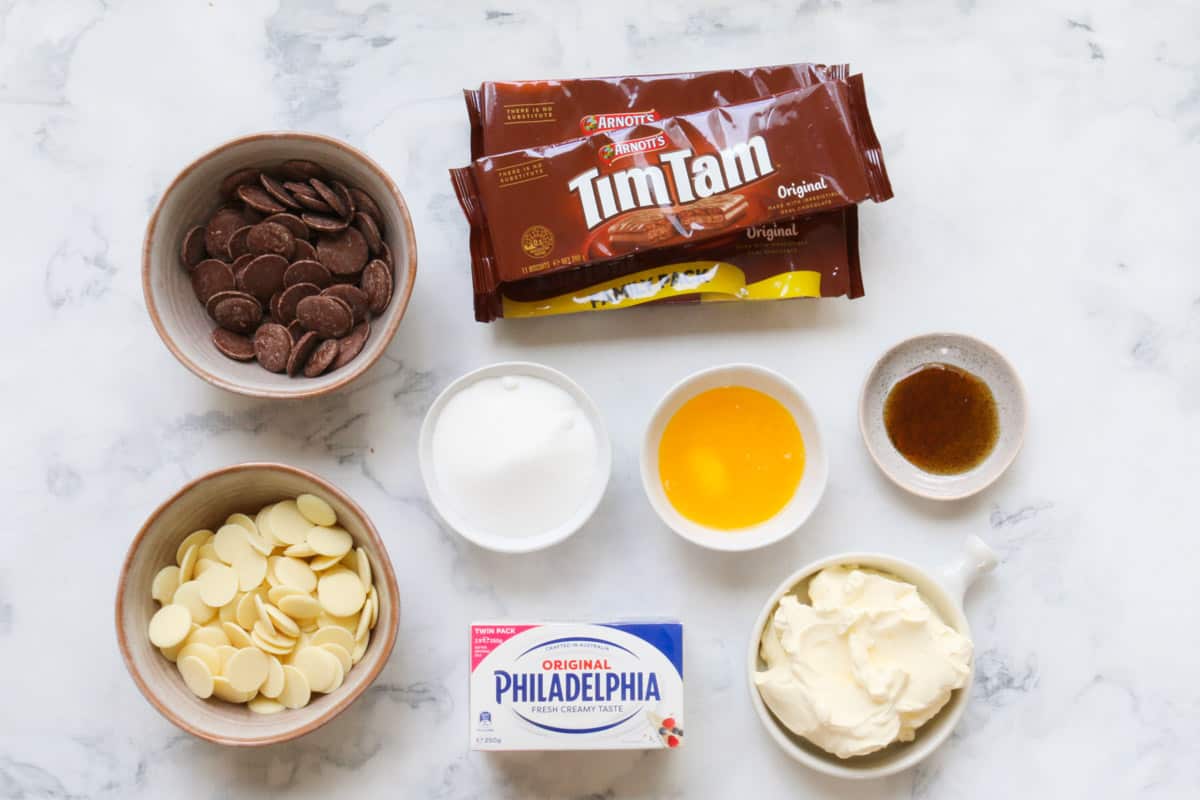
For The Base
- Tim Tams - a truly iconic Australian chocolate coated biscuit, however if not available, they can be substituted for any brand of chocolate coated biscuit (like Penguins) or alternatively, Oreos.
- butter - either salted or unsalted butter can be used in this recipe.
For The Filling
- cream - choose a cream that is suitable for whipping (such as thickened, heavy or whipping cream).
- cream cheese - for a smooth cheesecake, ensure the cream cheese is at room temperature before mixing. Use blocks of full fat cream cheese (not light or spreadable). I like to use the Philadelphia brand.
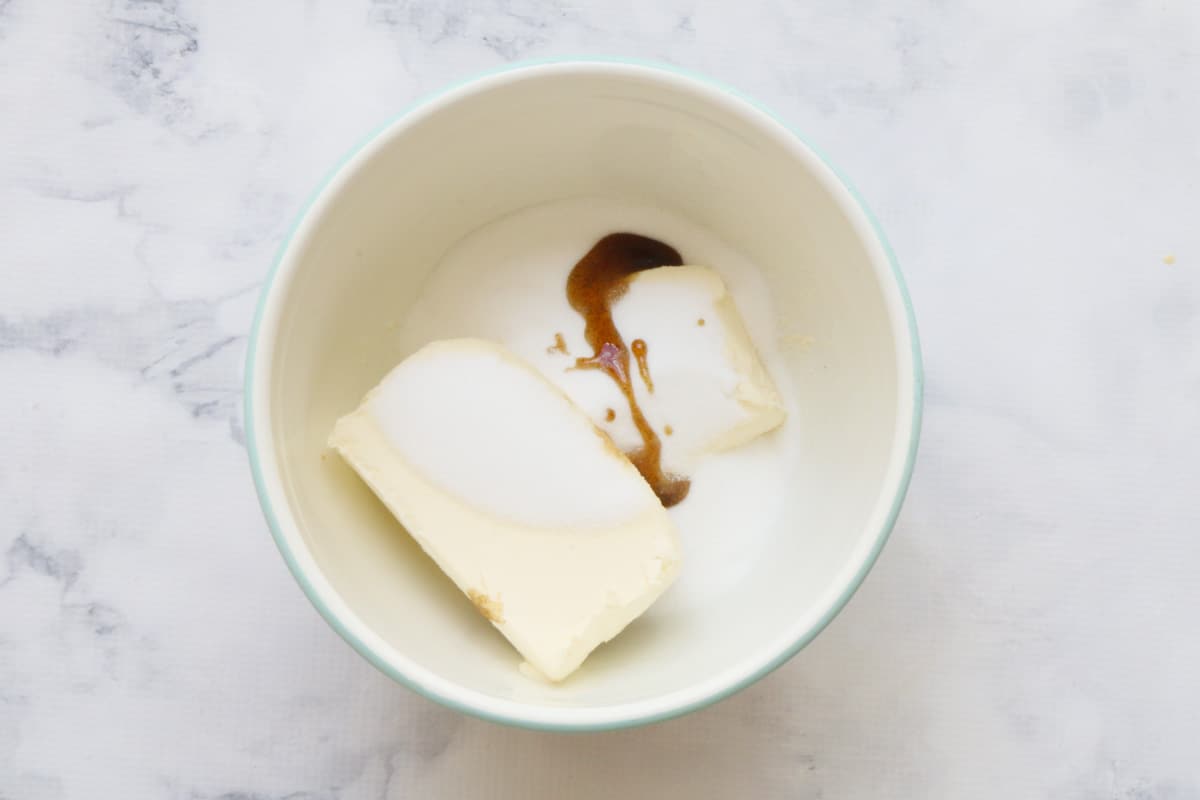
- vanilla - this can be vanilla bean paste, vanilla extract or vanilla essence. Vanilla bean paste will give you the best vanilla flavour, however, it is more expensive. Vanilla extract works well in this recipe too.
- caster sugar - (also known as superfine sugar). Caster sugar dissolves easily when beaten with the cream cheese making it perfect for cheesecakes.
- gelatine powder - dissolved in hot water - see my tips on How To Dissolve Gelatine below.
- chocolate - I use milk chocolate and white chocolate for my cheesecake layers. Choose a good quality cooking or baking chocolate that melts easily, such as Cadbury's.
Step By Step Instructions
While this Tim Tam Cheesecake may look fancy, it couldn't be easier to make!
With just 30 minutes prep time and a few simple steps, you'll have a sweet and creamy chocolate cheesecake in no time - the hardest part is just waiting for it to chill...
Note: please scroll to the recipe card for the ingredient quantities and full detailed method.
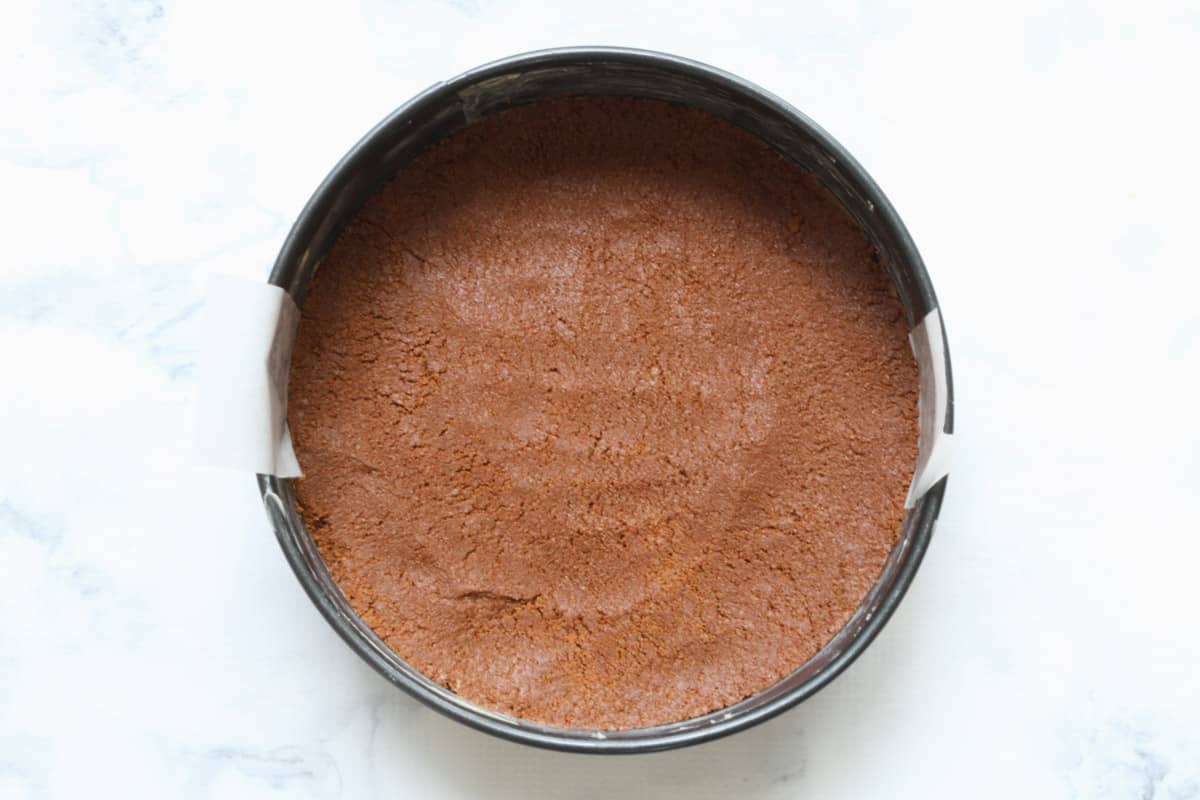
Step 1 - Prepare The Base
Crush Tim Tam biscuits for the base in a food processor, blender or Thermomix.
Add the melted butter and stir through until well combined.
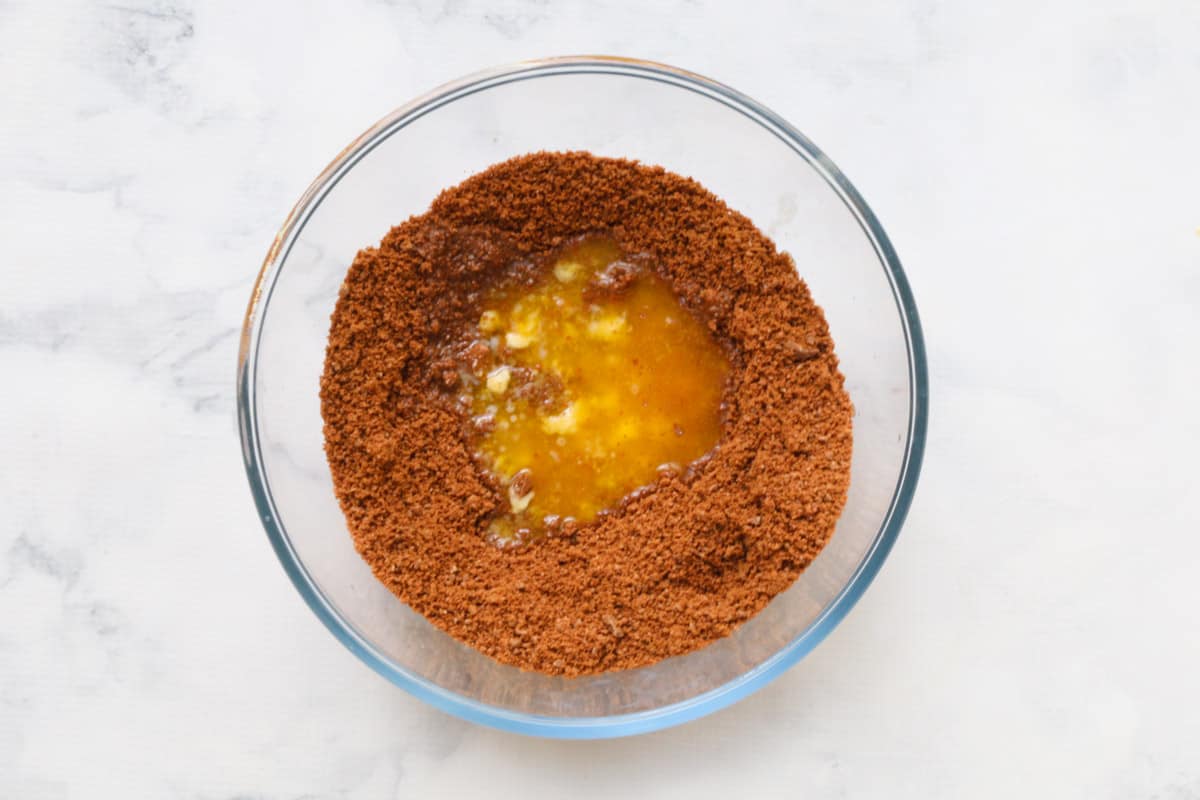
Press the mixture very firmly into a prepared springform tin.
Place the base into the fridge while you prepare the filling.
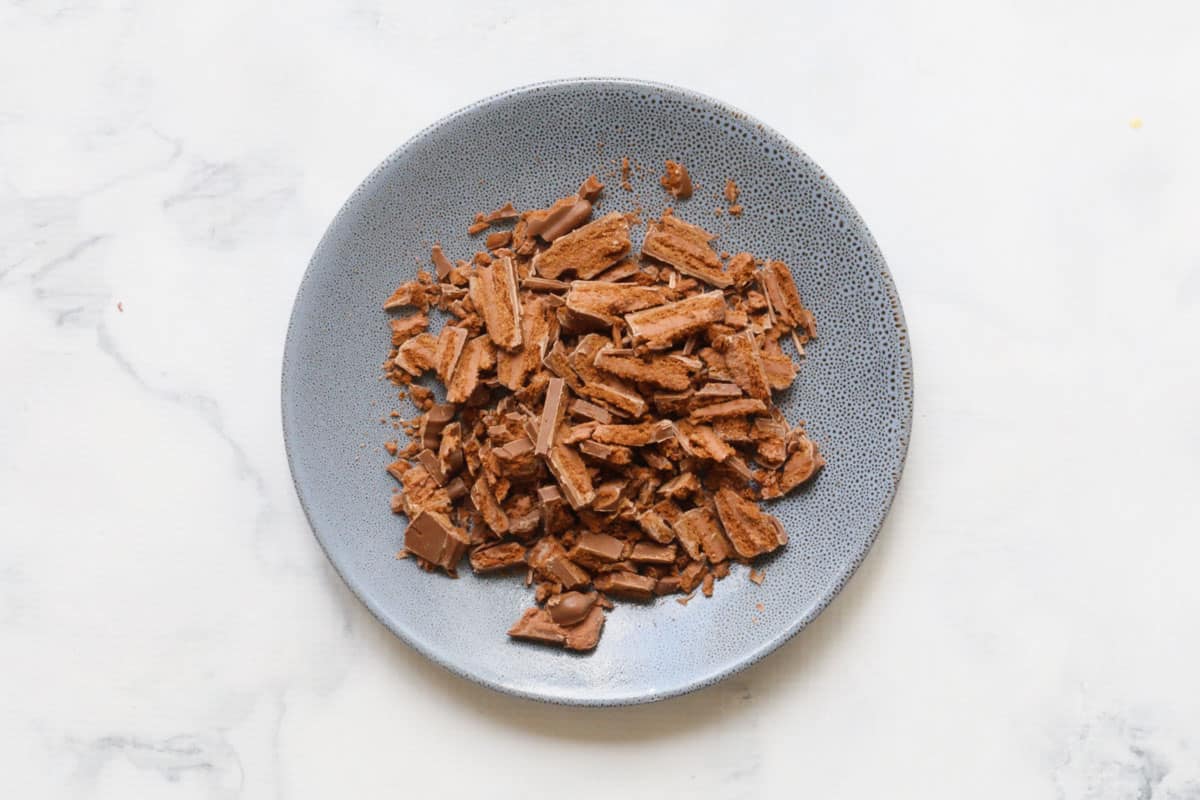
Step 2 - Chop Tim Tams For Filling
Roughly chop the remaining Tim Tam biscuits into large chunks.
Step 3 - Prepare The Cheesecake Filling
Whip the cream until soft peaks form, then set aside.
Dissolve gelatine in hot water and set aside to cool slightly.
Place the cream cheese, vanilla and caster sugar into a large bowl and mix with hand-held beaters or stand-mixer until creamy and smooth.
Add the cooled and dissolved gelatine and beat through.
Divide the mixture equally between two bowls.
Step 4 - Prepare The Milk Chocolate Cheesecake Layer
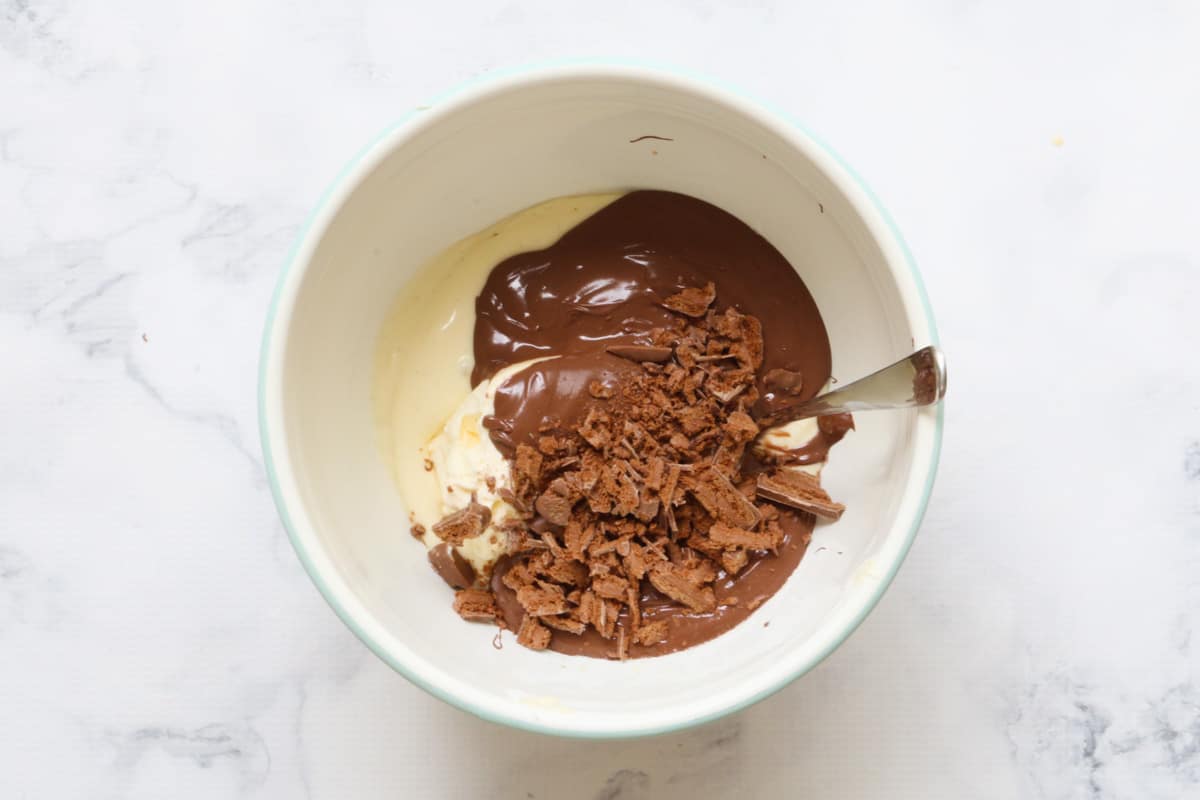
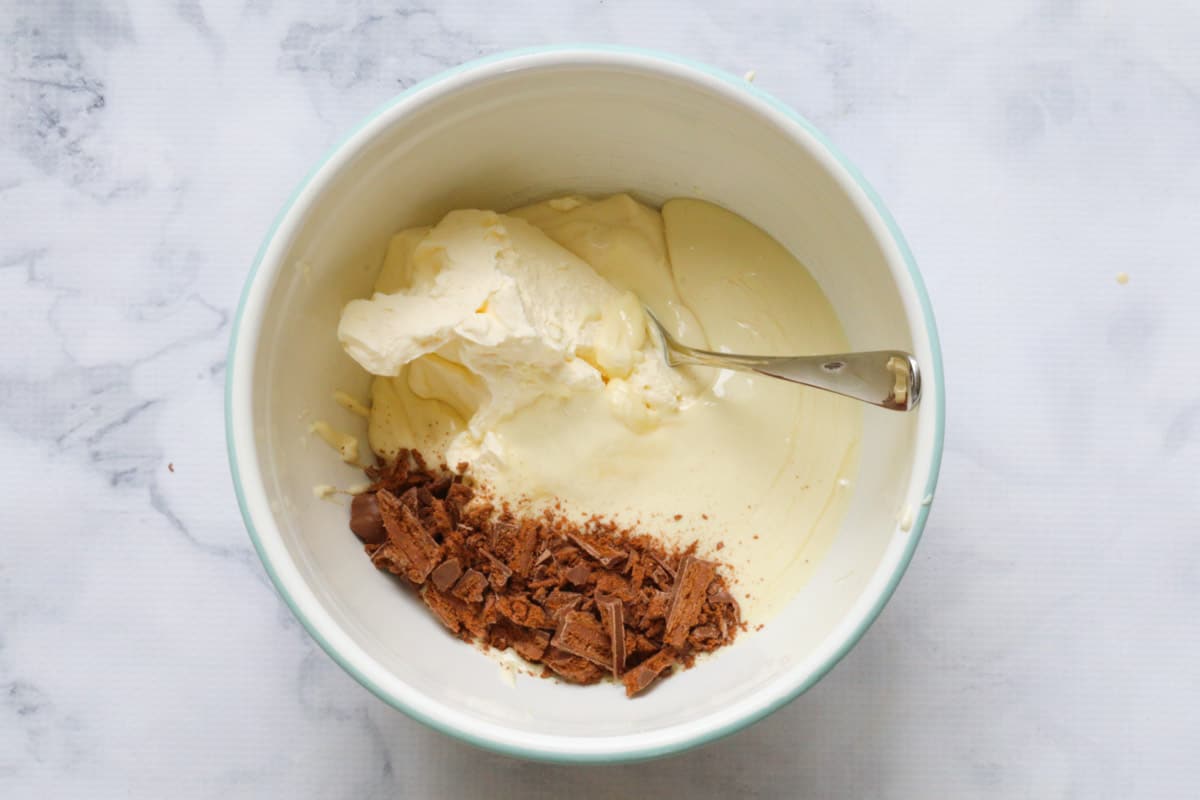
To one of the cheesecake mixture bowls, add the melted milk chocolate, half of the whipped cream and half of the chopped Tim Tams.
Mix gently until combined.
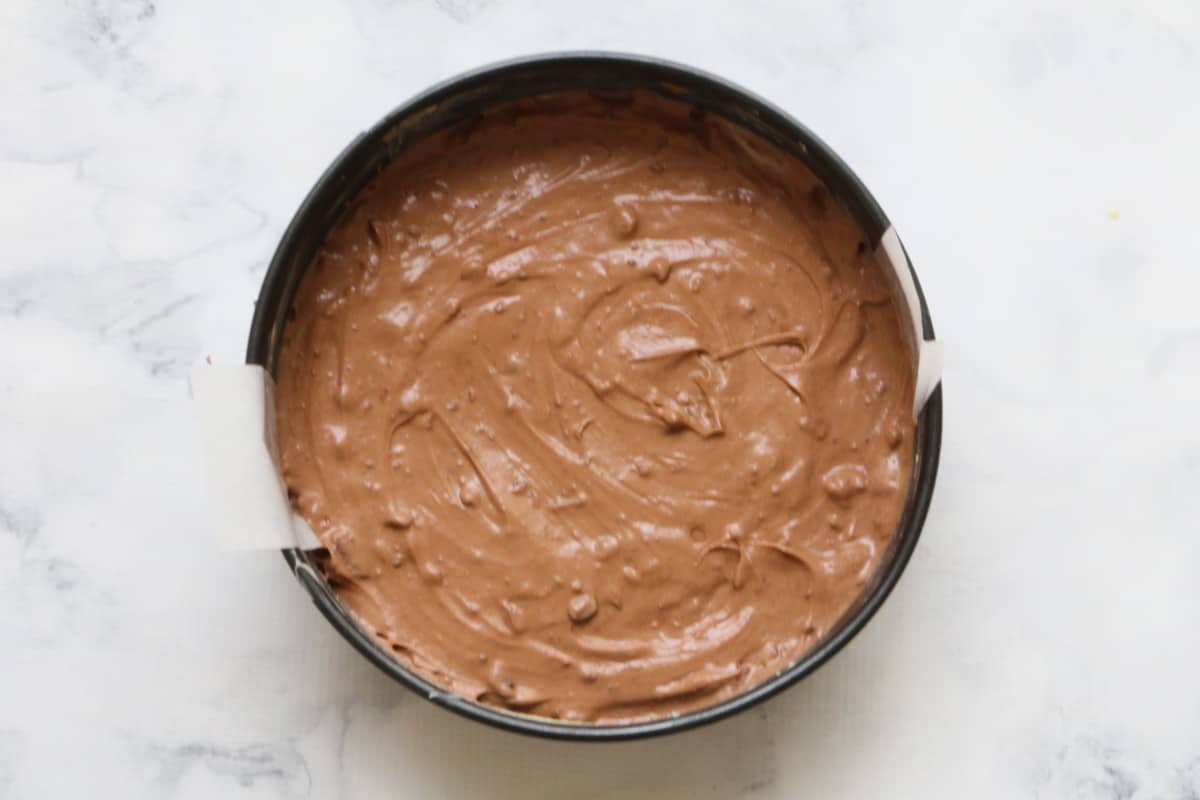
Pour the chocolate cheesecake mixture over the top of the Tim Tam base and spread out evenly with a spoon.
Chill in the fridge for 15 minutes.
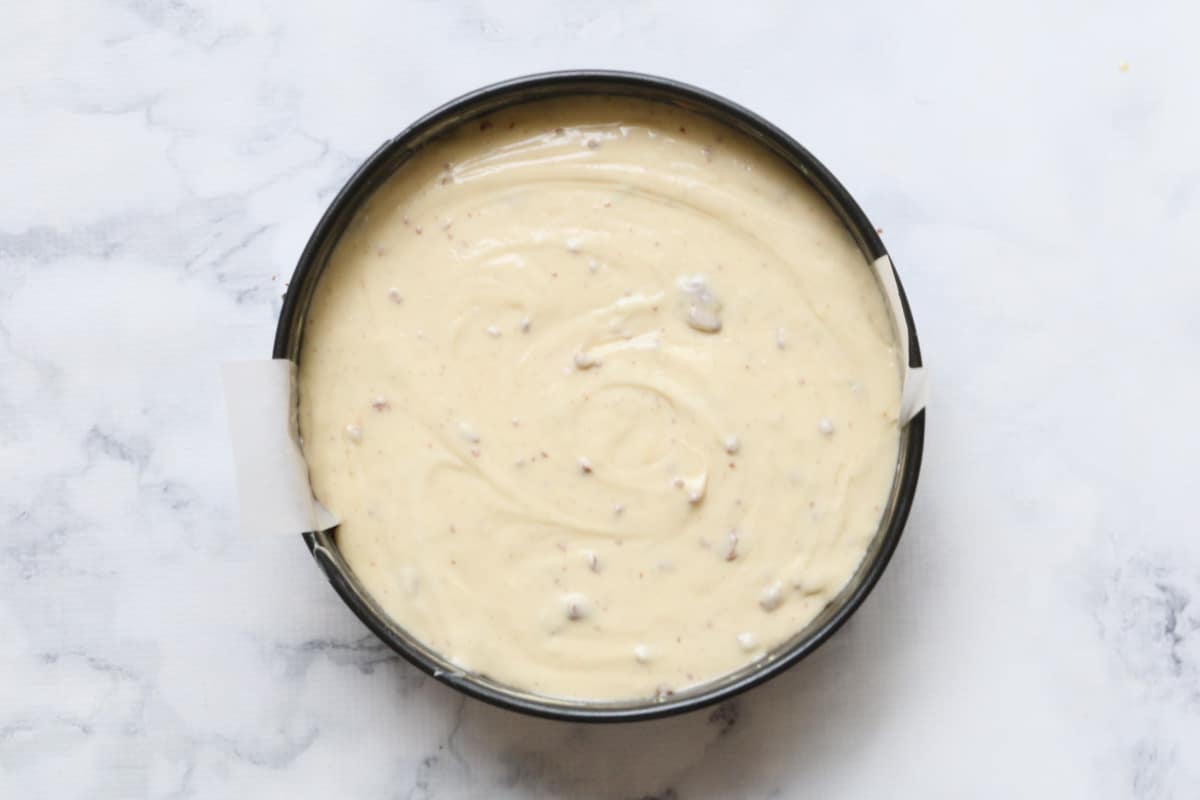
Step 5 - Prepare The White Chocolate Cheesecake Layer
To the remaining bowl of cheesecake mixture, add the melted white chocolate, the remainder of the whipped cream and the rest of the chopped Tim Tams.
Mix gently until combined.
Gently pour the white chocolate cheesecake mixture over the top of the milk chocolate layer and spread evenly with a spoon.
Chill in the fridge for a minimum of 6 hours.
Decorate with extra chopped Tim Tams before serving (optional).
How To Dissolve Gelatine
Gelatine helps the cheesecake to set and hold its texture when served. You can read about why I like to use gelatine in my no-bake cheesecakes here (and this is especially important if you're making a cheesecake for an event or party).
My no-fuss fool-proof method for dissolving gelatine ensures no lumps or bumps in the mixture.
To dissolve gelatine powder:
- Place 2 teaspoon of gelatine powder into a small bowl filled with ¼ cup lukewarm water.
- Place that small bowl into a large bowl and fill the larger bowl with boiling water (do not allow the boiling water to enter the smaller bowl).
- Allow the boiling water to slowly heat the smaller bowl and dissolve the gelatine (this will take a couple of minutes).
Expert Tips & FAQ
Here's my top tips for making the perfect Tim Tam Cheesecake:
Tim Tams are an iconic Australian cookie made by Arnott's. If Tim Tams are unavailable where you live, then you can substitute them with any other chocolate coated cookie. For those living in the UK, McVitie's Penguin biscuits are a close substitution. Alternatively, you could use Oreos in place of the Tim Tams.
Use a springform pan when making this Tim Tam cheesecake. The removable sides on the pan make it easy to transfer the cheesecake from the pan onto a serving plate.
Also, ensure that you grease the pan and line both the base and sides with baking paper to avoid the filling from sticking to the edges.
This no-bake cheesecake requires a minimum of 6 hours chilling time. If time allows, it's best to chill the cheesecake overnight before serving.
Remove the Tim Tam cheesecake from the fridge and decorate with extra chopped Tim Tams. As this cheesecake contains gelatine, it can be left out of the fridge for a couple of hours without losing it's texture.
Store the cheesecake in the fridge and consume within 3 days.
Alternatively, you can freeze the cheesecake as a whole or in individual portions. Wrap in a layer of plastic wrap and then a layer of foil and freeze for up to 1 month.
Related Recipes
If you love no-bake cheesecakes as much as I do (which is most definitely FAR too much!), then you're going to love these recipes too:
- Toblerone Cheesecake - a rich and creamy chocolate cheesecake made with Toblerone cheesecake - a favourite festive season dessert!
- Mars Bar Cheesecake - this no-bake cheesecake is literally packed with Mars Bars. The perfect combination of caramel and chocolate with plenty of extra pieces of Mars Bar on top.
- Lemon Cheesecake - a light and zesty cheesecake that is perfect for summer. Serve with whipped cream and fresh berries for the ultimate dessert.
- Crunchie & Malteser Cheesecake - calling all chocoholics! This honeycomb and chocolate cheesecake is an absolute showstopper.
- Rocky Road Cheesecake - the most over the top chocolate cheesecake decorated with marshmallows, raspberry lollies, nuts, coconut, chocolate sauce and more!
WANT EVEN MORE DELICIOUS RECIPES? Subscribe to my newsletter or follow along on Facebook or Instagram. And if you love baking, then please come and join my Facebook cooking club group or subscribe to my YouTube channel.

Tim Tam Cheesecake
Ingredients
- 400 g Tim Tam biscuits for base and filling
- 80 g butter melted
- 300 ml cream whipping or thickened
- 2½ teaspoon gelatine dissolved in ¼ cup hot water, cooled
- 500 g cream cheese full fat, room temperature
- 1 teaspoon vanilla bean paste or vanilla extract, essence
- 170 g (¾ cup) caster sugar
- 200 g milk chocolate block or melts
- 200 g white chocolate block or melts
- Tim Tam Biscuits extra, for decorating
Instructions
Conventional Method
- To ensure a smooth cheesecake, bring all ingredients to room temperature before starting.
- Grease and line the base and sides of a 23cm spring-form pan with baking paper and set aside.
- Finely crush 300g of the Tim Tam biscuits in a food processor and place into a bowl. Note: Reserve the extra 100g for the cheesecake layers.
- Add the melted butter and mix until well combined.
- Press the mixture firmly into the base of the pan and place into the fridge while you prepare the cheesecake layers.
- Roughly chop the remaining 100g of Tim Tams. Set aside.
- Using hand-held beaters or a stand-mixer, whip the cream until soft peaks form. Set aside.
- Pour ¼ cup of hot water into a cup, sprinkle over the gelatine powder and stir with a fork until dissolved. Set aside and allow to cool.
- Beat the cream cheese, vanilla bean paste and caster sugar until smooth and creamy.
- Add the cooled, dissolved gelatine to the mixture and beat until well combined.
- Divide the mixture equally between two bowls.
- Melt the milk chocolate in the microwave on 50% power for 3 minutes (or until melted). Allow to cool slightly.
- Fold the melted milk chocolate, half of the whipped cream and half of the chopped Tim Tams through one portion of the cream cheese mixture.
- Spoon the milk chocolate cheesecake mixture into the prepared tin. Spread out evenly with a spoon.
- Place into the fridge for 15 minutes.
- Melt the white chocolate in the microwave on 50% power for 3 minutes (or until melted). Allow to cool slightly.
- Fold the melted white chocolate, the remaining whipped cream and chopped Tim Tams through the second portion of the cream cheese mixture.
- Carefully spoon the mixture over the milk chocolate layer and spread out evenly with a spoon.
- Place the cheesecake into the fridge to set for a minimum of 6 hours. TIP: For best results, leave in the fridge overnight.
- Decorate with extra chopped Tim Tams before serving, optional.
Thermomix Method
- To ensure a smooth cheesecake, bring all ingredients to room temperature before starting.
- Grease and line the base and sides of a 23cm spring-form pan with baking paper and set aside.
- Melt butter in the Thermomix bowl for 2 minutes, 100 degrees, Speed 1.
- Add 300g of the Tim Tam biscuits and crush on Speed 10 for 10 seconds. Scrape down the sides of the bowl and repeat until well combined.
- Press the mixture firmly into the base of the pan and place into the fridge.
- Roughly chop the remaining 100g Tim Tam biscuits and set aside.
- Whip the cream in a clean, dry Thermomix bowl on Speed 3.5 until lightly whipped (the time it takes will depend on the freshness of the cream - it can be anywhere between 10 seconds and a few minutes). Set the cream aside in a separate bowl.
- Pour ¼ cup of hot water into a cup, sprinkle over the gelatine and stir with a fork until dissolved. Set aside and allow to cool.
- Beat the cream cheese, vanilla bean paste and caster sugar in a clean and dry Thermomix bowl for 30 seconds, Speed 5. Scrape down the sides with a spatula and repeat until smooth and creamy.
- Add the cooled, dissolved gelatine to the mix and mix for 30 seconds, Speed 5. Divide the mixture evenly between two bowls.
- Place the milk chocolate into the Thermomix bowl. Grate for 5 seconds, Speed 8. Scrape dow the sides of the bowl. Melt for 3 minutes, 50 degrees, Speed 2. Set aside in a bowl.
- Fold the melted milk chocolate, half of the whipped cream and half of the chopped Tim Tams through one portion of the cream cheese mixture.
- Spoon the milk chocolate mixture into the prepared tin. Spread out evenly with a spoon. Place into the fridge for 15 minutes.
- Place the white chocolate into the Thermomix bowl. Grate for 5 seconds, Speed 8. Scrape dow the sides of the bowl. Melt for 3 minutes, 50 degrees, Speed 2. Set aside in a bowl.
- Fold the melted white chocolate, the remaining whipped cream and chopped Tim Tams through the second portion of the cream cheese mixture. Carefully spoon the mixture over the milk chocolate layer and spread out evenly with a spoon.
- Place the cheesecake into the fridge to set for a minimum of 6 hours. TIP: For best results, leave in the fridge overnight.
- Decorate with extra chopped Tim Tams before serving, optional.
Notes
- Tim Tams - an iconic Australian chocolate coated biscuit. These can be substituted for any brand of chocolate coated biscuit (like Penguins) or alternatively, Oreos.
- Cream cheese - for a smooth cheesecake, ensure the cream cheese is at room temperature before mixing. Use blocks of full fat cream cheese (not light or spreadable). I like to use the Philadelphia brand.
- Gelatine powder - dissolved in hot water. This helps the cheesecake to set and hold its texture when served. You can read about why I always use gelatine in my no-bake cheesecakes here (this is especially important if you're making a cheesecake for an event or party).
- Chilling time - this no-bake cheesecake requires a minimum of 6 hours chilling time. If time allows, it's best to chill the cheesecake overnight before serving.
- Serving - remove the Tim Tam cheesecake from the fridge and decorate with extra chopped Tim Tams. As this cheesecake contains gelatine, it can be left out of the fridge for a couple of hours without losing it's texture.
- Storing & freezing - store the cheesecake in the fridge and consume within 3 days. Alternatively, you can freeze the cheesecake as a whole or in individual portions. Wrap in a layer of plastic wrap and then a layer of foil and freeze for up to 1 month.


Rita says
Hi, I’m looking to make this in individual mini dessert cups. Do you think this would work?
Lucy Mathieson says
Absolutely!!
Nat says
Looking to make this beauty today but wondering what size tin was used so the layers look nice like this and not too thin. Any help would be appreciated! Thanks!
Lucy Mathieson says
Hi Nat, sorry I should have included the size!!! From memory this was a 22cm tin. xx
Amy B says
HI. I'd love to make this dessert for my sister's bday. (She spent a summer in Australia while in college and introduced us all to the phenomenon of the TimTam.) Anyway - was wondering you have this recipe with American measurements? Just wanted to check before I start looking for a convertor tool on the internets. Thanks!
Bake Play Smile says
Hi Amy, no sorry I don't have American measurements but there are some great online converters! xx
Amy B says
Thanks so much. Appreciate the reply. I'll see what I can find. 🙂
Rosslyn Perry says
HI I was wondering if you know of any yummy cheesecake recipes without gelatine in them ?Thankyou so much !.
Bake Play Smile says
Sure thing! Here's a couple:
https://bakeplaysmile.com/twix-cheesecake-cups/
https://bakeplaysmile.com/newyorkcheesecake/
Emma says
This looks divine Lucy! Do you think it would freeze ok? I'm picturing freezing it in slices and having sneaky dessert once the kids are in bed haha!
Bake Play Smile says
Hmm I'm not a big fan of freezing cheesecake to be honest... but you could definitely try!