

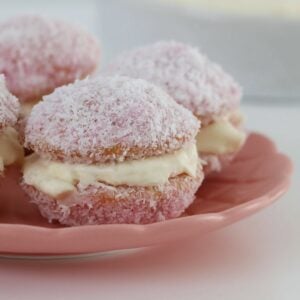
Old-fashioned raspberry and cream Jelly Cakes made with bite-sized light and fluffy sponge cakes dipped in raspberry jelly, coated in coconut, and then sandwiched together with delicious whipped cream. The ultimate Australian morning tea recipe.
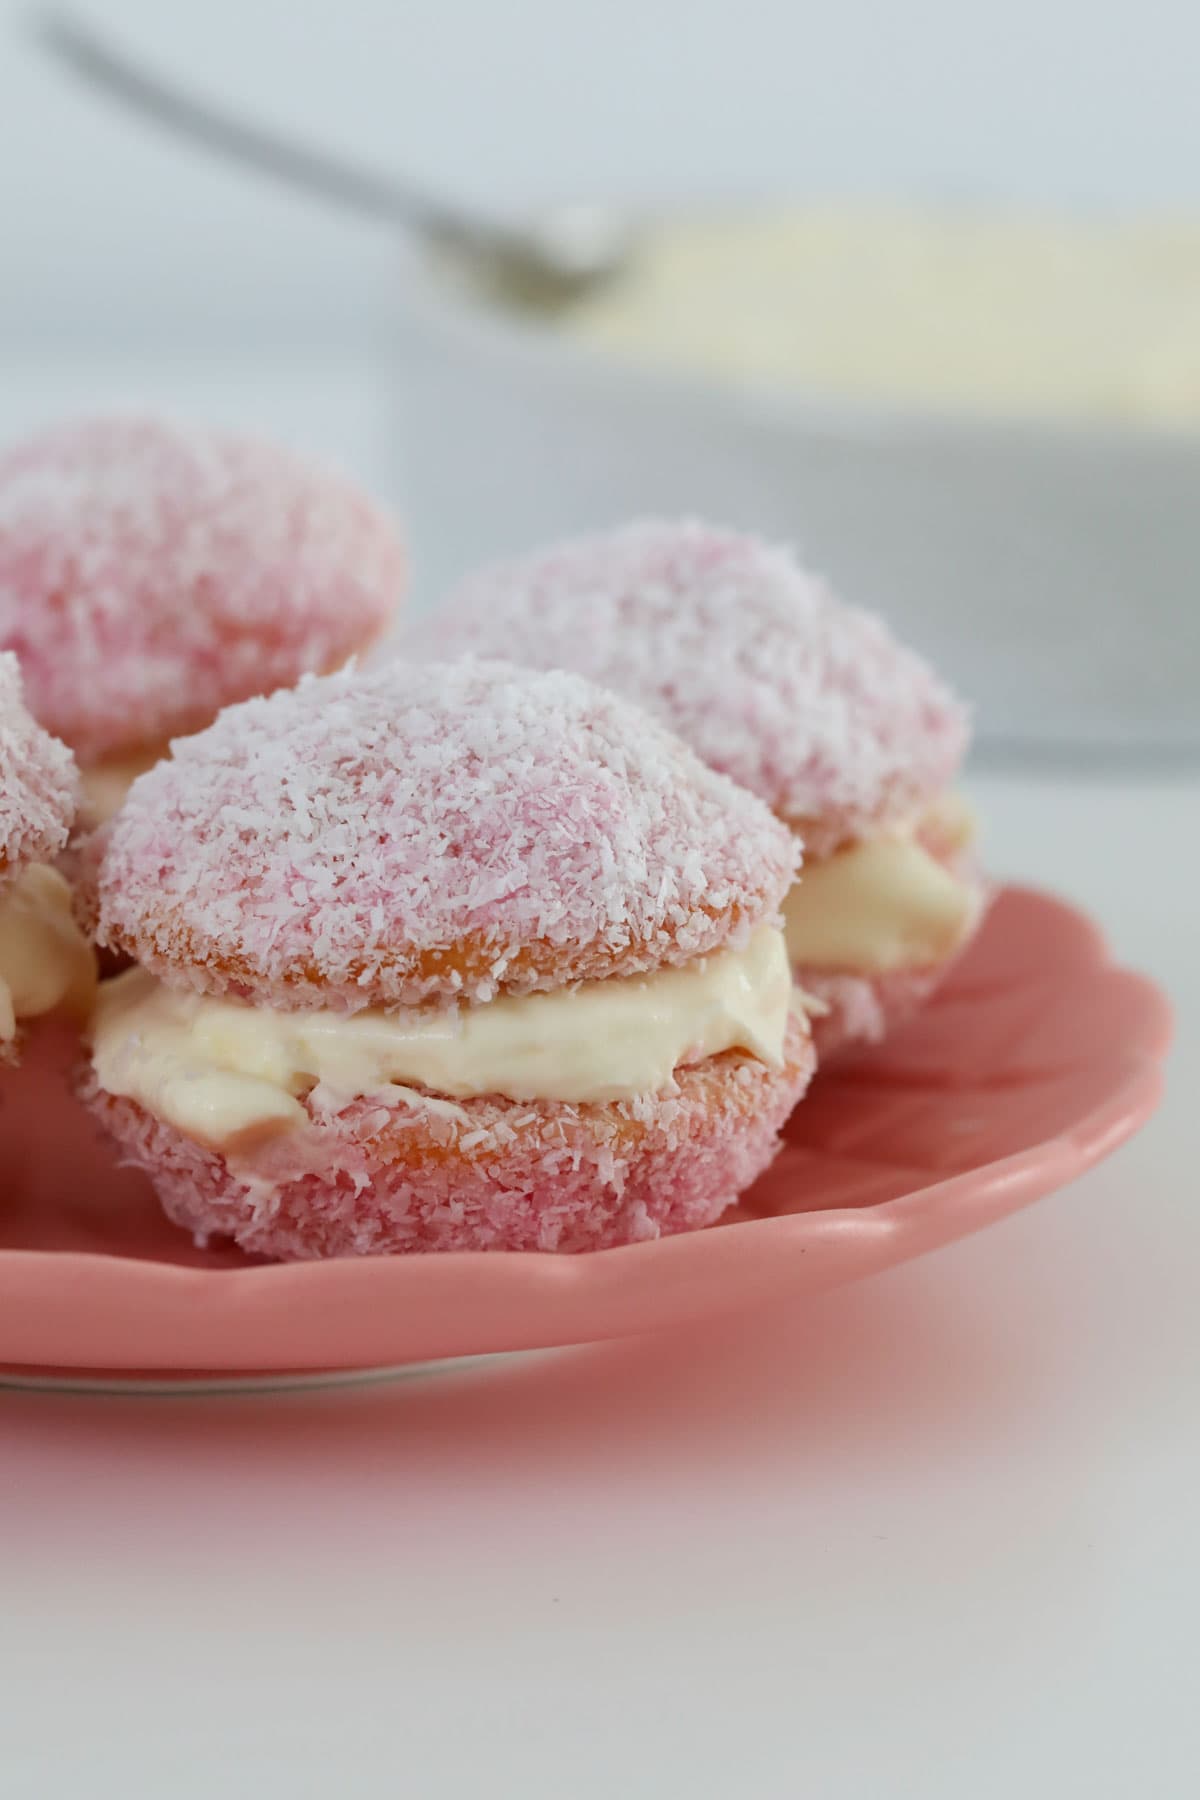
Say hello to these classic Raspberry & Cream Jelly Cakes! They really are the perfect combination of vanilla cake, raspberry jelly, whipped cream and coconut. YUM!!!
When it comes to popular old fashioned Australian recipes, these sweet little afternoon tea Jelly Cakes are right up there... along with Monte Carlo biscuits, ANZAC biscuits and Chocolate Ripple Cake, of course!
Table Of Contents
Why You're Going To Love This Recipe
Whether you're serving these jelly cakes at a cake stall, fete, high tea or baby shower, they're sure to be the first thing to disappear!
- CWA recipe - this recipe is based on the CWA (Country Women's Association) classic recipe.
- Fancy looking... but easy to make - while these delicate little jelly and cream cakes may look super impressive, they're actually very simple to make. The vanilla sponge cakes are quick and easy to whip up using your beaters, stand-mixer or Thermomix. Then it's just a matter of coating the cakes in the thickened jelly, tossing them in coconut and filling with whipped cream.
- Conventional & Thermomix - I've included both the Thermomix and conventional methods in the recipe card below.
What You Need
As Jelly Cakes are an old fashioned recipe, they're made using basic pantry and fridge staples, making them a very budget-friendly afternoon tea option.
Note: Scroll to the recipe card at the bottom for the ingredients quantities and full detailed method.
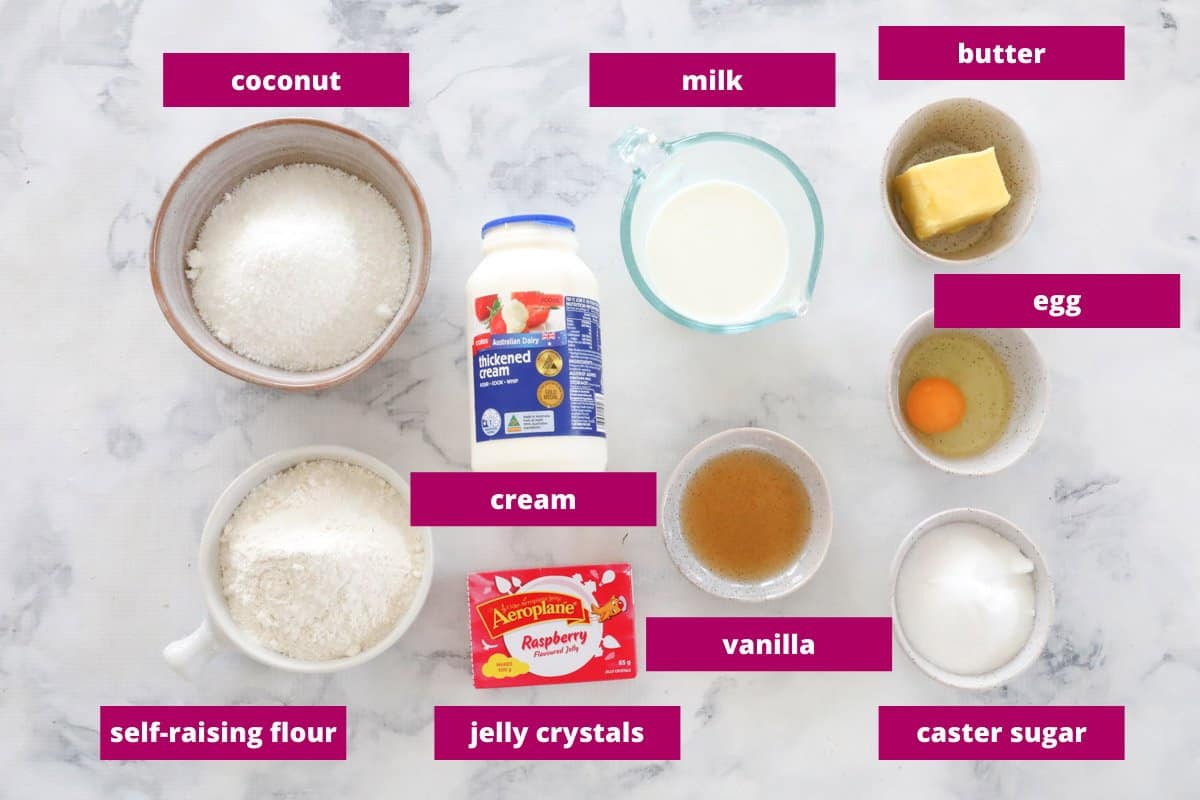
- Butter - you can use salted or unsalted butter in this recipe. Allow your butter to soften to room temperature to cream easier.
- Caster sugar - also known as superfine sugar. This sugar is perfect for jelly cakes as it dissolves easily when mixed together with the butter.
- Vanilla extract - or substitute with vanilla paste or essence.
- Egg - use a large egg (approximately 60g) and ensure it is at room temperature before using.
- Milk - full cream/full fat milk is best to use when baking as it gives the cakes a lovely texture.
- Self-raising flour - use store-bought self-raising flour or make your own self-raising flour by using my homemade recipe.
- Raspberry jelly crystals - I like to use Aeroplane brand which is popular here in Australia, but you can use any brand of jelly crystals you like.
- Coconut - choose fine desiccated coconut for coating.
- Cream - choose a heavy whipping or thickened cream.
Equipment
To make jelly cakes, you will need a few basic kitchen appliances:
- Beaters, stand-mixer or Thermomix - to beat the butter, sugar, vanilla and egg together. You will also need to use this for whipping the cream for the filling.
- Large spoon - for folding through the milk and flour.
- Kettle/Jug - for boiling the water to make the jelly.
- Patty pan baking tray - a baking tray with small, shallow round holes. See my FAQs below for substitutions.
- Oven - bake the jelly cakes in the oven at 175 degrees celsius (350 degrees fahrenheit).
Step By Step Instructions
These simple Jelly Cakes take just 15 minutes to prepare.
Note: Scroll to the recipe card at the bottom for the ingredients quantities and full detailed method.
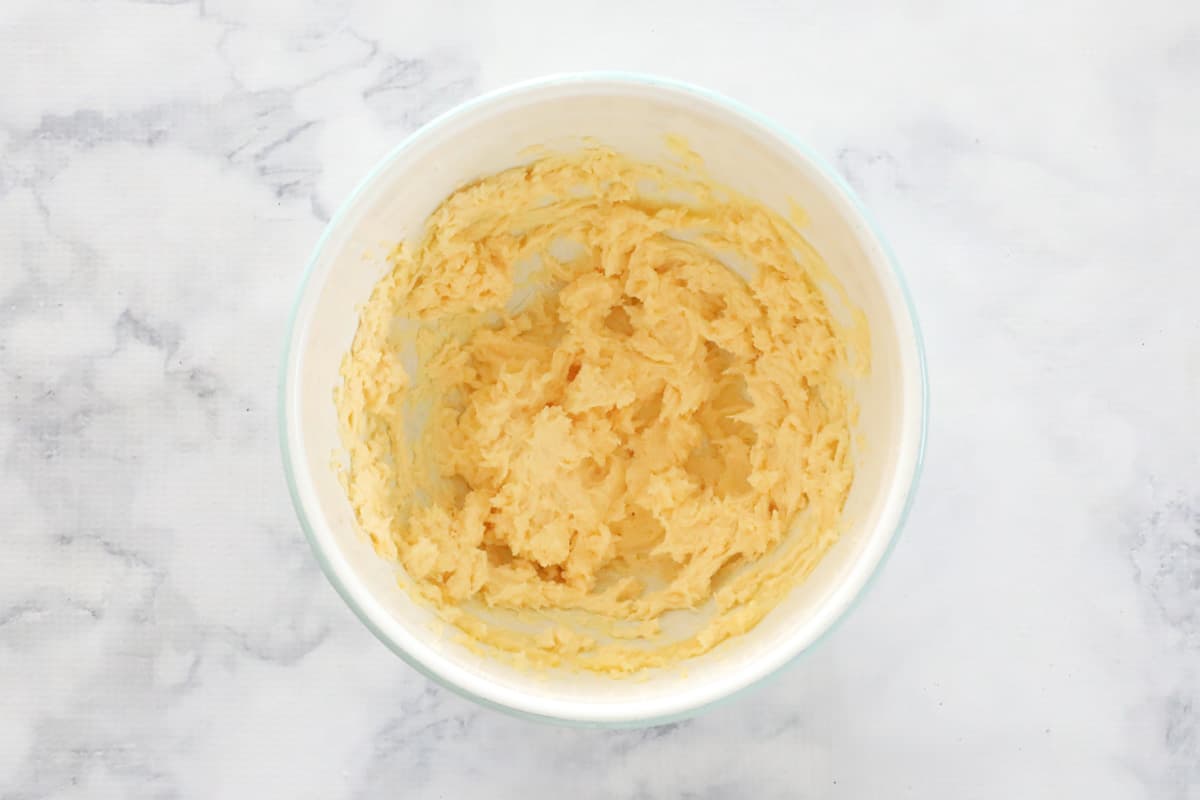
Step 1 - Beat
Using hand-held beaters, a stand-mixer or a Thermomix, beat the butter, sugar and vanilla until pale, soft and creamy.
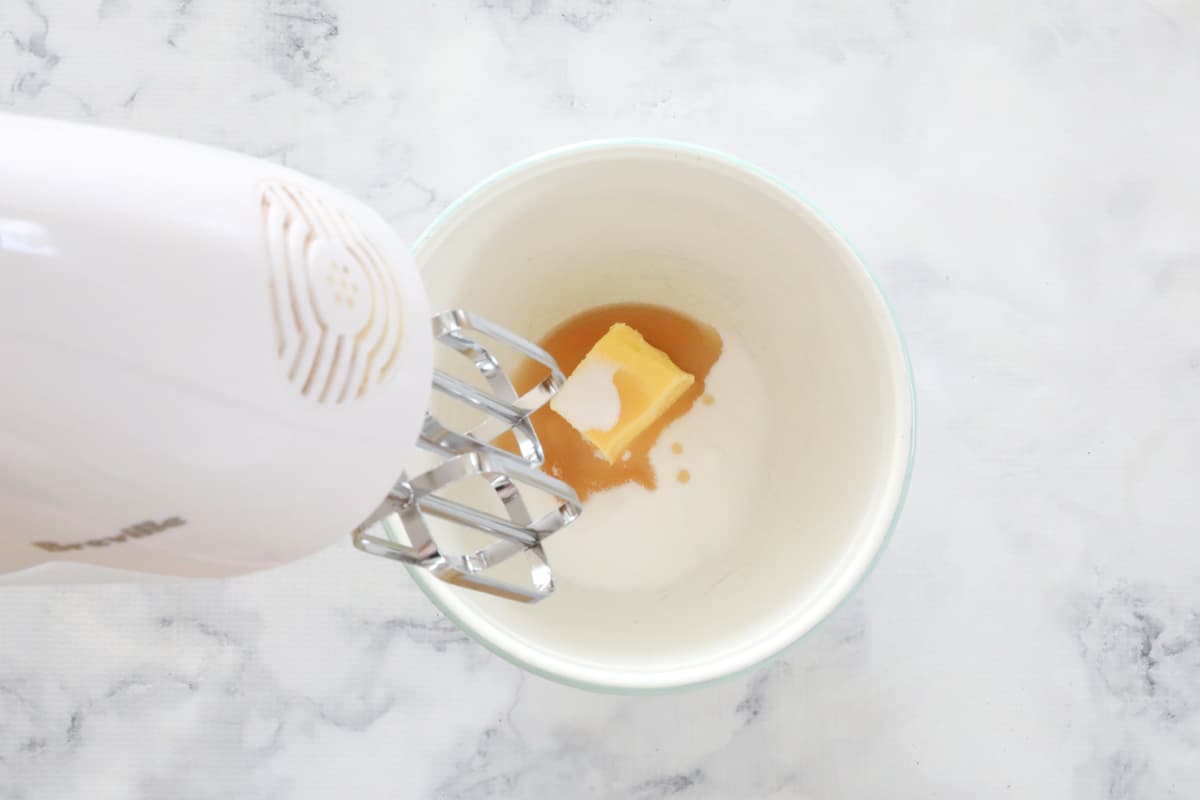
Add the egg and beat through.
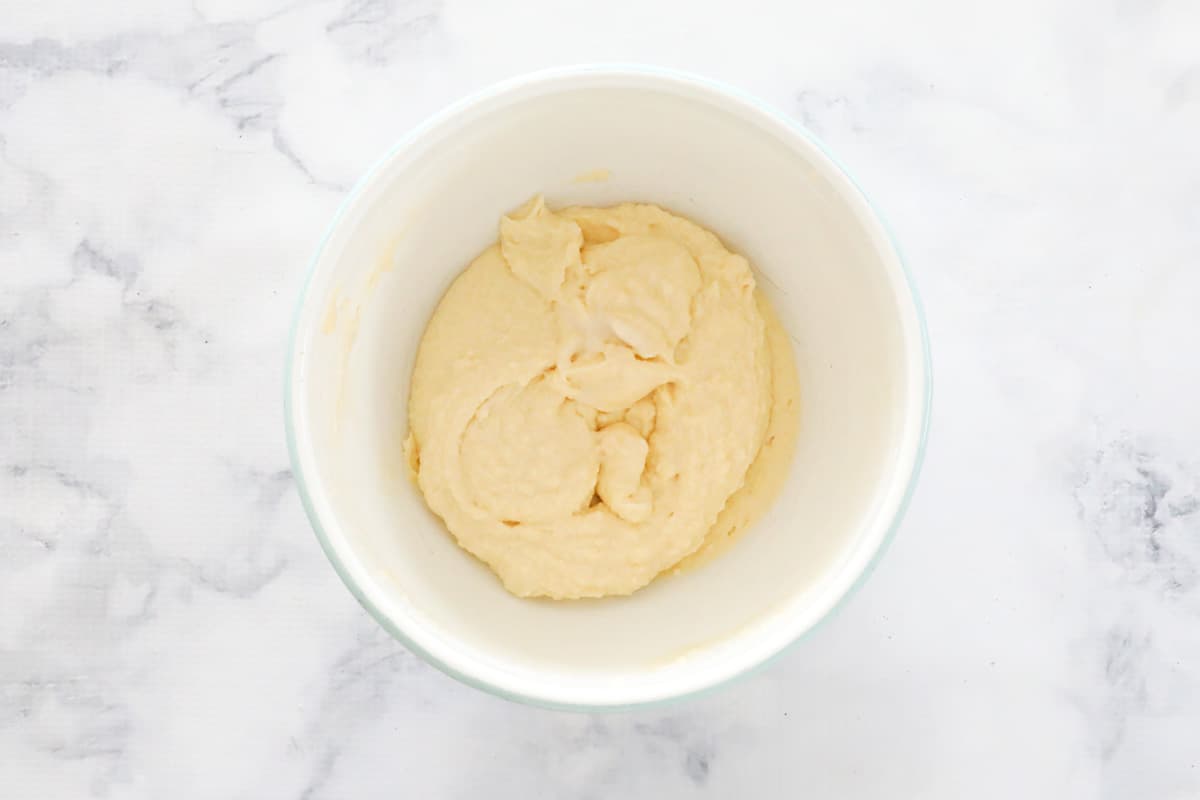
Step 2 - Alternative Milk & Flour
Alternative adding half of the milk and half of the self-raising flour and mixing through with a spoon.
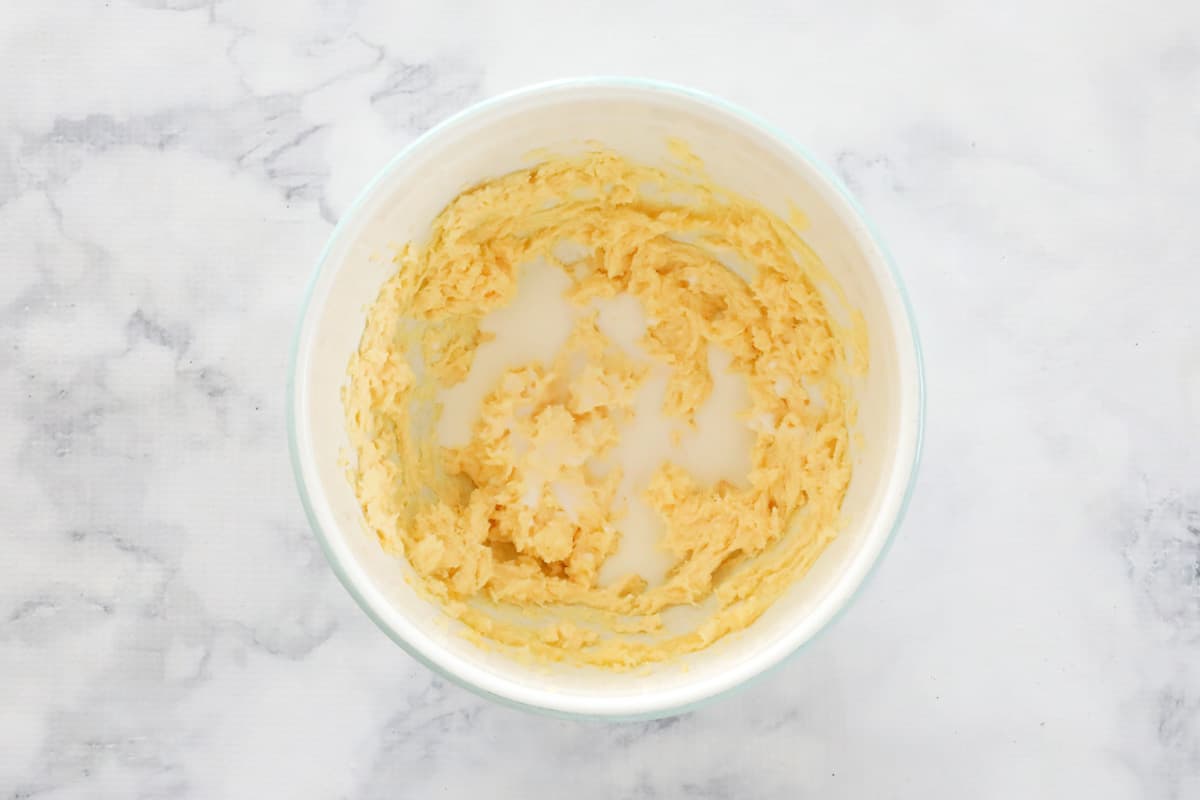
Repeat with the remaining milk and flour.
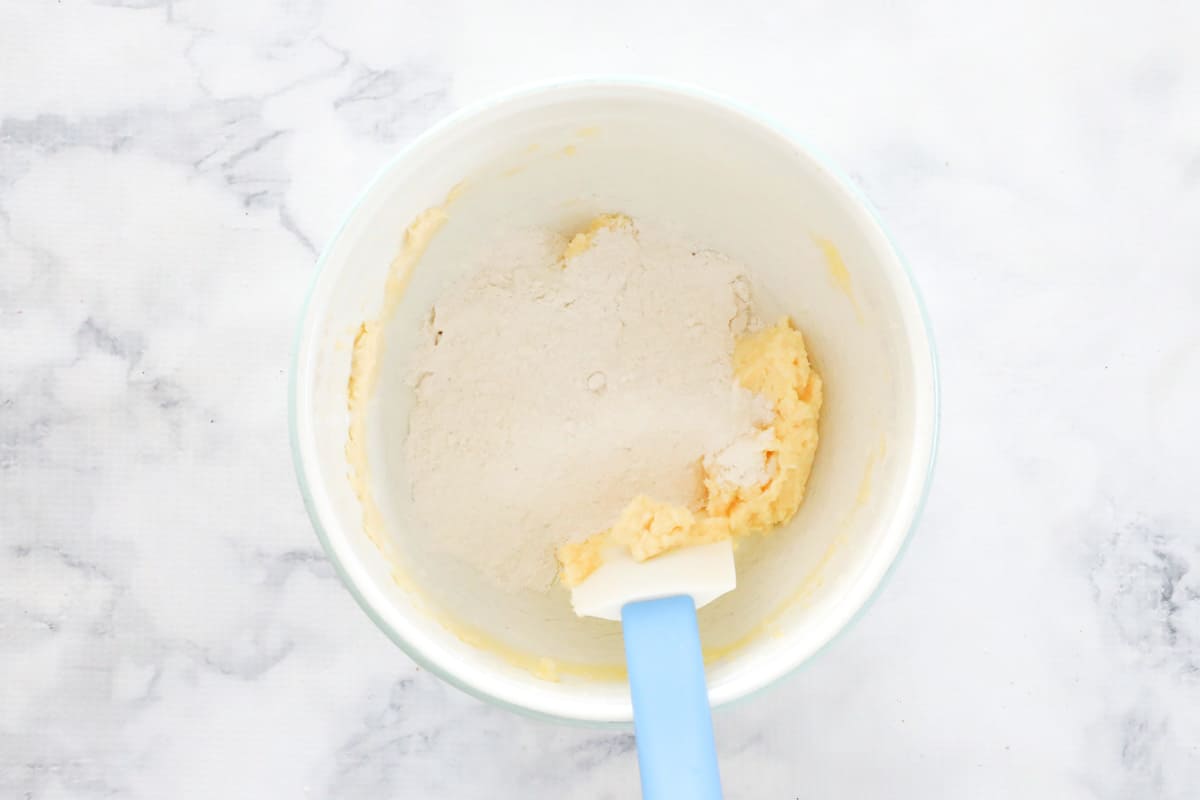
Continue to mix until the mixture is combined and smooth.
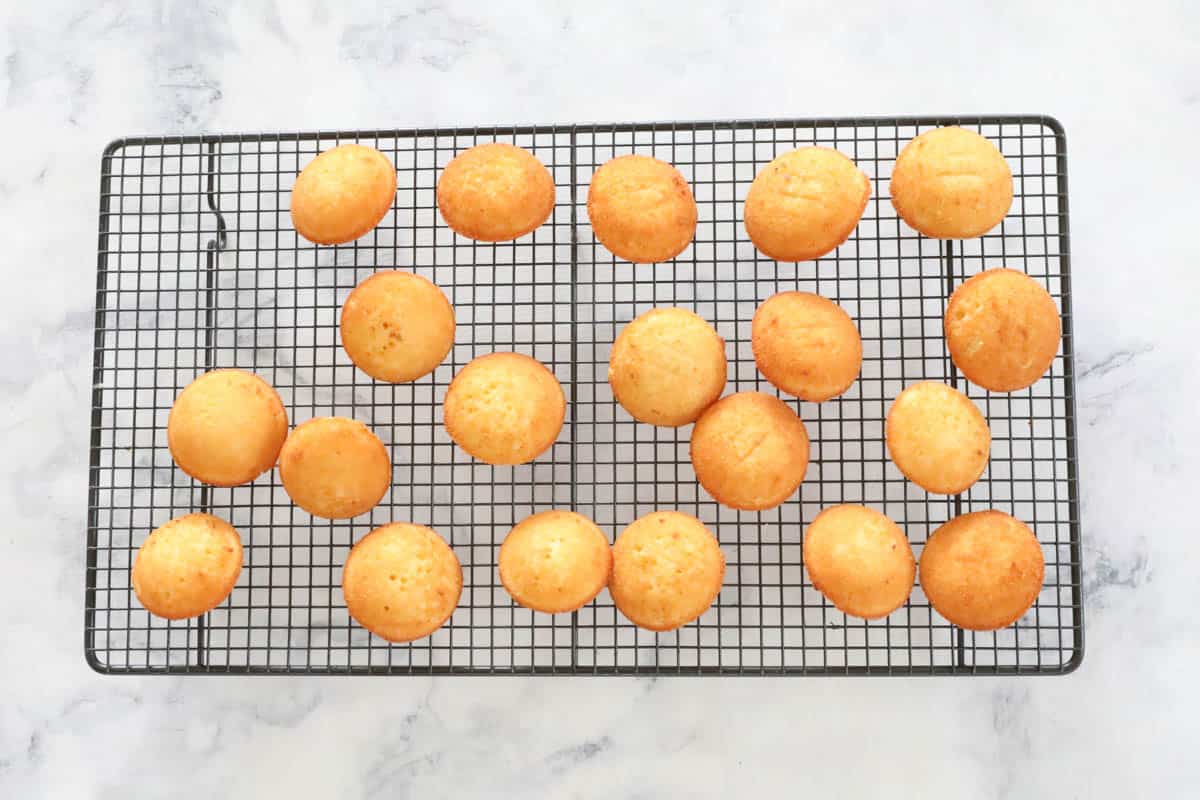
Step 3 - Bake
Bake the sponge cakes in lightly greased patty pans until light, fluffy and just golden.
Allow to cool in the tray for 10 minutes before transferring to a wire rack to cool completely.
TIP: If the cakes are difficult to remove from the tin, simply use a butter knife to gently loosen them around the edges.
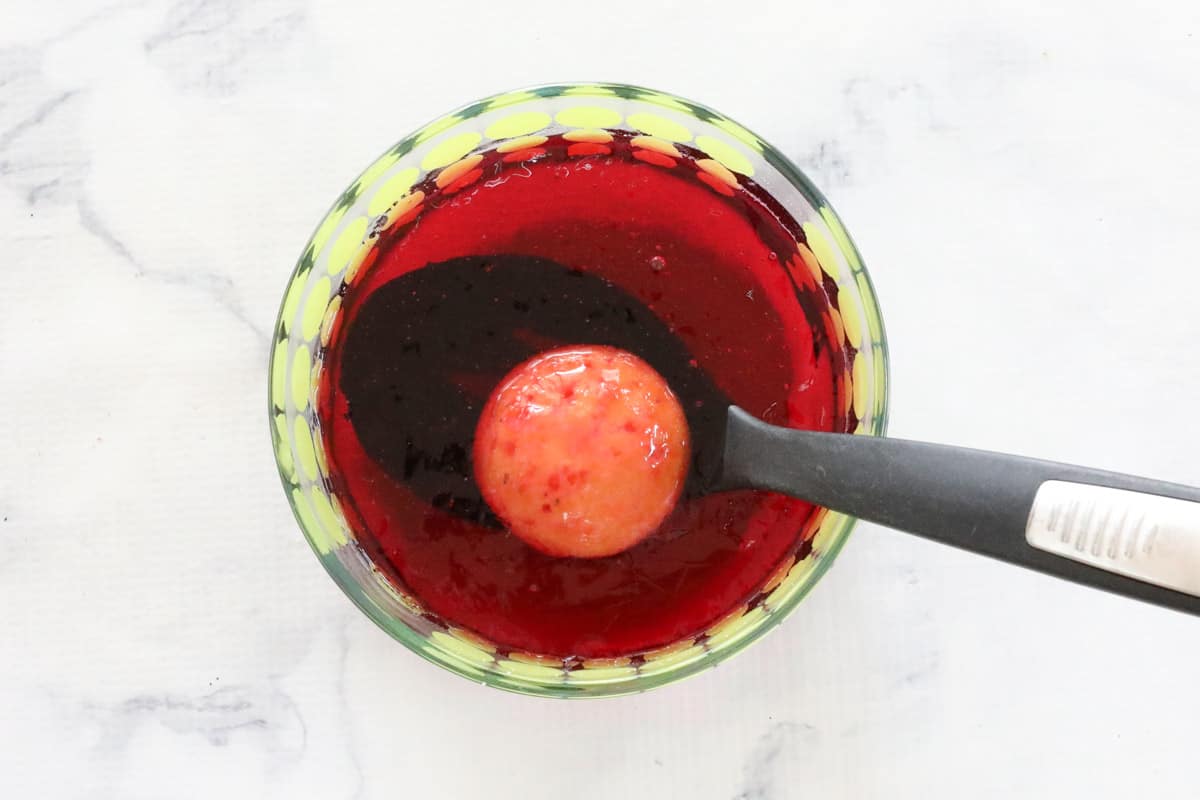
Step 4 - Dip In Jelly
Prepare the jelly and place into the fridge for 1-2 hours or until thickened but not completely set (see my tips below).
Using a slotted spoon, dip each of the cakes into the thickened jelly and allow any excess to drip off.
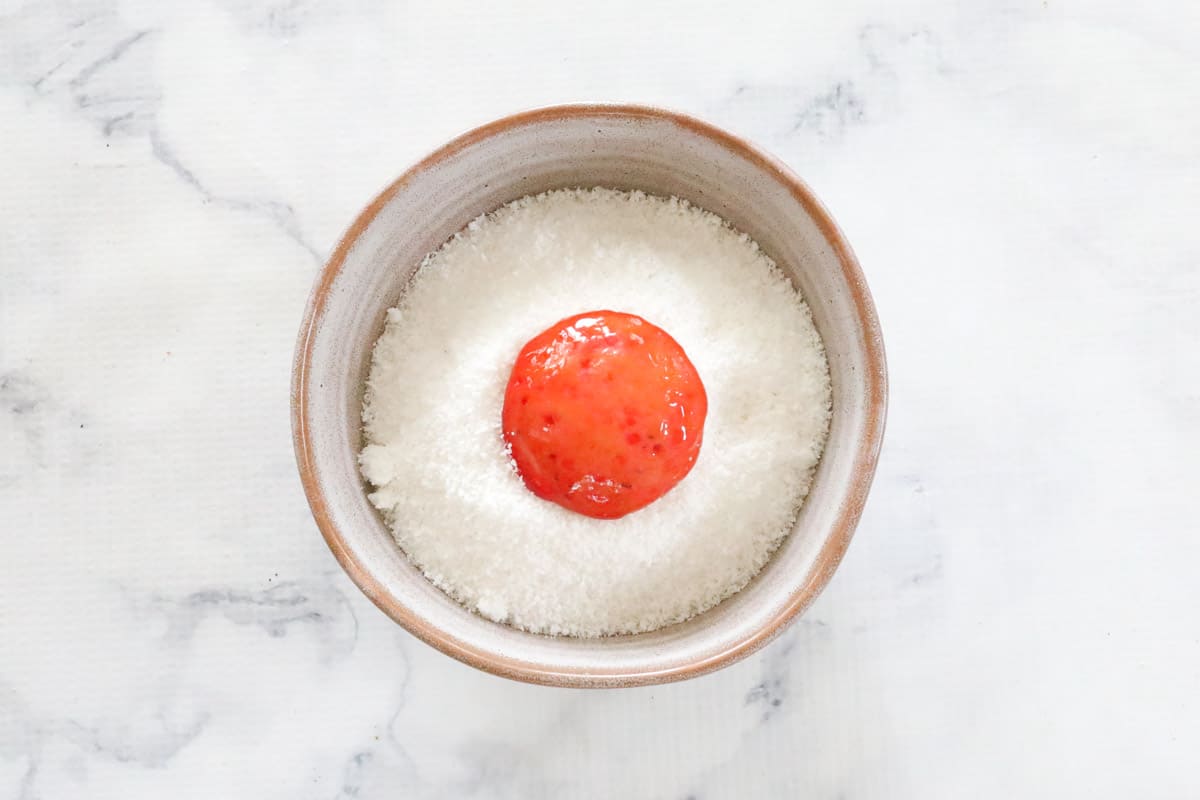
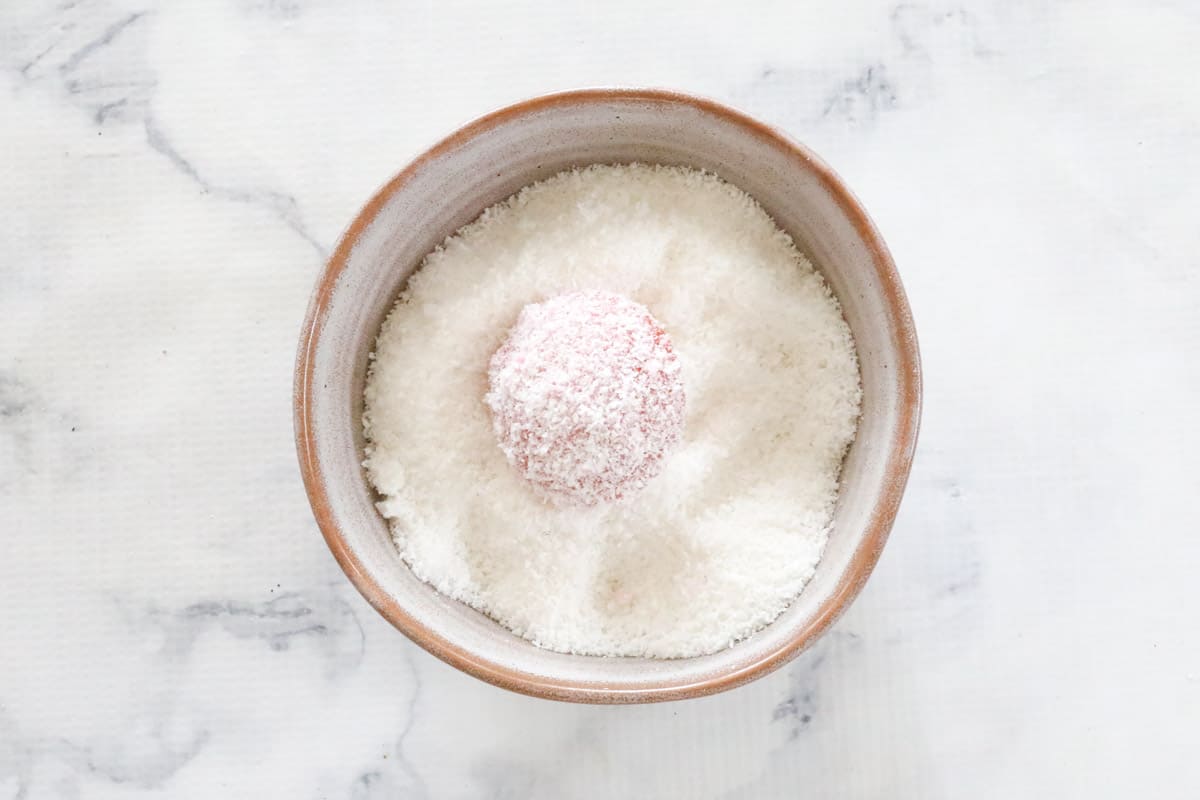
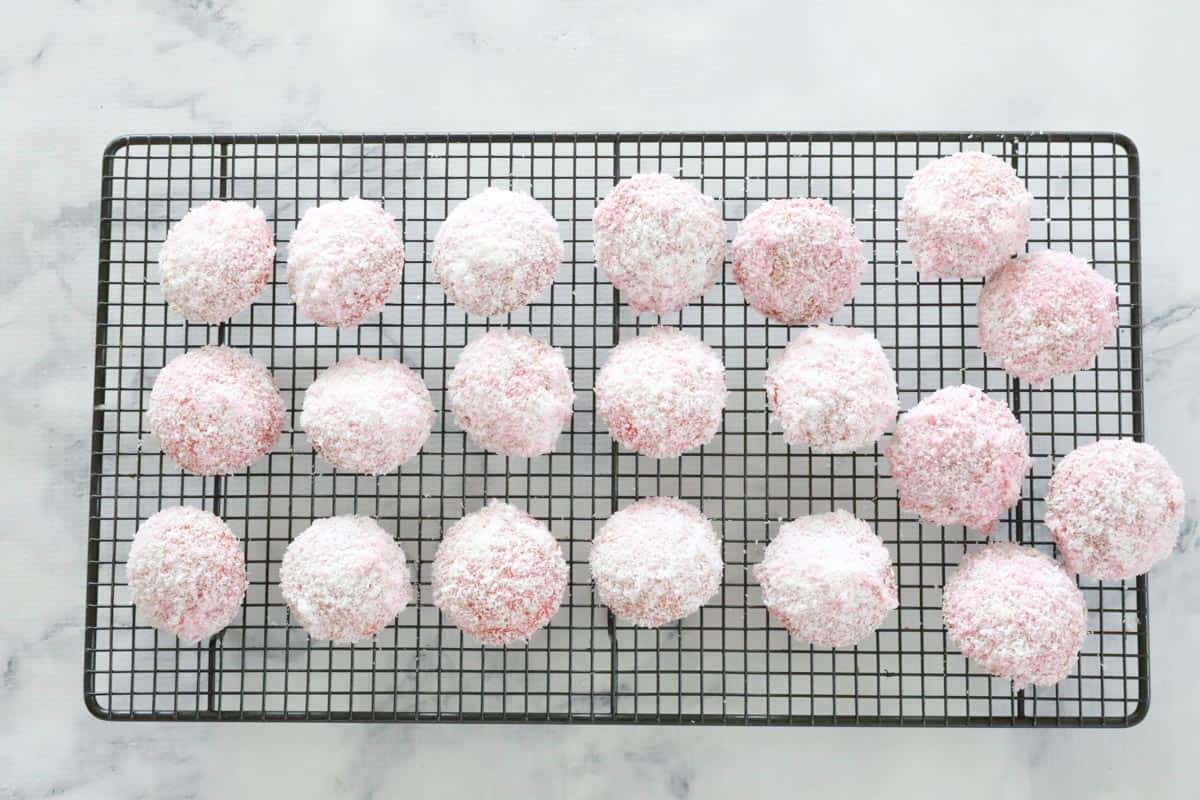
Step 5 - Toss In Coconut
Toss the cakes in the coconut until well covered on both sides.
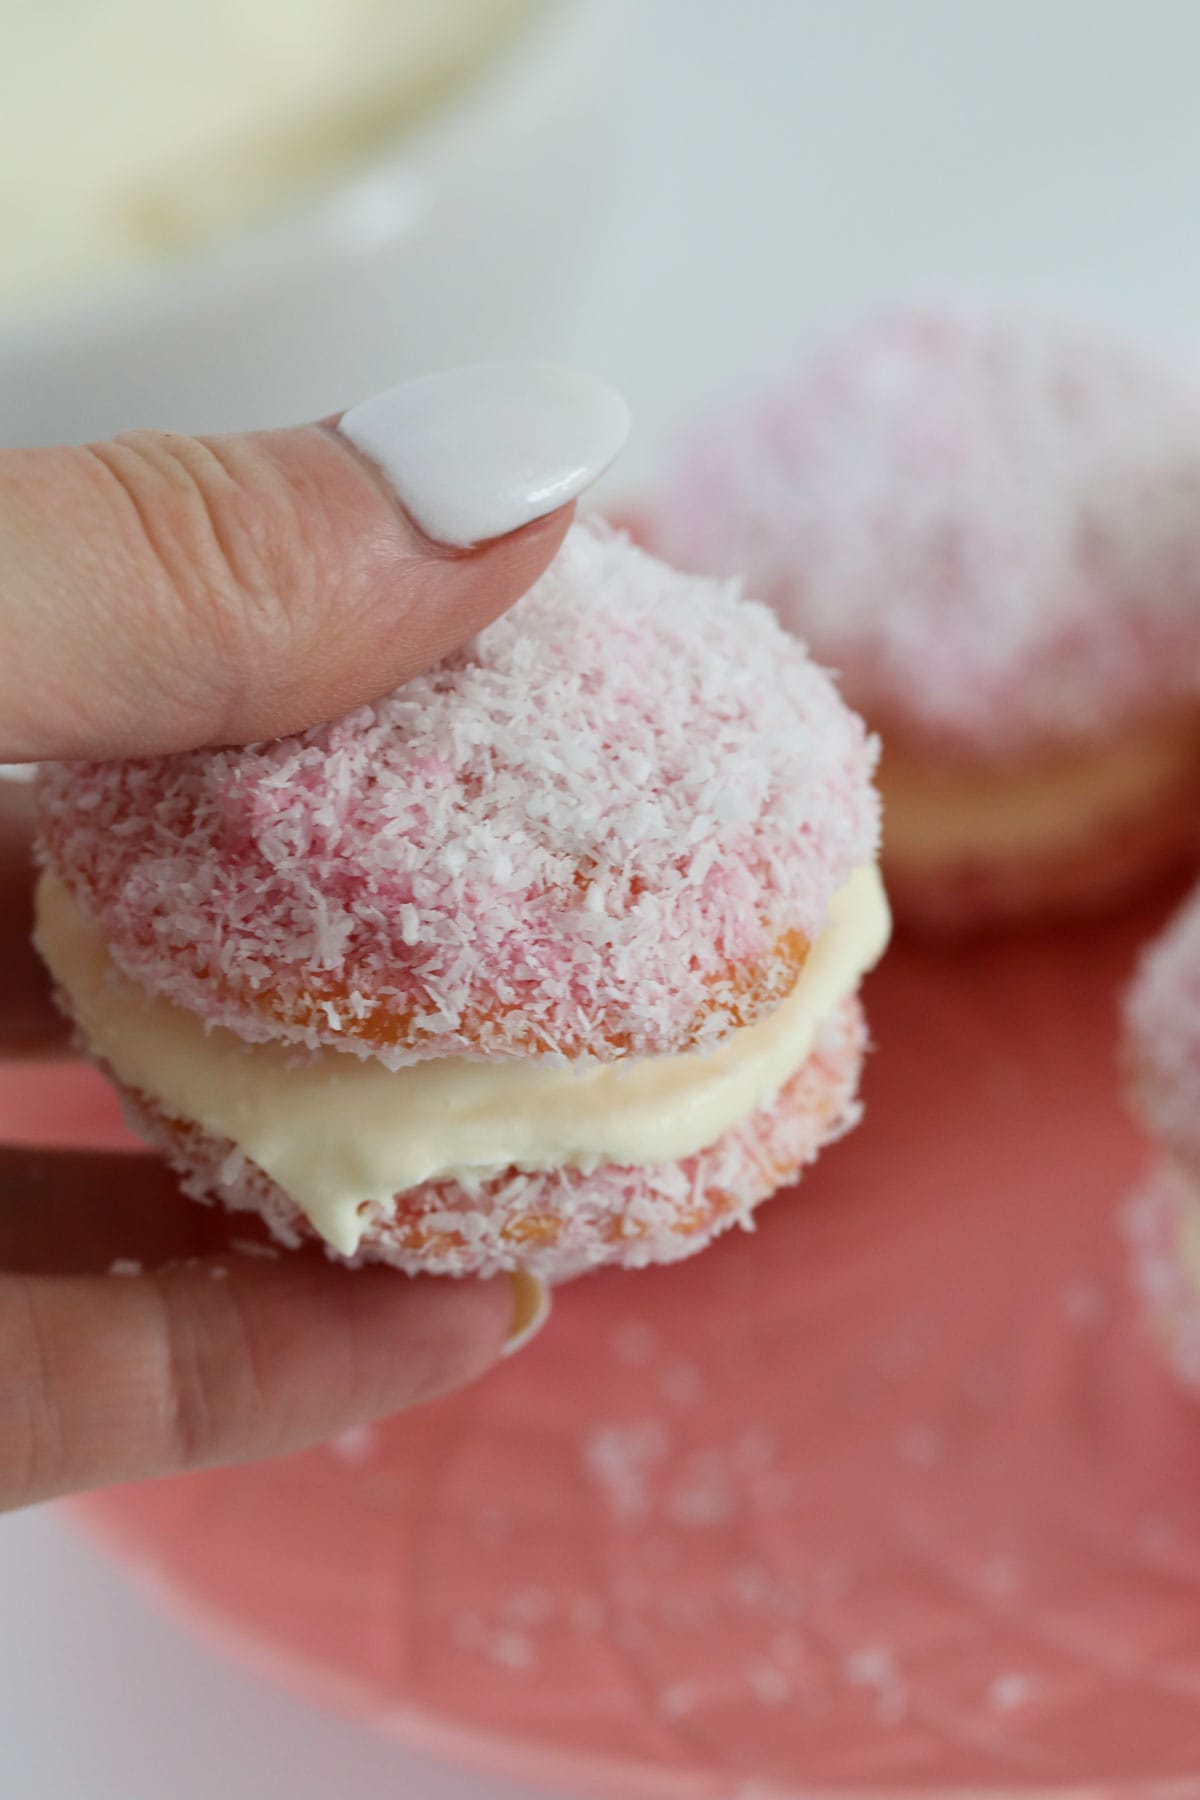
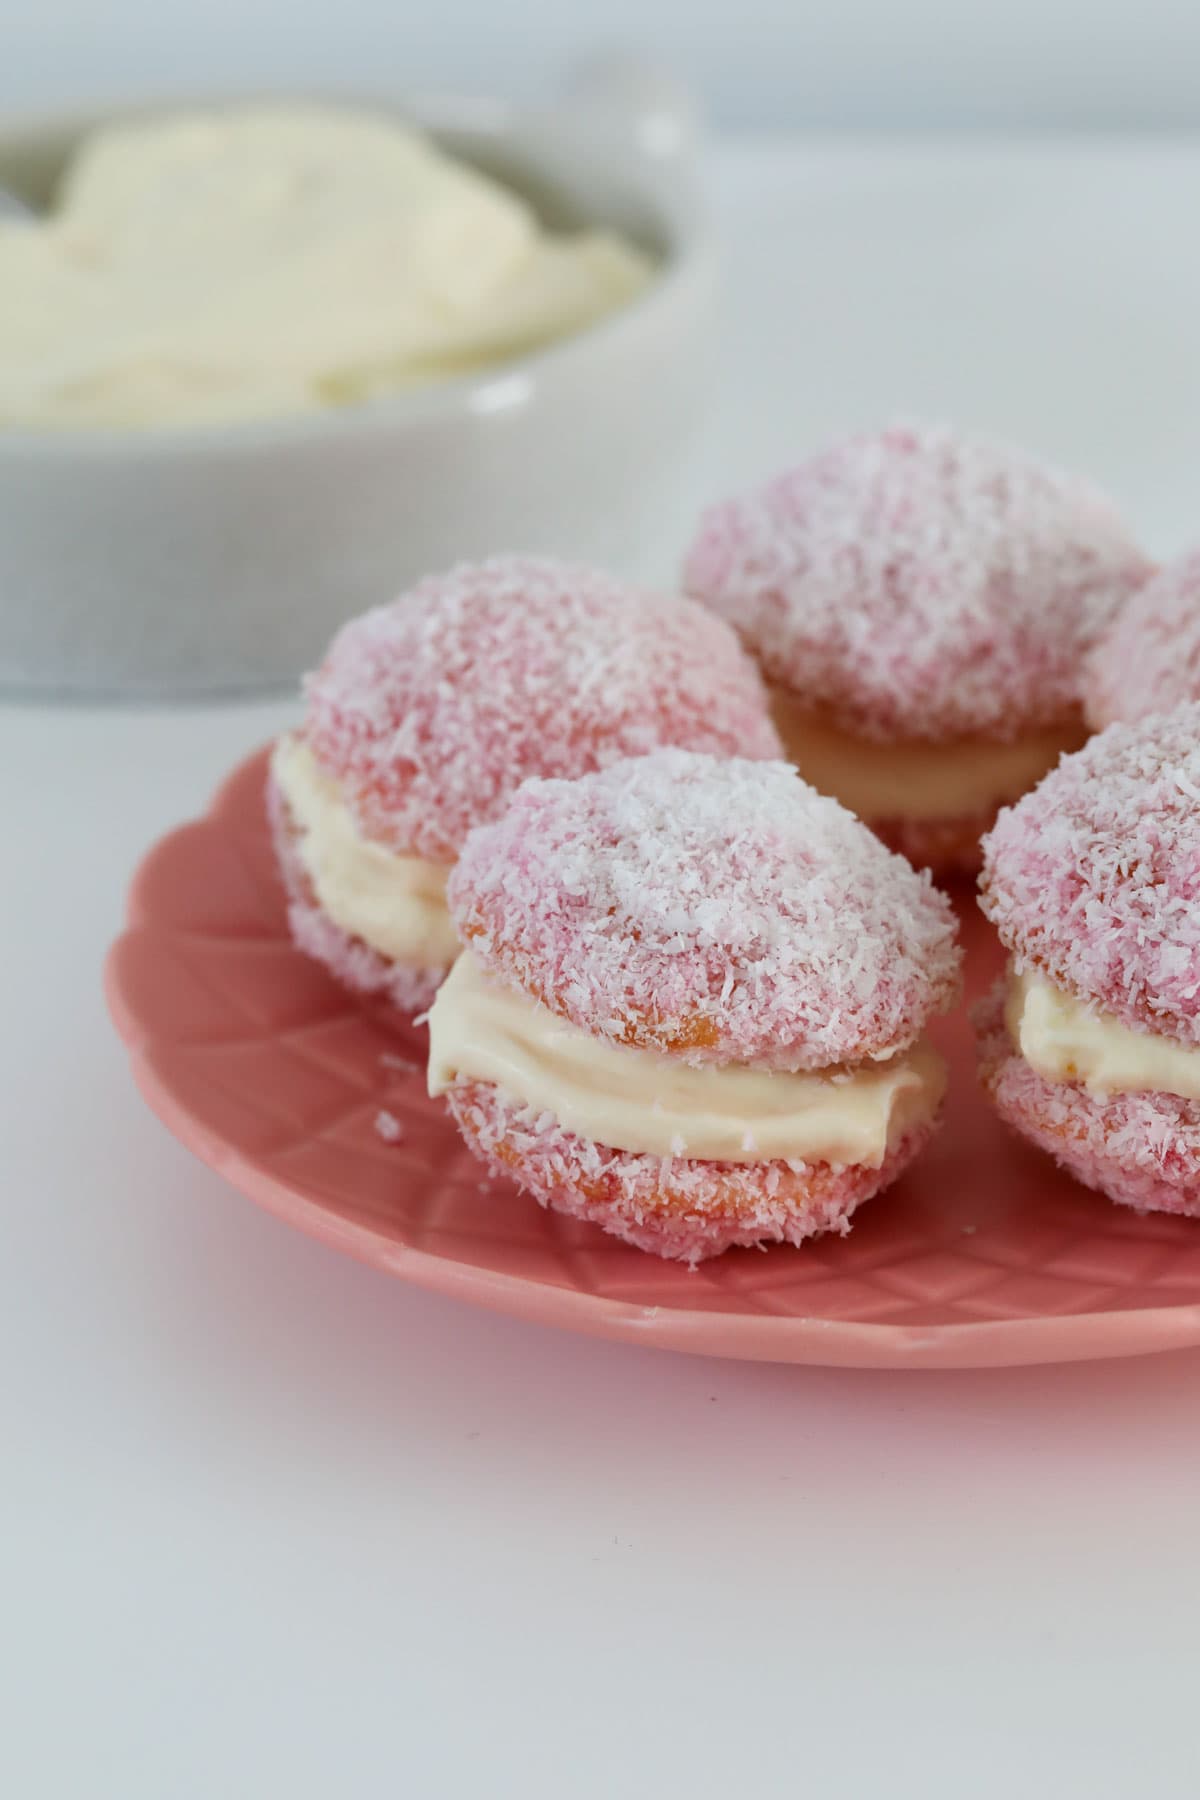
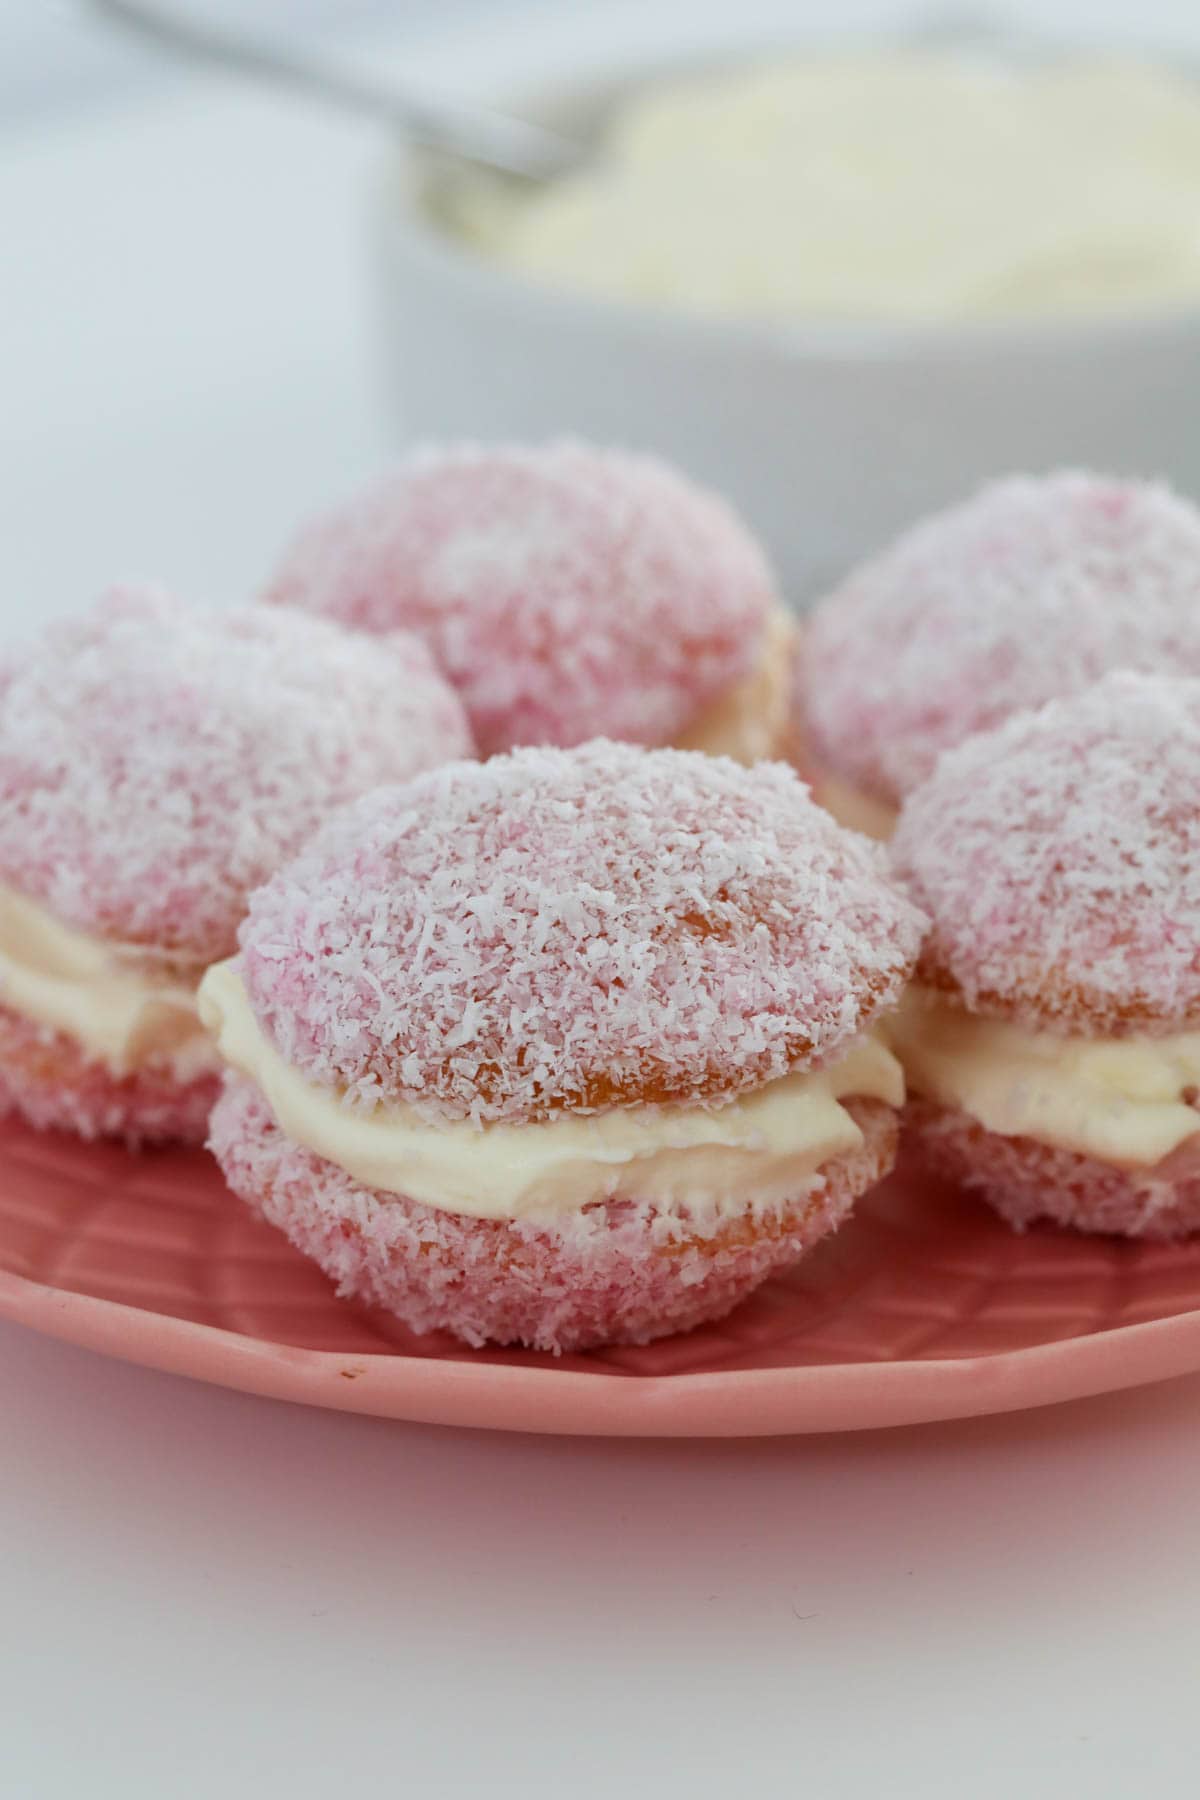
Step 6 - Serve With Whipped Cream
When ready to serve, place a spoonful of whipped cream on top of one of the cakes and lightly sandwich it together with another cake.
Serve immediately.
FAQs
Jelly cakes consist of small fluffy vanilla sponge cakes that are dipped in jelly and then coated in desiccated coconut. Just before serving, a small amount of whipped cream is placed between two of the cakes, lightly sandwiching them together.
Jelly cakes (also known as raspberry jelly cakes) are an old fashioned Australian recipe made famous by the Country Women's Association (CWA). They are similar to a pink lamington, however, they are smaller and do not contain any jam.
A patty pan is a baking tray with small, shallow round holes. This type of tray is popular for use when making tarts, small cakes, mini savoury quiches and butterfly cakes.
If you don't have a patty pan tin, you can use an old fashioned gem iron pan. Alternatively, you can bake the mixture in a regular muffin tin and then cut each of the sponge cakes in half, once cooled, to make smaller cakes.
Great question! Your jelly needs to be thickened but not set. If it's too runny, the liquid will drip straight off the cakes and the coconut will not stick. If it's been in the fridge for too long and has set, the jelly won't stick to the cakes at all. The jelly should be left in the fridge for 1-2 hours or until it's considerably thickened but doesn't turn lumpy when stirred.
Expert Tips
- Room temperature ingredients - have your butter, egg and milk at room temperature.
- Dipping the cakes into the jelly - once the jelly has slightly thickened (but not set), use a slotted spoon to dip each of the small sponge cakes into the jelly mixture one at a time. Allow any excess jelly to drip off the cakes before tossing them through the desiccated coconut to coat.
- Serving - just before serving, add a spoonful of whipped cream on top of one jelly cake and lightly sandwich together with another cake.
- Storing - jelly cakes are best served on the day of baking. However, you can prepare the cakes the day before and store overnight in an airtight container in the fridge. Add the whipped cream filling immediately before serving.
- Freezing - jelly cakes are not suitable for freezing due to their cream filling and the jelly coating.
More Classic Baking Recipes
These classic Australian recipes have stood the test of time and are just as popular now as when our great-grandmothers used to make them!

WANT EVEN MORE DELICIOUS RECIPES? Subscribe to my newsletter or follow along on Facebook or Instagram. And if you love baking, then please come and join my Facebook cooking club group or subscribe to my YouTube channel.
Raspberry & Cream Jelly Cakes
Ingredients
- 80 g butter softened
- 110 g (1./2 cup) caster sugar
- 1 tsp vanilla extract
- 1 egg room temperature
- 160 g (⅔ cup) milk room temperature
- 150 g (1 cup) self-raising flour sifted
- 85 g packet raspberry jelly crystals
- 240 g (1 cup) boiling water
- 240 g (1 cup) cold water
- 280 g (3 ½ cups) desiccated coconut
- 240 g (1 cup) whipped cream
Instructions
- Preheat oven to 175 degrees celsius fan-forced (350 degrees fahrenheit).
- Lightly grease 2 x 12 hold patty pan tins and set aside.
- Cream the butter, caster sugar and vanilla extract until pale and creamy. Add the egg and beat until well combined. If using a Thermomix: Place sugar and butter into the Thermomix bowl and and mix for 15 seconds, Speed 5.
- Fold through the milk and self-raising flour (see Notes). If using a Thermomix: Add the vanilla extract, egg, milk and self-raising flour and mix for 15 seconds, Speed 5. Scrape down sides of mixing bowl with spatula, then mix for a further 10 seconds, Speed 5.
- Divide the mixture between the patty pan holes, filling to just below the top.
- Bake in the preheated oven for 15 - 18 minutes or until lightly golden and a skewer inserted into the middle comes out clean.
- Allow to cool in the tins for 5 minutes before transferring to a wire rack to cool completely.
- Meanwhile prepare the jelly with the boiling water and cold water (as per the packet instructions) and place into the fridge for 1-2 hours or until slightly thickened.
- Dip each cake into the jelly mixture (one at a time - using a slotted spoon). Then coat with the coconut by tossing together well in a bowl.
- Place a spoonful of whipped cream on top of one of the jelly cakes and sandwich together with another. Place into the fridge to set.
Notes
- Room temperature ingredients - have your butter, egg and milk at room temperature for best mixing results.
- Alternate folding the milk and self-raising flour through (½ milk, ½ self-raising flour, mix, then ½ milk, ½ self-raising flour, mix again).
- A patty pan is a baking tray with small, shallow round holes. If you don't have a patty pan tin, you can use an old fashioned gem iron pan. Alternatively, you can bake the mixture in a regular muffin tin and then cut each of the sponge cakes in half once cooled to make smaller cakes.
- Jelly - your jelly needs to be thickened but not set. If it's too runny, the liquid will drip straight off the cakes and the coconut will not stick. If it's been in the fridge for too long and has set, the jelly won't stick to the cakes at all. The jelly should be left in the fridge for 1-2 hours or until it's considerably thickened but doesn't turn lumpy when stirred.
- Serving - just before serving, add a spoonful of whipped cream on top of one jelly cake and lightly sandwich together with another cake.
- Storing - these jelly cakes are best served on the day of baking. However, you can prepare the cakes the day before and store overnight in an airtight container in the fridge. Add the whipped cream filling immediately before serving.
- Freezing - Jelly Cakes are not suitable for freezing due to the cream and jelly.


Julia Schwarz says
Can a diet jelly be used
Lucy says
Hi Julia, I haven't personally tried that but I can't see why not!
Maadi Little says
Hi, I have the patty pans that are approx 5cms across are they the right size or do you use the smaller 2cms size ones?
Thankyou
Lucy says
Hi Maadi, I have the 5cm ones xx