

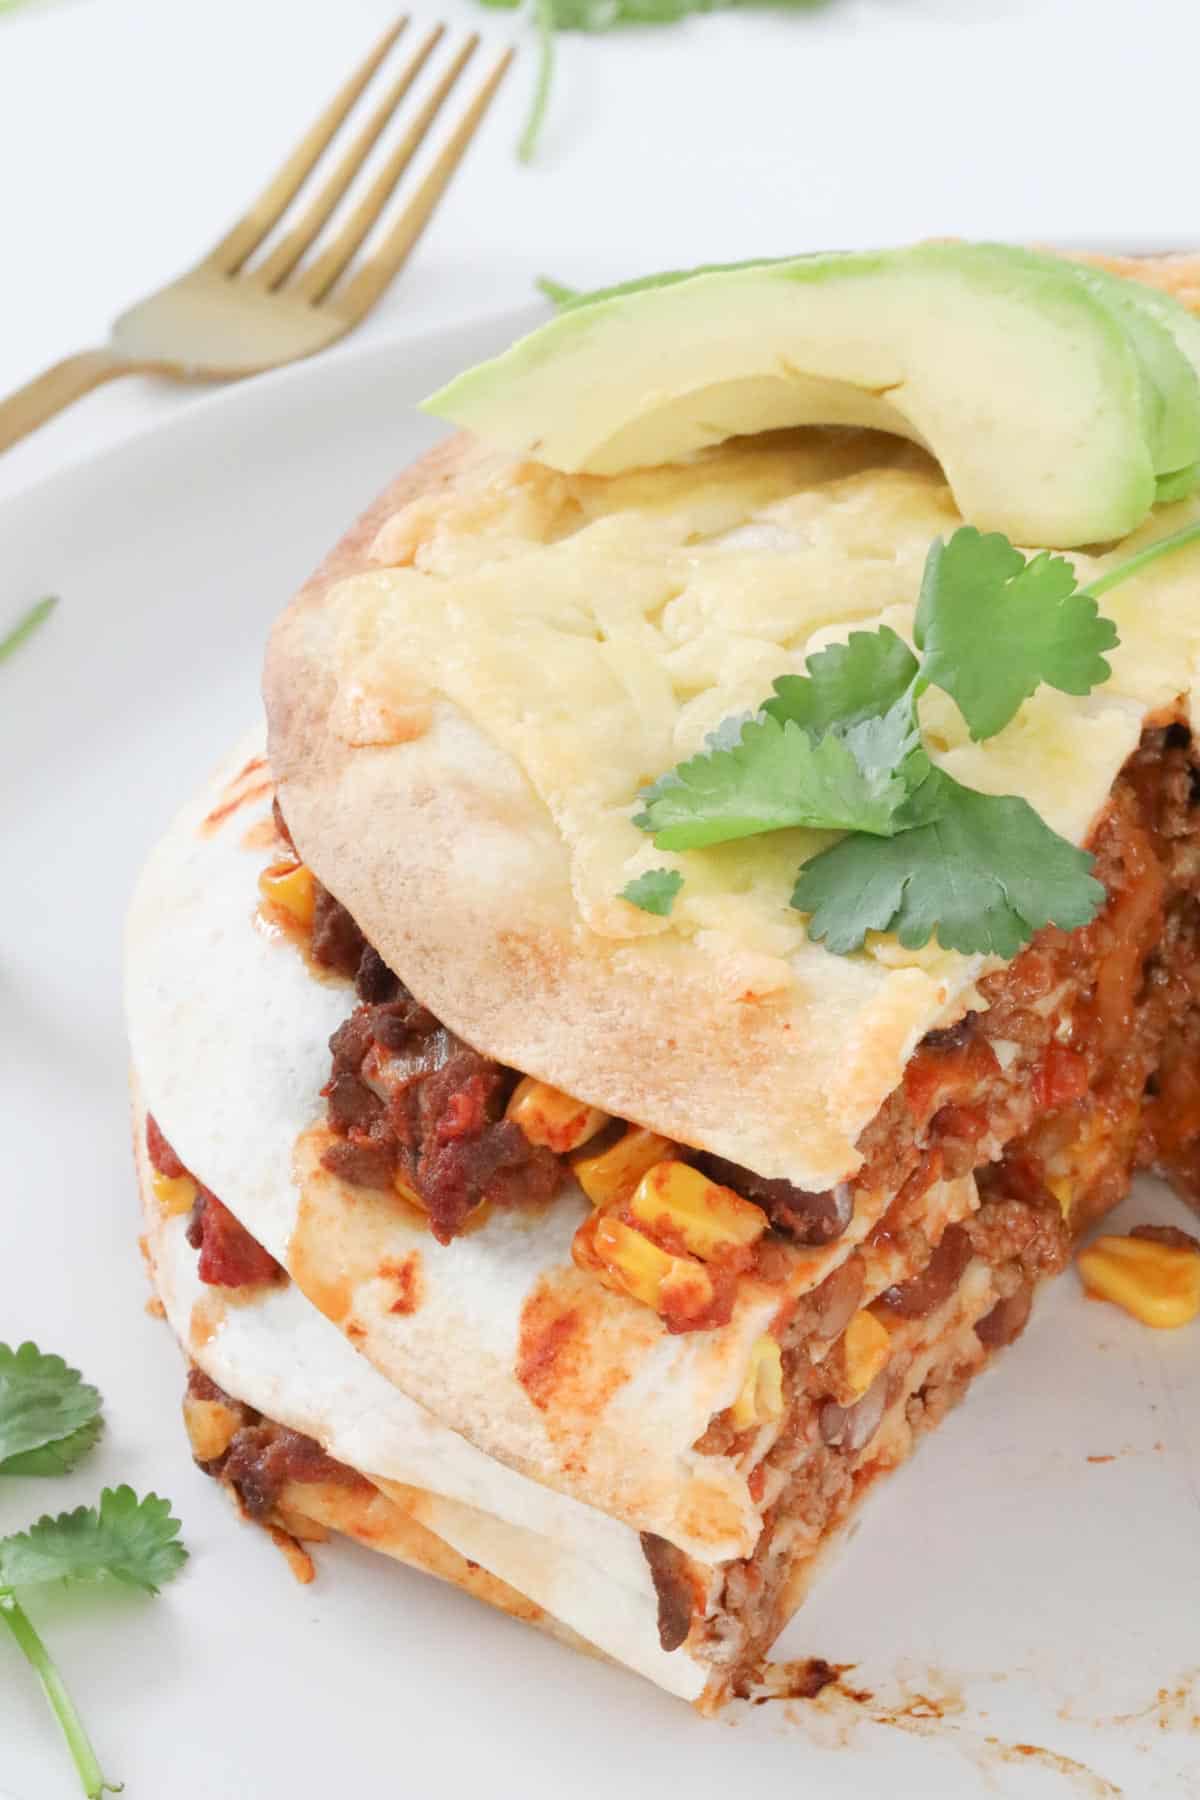
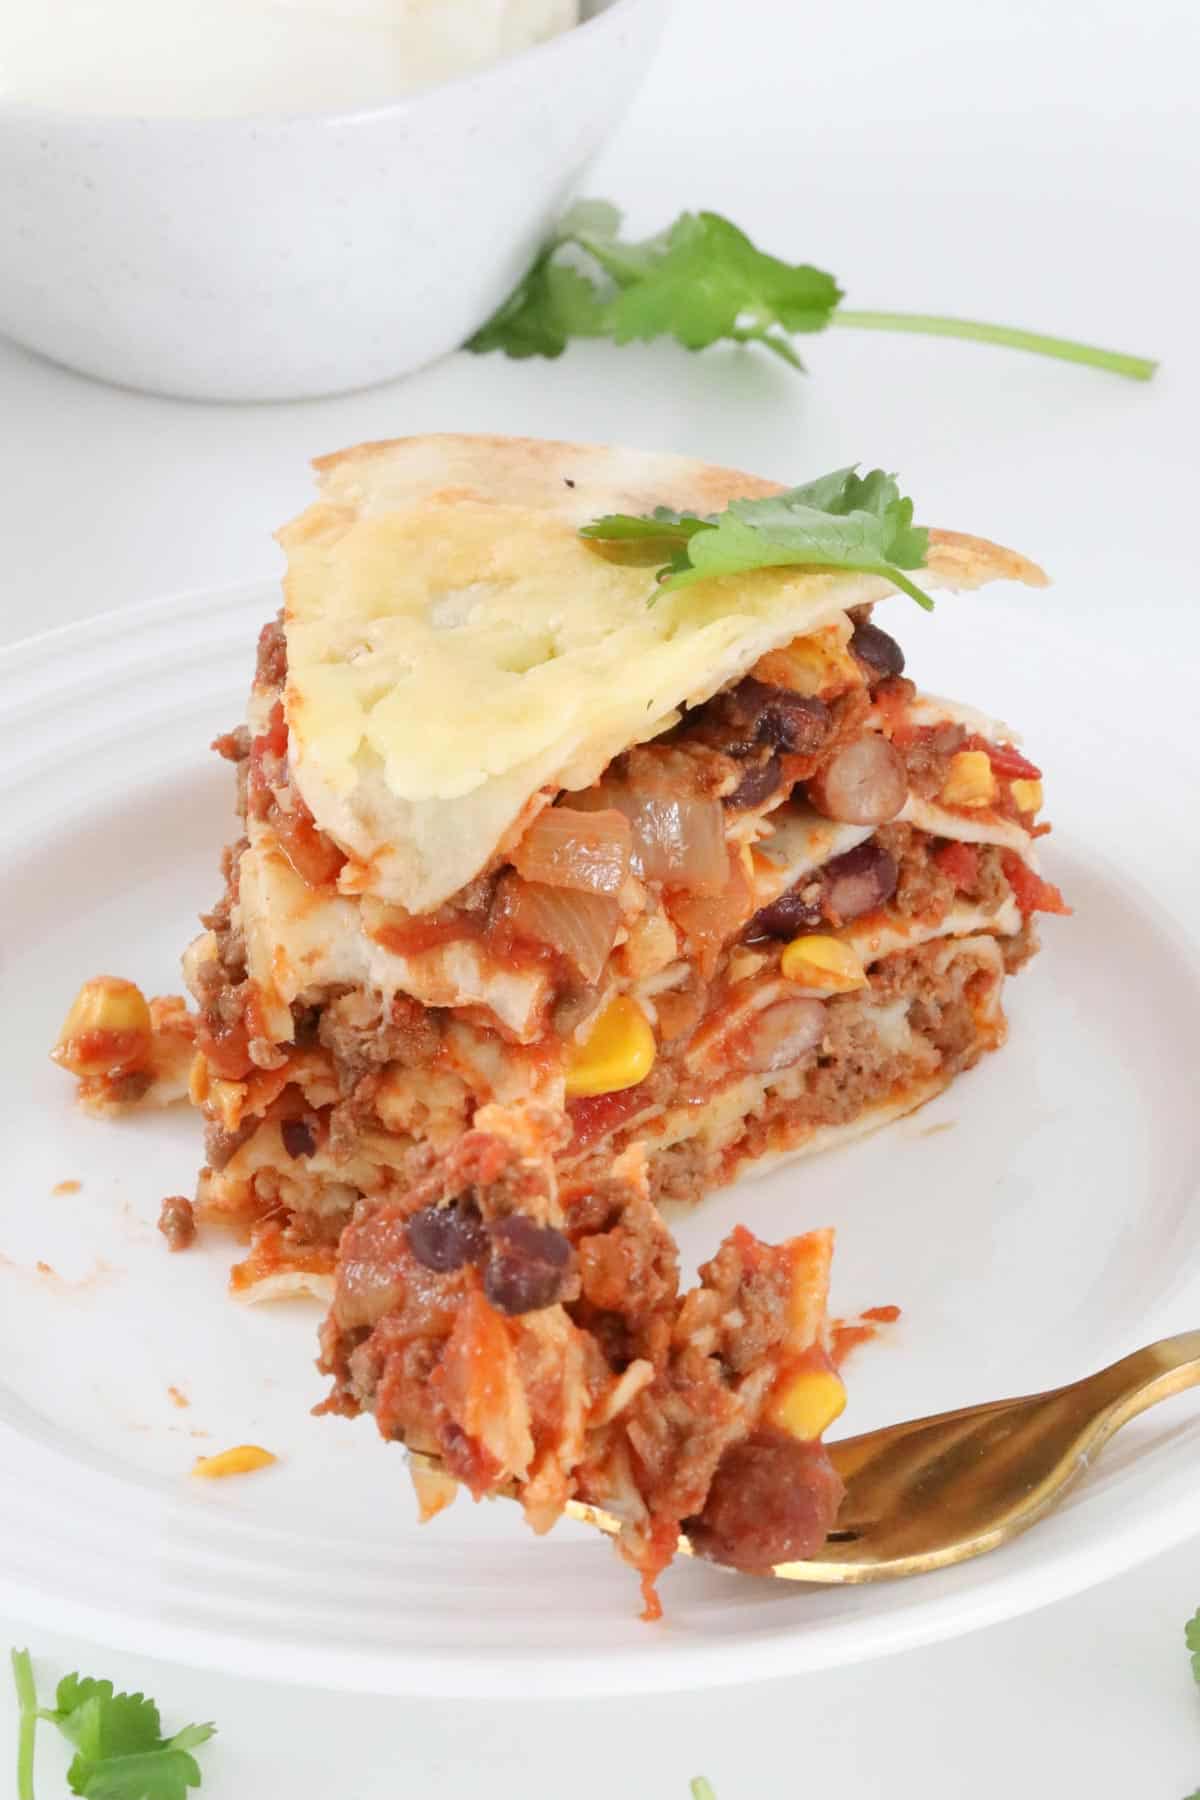
Classic lasagne gets a Mexican makeover with this irresistible tortilla lasagne! Using tortillas instead of pasta sheets, it features hearty layers of seasoned ground beef, black beans, corn, tomatoes and cheese, all baked together until bubbly and golden. It's always a crowd fave and is perfect for meal prep and freezing too!
If you love Mexican food, you will absolutely LOVE this easy recipe! It is rich, cheesy, savoury, comforting and utterly delicious!
Mexican lasagne is a fun and tasty twist on traditional lasagne. In this recipe, pasta sheets are replaced with corn or flour tortillas and rather than using Italian meat sauce, this version is filled to the brim with juicy ground beef, beans, taco seasoning and shredded cheese. Layered together in one dish, they are then baked until hot and melty, and garnished with any of your favourite Mexican toppings.
The whole family will love this Mexican lasagne recipe. As well as tasting amazing, it makes a filling and nutritious easy dinner that is quick enough to throw together at the end of a busy day (the oven will do most of the work!) It is also pantry friendly and incredibly versatile. You can follow the recipe below or vary it with your favourite meats and veggies, or anything you have in the fridge.
If you love Mexican inspired dinners, you'll love this Mexican chicken soup and slow cooker Mexican shredded chicken.

Why You're Going To Love This Mexican Lasagne Recipe
- Pantry friendly - using ground beef and a handful of pantry and fridge staples, this lasagne comes together in no time. After a few minutes of cooking on the stovetop, the whole dish goes into the oven to finish cooking while you relax.
- Make ahead - the whole dish can be assembled and then refrigerated for 1-2 days until you are ready to bake and eat. Perfect for meal prepping and busy nights!
- Feeds a crowd - great to share at a family gathering.
- Versatile - you can follow this recipe as written, or mix it up by adding lentils, different meats (like rotisserie chicken or turkey mince) or any veggies left in your fridge.
- Freezer friendly - keep a batch in the freezer for those days when you need something quick, easy and comforting for dinner.
- Conventional and Thermomix Instructions - this Mexican lasagne can be made conventionally or in a Thermomix. You will find both the conventional and Thermomix methods in the recipe card at the bottom of the post.
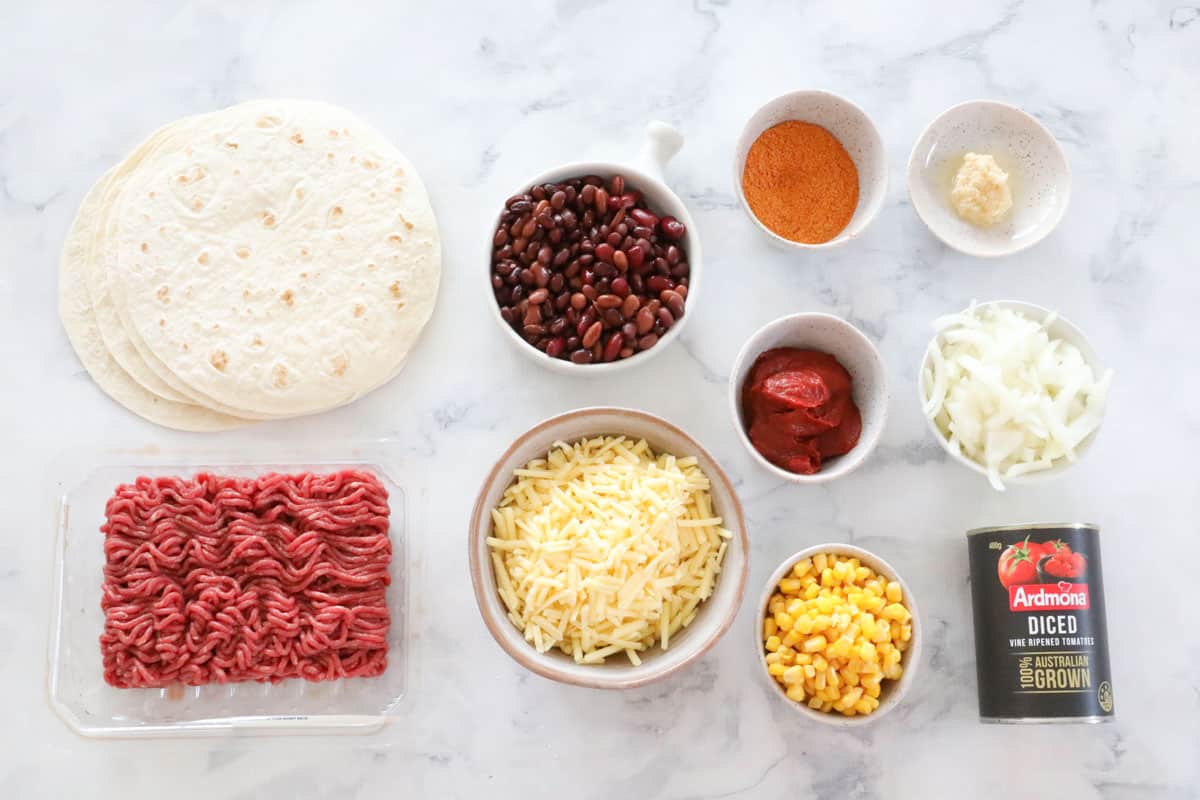
What You Need
This easy lasagne is such an easy and convenient dinner to make, because you only need some ground beef, basic fridge and pantry staples and you can adapt the veggies to suit what you have available!
Note: Please scroll to the recipe card at the bottom for ingredient quantities and the full detailed method.
- Olive oil, onion and garlic.
- Lean beef mince - lean ground beef is used for the meat filling. You can also swap for any other meats like leftover chicken, turkey or chicken mince or even Quorn mince for a vegetarian version.
- Taco seasoning - to save time, I use a packet of taco seasoning from the supermarket which is fantastic., but you can also make your own, if you prefer. If using salt reduced seasoning, you may need to adjust the seasoning before assembling the layers.
- Tomato paste - to add that rich intense flavour.
- Diced tomatoes - any regular diced canned tomatoes, preferably with no added flavours as the taco seasoning is flavour intense.
- Corn - either canned or frozen corn will work perfectly, depending on what you have on hand.
- Beans - any type of canned beans will work, but black beans, red kidney beans or a 5-bean mix are recommended. Refried beans work wonderfully too!
- Tortillas - use any flour or corn tortillas, depending on preference.
- Cheese - use low fat cheddar, mozzarella or a shredded Mexican blend of cheeses for best results.
- Sour cream and avocado - to serve (optional).
Equipment Required
There's no need for any fancy equipment here. A 30cm round ovenproof baking dish/casserole dish, a frying pan and an oven are all that you will need. The filling can also be made in a Thermomix (see recipe card below).
Step by Step Instructions
Just 15 minutes to prep, and then let the oven do the work!
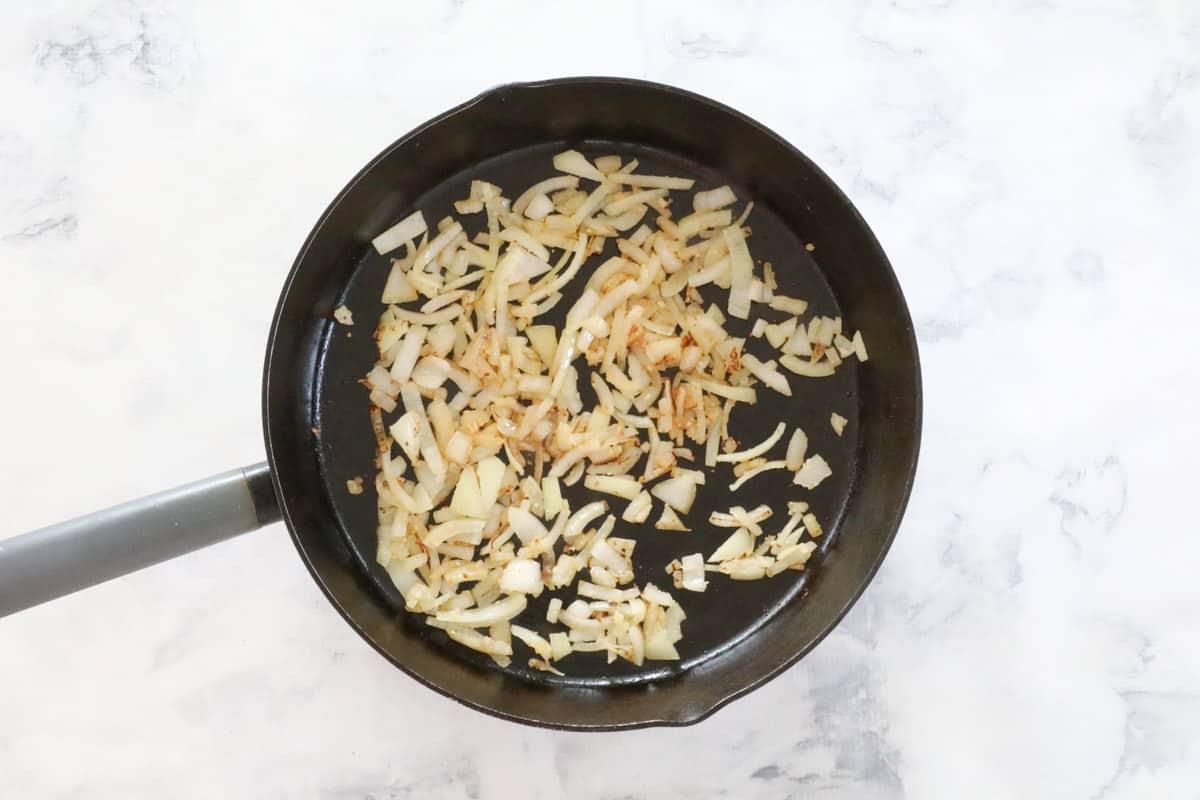
Step 1 - Make The Meat Filling
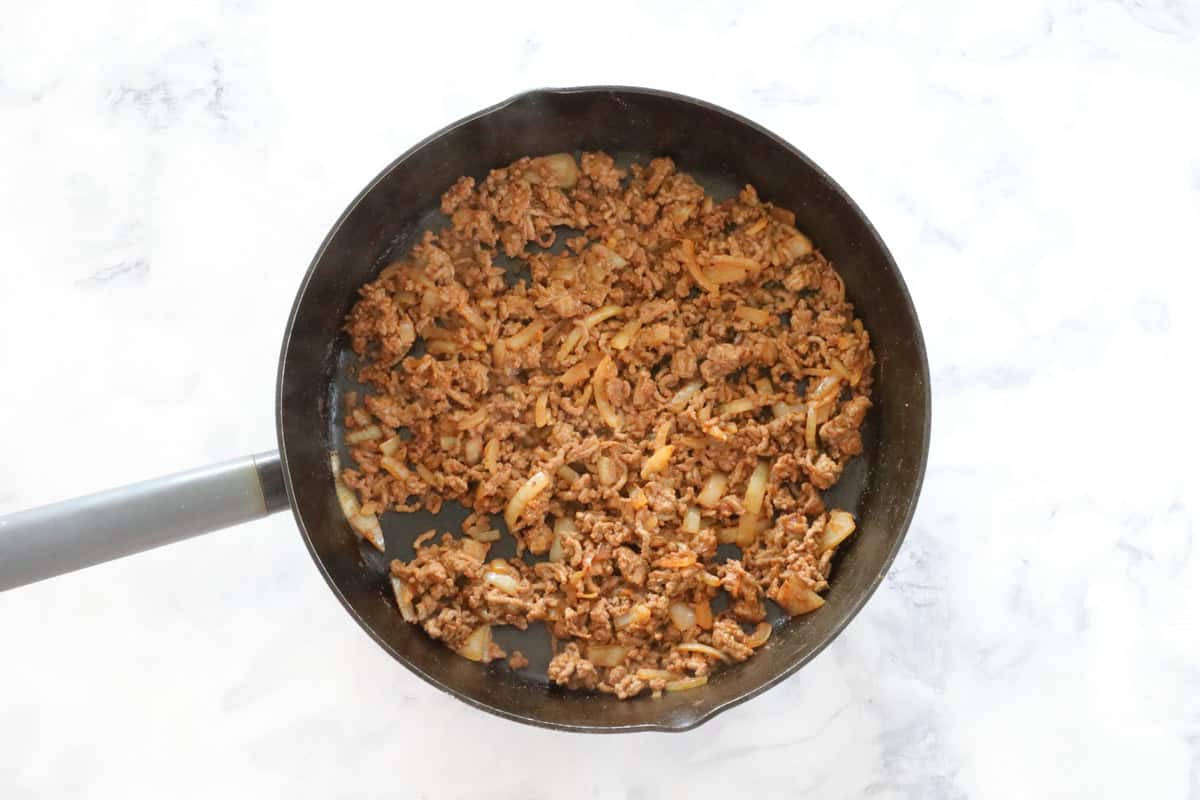
Heat the onion and garlic in olive oil until soft and fragrant.
Brown the beef mince and add the taco seasoning.
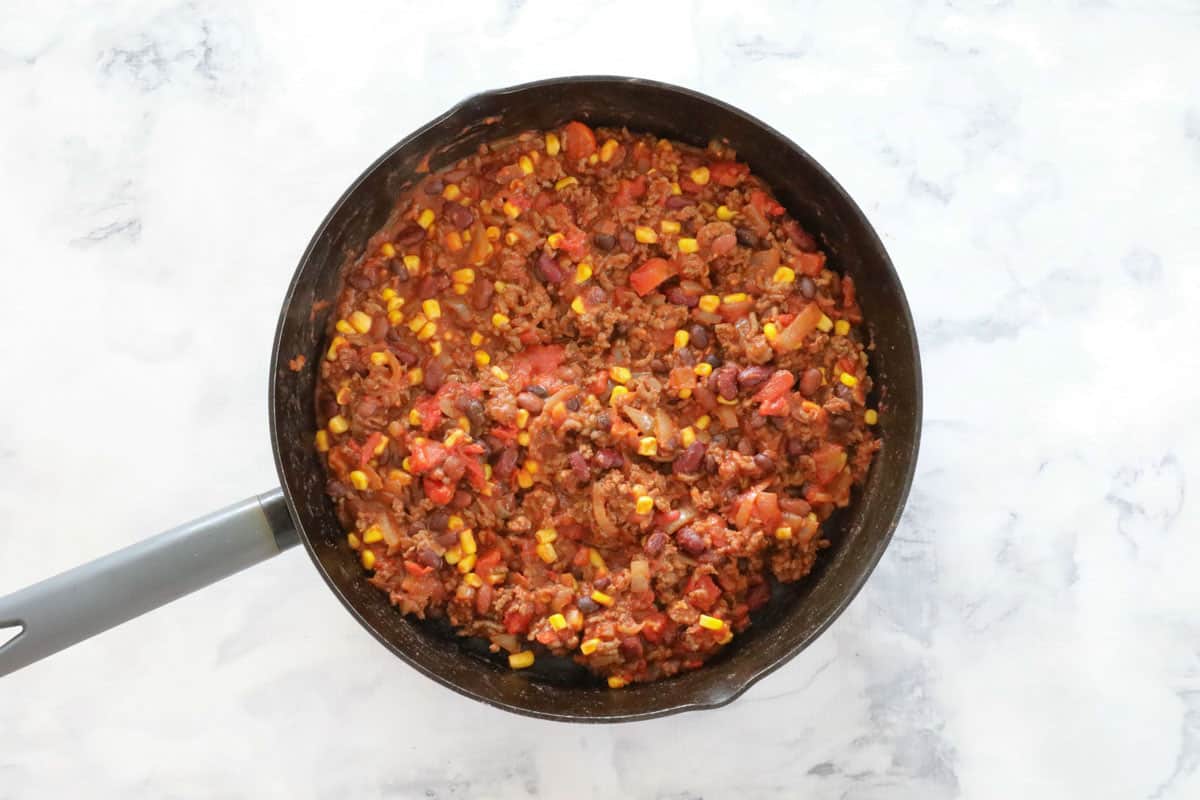
Add the tomato paste, diced tomatoes, frozen corn and beans and cook until heated through.
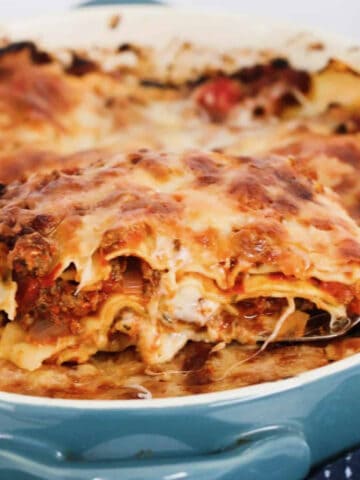
Step 2 - Assemble The Lasagne
Place a tortilla onto the base of the baking dish and add ⅕ of the beef filling.

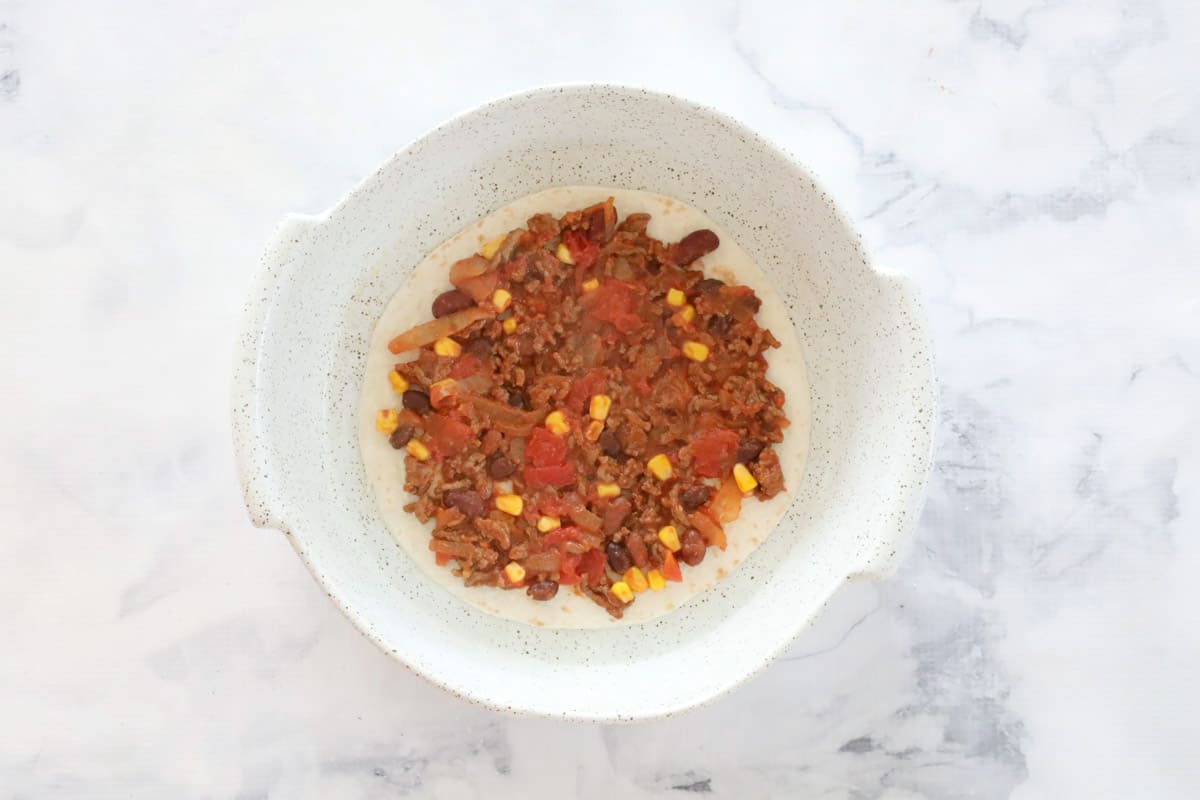
Sprinkle with some of the shredded cheese. Repeat layering the tortillas, beef filling and cheese until the filling is all used up.

Finish with a layer of tortilla and grated cheese.

Step 3 - Bake
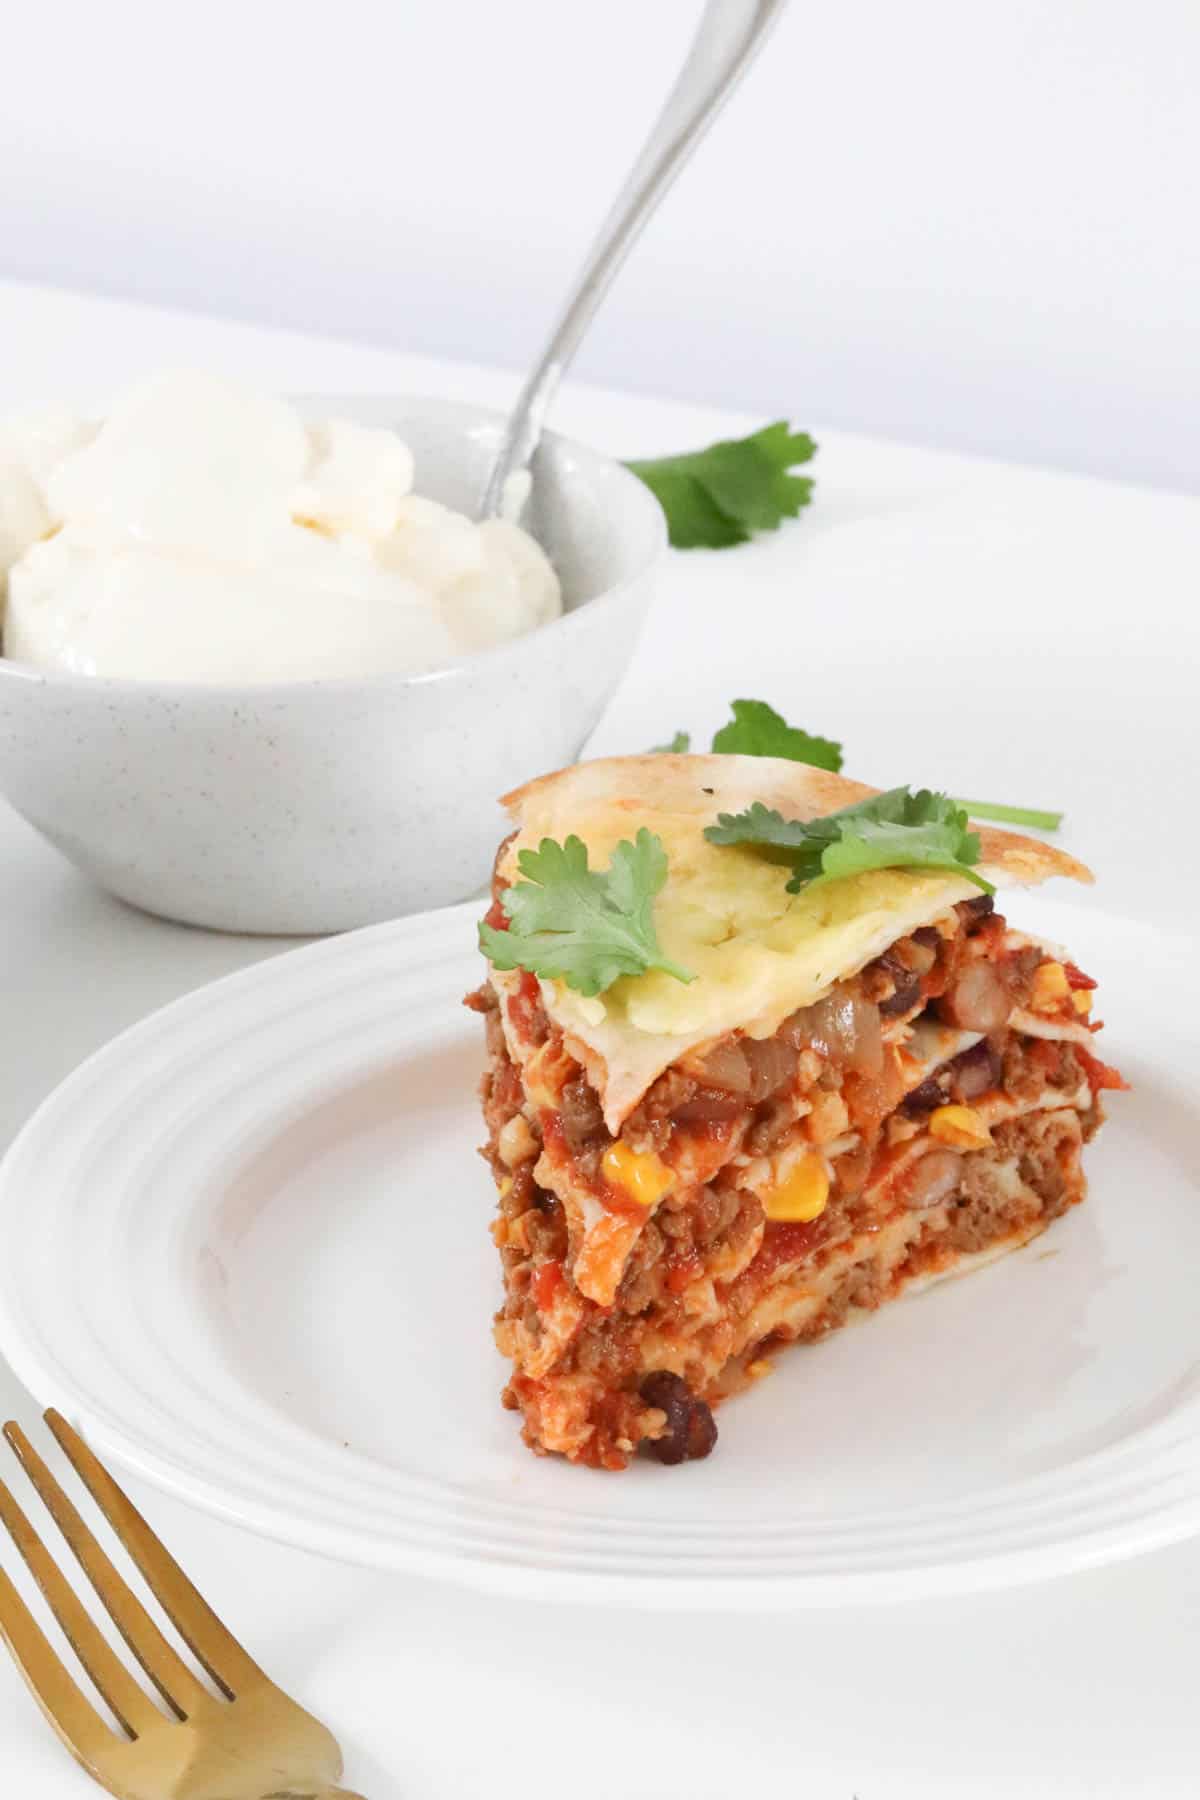
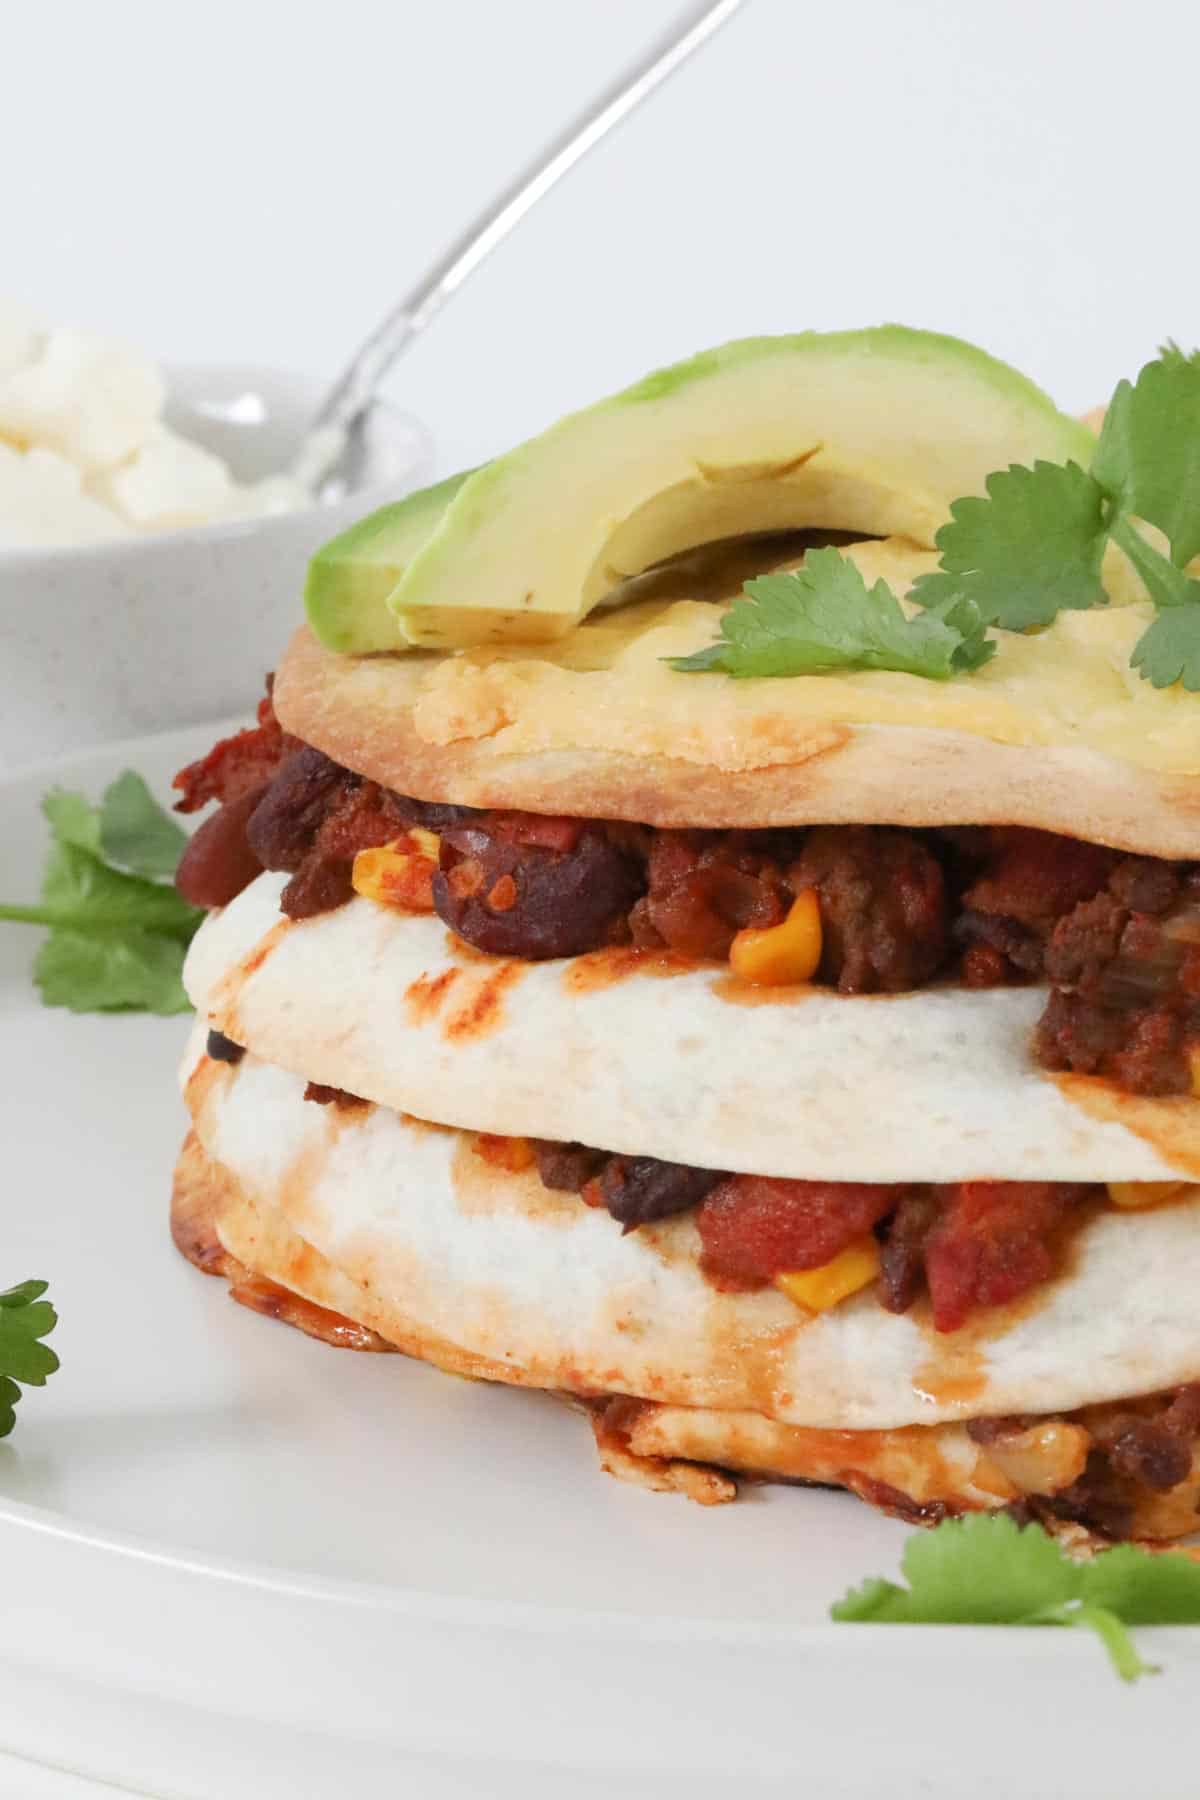
Bake until golden and cooked through. Cut into slices and top with any of your favourite Mexican inspired toppings (choose from the list below!).
Expert Tips
- Swap the ground beef for ground chicken or turkey mince, rotisserie or leftover cooked chicken, or vegetarian mince.
- Instead of cheddar or mozzarella cheese, try a Mexican cheese blend for a (mild) spicy flavour hit.
- Flour tortillas or corn tortillas can be used.
- Topping ideas - serve the Mexican lasagne as is, or add your favourite toppings like sour cream, sliced avocado, homemade guacamole, coriander, jalapenos, black olives or crushed corn or tortilla chips.
- Storage - allow the lasagne to cool completely and cover the whole lasagne, or cut and store as individual serves. It will keep in the fridge for up to 3 days. See FAQ's below for freezing instructions.
FAQ's
Yes! The lasagne can be assembled 1-2 days ahead and stored, covered in the fridge. When ready to eat, place it into the oven to bake (add a little extra time to account for the chilled temperature) and then serve. Easy!
This dish freezes and reheats beautifully, making it such a great make-ahead dinner for days when you don't have time to cook. To freeze, make the meat filling and assemble the lasagne as normal. It can be frozen either baked or unbaked. If freezing from baked, allow it to cool completely first and then freeze the whole lasagne or individual serves in an airtight container for up to 3 months. Thaw overnight in the refrigerator and then follow the instructions below to bake, or reheat in the oven until steaming hot.
Related Recipes
Dinners that are quick and easy PLUS family-friendly are my go-to (especially on busy weeknights!)
Here's a few more of my favourite (and EASY!!) family dinners:


WANT EVEN MORE DELICIOUS RECIPES? Subscribe to my newsletter or follow along on Facebook or Instagram. And if you love baking, then please come and join my Facebook cooking club group or subscribe to my YouTube channel.

Mexican Lasagne with Tortillas
Ingredients
- 15 g (1 tbs) olive oil
- 1 brown onion medium, chopped
- 1 teaspoon minced garlic
- 500 g lean beef mince
- 35 g sachet taco seasoning
- 50 g tomato paste
- 400 g tin diced tomatoes
- 175 g (1 cup) frozen corn or tinned corn (drained)
- 400 g tinned beans rinsed and drained - see notes
- 6 flour tortillas or corn tortillas
- 250 g grated cheese see notes
- sour cream and avocado, to serve
Instructions
Conventional Method
- Preheat the oven to 180 degrees celsius (fan-forced). Lightly grease a large round baking dish (approx 30cm diameter) and set aside (see notes).
- Heat the olive oil in a frypan over medium heat. Add the chopped brown onion and garlic and stir until the onion is soft.
- Turn the heat up to medium-high and add the beef mince and the taco seasoning. Break up the mince and cook for 5 minutes or until browned.
- Add the tomato paste, diced tomatoes, frozen corn and drained beans and cook until heated through.
- Place one tortilla onto the base of the baking dish. Top with ⅕ beef mince and sprinkle over some grated cheese.
- Repeat until you've used up all the beef mince. Finish with a layer of tortilla and grated cheese.
- Bake in the oven for 35 minutes or until golden and cooked through (see notes).
- Serve with sour cream and avocado slices (see notes).
Thermomix Method
- Preheat the oven to 180 degrees celsius (fan-forced). Lightly grease a large round baking dish (approx 30cm diameter) and set aside (see notes).
- Place the onion into the Thermomix bowl. Chop for 6 seconds on Speed 6. Scrape down the sides of the bowl.
- Add the olive oil and minced garlic and saute for 3 minutes, 100 degrees, Speed 2.
- Add the beef mince and the taco seasoning. Break up the mince and cook for 10 minutes, 100 degrees, Speed Soft, Reverse.
- Add the tomato paste, diced tomates, frozen corn and drained beans and cook for 10 minutes, 100 degrees, Speed Soft, Reverse.
- Place one tortilla onto the base of the baking dish. Top with ⅕ beef mince and sprinkle over some grated cheese. Repeat until you've used up all the beef mince.
- Finish with a layer of tortilla and grated cheese.
- Bake in the oven for 35 minutes or until golden and cooked through (see notes). Serve with sour cream and avocado slices.
Notes
- Swap the ground beef for ground chicken or turkey mince, rotisserie or leftover cooked chicken, or vegetarian mince.
- Beans - use canned beans and drain well. Use black beans, red kidney beans, 5 bean mix, or refried beans.
- Instead of cheddar or mozzarella cheese, try a Mexican cheese blend for a (mild) spicy flavour hit.
- Flour tortillas or corn tortillas can be used.
- Topping ideas - serve the lasagne as is, or add your favourite toppings like sour cream, sliced avocado, homemade guacamole, coriander, jalapenos, black olives or crushed corn or tortilla chips.
- Make ahead - the lasagne can be assembled 1-2 days ahead and stored, covered in the fridge. When ready, place it into the oven to bake (add a little extra time to account for the chilled temperature) and then serve. Easy!
- Baking Tray - if you don't have a round baking dish, you can use a flat baking tray instead. The beef mixture and grated cheese will stay in place when layered with the tortillas.
- Storage - allow the lasagne to cool completely and then cover the whole lasagne, or cut as individual serves. It will keep in the fridge for up to 3 days.
- Freezing - this dish freezes and reheats beautifully, making it such a great make-ahead dinner for days when you don't have time to cook. To freeze, make the meat filling and assemble the lasagne as normal. It can be frozen either baked or unbaked. If freezing from baked, allow it to cool completely first and then freeze the whole lasagne or individual serves in an airtight container for up to 3 months. Thaw overnight in the refrigerator and then follow the instructions below to bake, or reheat in the oven until steaming hot.


Marian Huertas says
Hi great idea, can be eaten next day ? Is it still nice?
Lucy says
Absolutely!! It reheats really well!
Samantha Ball says
Love it! Got to be one of my favorite meals. Thank you x
Lucy says
Mine too!
Mandi says
Also a family favourite in our house. I add grated carrot and zucchini too.
Lucy says
Fantastic!!!
Shelley Bernard says
Hello there! Can I start off by saying I’m a big fan, love cooking your recipes ☺️
Just wanted to let you know in Step 4 of your thermomix method it seems that the bit about added the diced tomatoes is missing... I just cooked the recipe for the first time and noticed the tin of tomatoes has been left behind on my kitchen bench hahaha I tried re-reading the recipe over and over again but it doesn’t look like it’s there.
Hope you don’t mind me mentioning,
Thanks for all your work and recipes,
Shelley
PS can’t wait to try, smells delicious ☺️
Lucy says
Hi Shelley, thank you so much!!! That was a typo of mine - I've just fixed it! Thank you xxxx