

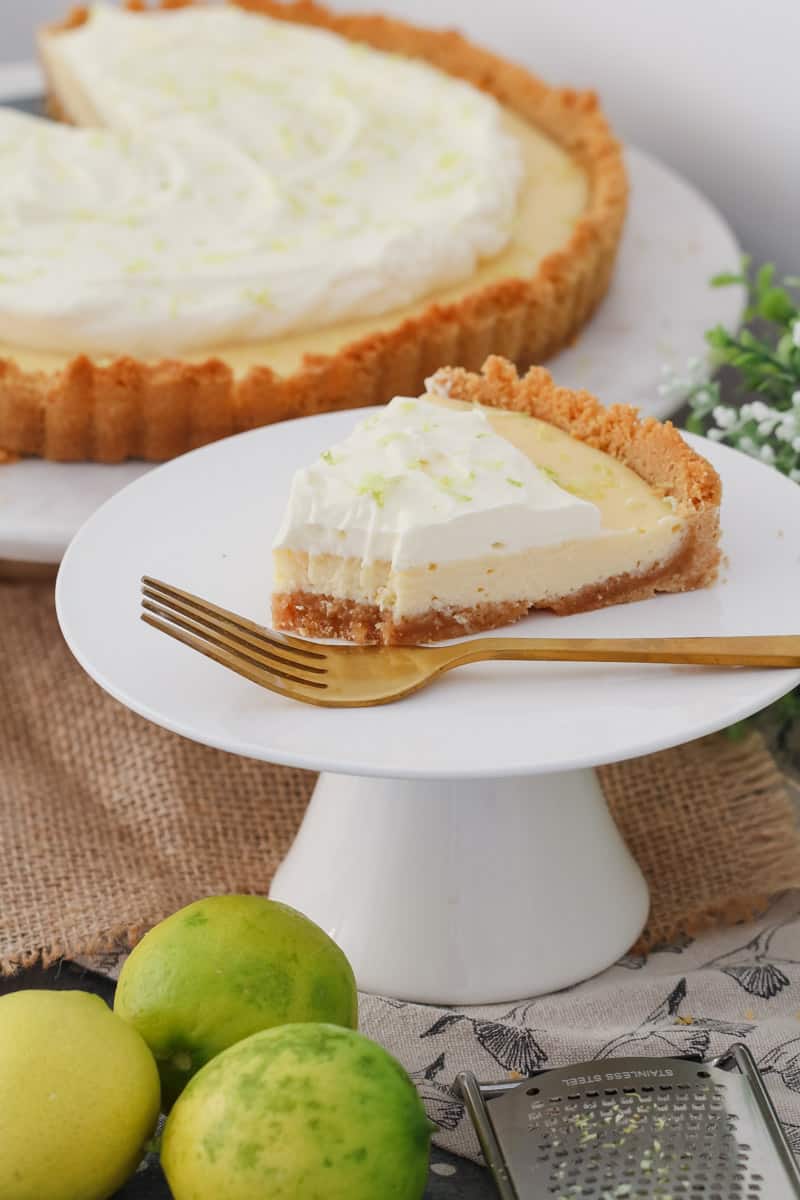
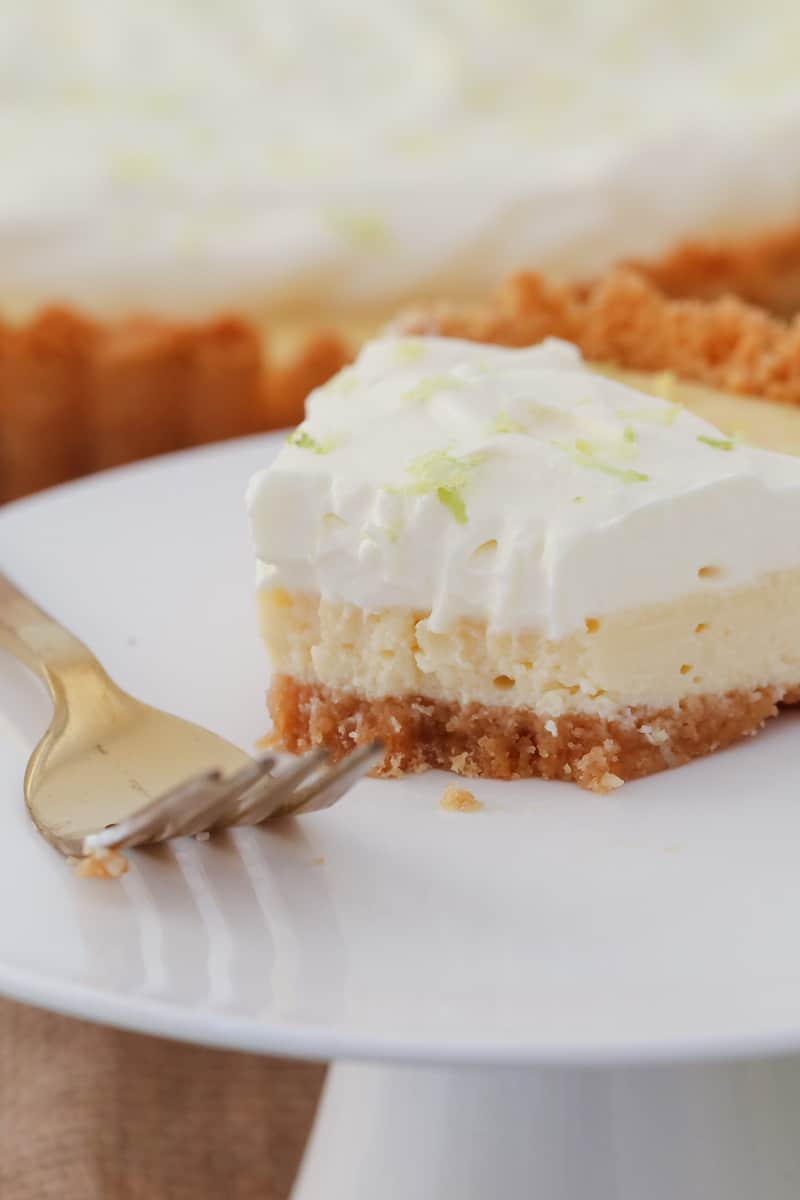
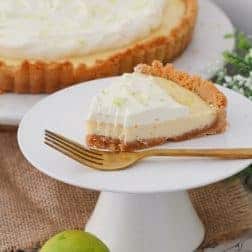
Hands down, this is the EASIEST Key Lime Pie recipe you'll ever make! Made with a crushed cookie base, a creamy sweetened condensed milk and lime filling, and a whipped cream topping.....all ready to eat in just 35 minutes. A quick and easy dessert everyone will love!
I know some of you are feeling the full artic blast of winter at the moment (here in southern Australia anyway!), and we can only dream of a tropical paradise at the moment, but baked desserts with citrus fruits is the ultimate sweet tropical treat - for any time of the year!
From this delicious Key Lime Pie to Lemon Tart, Lime & Coconut Slice to Creamy Lemon Crumble Bars, Orange & Almond Cake to Lemon Cheesecake... and oh so many more!
Citrus Fruits + Dessert = BLISS!

What Is Key Lime Pie?
For most Aussies (like myself!), key lime pie is best known as a famous American dessert, originating from Florida Keys where a particular variety of lime is grown, hence the name 'Key Lime'.
But the reality is that this well-known pie is actually made from very simple ingredients, all of which you can buy from any supermarket or grocery store.
Plus, it's SO simple to make and tastes AMAZING, AMAZING, AMAZING!!!!
Why You're Going To Love This Recipe
A classic Key Lime Pie is a very popular dessert recipe across in the world, not just in America.
Here's why it's going to become a favourite in your house:
- Quick & easy - you won't believe how simple it is to make this dessert pie! With just 10 minutes prep time and 25 minutes cooking time, it's ready in a flash!
- Perfect for entertaining - key lime pie is light and fresh making it a fabulous option for an easy after dinner dessert for any special occasion (but really, who needs a 'special' occasion, right!?)
- Tropical dessert - I love how light and citrusy this pie is! It's the perfect ending to a hot summers night, or when dreaming of that tropical lagoon....
What You Need
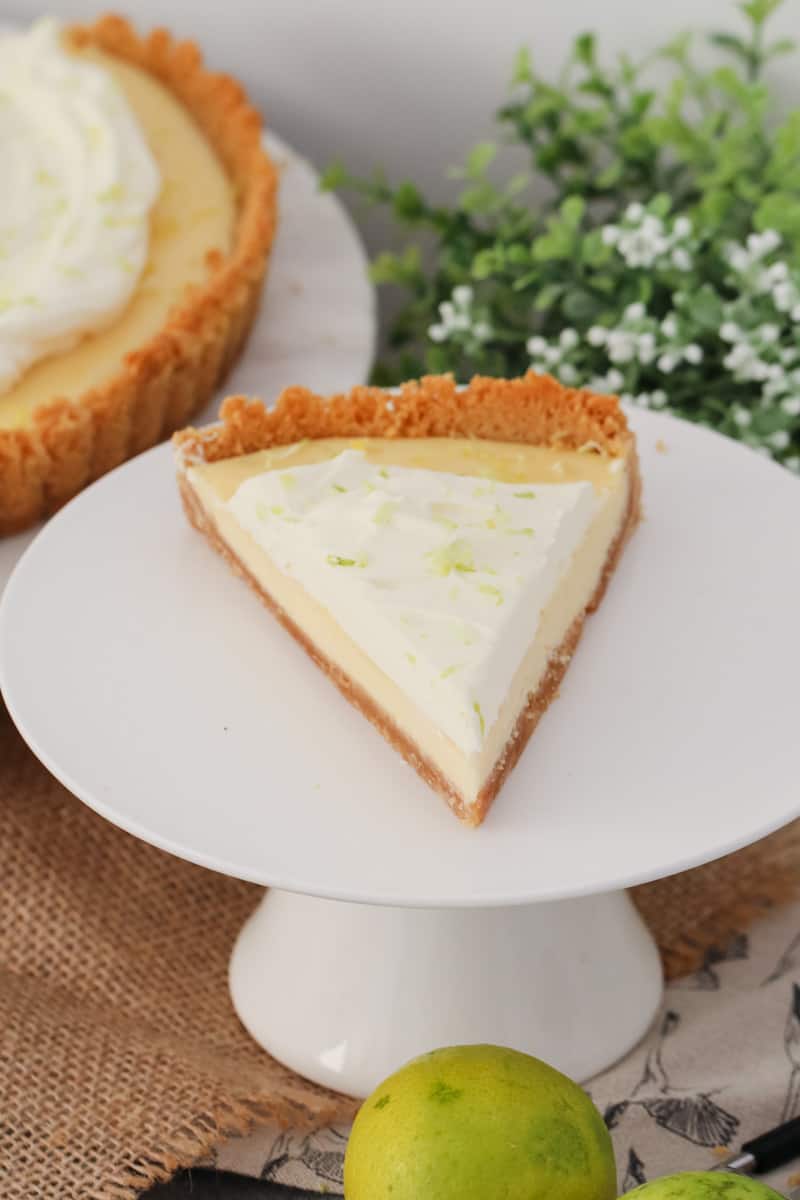
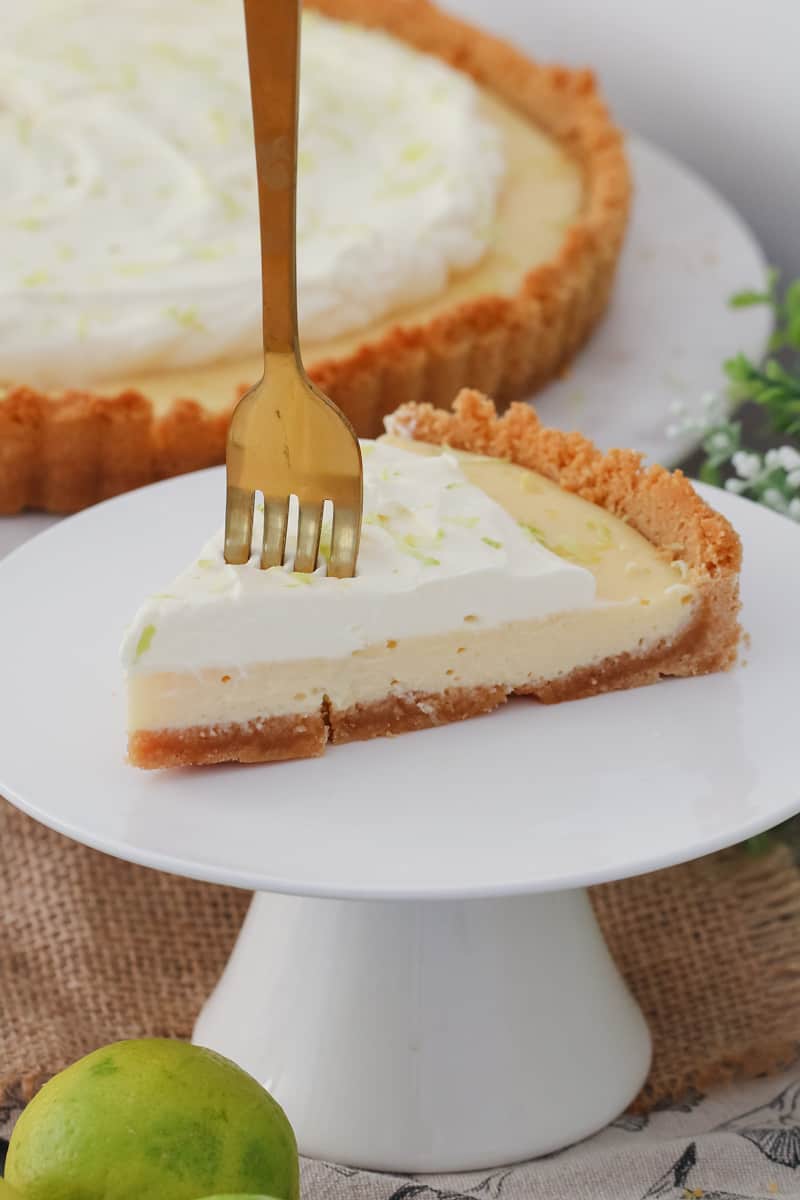
Key lime pie is made with 3 simple layers - the base, the most delicious tangy creamy filling and the whipped cream topping.
Here's what you need to make this simple dessert:
Note: Scroll to the recipe card at the bottom for the ingredients quantities and full detailed method.
Layer 1 - The Base
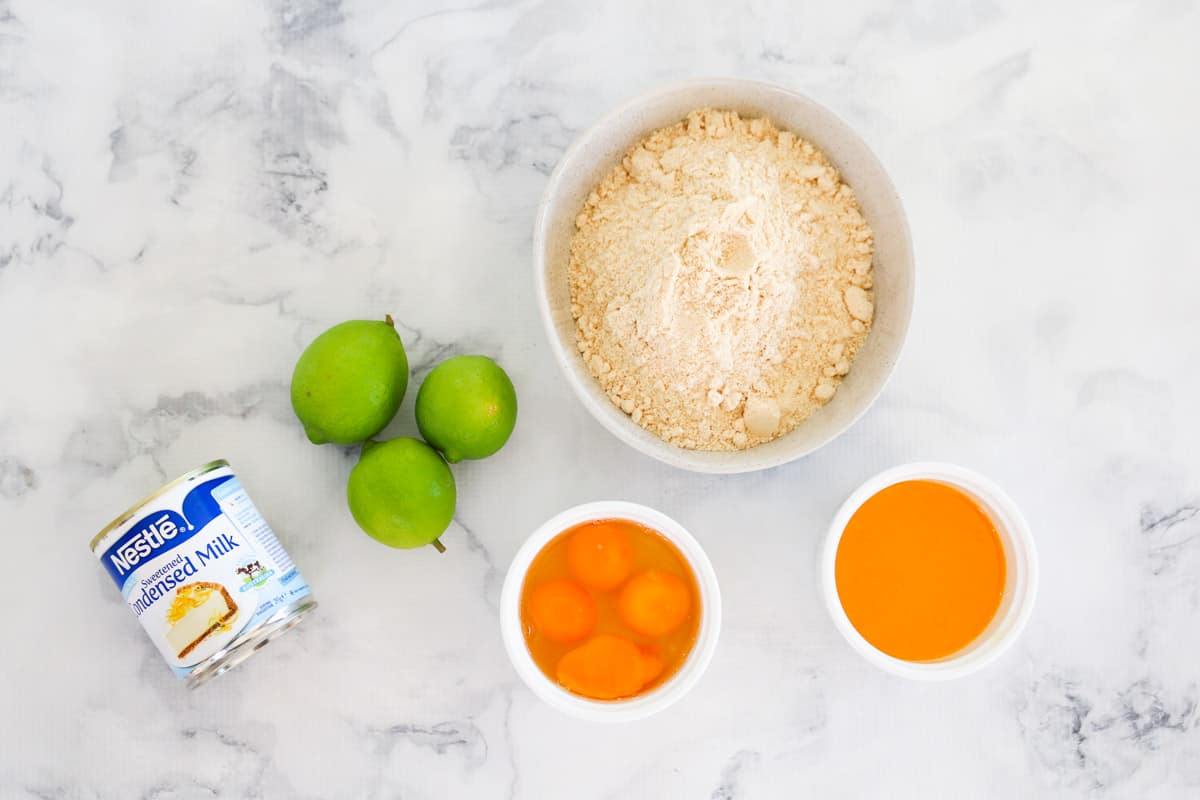
- biscuits - also known as cookies in America. Choose a plain cookie/biscuit such as Arnott's biscuits like Granita or Marie or Graham Crackers (if you're in the US).
- butter - you can use either salted or unsalted butter in this recipe.
Layer 2 - The Filling
- sweetened condensed milk - I recommend using full fat sweetened condensed milk (not skim) as it has a richer flavour and sets firmer.
- lime juice - you can use fresh or store-bought lime juice for this recipe
- eggs - have your eggs at room temperature for best results
- lime zest - you can use any type of lime you like - you don't need to use the traditional key lime variety
Layer 3 - The Topping
- cream - choose a cream that is suitable for whipping (thickened or whipping cream)
- lime zest - optional - for sprinkling over the top of the whipped cream.
Step By Step Instructions
It takes just 10 minutes to prepare this simple lime pie!
Note: Scroll to the recipe card at the bottom for the ingredients quantities and full detailed method.
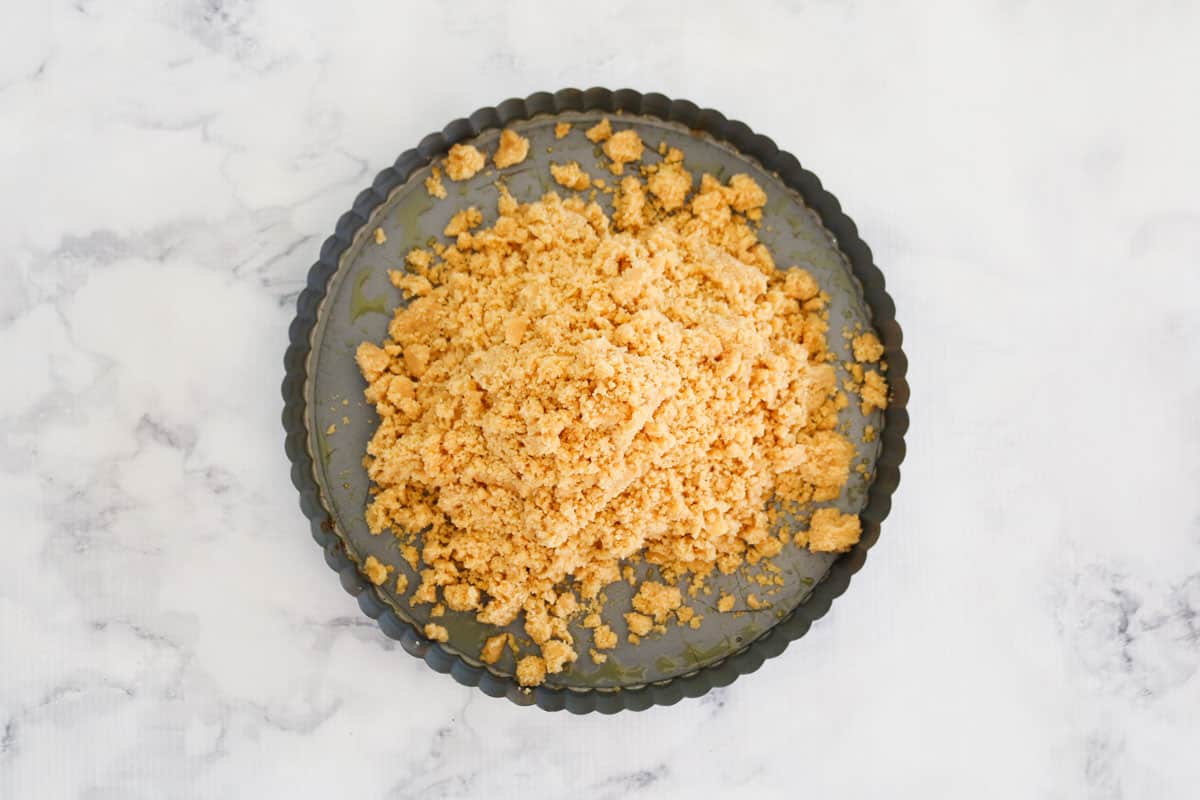
Step 1 - Prepare The Base
Preheat your oven to 160 degrees celsius (fan forced).
Combine the melted butter with the crushed biscuit crumbs until completely mixed together.
Press crumb mixture into the base and sides of a greased loose-bottomed tart tin.
Step 2 - Bake The Base
Bake the base for 10 minutes and then allow to cool.
Note: Baking the base before adding the filling keeps it beautifully crispy when the wet mixture is added.

Step 3 - Add The Filling Gently
Mix the filling ingredients together using hand-held beaters, a stand mixer or a Thermomix until smooth and creamy.
Once the biscuit base has cooled, pour the creamy lime filling over the base, see notes for tips on adding the filling.
Tip: The filling will not rise when baked so you can fill it almost to the very top.
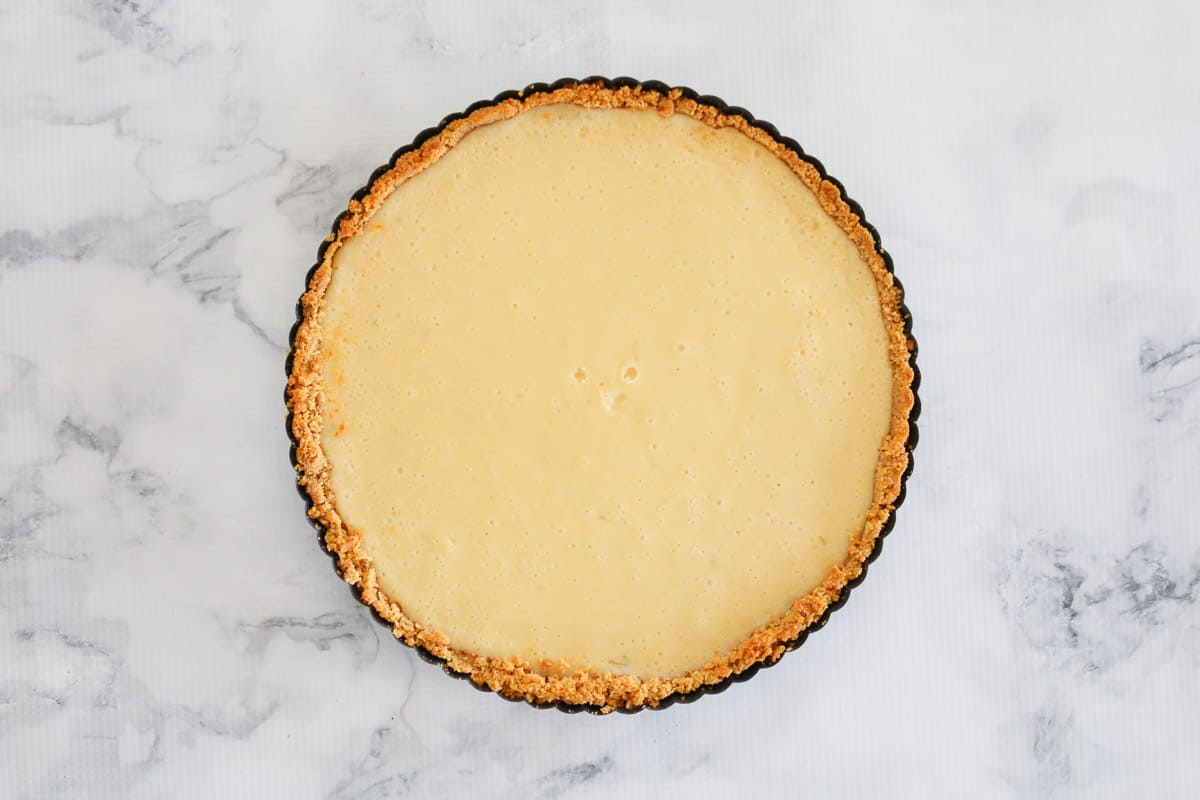
Step 4 - Bake The Pie
Carefully place the pie into the oven and bake for a further 15 minutes or until the filling has set.
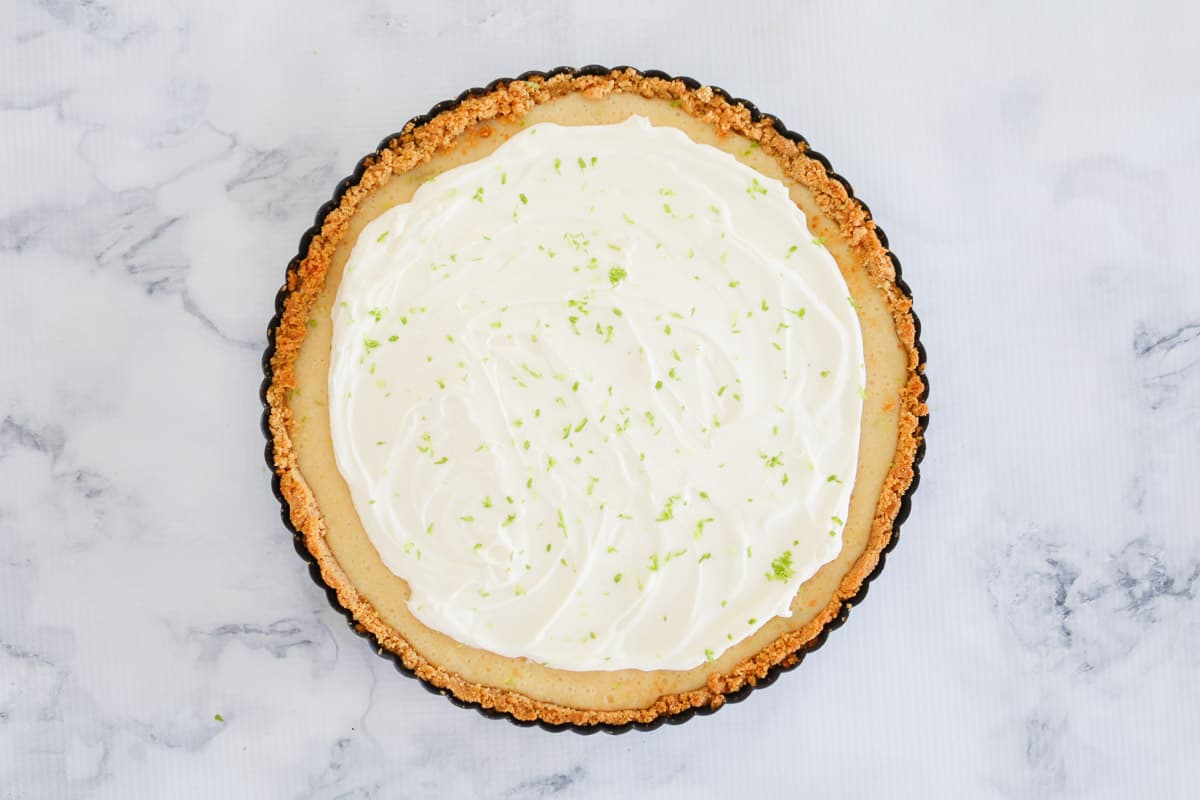
Step 5 - Add The Cream Topping
Once the pie has cooled, chill it in the refrigerator for several hours.
Gently remove from baking tin on to a serving plate, whip your cream and spread it over the top prior to serving.
Grate a small amount of lime zest over the top of the pie to decorate (optional).
Expert Tips & FAQ
My key lime pie could not be easier to make!
Here's a few simple tips for getting it just right every single time:
The amount of melted butter you need will depend on the brand and variety of plain cookies/biscuits that you use. Start with 125g of melted butter, but if the mixture is too crumbly (and difficult to press into the base and sides of the tin) add a little more melted butter (up to 50g extra) and mix again.
This recipe needs to be baked in a loose-bottomed tin as this allows you to gently remove the pie after baking. I recommend using a round 22cm tin with a removable base.
You can place the loose-bottomed tin onto a flat baking tray (this makes it easier to move). Place the tray onto an oven rack and slowly pour the filling into the tin until it reaches almost the top. Slide the oven rack into the oven, close the door and bake. Note: the filling will not rise, so you can fill it right to the top.
I recommend using full-fat condensed milk, rather than skim or light, as you will get a more creamy flavour and the filling will set firmer.
Use a cream that is suitable for whipping (thickened or whipping cream). There's no need to add sugar to the cream when whipping as the filling and base are sweet enough.
Key lime pie can be stored in an airtight container in the fridge for 3 days.
Alternatively, the pie (without the cream topping) can be wrapped in plastic wrap and then foil and frozen for up to 3 months. Allow to defrost in the fridge before topping with whipped cream and serving.
More Easy Dessert Recipes
Everyone loves a delicious dessert... and this collection of dessert recipes has something for everyone.
Including:
- Homemade Apple Pie - this old fashioned recipe is so simple to make! Serve with ice-cream or custard for an amazing winter warming dessert.
- Classic New York Baked Cheesecake - my all-time favourite cheesecake! Follow my tips for baking the perfect cheesecake every time!
- Butterscotch Pudding - the sweet butterscotch sauce perfectly compliments the light sponge layer.
- Apple Crumble - a comforting homemade apple crumble is the perfect way to end a cold winters day.
- Chocolate Self-Saucing Pudding - a rich dessert to satisfy all the chocoholics out there.

WANT EVEN MORE DELICIOUS RECIPES? Subscribe to my newsletter or follow along on Facebook or Instagram. And if you love baking, then please come and join my Facebook cooking club group or subscribe to my YouTube channel.
Key Lime Pie
Ingredients
- 250 g plain sweet biscuits like Arnott's Granita, Marie or Graham Crackers
- 125 g butter melted
- 395 g sweetened condensed milk full fat (not skim)
- ½ cup lime juice
- 4 eggs large, room temperature
- 1 teaspoon lime zest grated
- 300 ml whipping or thickened cream for topping
- 1 tbs lime zest for grating
Instructions
Conventional Method
- Preheat oven to 160 degrees celsius (fan-forced).
- Grease a 22cm loose-bottomed tin and set aside.
- Crush the biscuits until they resemble fine crumbs. Add the melted butter and mix to combine.
- Press the biscuit mixture firmly into the base and sides of the tin. Bake for 10 minutes in the oven. Remove and allow to cool.
- Using electric beaters or a stand mixer, beat the sweetened condensed milk, lime juice, eggs and lime zest until thick and creamy (approximately 4-5 minutes).
- Gently pour the liquid into the prepared base and bake for 15 minutes or until set. Allow to cool in the fridge for a minimum of 4 hours (preferably overnight).
- Serve with whipped cream and extra grated lime zest.
Thermomix Method
- Preheat oven to 160 degrees celsius (fan-forced). Grease a 22cm loose-bottomed tin and set aside.
- Melt the butter in the Thermomix for 3 minutes, 80 degrees, Speed 2 (or until melted). Add the biscuits and crush for 5 seconds, Speed 8. Scrape down the sides of the bowl and repeat for a further 5 seconds.
- Firmly press the mixture into the base and sides of the prepared tin and bake for 10 minutes. Remove from oven and allow to cool.
- Place the sweetened condensed milk, lime juice, eggs and lime zest into a clean and dry Thermomix bowl and mix for 45 seconds, Speed 4. Scrape down the sides and mix for a further 45 seconds or until thick and creamy.
- Gently pour the liquid into the prepared base and bake for 15 minutes or until set.
- Allow to cool in the fridge for a minimum of 4 hours (preferably overnight). Serve with whipped cream and extra grated lime zest.


Jo Watson says
Hi There , mine has been cooking for 30 minutes still not quite firm in the centre .I used a loose bottom cheesecake pan instead of a pie dish .I'm assuming this is whats extending the cooking time. Well I Hope ?
Lucy says
Hi Jo, a loose bottom cheesecake pan would be fine to use. All ovens are different so yours may just need a little longer to cook!
Anney says
Absolutely foolproof!! Fanastic texture! Baking the crust for 10 minutes really is a super idea. I put my bikkies in a blender & " mulched" them to the consistency of " fine sand", exactly 250gm to 125gm of melted butter & it was a perfect ratio. I used the 'new' flavored salted caramel tart Scotch finger biscuits. My limes from the tree at home were quite tart & not as juicy as usual & the pulp was getting into the juice. But as the recipe said to add zest to the main wet mix, I thought, "what oh"& decided not to get finicky in straining the juice & put it all in. I'm talking of juice vessicles & not any nasty pith, mind you. Well like I said,texture of pie is brilliant, can't feel any of the pulp that I put in and that tangy bit of zest just suits the sweetness of the pie & in making this again I definitely would leave it in.
Lucy says
Hahahaha! I love this!!! So glad you enjoyed it!
Em says
Hiya! My filling never ended up becoming thick and creamy. I used condensed coconut milk. Would that have made a difference? Also, I noticed a lot of other recipes called for egg yolk. Could that have been the problem?
Thanks!
Lucy says
Hi Em, the reason it didn't thicken is because you need to use sweetened condensed milk not condensed coconut milk. The lime juice and the dairy in sweetened condensed milk combine to curdle and thicken. This doesn't happen with coconut milk as it doesn't contain any dairy.
Katy says
I have made this three times over the past week, one which I took to dinner with friends, one for a family gathering and another which is in the freezer awaiting the next social event.
So easy to make and demolished by all.
Lucy says
That is wonderful to hear!