

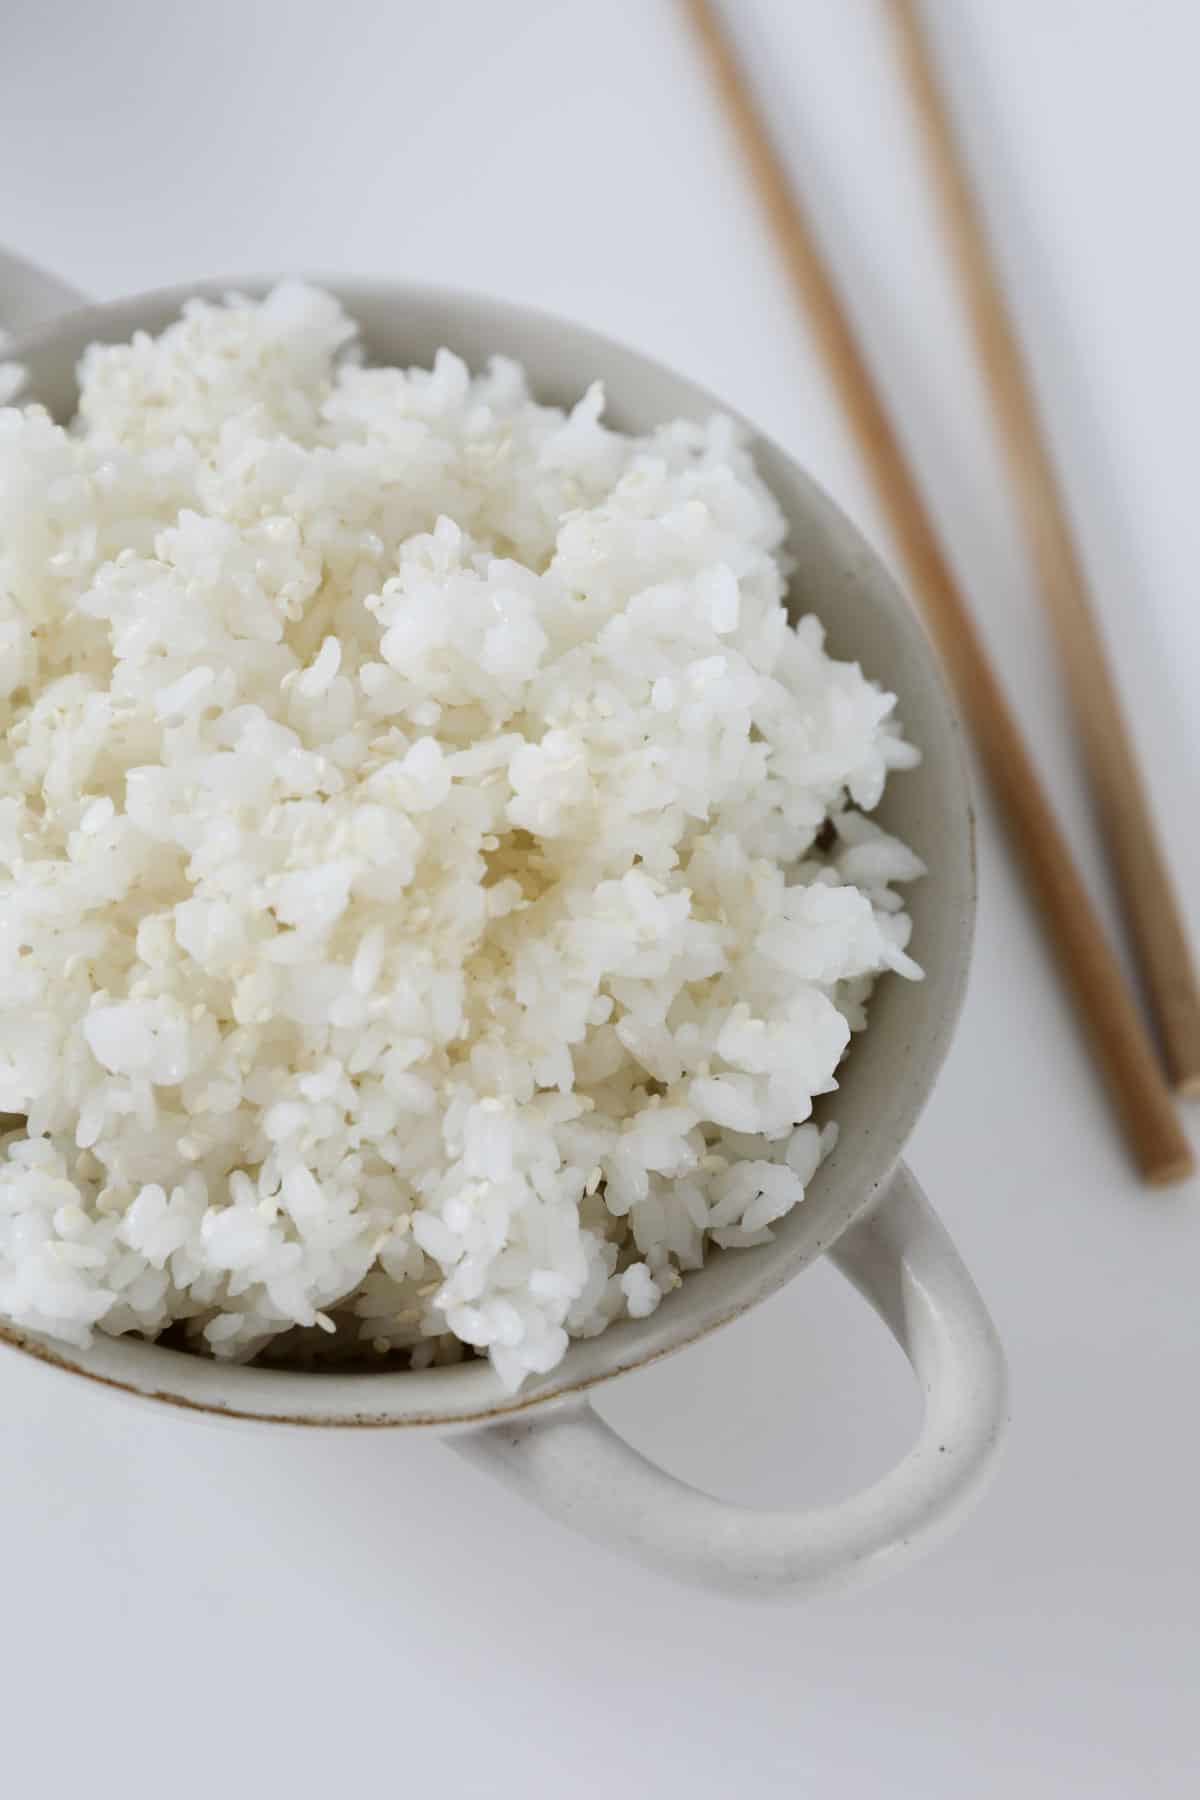
This Thermomix Sushi is the easiest way to make perfect sticky sushi rice at home - no stress, no guesswork.
If you love easy Thermomix basics like Thermomix mashed potato or Thermomix brown rice, this one is going to be a game-changer.
A Quick Look At The Recipe
✅ Recipe Name: Thermomix Sushi (Sushi Rice)
🕒 Ready In: 20 minutes
👪 Serves: 10
🍽 Calories: 148 per serve
🥣 Main Ingredients: sushi rice, water, sushi seasoning
📖 Dietary Info: gluten-free
⭐ Why You'll Love It: A foolproof Thermomix method for perfectly fluffy, sticky sushi rice - ideal for rolls, bowls or lunchboxes.
SUMMARIZE & SAVE THIS CONTENT ON
We've used this TM sushi rice recipe a number of times and it's always been amazing!
- Katrina
This Thermomix sushi rice is one of those recipes that makes you feel like you've got your life together 😄
It's quick, easy and turns out perfectly every time - no burnt pots or sticky mess.
Use it for sushi rolls, poke bowls, or even a quick dinner with bang bang chicken or crispy chicken schnitzel on top.
Why You're Going To Love This Recipe
- Just 3 ingredients - so simple
- Ready in 20 minutes
- Fail-proof method (Thermomix does all the work)
- Perfect for lunchboxes (Will-level approval ✔️)
- Great for meal prep
Jump to:
Sushi Ingredients
You only need a couple of ingredients, but here's what's important:
Note: Scroll to the recipe card at the bottom for the ingredients quantities and full detailed method.
- Sushi rice - This Japanese short-grain rice has a higher starch content, which gives it that signature sticky, slightly glossy texture that holds together perfectly for sushi. Don't substitute with long grain or jasmine rice as they won't give you that classic sticky texture.
- Sushi seasoning (liquid) - A mix of rice vinegar, sugar and salt that gives sushi rice its signature flavour - find it in the Asian section of the supermarket, Asian specialty shops, or you can make your own.
Variations
- Sushi bowls: skip rolling, add toppings like avocado, chicken or salmon
- Brown rice: use short grain brown rice (longer cook time)
- Low sugar: reduce sugar in seasoning
- Gluten-free: check seasoning label
How To Make Thermomix Sushi Rice
This is one of those recipes where the Thermomix does all the heavy lifting.
Rinse the rice, cook it in the basket, then mix through the seasoning while warm. Chill… and you've got perfect sushi rice every single time.
Note: Scroll to the recipe card at the bottom for the ingredients quantities and full detailed method.
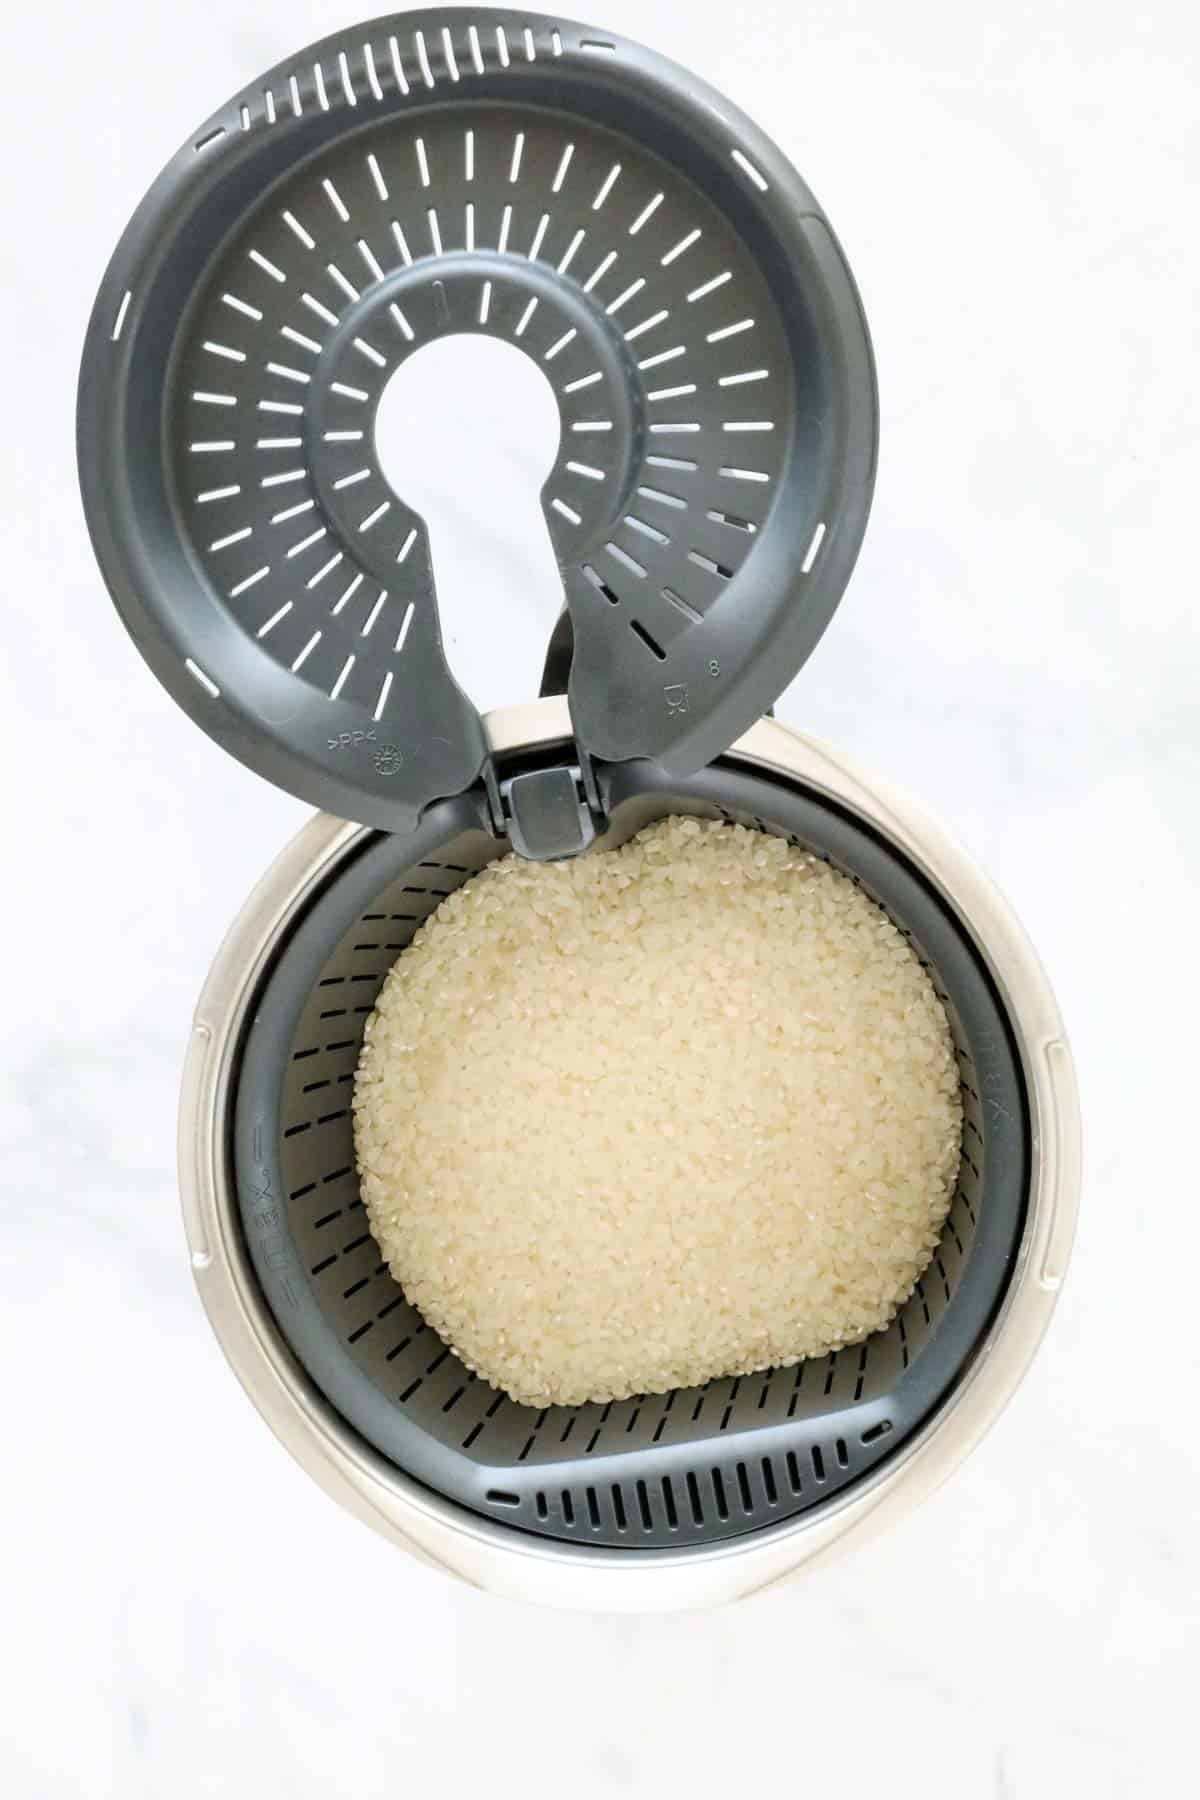
- Weigh and rinse the rice: Place the simmering basket into the Thermomix bowl and weigh in the sushi rice. Remove the basket and rinse the rice under cold water until the water runs clear (this step is crucial!).
- Cook the rice: Add water (1000ml) to the Thermomix bowl, then return the rice-filled basket. Cook for 18 minutes, Varoma, Speed 4.
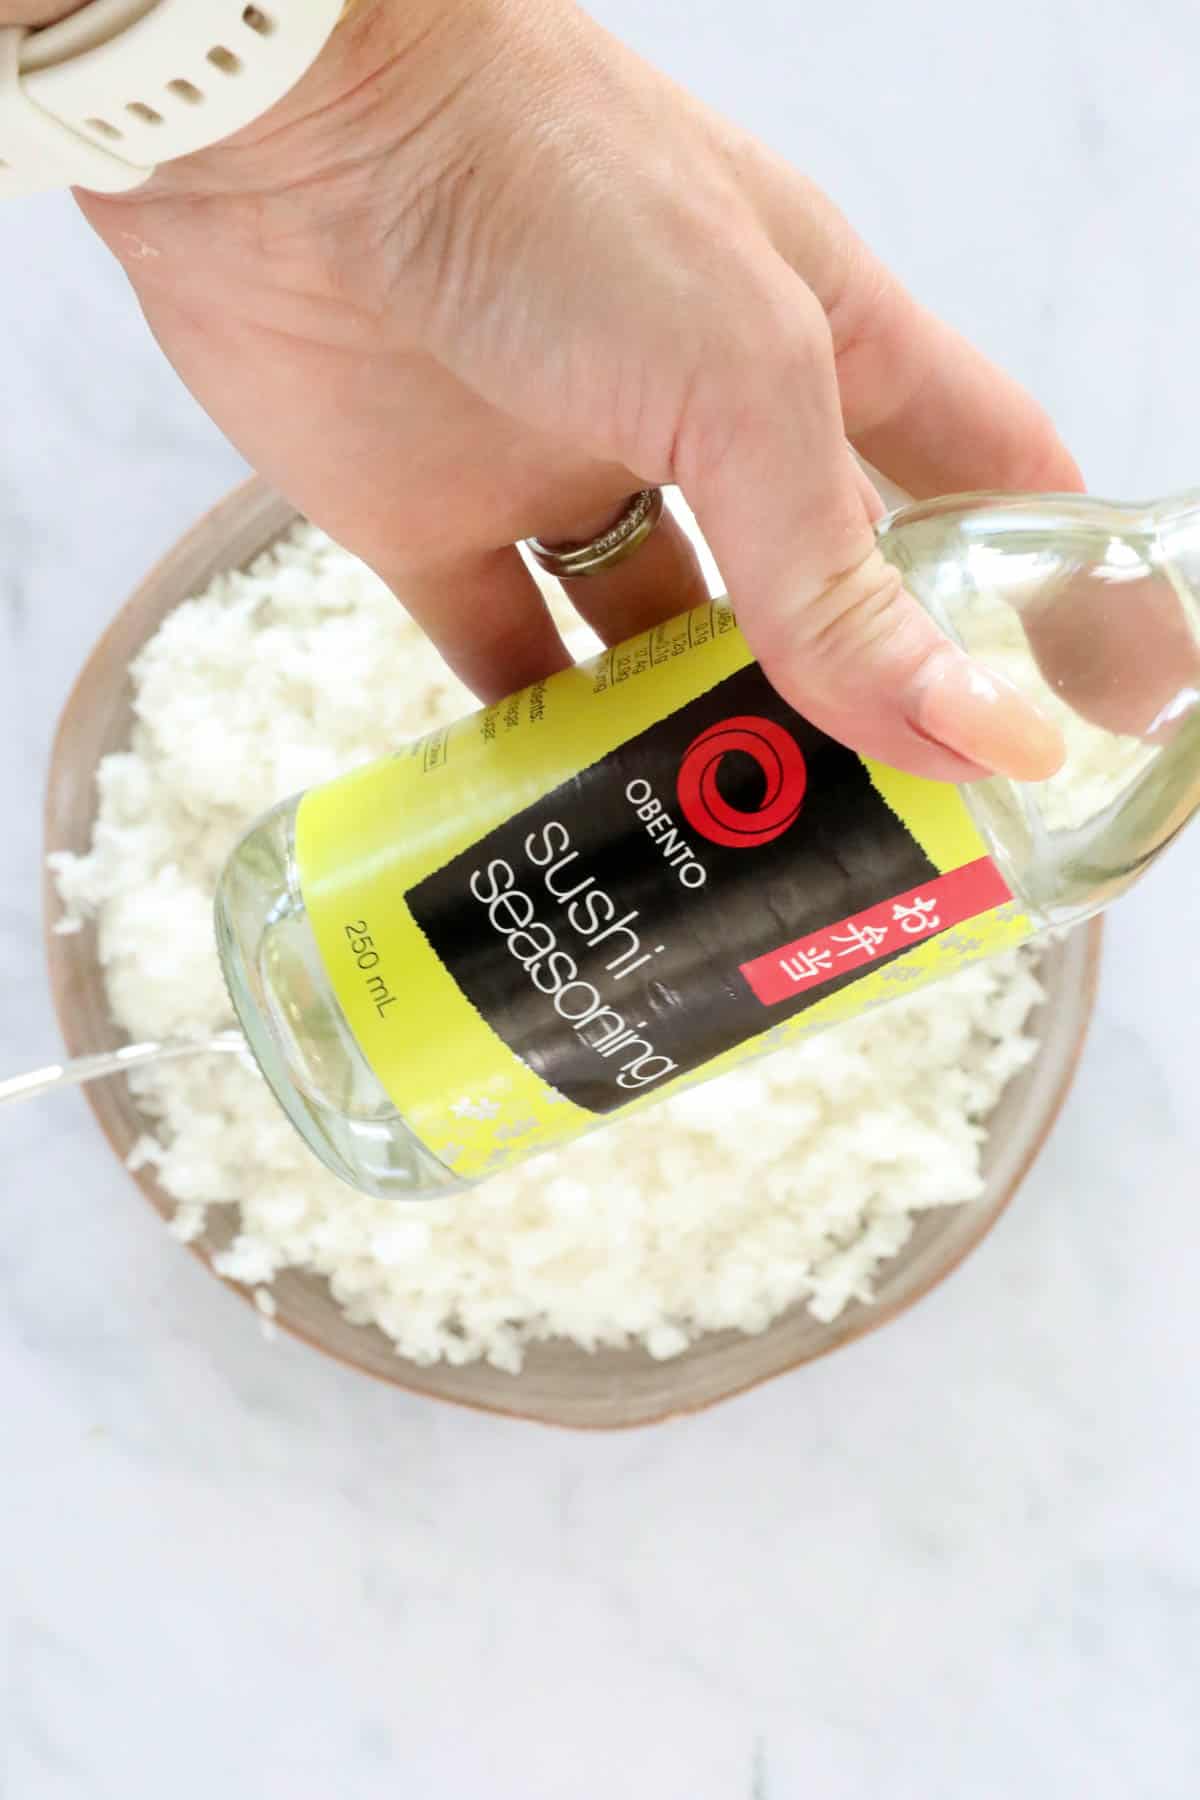
- Add sushi seasoning: Carefully remove the basket using the hook on the spatula (it will be HOT!) and transfer the rice to a large bowl or tray. Gently mix through the sushi seasoning while the rice is still warm.
- Allow the rice to cool completely (preferably in the fridge) before using.
How To Roll Sushi
If you'd like to turn your sushi rice into sushi rolls, then follow these simple steps:
- Place a sushi rolling mat onto a flat board;
- Place a sheet of nori onto the rolling mat (shiny side facing down);
- Sprinkle a few drops of water onto the nori sheet and spread it out (this will soften the nori sheet and allow it to be easily rolled);
- Spoon a few tablespoons of the cooked and cooled sushi rice onto the lower ¾ of the nori sheet (closest to you);
- Add your fillings in a straight, thin line onto the rice;
- Start at the edge closest to you and use the rolling mat to tightly roll the sushi over onto itself (until it's completely rolled);
- Cut into pieces and serve.
Serving Suggestions
Here are a few of the most popular sushi roll fillings:
- Sushi-grade salmon and avocado;
- Smoked salmon and cream cheese;
- Tuna and mayo;
- Spicy tuna and mayo;
- Chicken schnitzel, cut into strips;
- Prawn and avocado;
- Tempura prawn;
- Vegetable (carrot, cucumber, spring onions), cut into matchsticks;
- Avocado;
- Calamari;
- Crab.
Serve with wasabi, pickled ginger, kewpie mayo and soy sauce - all available in the Asian section of your supermarket, or from Asian specialty shops.
Recipe Tips
- Always rinse the rice until the water runs clear
- Use proper sushi rice - not long grain or jasmine
- Season while warm so it absorbs properly
- Cool completely before rolling
- Use a wide bowl so it cools evenly
- Store in the fridge for up to 2 days
- Freeze cooked rice for up to 1 month
- Refresh leftovers with a splash of water when reheating
Thermomix Sushi Rice FAQs
No - sushi rice is a short grain rice (also known as 'sticky rice') that gives the correct sticky texture as it has a high starch and moisture content. Other types won't work the same.
It removes excess starch so it's not gummy.
It gives that classic flavour - highly recommended!
Yes - just store in the fridge and use within 2 days.
More Thermomix Essentials
Once you've mastered this recipe, be sure to explore more of my go-to Thermomix basics that make everyday cooking quicker, easier and so much more delicious.


WANT EVEN MORE DELICIOUS RECIPES? Subscribe to my newsletter or follow along on Facebook or Instagram. And if you love baking, then please come and join my Facebook cooking club group or subscribe to my YouTube channel.
Thermomix Sushi
Ingredients
- 400 g sushi rice
- 1000 g water
- 2-3 tbs sushi seasoning
Instructions
- Place the rice basket (steaming basket) into the Thermomix bowl.
- Weigh the rice into the basket.
- Remove the rice basket and rinse the rice under cold water until the water runs clear.
- Add the water to the Thermomix bowl and insert the rice basket (steaming basket) with the rinsed rice.
- Cook for 18 minutes, Varoma, Speed 4.
- Carefully remove the rice basket (steaming basket) and spread the rice onto a flat plate or large bowl.
- Add the sushi seasoning (see notes) and mix well.
- Cool the rice in the fridge before using.
Notes
- Rinse rice thoroughly
- Use proper sushi rice
- Season while warm
- Cool before using
- Store 2 days in fridge
- Freeze up to 1 month


Katrina says
We've used this sushi rice recipe quiet a few times and it's always been amazing