

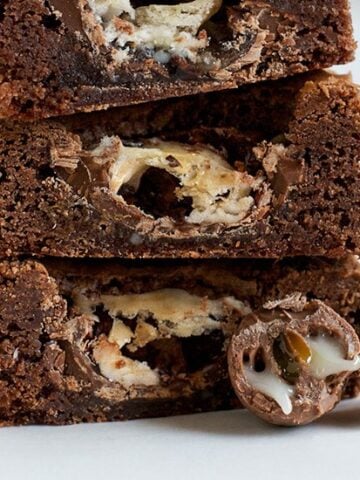
These fudgy, rich and decadent espresso brownies made with coffee are a delicious adults-only treat.
Taking just 5 minutes to prepare, they're sure to please any chocaholic!
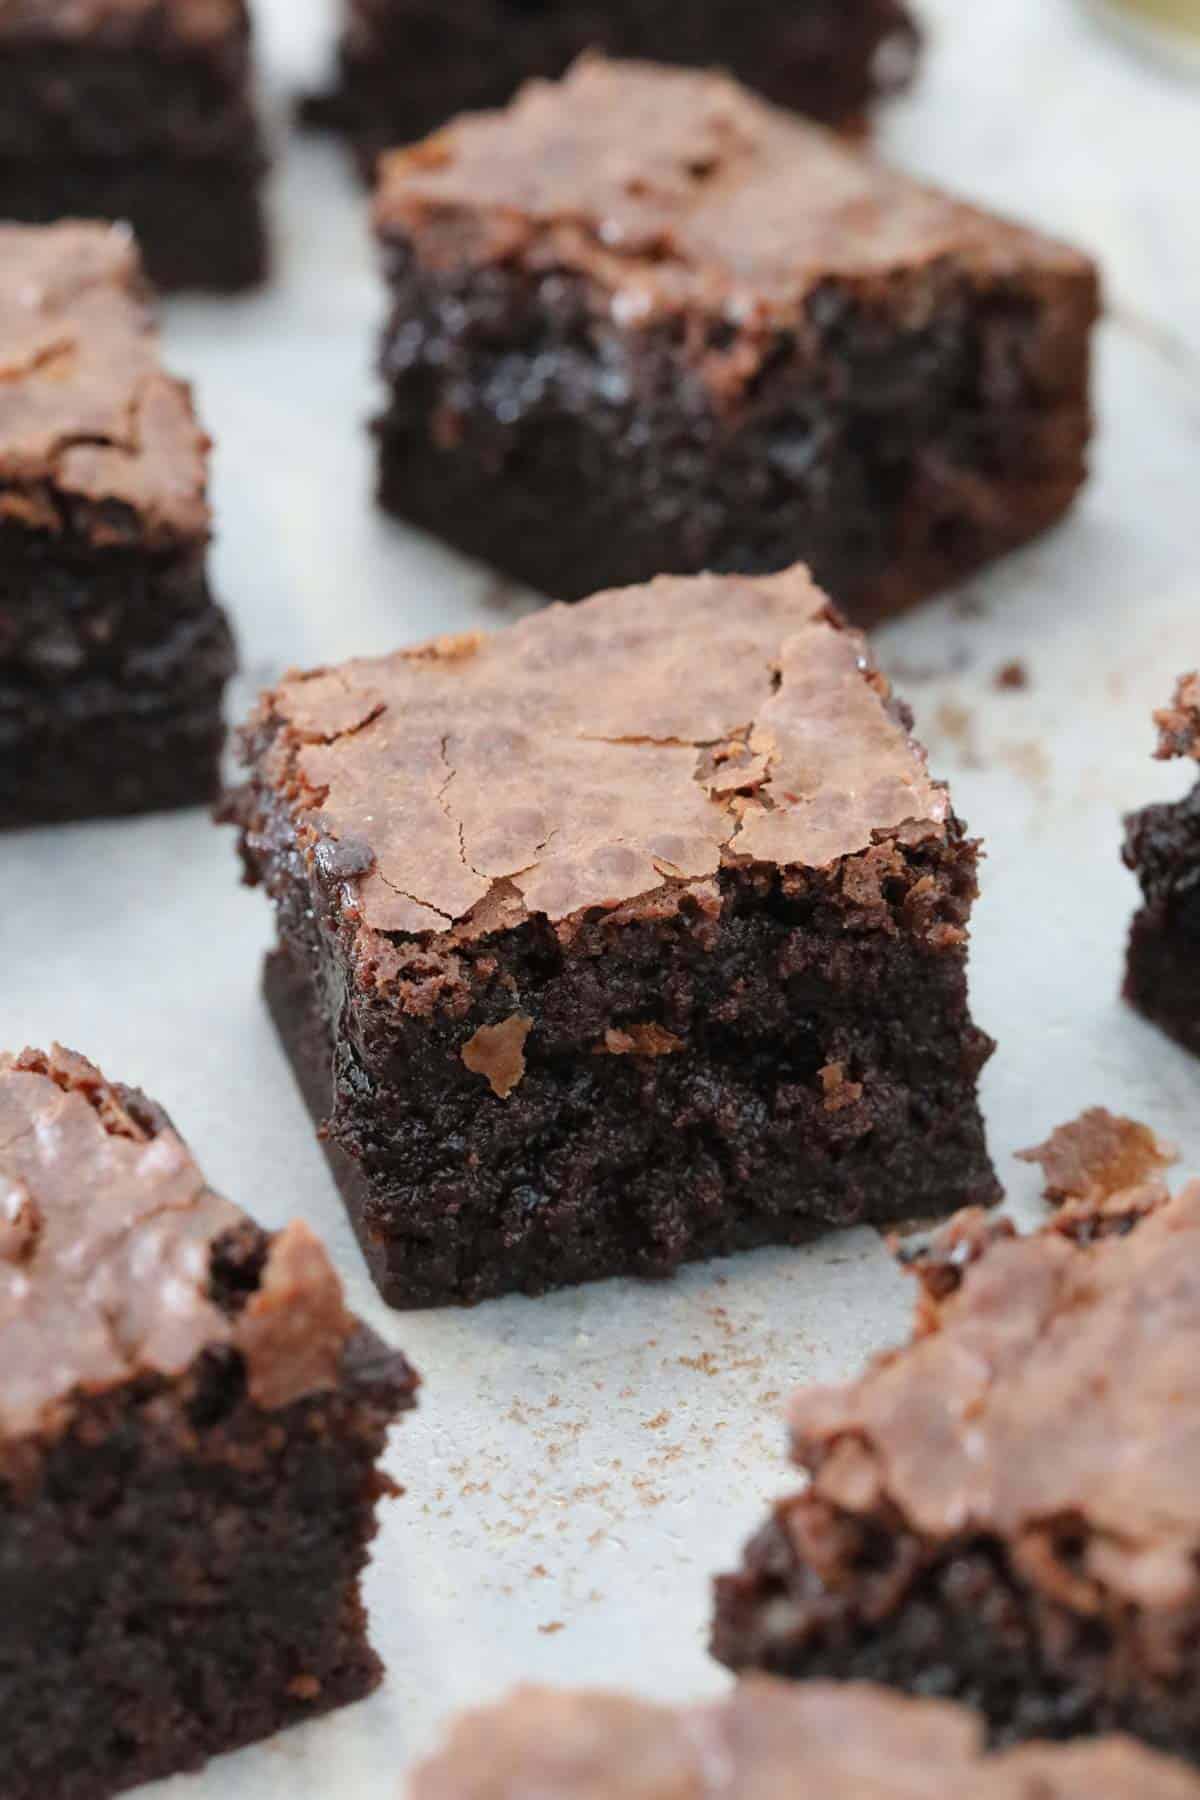
Chocolate brownies are the perfect fix for any chocolate cravings, and these gooey espresso chocolate brownies, just like my Baileys brownies, are a decadent adults-only treat. Rich and fudgy, they are guaranteed to satisfy any chocolate cravings!
For more decadent brownie recipes, these triple chocolate brownies, peanut butter brownies, raspberry brownies, and Nutella brownies are all a delicious and luxurious hit of chocolate.
It is safe to say we LOVE all variations of brownies in our house!
Why You're Going To Love This Recipe
- Easy recipe - this melt and mix recipe takes just 5 minutes to prepare!
- One bowl recipe - you just need one bowl to make espresso brownies - less washing up is always a win in my books!
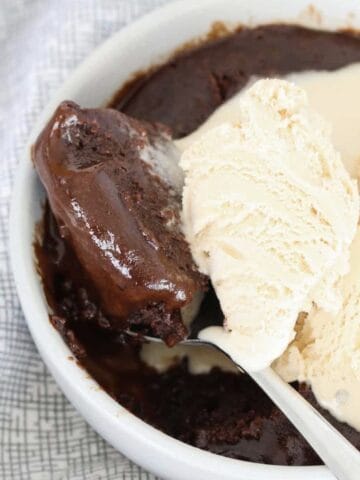
- Versatile - whether you want a hit of chocolate with your morning cup of coffee, or a luxurious dessert with a scoop of ice cream, these brownies are perfect for any occasion!
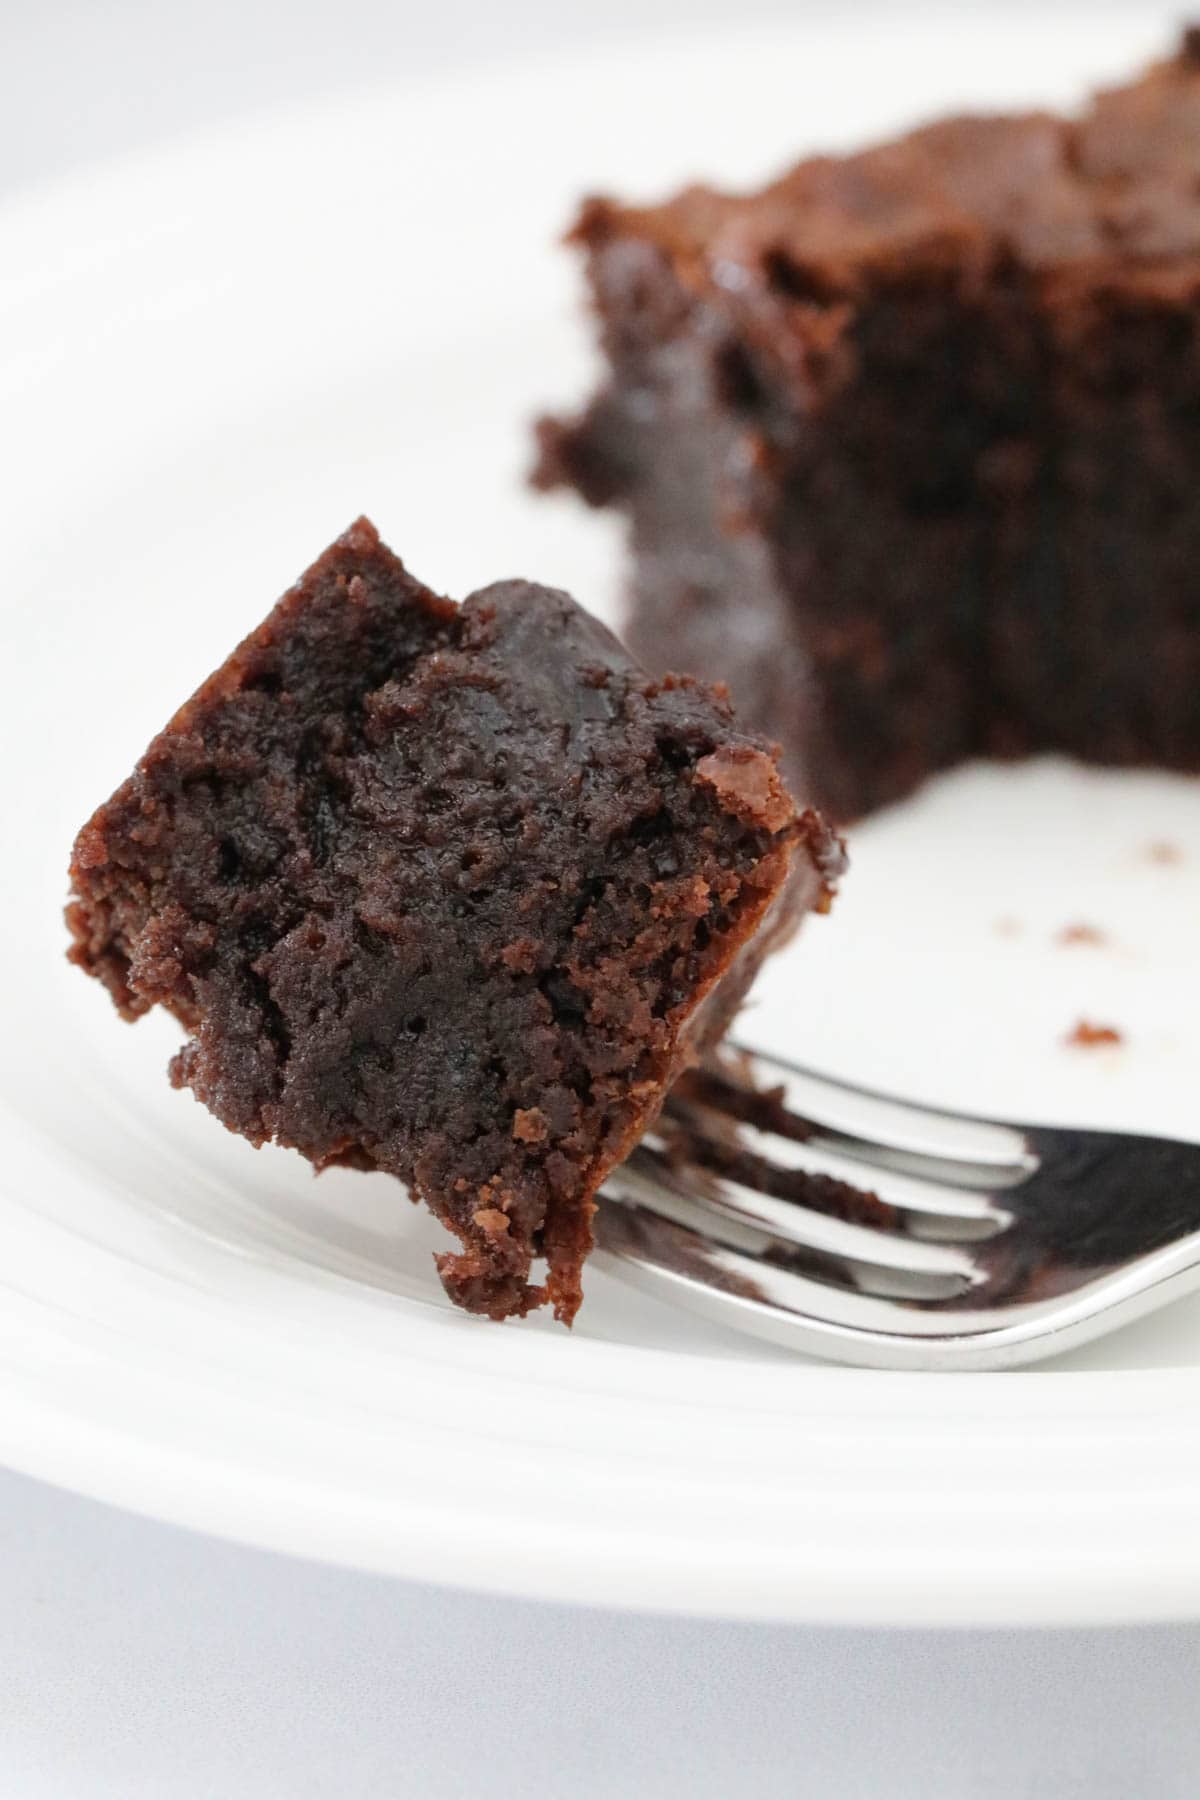
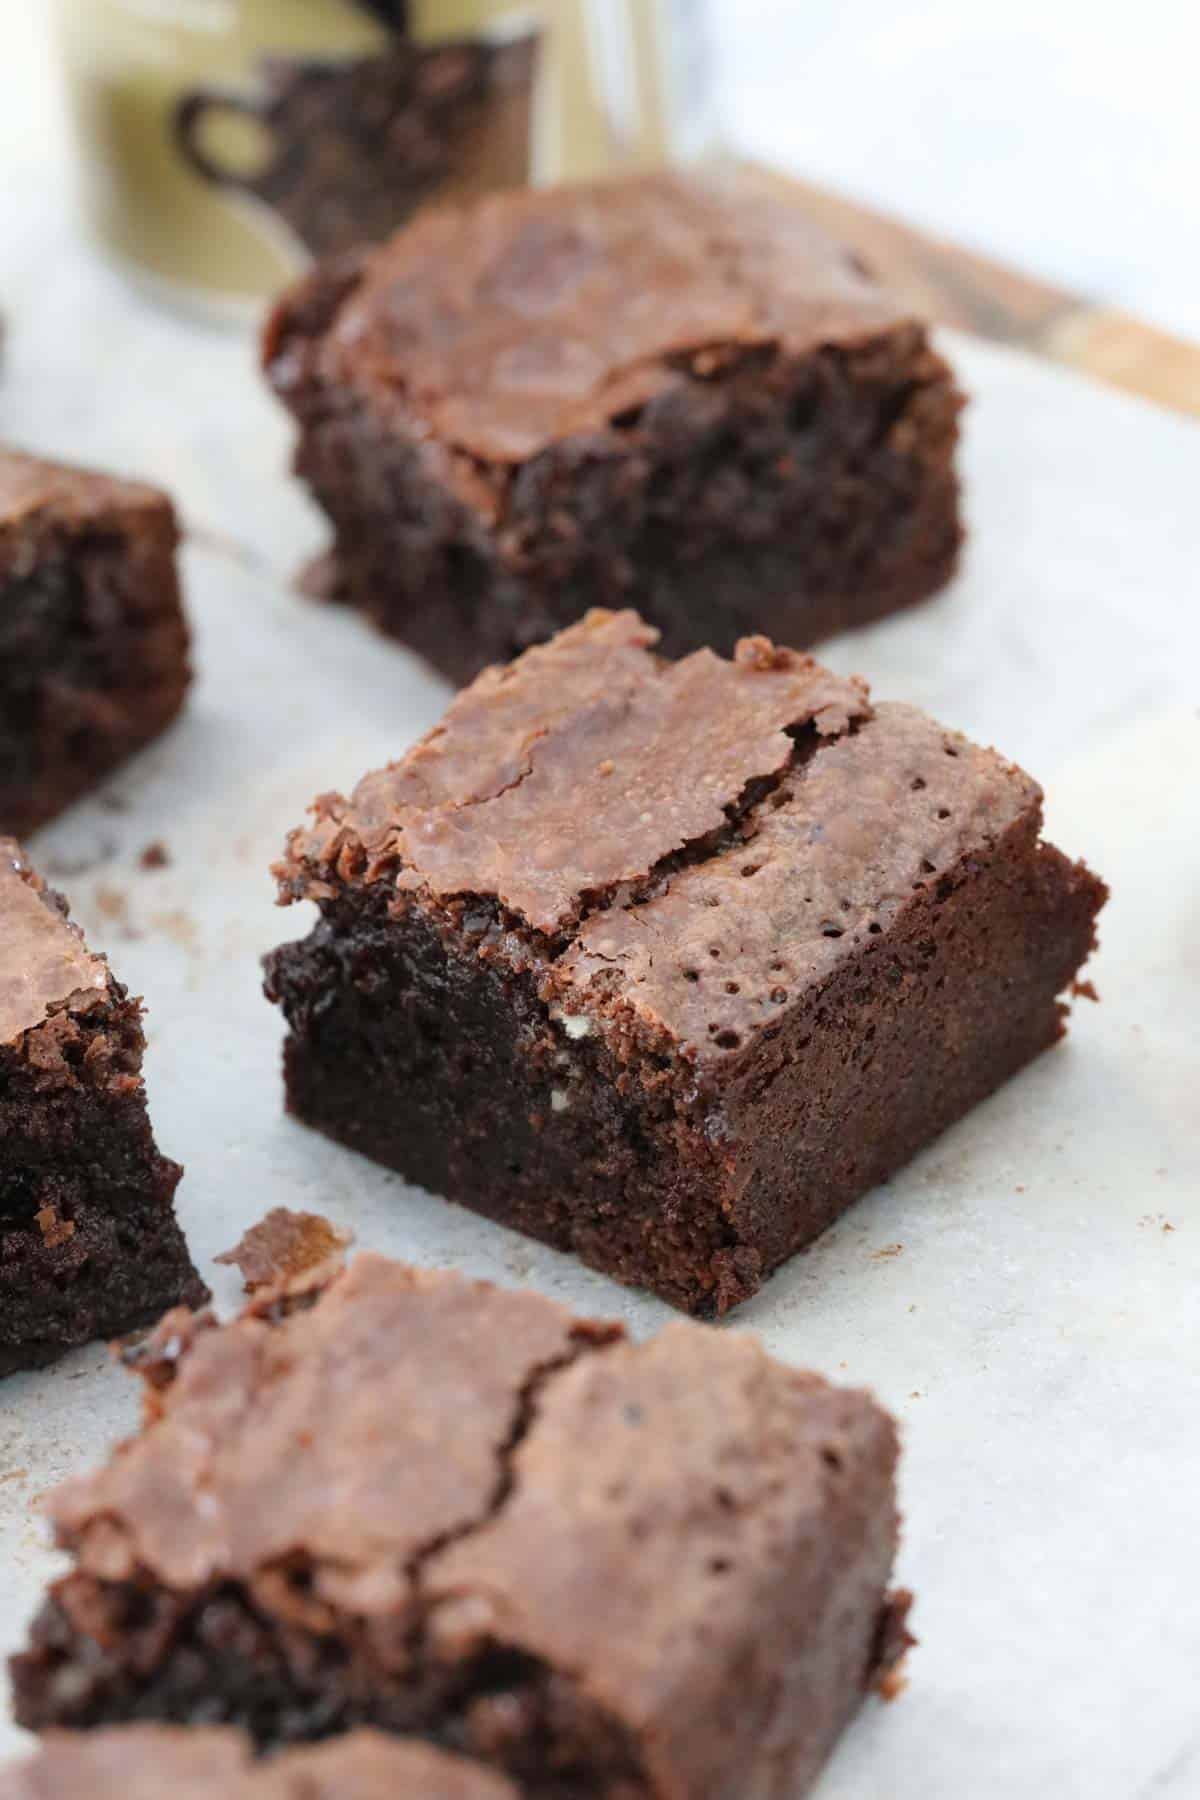
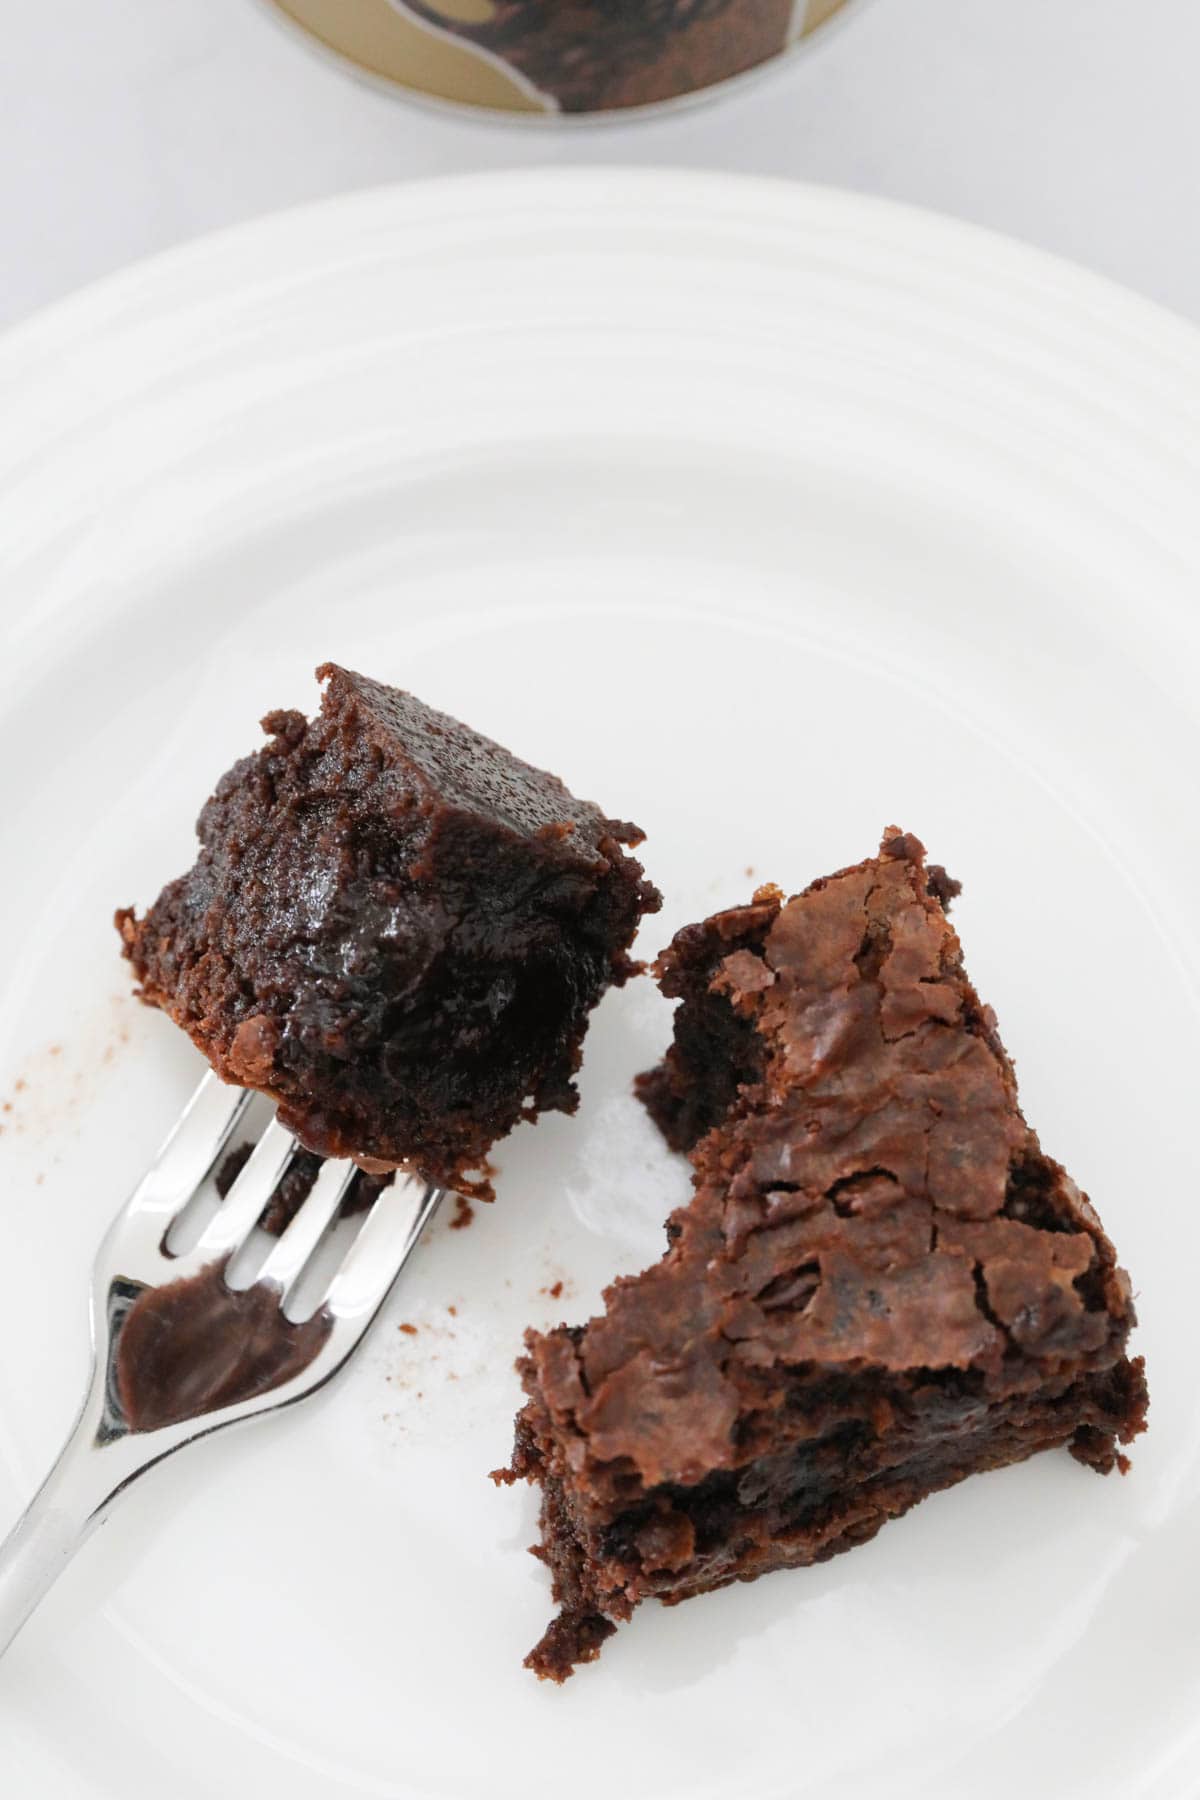
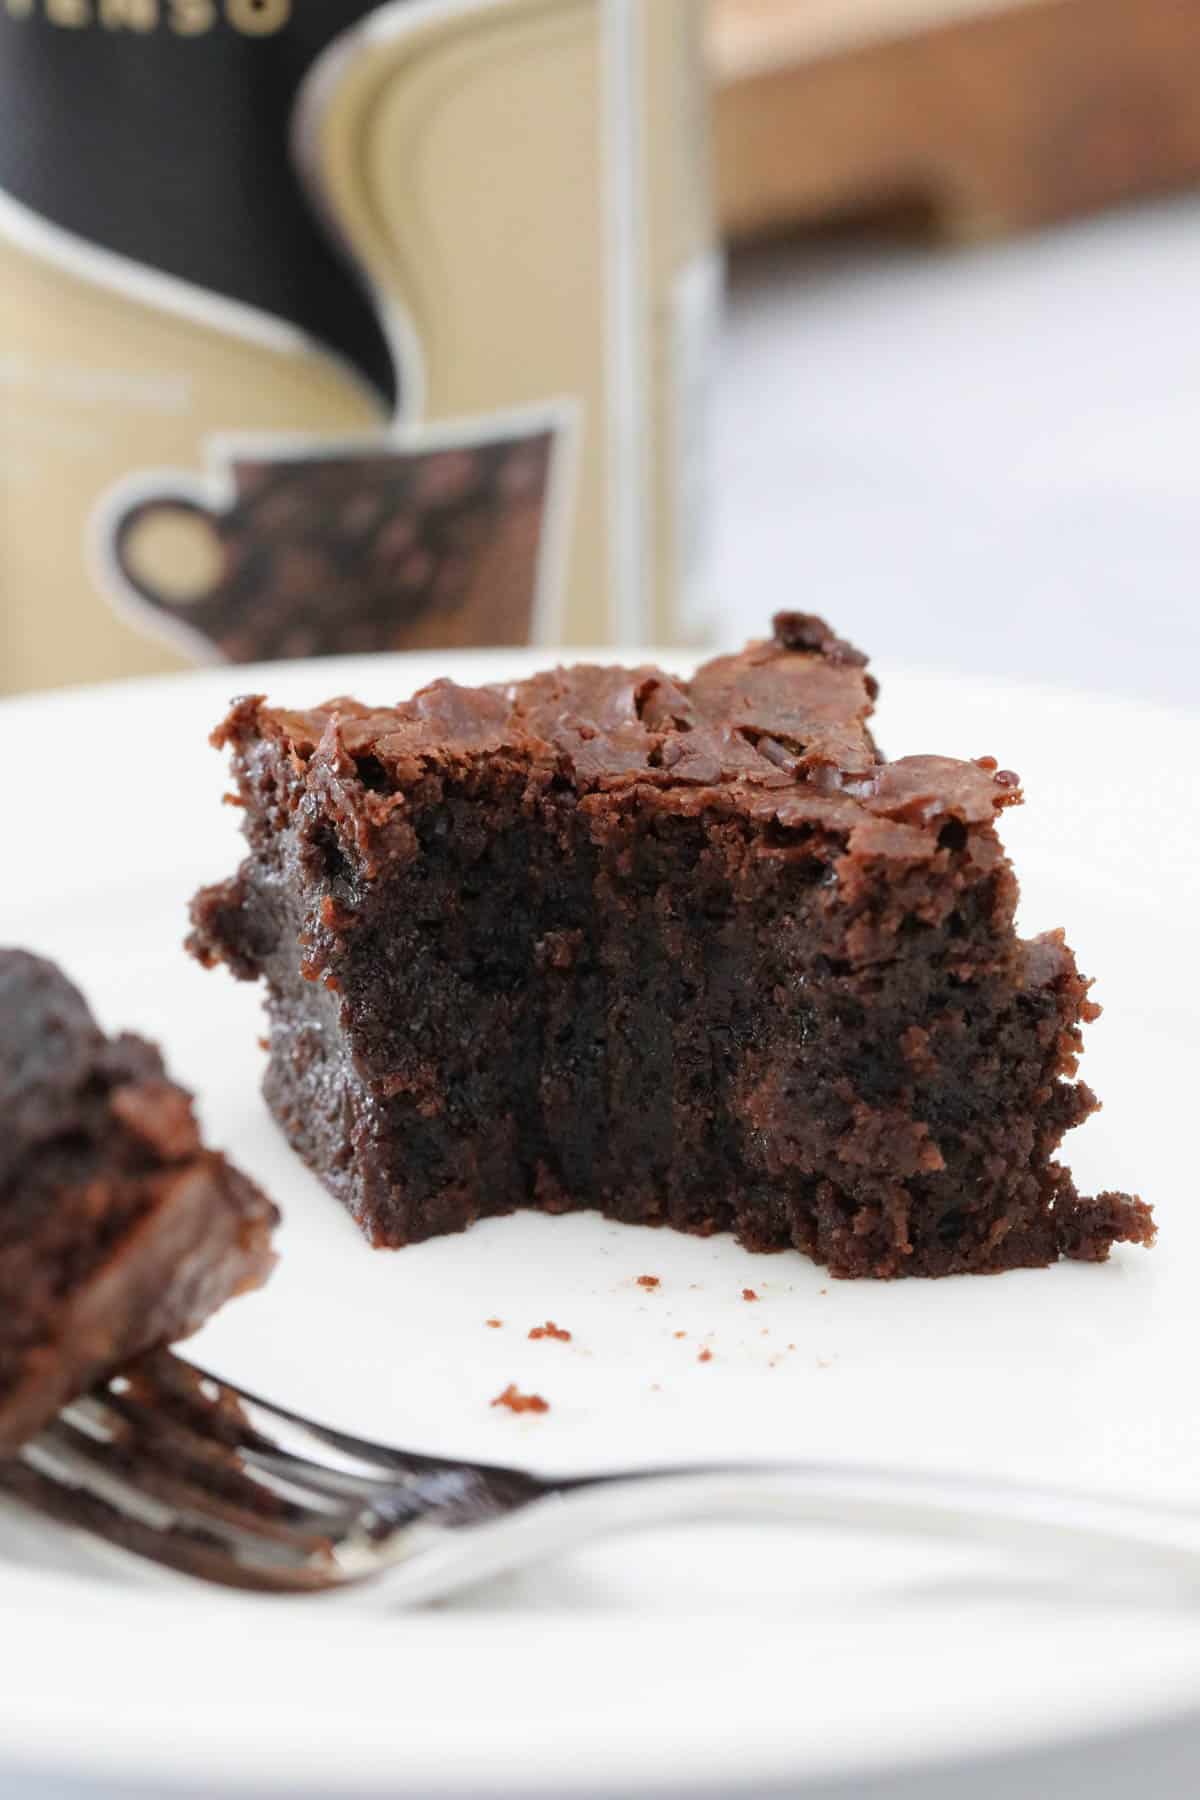
- Fudgy texture - with a gooey dense fudgy centre and crispy edges, these espresso brownies have the best texture that will have you coming back for a second piece!
- Conventional and Thermomix - both methods are included in the recipe card at the end of the post.
What You Need
You just need a handful of ingredients to make these dark chocolate espresso brownies.
Note: Scroll to the recipe card at the bottom for the ingredients quantities and full detailed method.
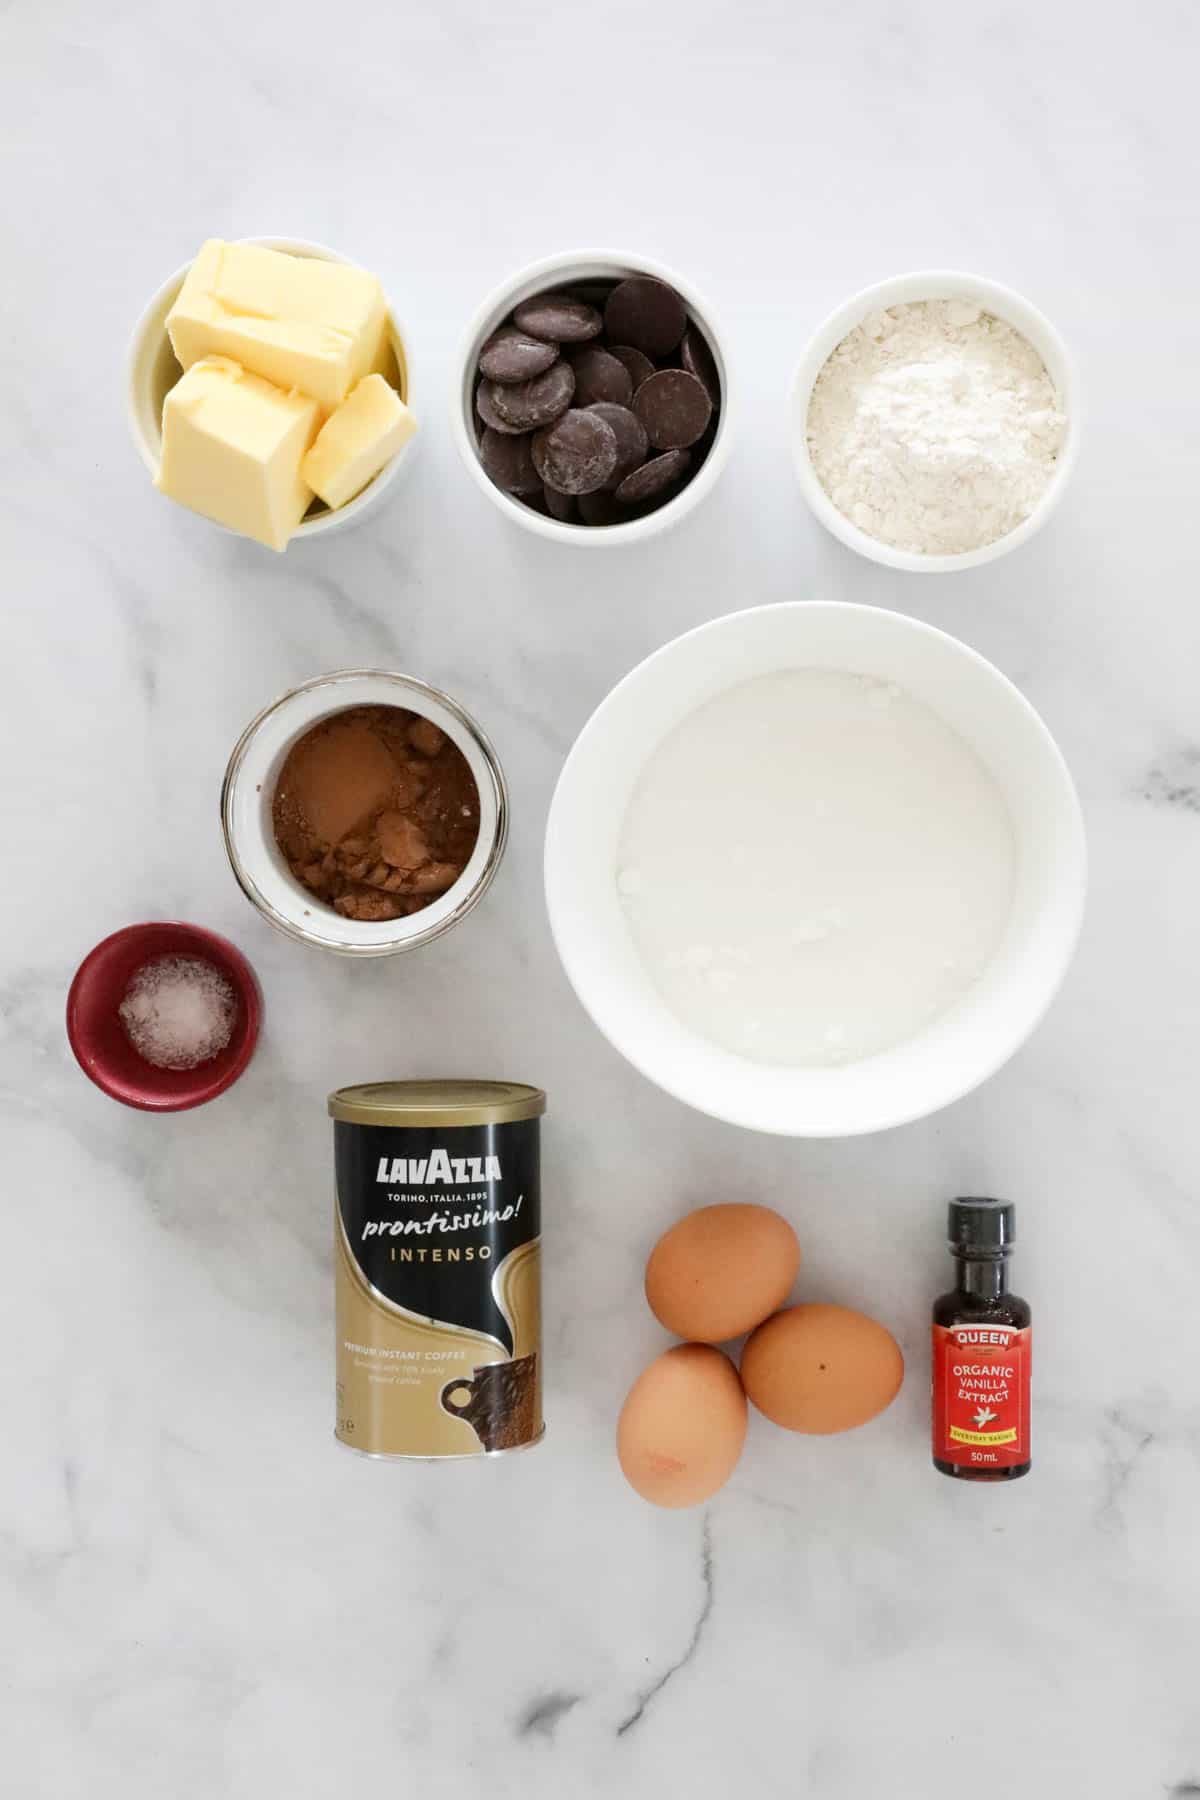
- Butter - you can use either salted butter or unsalted butter for this recipe. If using salted butter, omit the pinch of salt.
- Dark chocolate melts - I prefer to use dark chocolate for a rich chocolate hit, but you could use milk chocolate instead if you prefer.
- Caster sugar - also known as superfine sugar.
- Instant coffee granules - I recommend using good quality coffee granules for the richest coffee flavour. I like to use Lavazza instant coffee but any brand is fine - use your favourite!
- Vanilla extract - or vanilla bean paste.
- Eggs - I use large size eggs which weigh approx. 60g each. Ensure your eggs are at room temperature as this helps the baking process.
- Plain flour - also known as all-purpose flour.
- Cocoa powder - choose a good quality cocoa powder such as Cadburys or Nestle, for the richest chocolate flavour. Dutch processed cocoa powder lends a deep smooth flavour and is recommended, but natural cocoa powder works too, if that's what you have on hand.
- Salt - to bring out the chocolate flavour. Omit if using salted butter.
Equipment Required
You don't need any fancy equipment to make these gooey chocolate brownies, just:
- A heatproof bowl.
- Microwave, stove top or Thermomix - for melting the butter.
- 20cm / 8 inch square tin - for baking espresso brownies in.
- Oven - I use a fan-forced oven. If using a conventional oven, increase the temperature by 10-20 degrees celsius.
Step By Step Instructions
Whip up a batch of these coffee brownies in a few minutes, and using just 1 bowl!
Note: Scroll to the recipe card at the bottom for the ingredients quantities and full detailed method.
Step 1 - Melt The Butter
Preheat the oven and line a 20cm / 8 inch square tin with baking paper.
Place the butter into a microwave-safe bowl. Heat until melted.

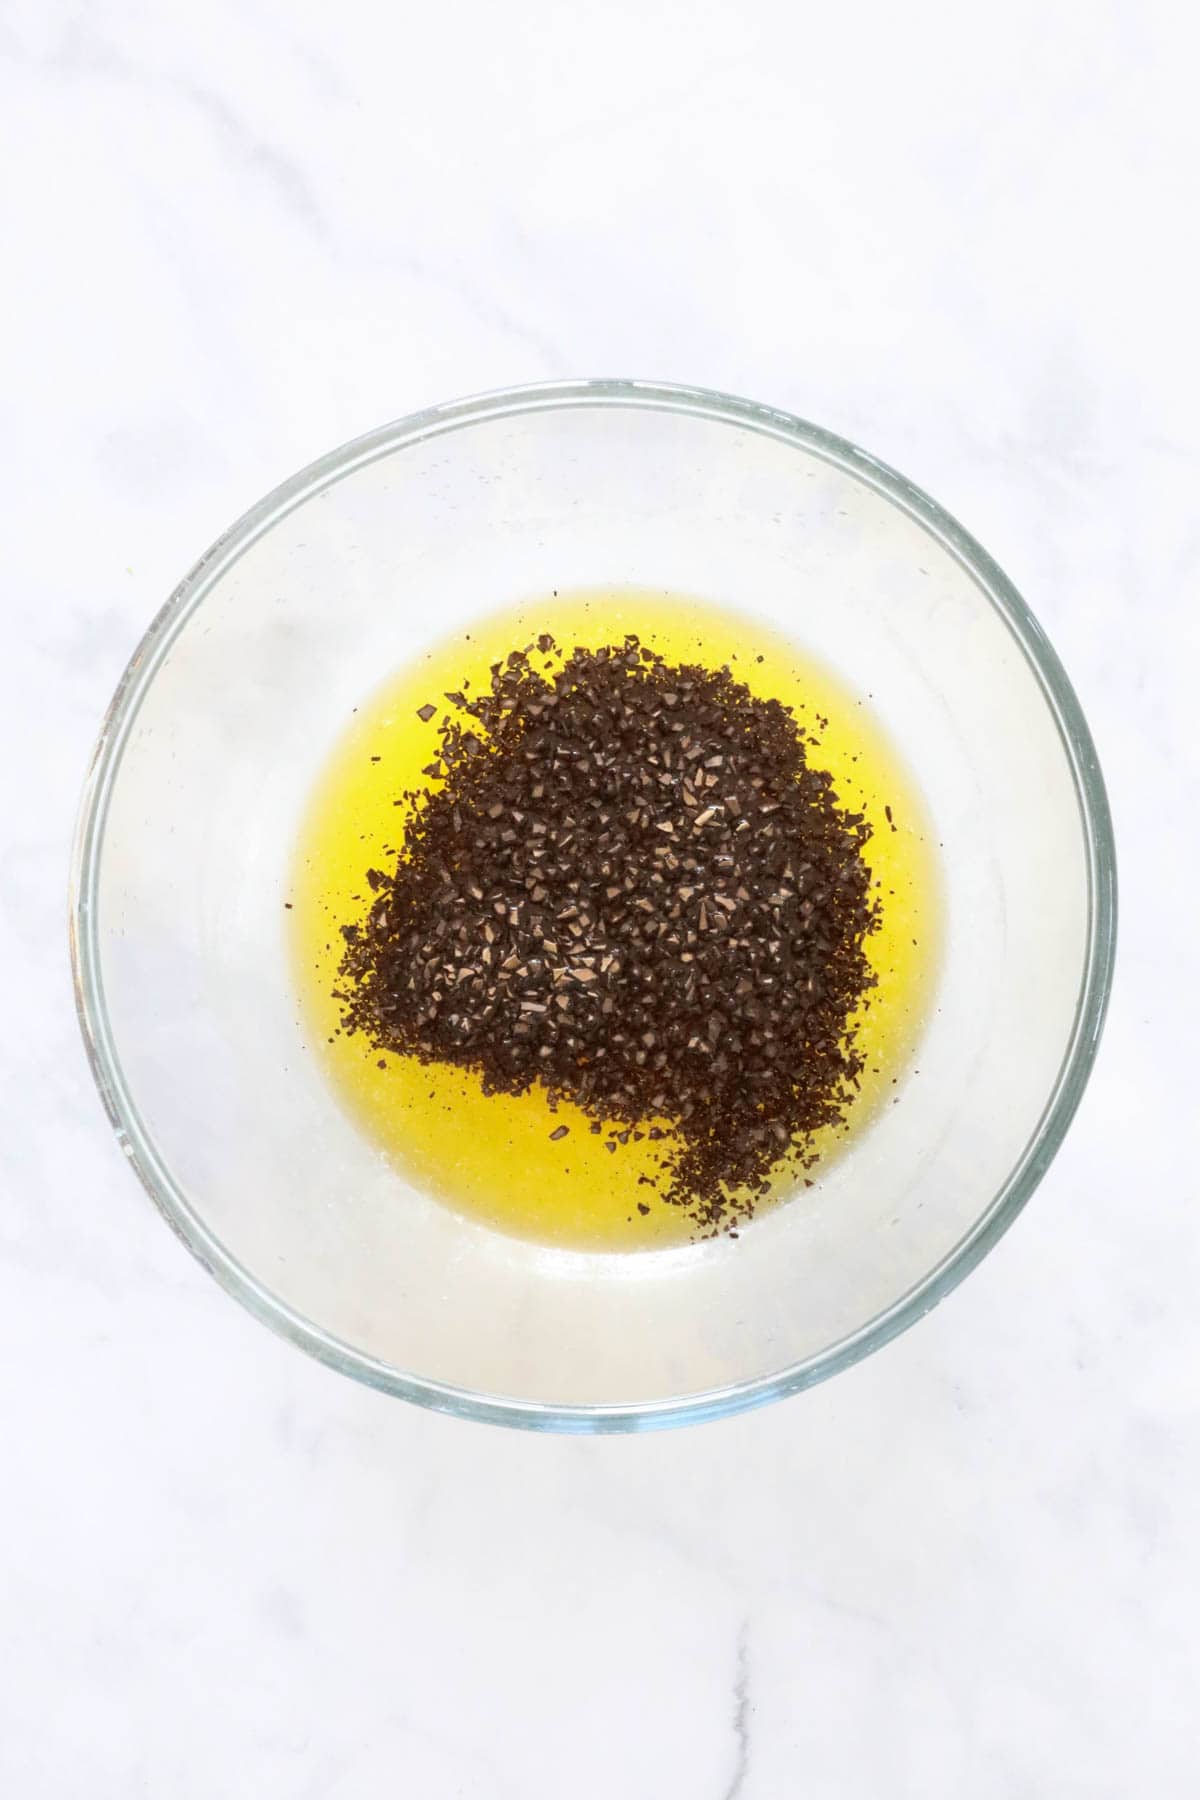
Step 2 - Add The Coffee Granules
Add the coffee granules and stir. Heat on a low power in the microwave for 2 - 3 minutes, stirring every 30 seconds.
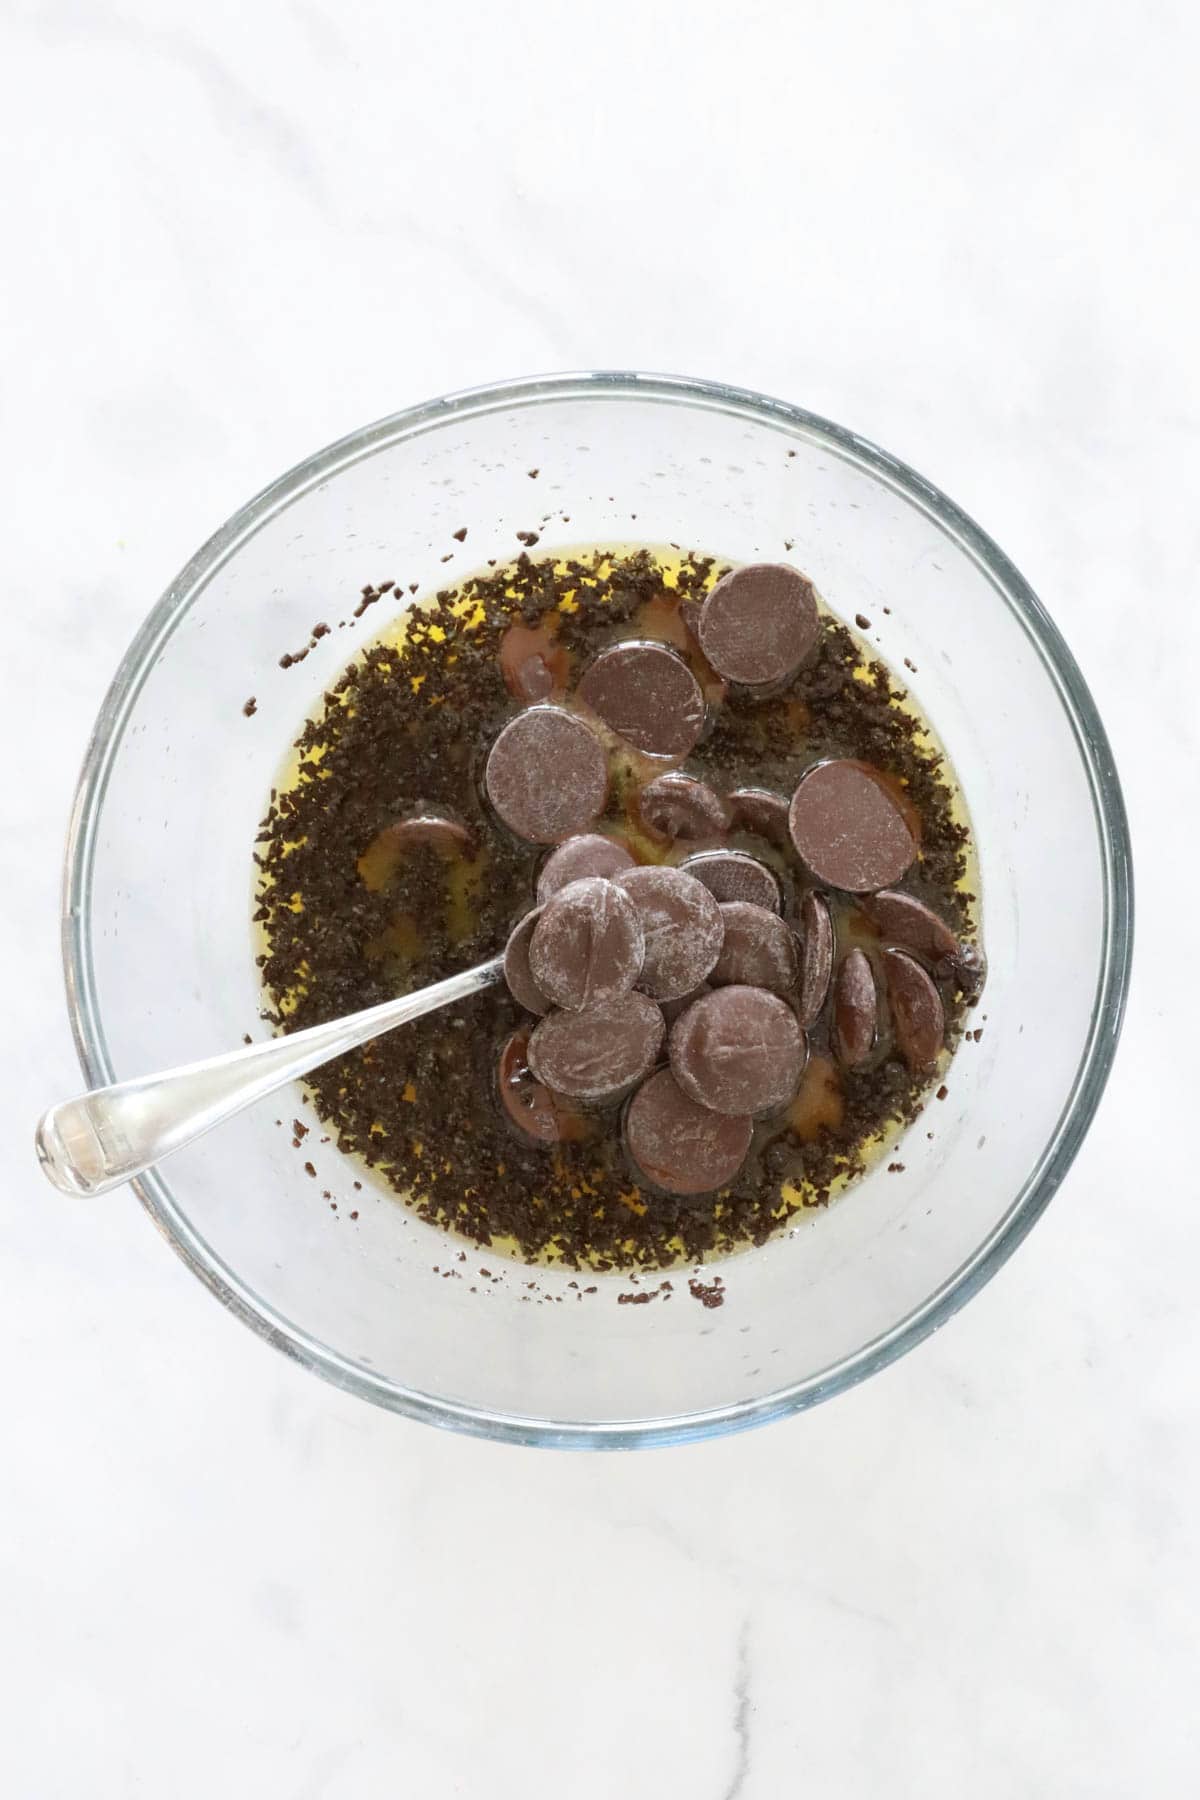
Step 3 - Stir In The Chocolate Melts
Place the chocolate melts into the bowl and slowly stir until almost melted.
Allow the mixture to cool slightly.
Step 4 - Add The Sugar, Cocoa Powder And Salt
Stir in the sugar, cocoa powder and a pinch of salt.

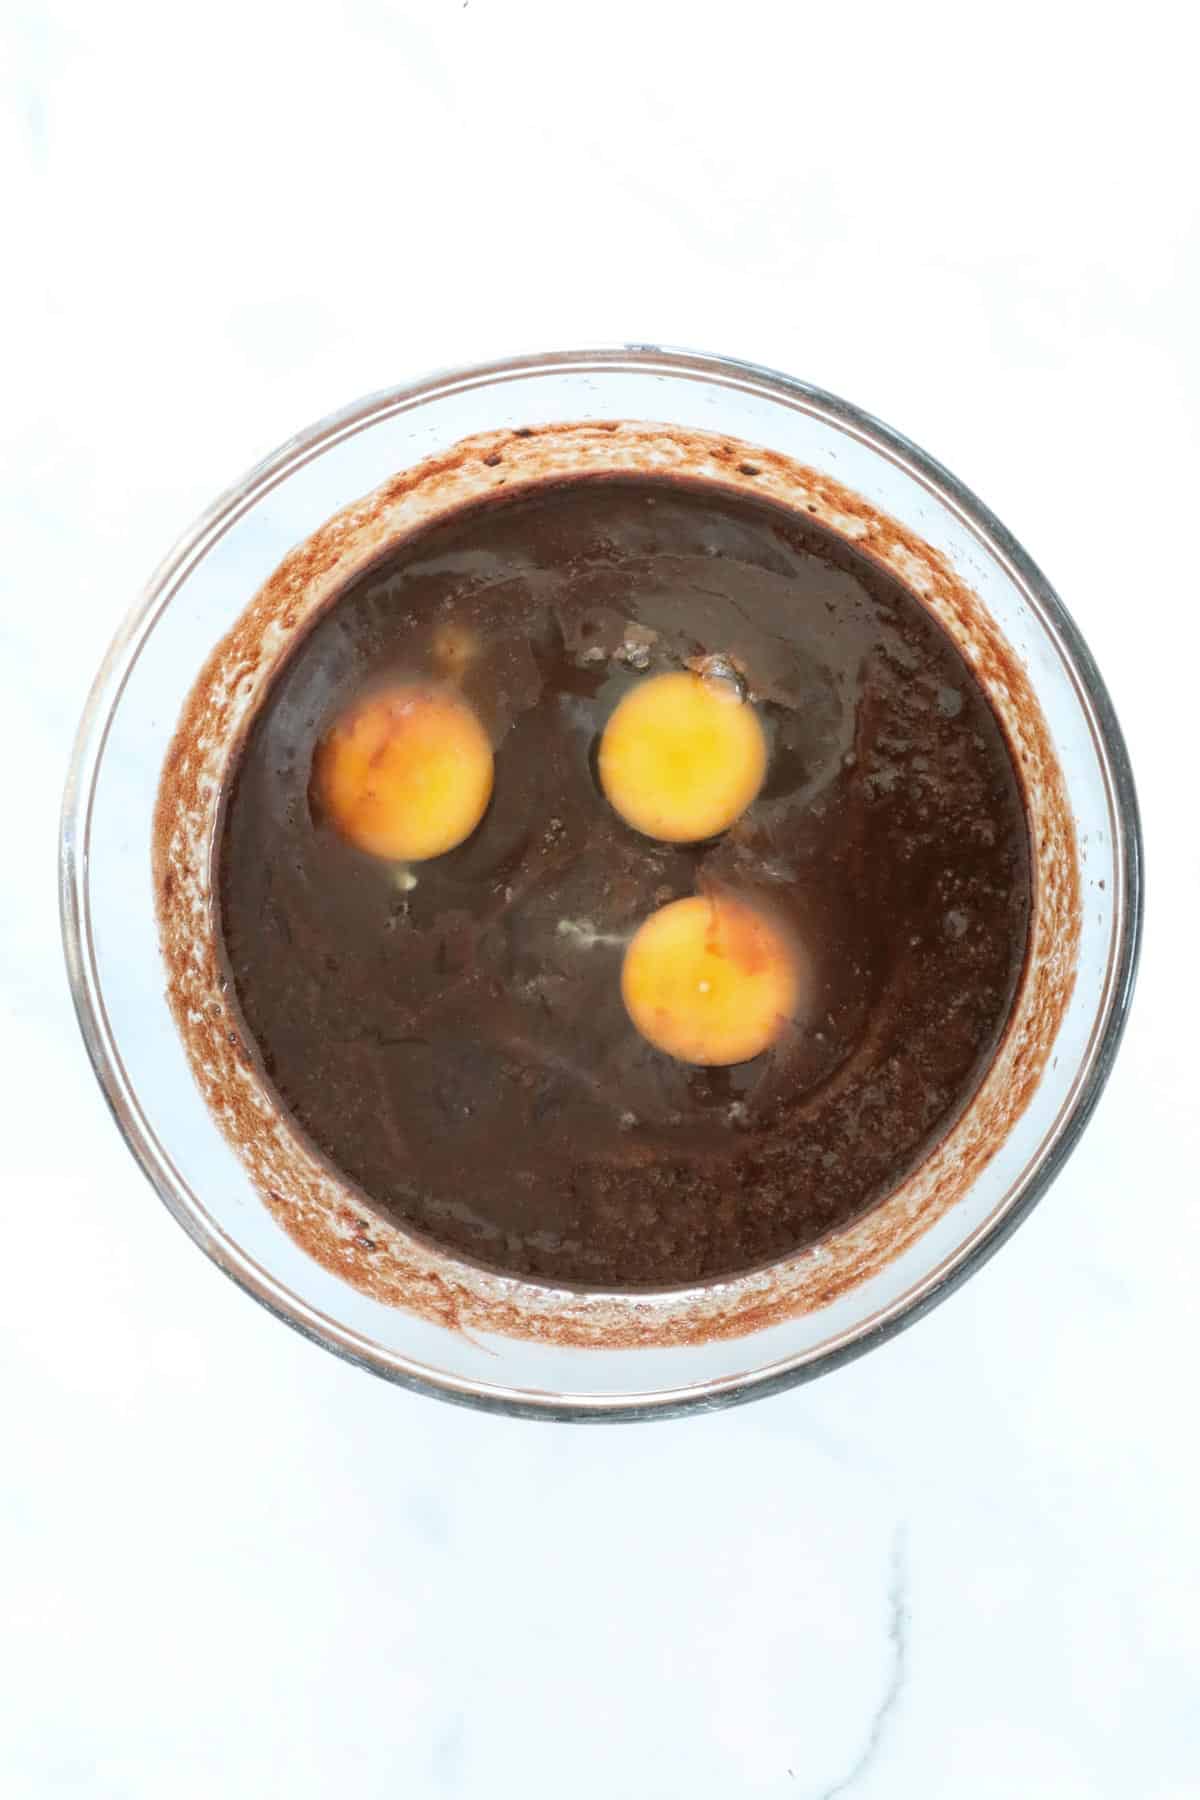
Step 5 - Add The Vanilla And Eggs
Add the vanilla extract and eggs, and whisk until combined.
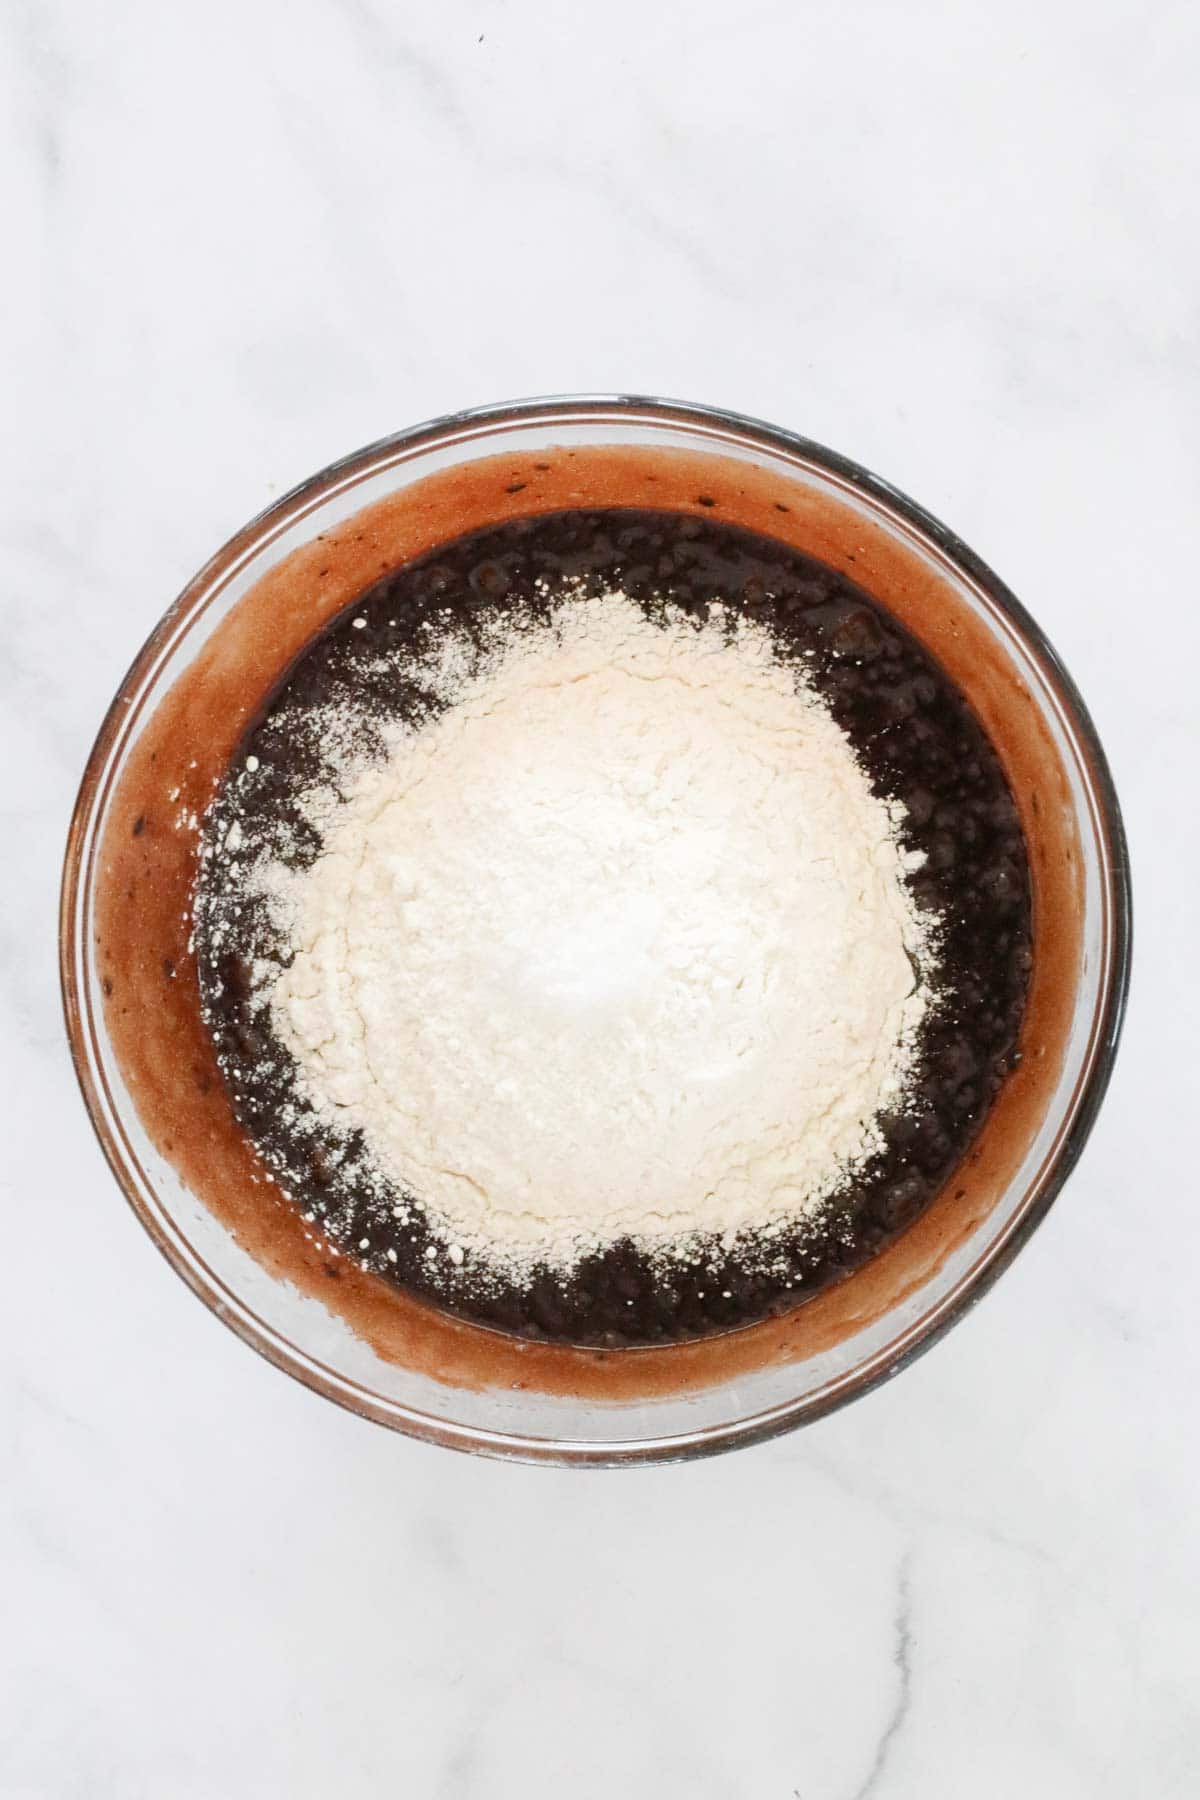
Step 6 - Stir In The Flour
Sift in the flour and gently fold through, taking care not to over-mix.
Step 7 - Bake
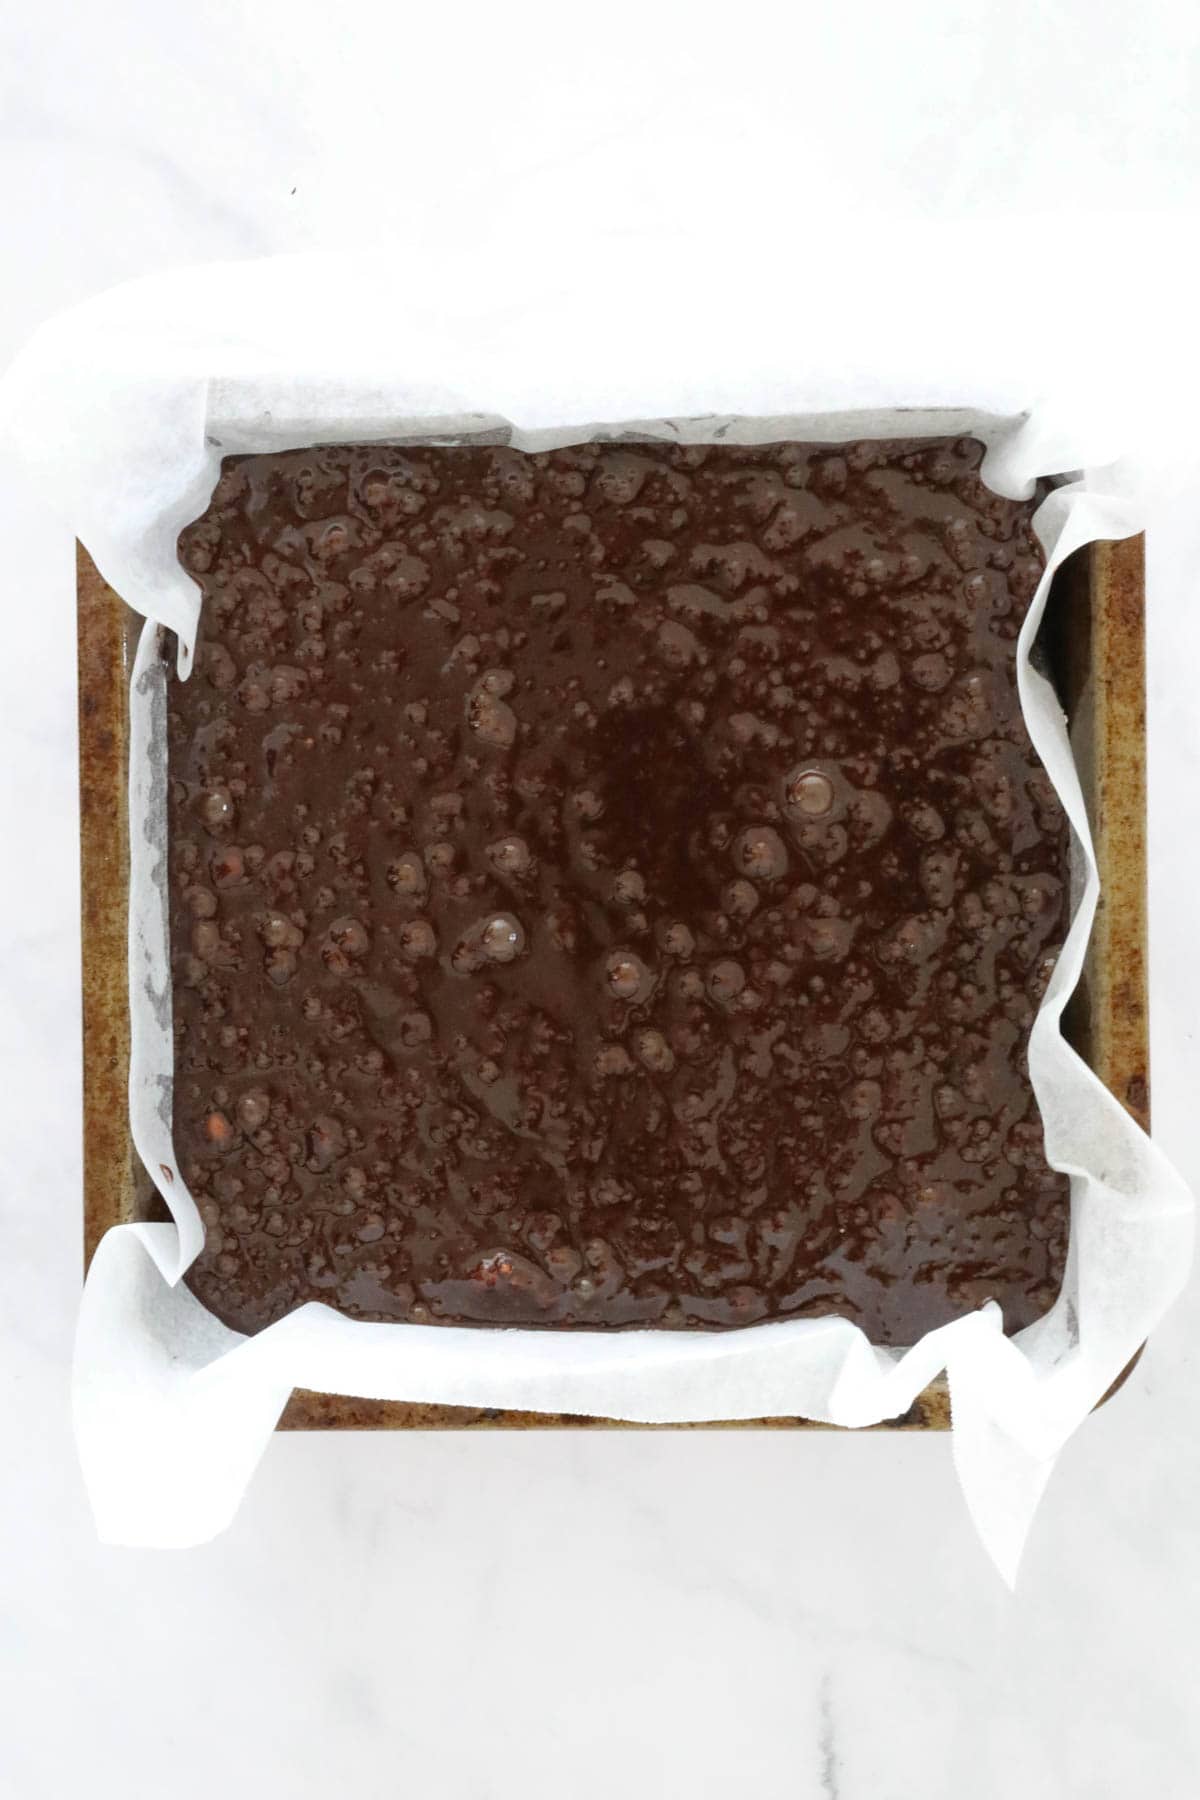
Pour the brownie mixture into the prepared tin.
Bake in the preheated oven until cooked to your liking (see Expert Tips below for cooking times for gooey or fudgy brownies).
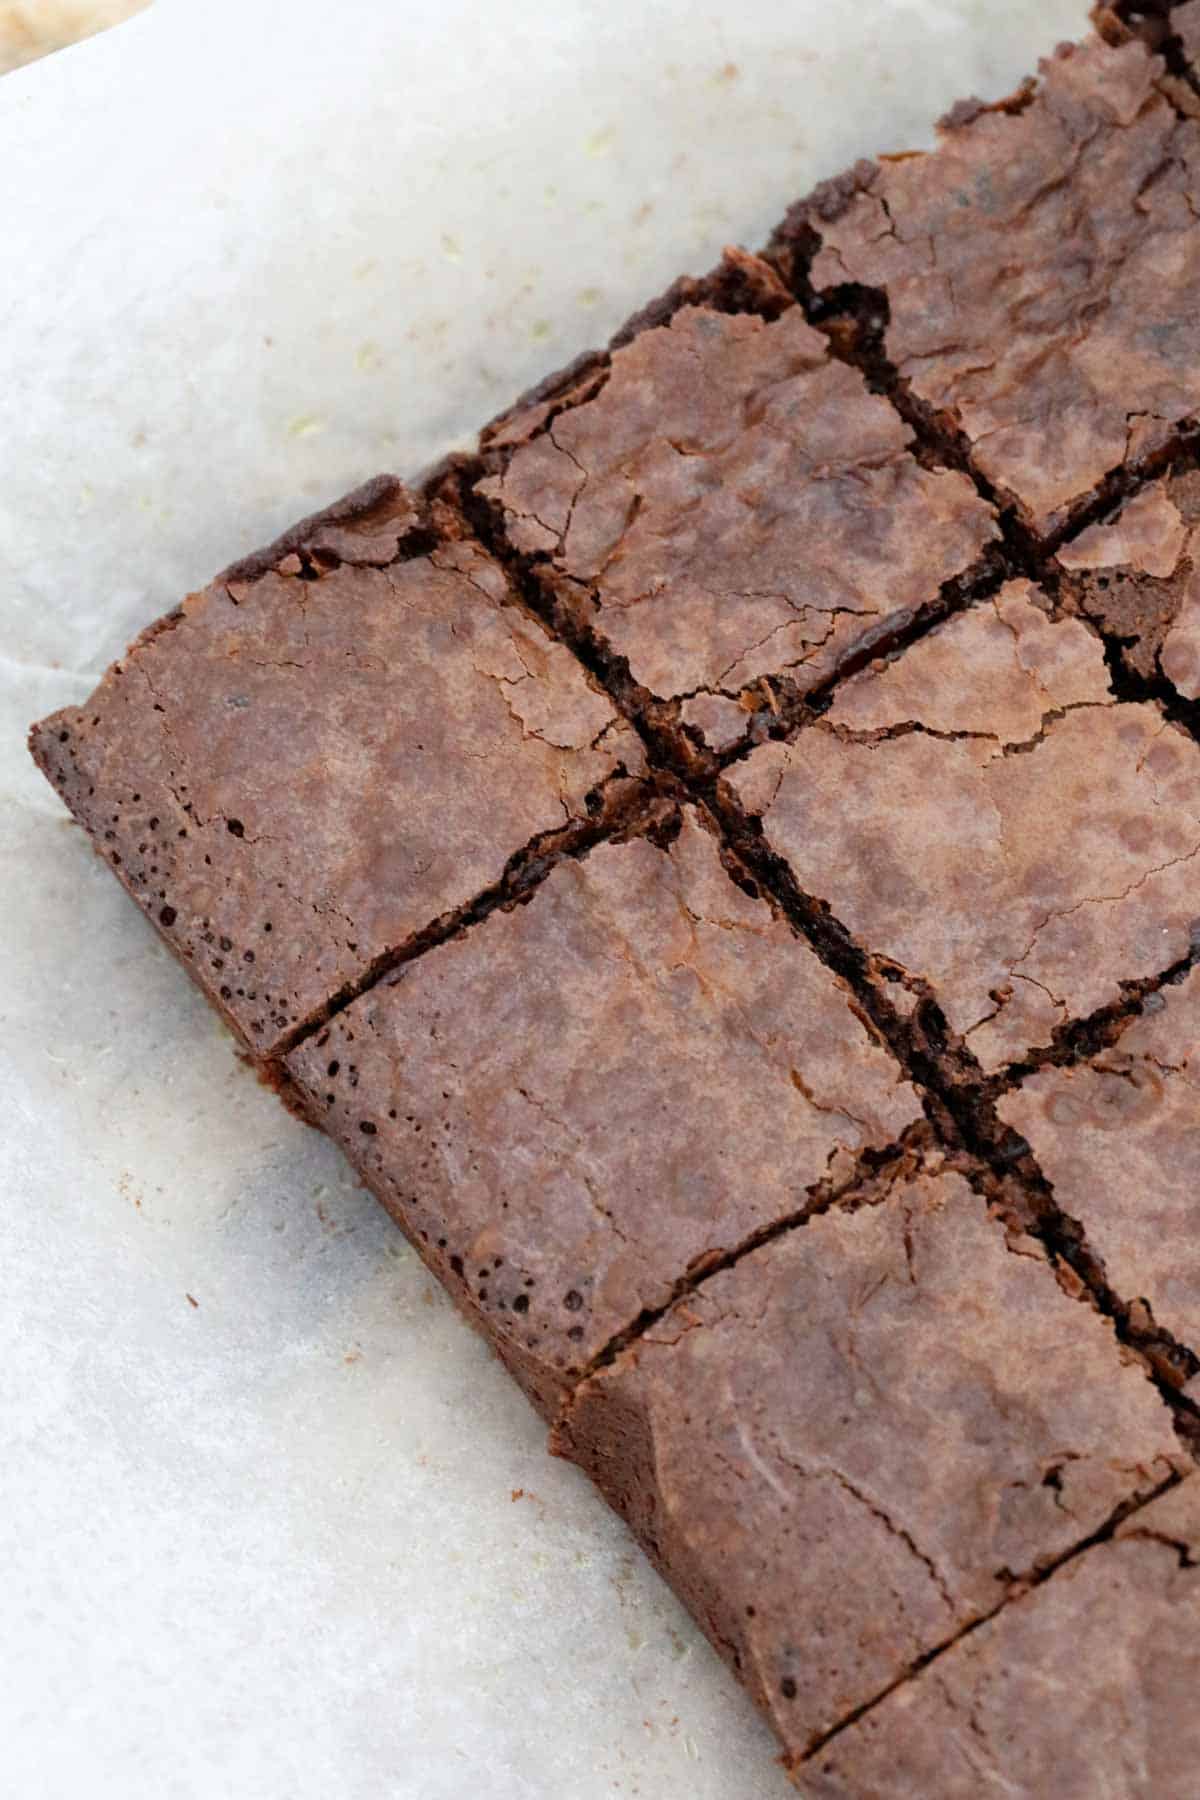
Leave in the tin to cool completely. Slice espresso brownies when cool.
Expert Tips
- Line your tin with baking paper/parchment paper. This will make it easier to remove espresso brownie from the tin later. Leave the edges over hanging slightly for convenience.
- Sift the plain flour before adding it to the batter.
- Don't overmix the batter once the flour has been added. Overbeating will add air, which will produce cakey brownies, rather than fudgy.
- Don't overbake! Brownies will continue to cook after they've been removed from the oven. So, it's best to remove them when they are slightly under cooked, rather than over cooked. All ovens differ slightly, so start to check them at the 20-minute mark and then in 5-minute intervals until they are ready.
- For fudgy/moist brownies, cook for 35 minutes and test with a toothpick which should come out with less thick mixture on it. The top should be flaky and set. Remove them from the oven when the sides have begun to shrink away from the tin but the centre is still gooey.
- For gooey brownies, cook for 30 minutes and test by inserting a toothpick into the centre for a second or two. If the toothpick is covered in thick (but not runny) chocolate mixture, then you will have gooey brownies.
- Cool before cutting - allow espresso brownies to cool in the tin before cutting into them. You will have neater slices if they are cut at room temperature.
- Serve the brownies - on their own, dusted with icing sugar or slather ganache or frosting over the top. You can also heat them and add a dollop of cream, or a big scoop of your favourite ice cream!
- Storage - store espresso brownies in an airtight container at room temperature, rather than the fridge, for up to 4 days.
FAQs
Absolutely! Allow the espresso brownies to cool completely then wrap well, and freeze for up to 3 months.
Insert a toothpick in the centre of the brownies, if it comes out with thick (not runny) batter the brownies will be gooey, if you want fudgy brownies, the toothpick should come out with few pieces of batter attached. If the toothpick is clean when removed, the brownies may be slightly overcooked.
No, it is best to store espresso brownies in an airtight container at room temperature. Placing brownies in the fridge causes them to dry out.
Related Recipes
Love brownies as much as we do? Here are some more of our favourite brownie recipes, perfect for a much-needed chocolate fix:


WANT EVEN MORE DELICIOUS RECIPES? Subscribe to my newsletter or follow along on Facebook or Instagram. And if you love baking, then please come and join my Facebook cooking club group or subscribe to my YouTube channel.

Espresso Brownies
Ingredients
- 225 g butter
- 2 tablespoon instant coffee granules
- 190 g (1 cup) dark chocolate melts
- 275 g (1 ¼ cups) caster sugar
- 25 g (¼ cup) cocoa powder
- pinch of salt
- 2 teaspoon vanilla extract or vanilla bean paste
- 3 eggs room temperature
- 150 g (1 cup) plain flour
Instructions
- Preheat oven to 160 degrees celsius (fan-forced) and line a 20cm square tin with baking paper. Set aside.
- Place the butter into a microwave-safe bowl. Heat for 1 minute (or until melted).If using a Thermomix: Place the butter into the Thermomix bowl. Melt for 4 minutes, 60 degrees, Speed 2, or until melted.
- Add the coffee granules and stir. Heat for 2-3 minutes, 50% power (stirring every 30 seconds). If using a Thermomix: Add the coffee granules and mix for 10 seconds, Speed 4. Scrape down the sides of the bowl and repeat for a further 10 seconds.
- Place the chocolate melts into the bowl with the butter and coffee and stir until they have almost melted. If using a Thermomix: Add the chocolate melts and mix for 2 minutes, 60 degrees, Speed 2.
- Allow to cool slightly.
- Add the sugar, cocoa powder and a pinch of salt into the bowl and stir to combine.If using a Thermomix: Add the sugar, cocoa powder and a pinch of salt and mix for 10 seconds, Speed 4. Scrape down the sides of the bowl and repeat for a further 5 seconds.
- Add the vanilla extract and the eggs and whisk until combined.If using a Thermomix: Add the vanilla extract and the eggs and mix for 10 seconds on Reverse, Speed 4. Scrape down the sides and repeat.
- Sift the plain flour and gently fold through.If using a Thermomix: Add the plain flour and mix for 5 seconds, Speed 4. Scrape the sides of the bowl and repeat.
- Pour the brownie mixture into the prepared tin.Bake for 30-35 minutes or until cooked through.
- Leave in the tin to cool completely.
Notes
- Line your tin with baking paper/parchment paper. This will make it easier to remove them from the tin later. Leave the edges over hanging slightly for convenience.
- Sift the plain flour before adding it to the batter.
- Don't overmix the batter once the flour has been added. Overbeating will add air, which will produce cakey brownies, rather than fudgy.
- Don't overbake! Brownies will continue to cook after they've been removed from the oven. So, it's best to remove them when they are slightly under cooked, rather than over cooked. All ovens differ slightly, so start to check them at the 20-minute mark and then in 5-minute intervals until they are ready.
- For fudgy/moist brownies, cook for 35 minutes and test with a toothpick which should come out with less thick mixture on it. The top should be flaky and set. Remove them from the oven when the sides have begun to shrink away from the tin but the centre is still gooey.
- For gooey brownies, cook for 30 minutes and test by inserting a toothpick into the centre for a second or two. If the toothpick is covered in thick (but not runny) chocolate mixture, then you will have gooey brownies.
- Cool before cutting - allow espresso brownies to cool in the tin before cutting into them. You will have neater slices if they are cut at room temperature.
- Serve the brownies - on their own, dusted with icing sugar or slather ganache or frosting over the top. You can also heat them and add a dollop of cream, or a big scoop of your favourite ice cream!
- Storage - store espresso brownies in an airtight container at room temperature for up to 4 days or freeze for up to 3 months.


Leave a Reply