

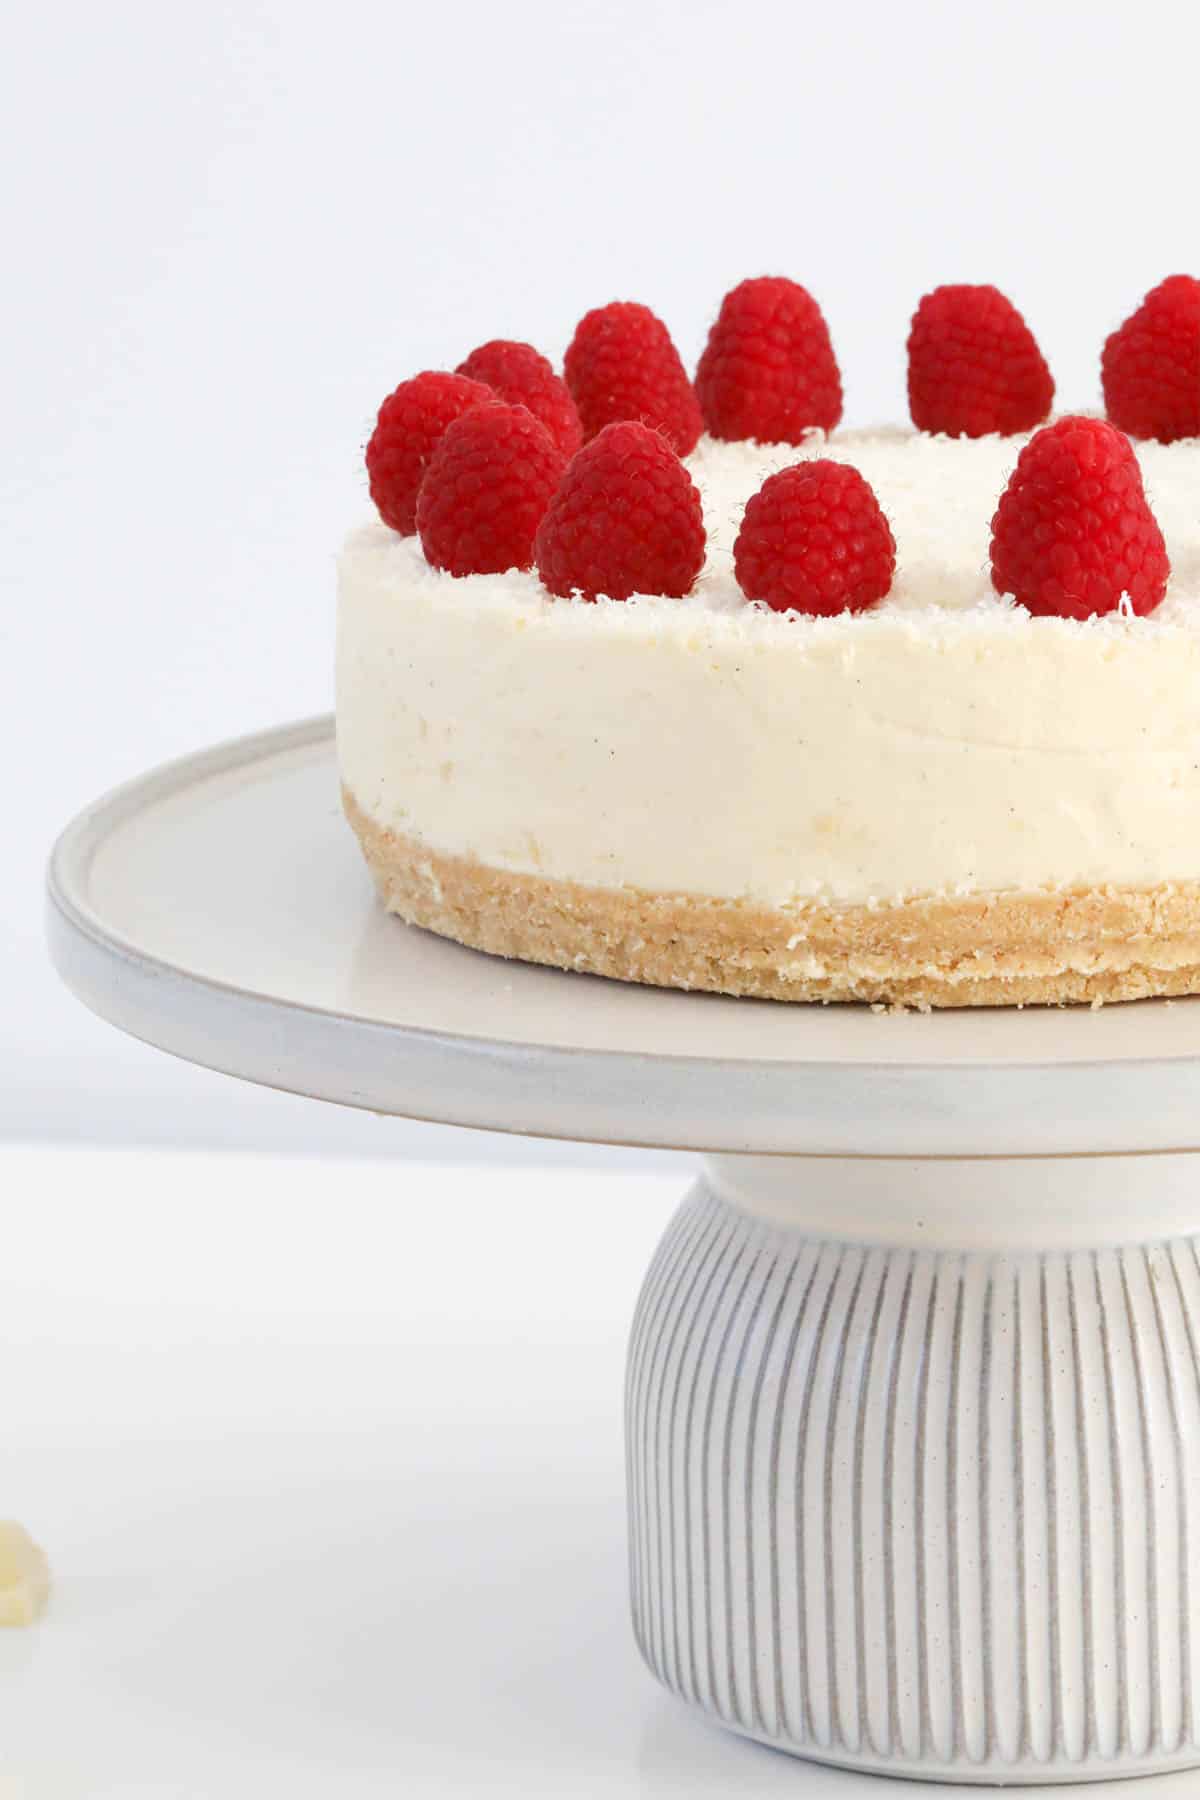
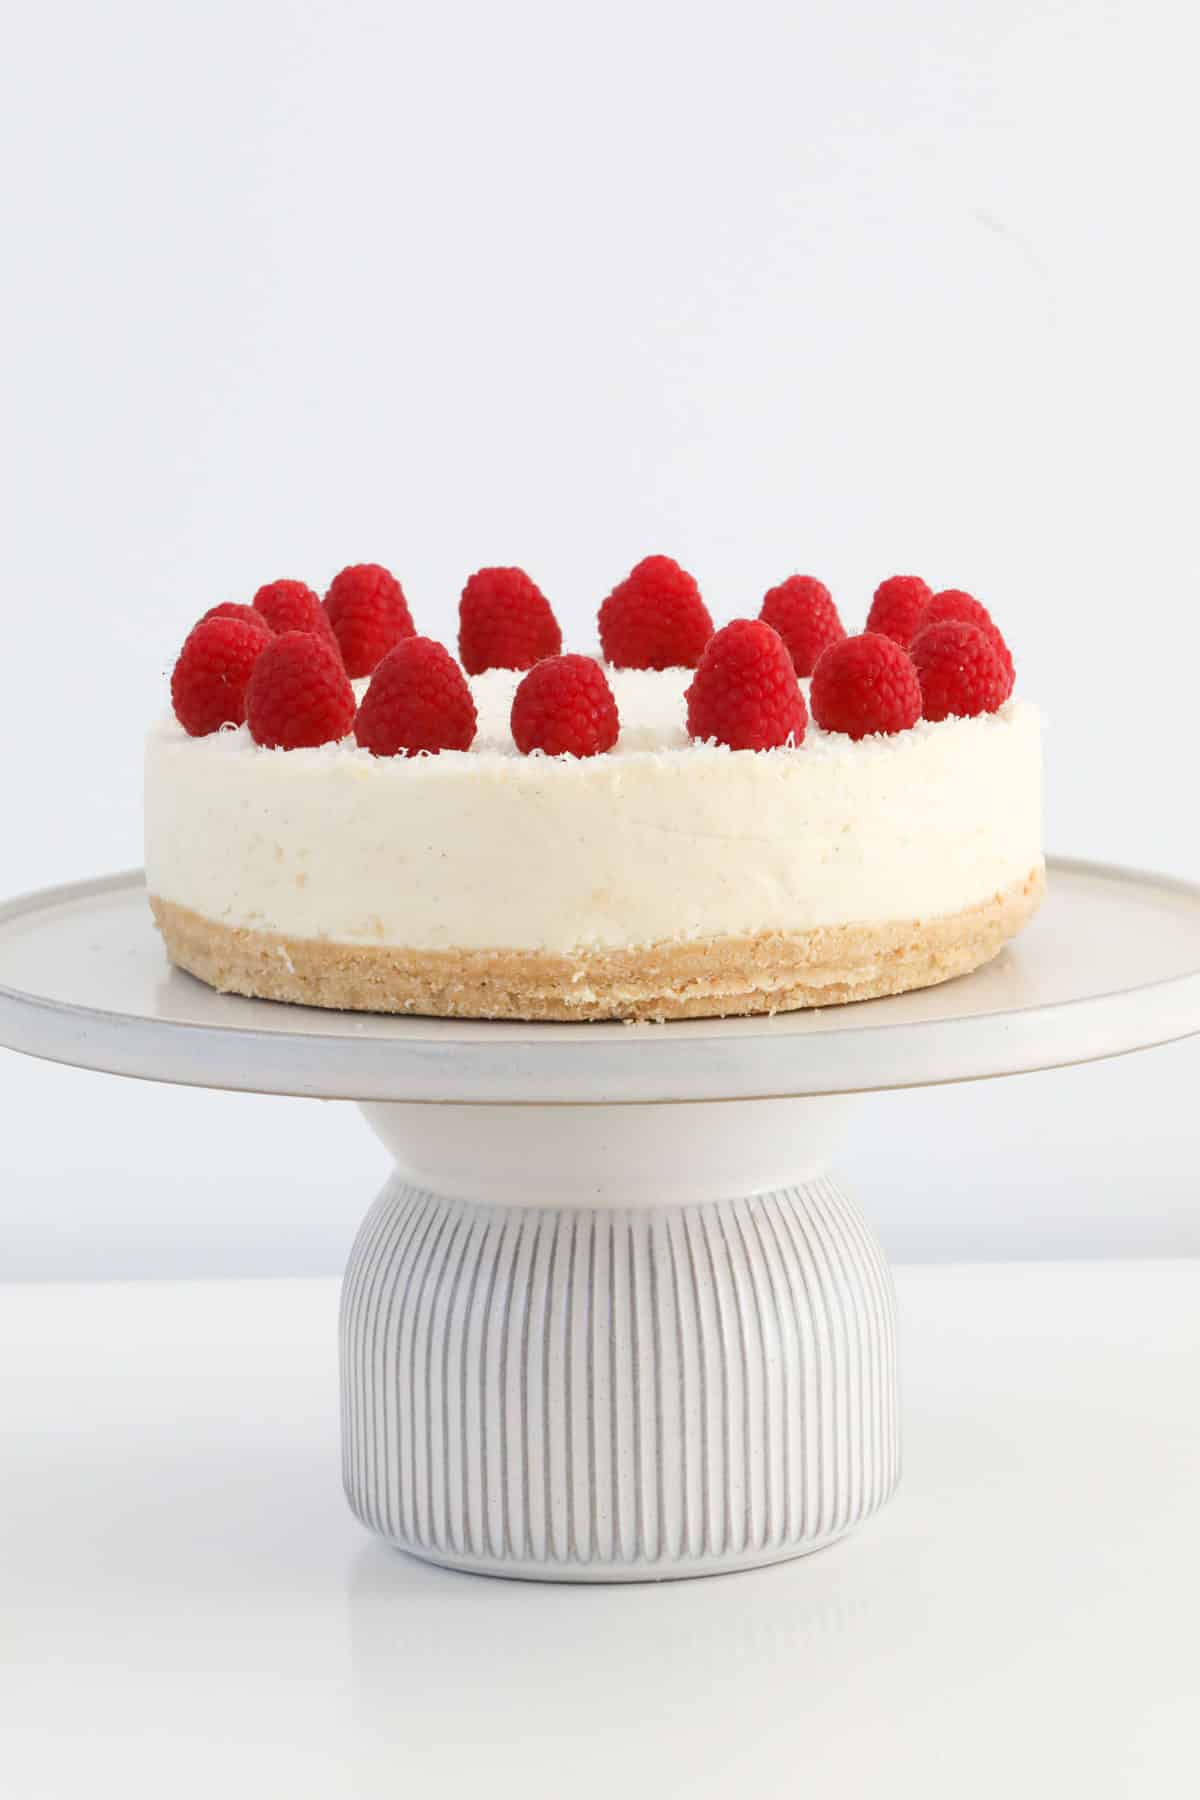
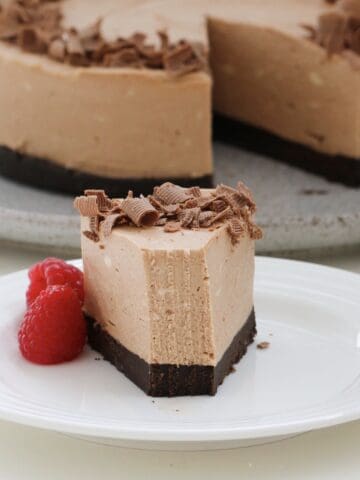
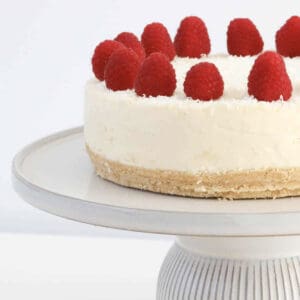
The ultimate no-bake white chocolate cheesecake - rich, creamy and silky smooth with a buttery biscuit base and a white chocolate filling that melts in your mouth. It's an easy show-stopper dessert that looks impressive but couldn't be simpler to make (no oven required!).
If you love a creamy, dreamy dessert like this, you might also enjoy my Classic Baked New York Cheesecake or my Tim Tam Cheesecake for a fun, bite-sized twist.
Made this white chocolate cheesecake a couple of times. Absolutely beautiful, best one I've made yet.
Thank you for your recipe!
- Janet
This white chocolate cheesecake is one of those recipes that never fails to wow a crowd - smooth, rich and decadent, but with just a handful of simple ingredients. It's the perfect make-ahead dessert for birthdays, dinner parties, or when you want something you can pull straight from the fridge and serve with zero stress.
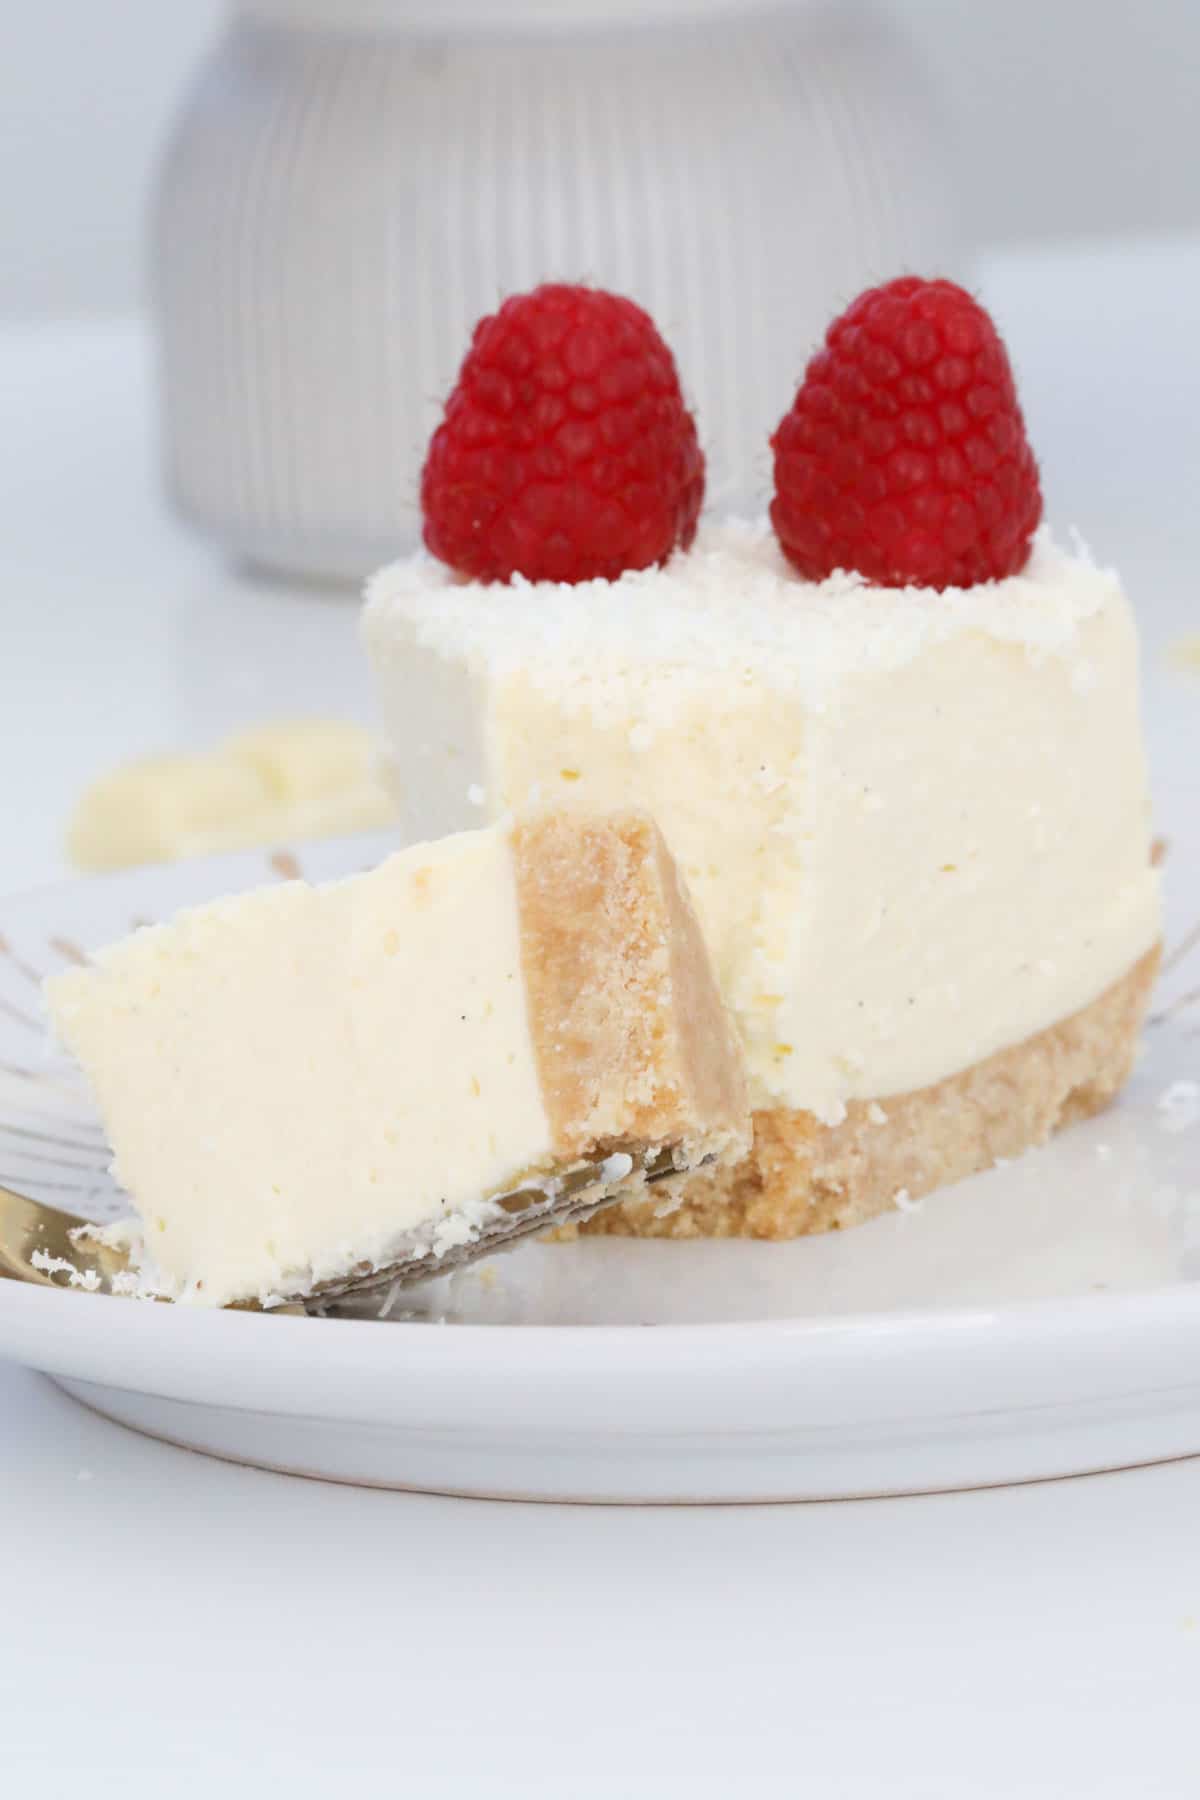
The buttery biscuit crust perfectly balances the creamy filling, and thanks to a bit of gelatine magic, it slices beautifully every time. I like to top mine with a scattering of fresh raspberries or a drizzle of homemade raspberry sauce or coulis, but it's just as delicious plain, letting the white chocolate shine.
If you love this one, don't miss my Biscoff Cheesecake or Caramilk Cheesecake - both no-bake crowd favourites!
Why You're Going To Love This Recipe
- No-bake magic! No oven, no fuss - just chill, slice and serve.
- Rich & creamy texture that's soft yet perfectly sliceable.
- Make-ahead friendly - prepare it the night before and forget the last-minute dessert panic.
- Impresses every time - looks fancy, but it's secretly foolproof.
- Perfect base for variations - add berries, swirls or chocolate curls to make it your own!
Jump to:
Cheesecake Ingredients
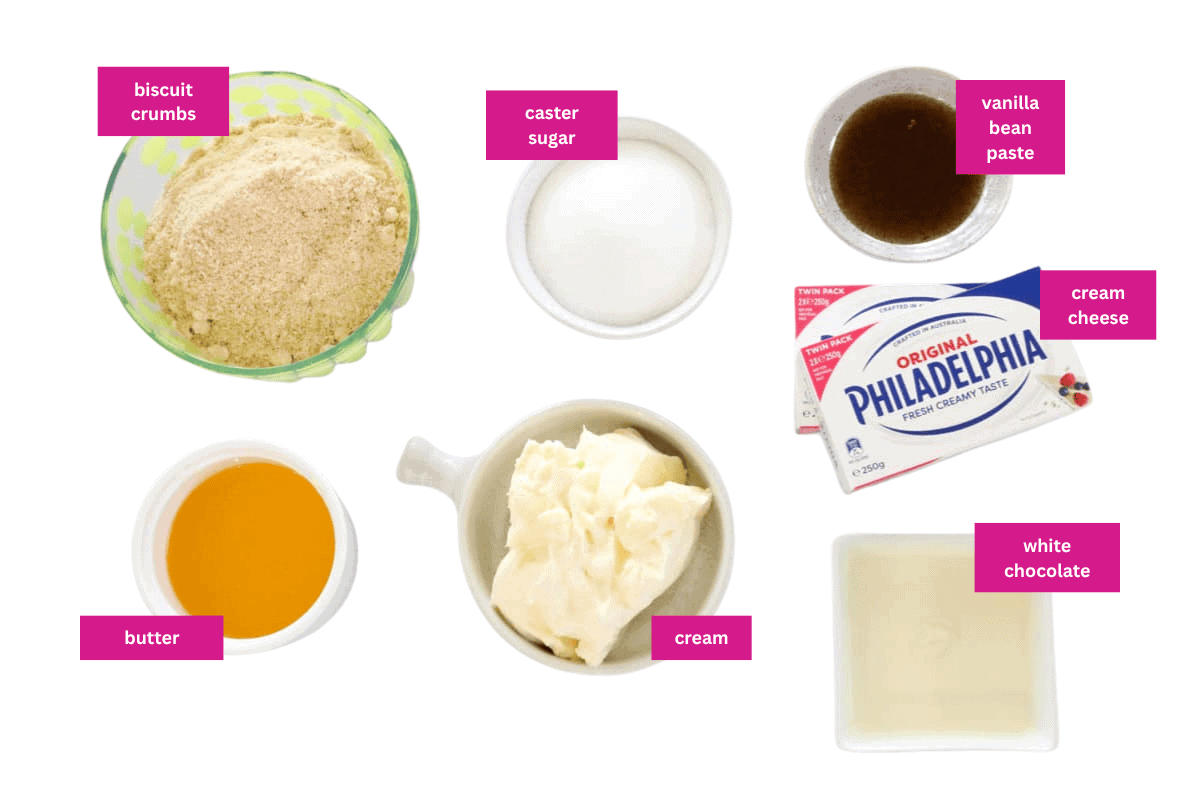
You'll only need a few pantry staples and fridge basics to whip up this creamy white chocolate cheesecake recipe.
(Here's what you'll need - and why)
- White chocolate - use a good-quality block chocolate (like Cadbury or Nestlé). Cheaper melts can be grainy and won't give that silky finish.
- Gelatine powder - the key to that perfect, set-but-creamy texture. Make sure it's completely dissolved before adding it to your filling.
- Cream cheese - always use full-fat (not light!) for a smooth and firm set. Room temperature cream cheese mixes much more easily.
- Vanilla bean paste - adds a gorgeous depth of flavour that pairs beautifully with the white chocolate, making a decadent white chocolate cheesecake filling.
- Plain sweet biscuits - I love using Arnotts Scotch Finger or Nice biscuits for a crunchy, buttery base, but any plain sweet biscuit (such as digestive biscuits) will do.
Variations
Give your cheesecake a personal twist with one of these easy variations:
- Caramilk Cheesecake: swap the white chocolate for Caramilk for a rich, caramel-choc flavour.
- White Chocolate & Raspberry Cheesecake: fold a handful of fresh or frozen raspberries through the filling before chilling.
- White Chocolate & Lemon Cheesecake: add 2 teaspoon finely grated lemon zest and a squeeze of lemon juice for a bright, zesty kick.
- Gluten-Free Option: use gluten-free biscuits for the base - the rest of the recipe is naturally GF.
Need To Substitute An Ingredient?
Ask ChatGPT for suggestions on how to substitute the particular ingredient:
How To Make White Chocolate Cheesecake
These simple steps are all you need for a smooth, luscious cheesecake - no baking required!
Note: Please scroll to the recipe card at the bottom of the post for ingredient quantities and the full detailed method.
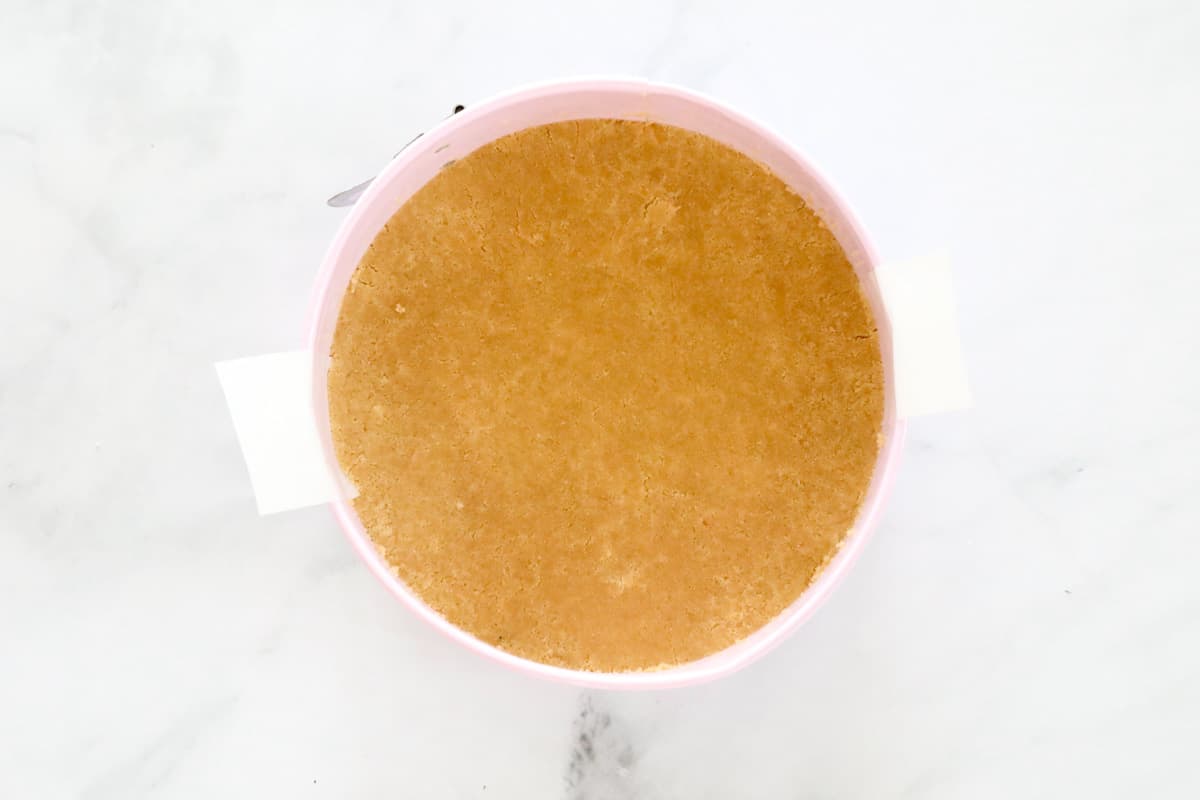
- Step 1: Prepare the base: Crush cookies finely into crumbs, mix with melted butter and press firmly into a lined 23cm springform pan. Refrigerate while you make the filling.
- Step 2: Melt the chocolate: Microwave on 50% power in 30-second bursts, stirring each time until smooth. Set aside to cool slightly.
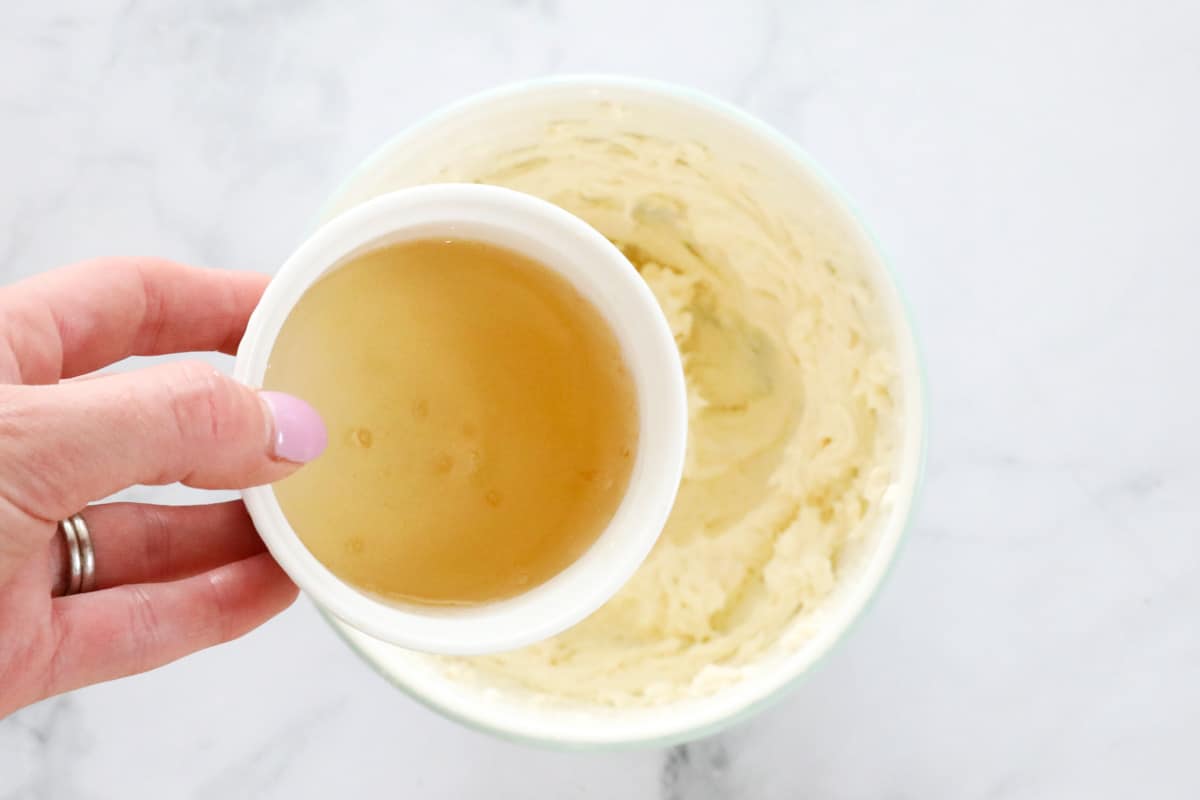
- Step 3: Dissolve gelatine: Sprinkle gelatine over ¼ cup boiling water and stir until fully dissolved. Allow to cool to room temperature.
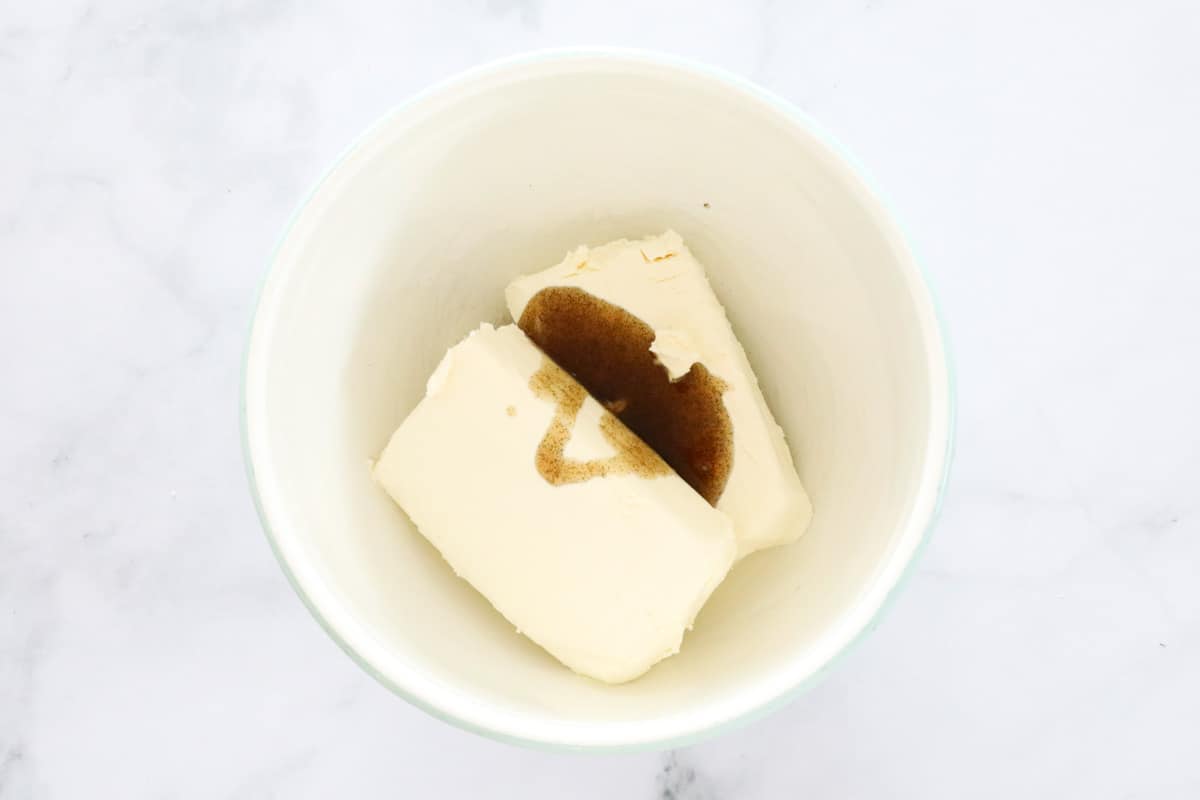
- Step 4: Make the filling: In a large bowl, beat cream cheese, caster sugar and vanilla until smooth. Add the cooled gelatine to the cream cheese mixture and mix until combined.
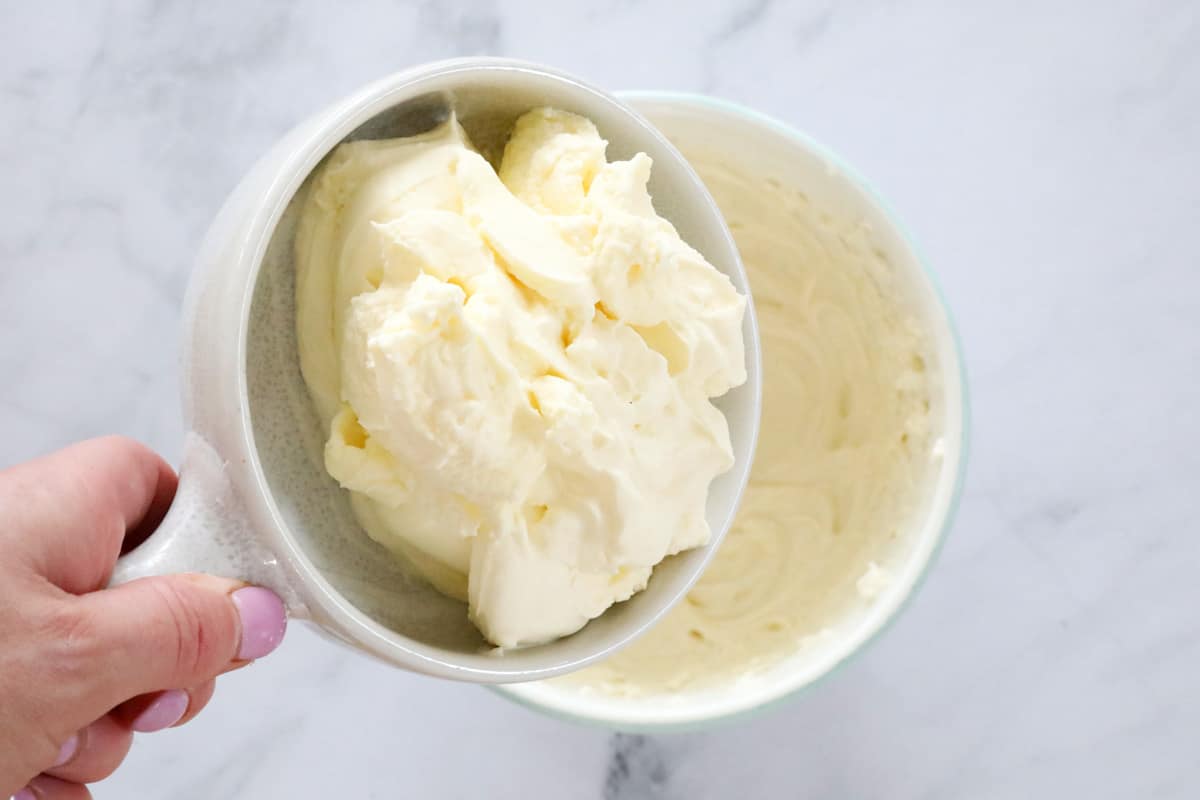
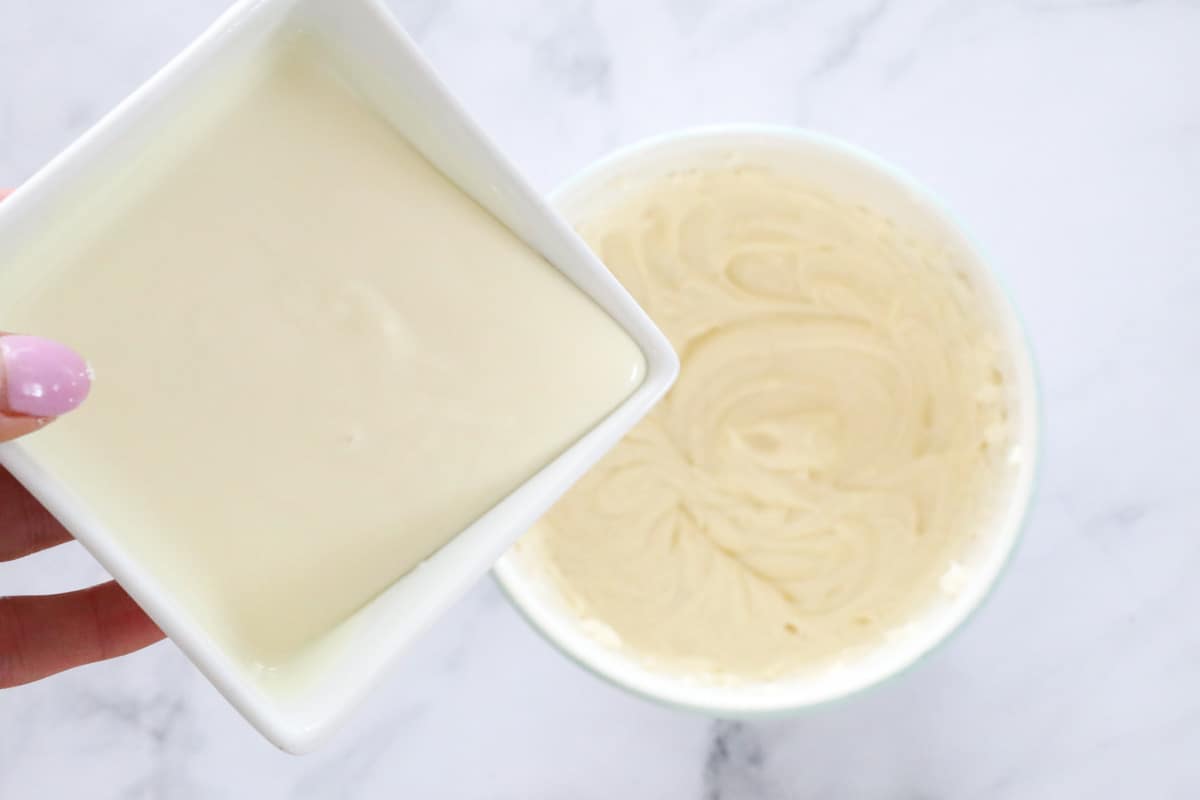
- Step 5: Combine: Fold in melted white chocolate, then gently fold through lightly whipped cream.
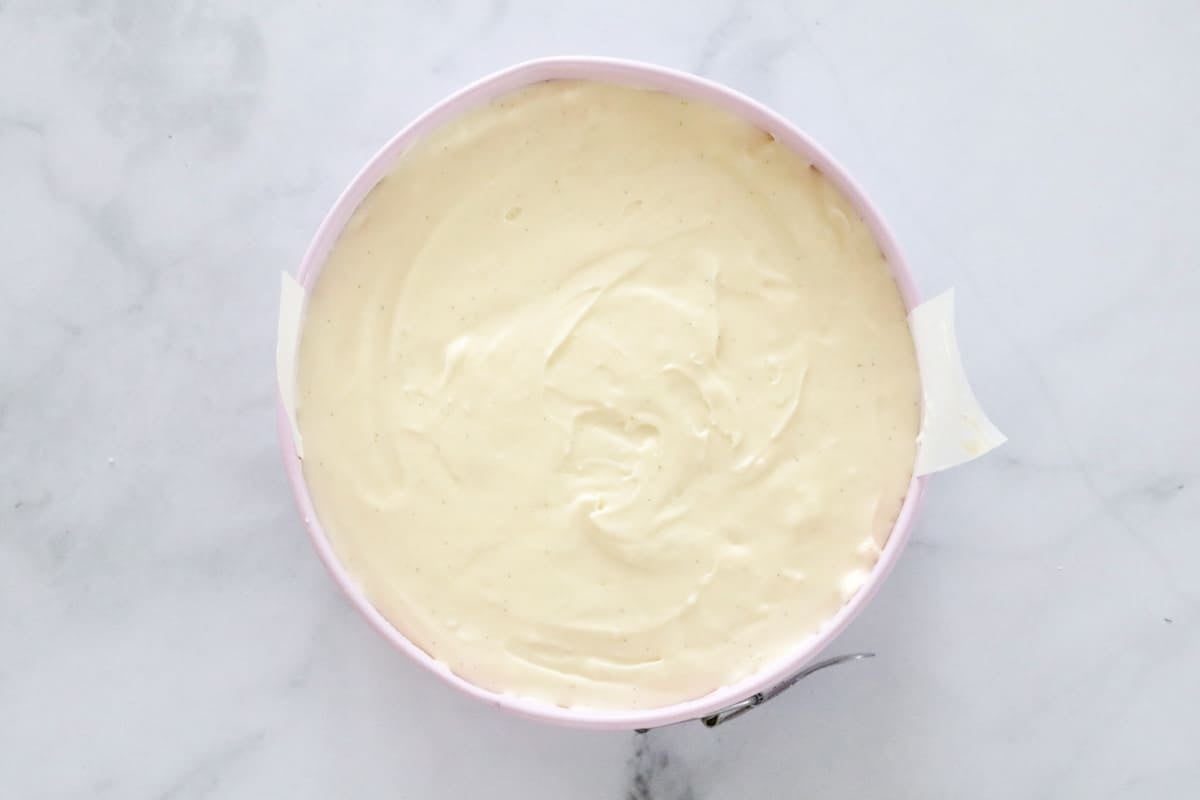
- Step 6: Chill: Spoon the cheesecake batter over the chilled base, smooth the top and refrigerate for at least 4 hours (overnight is best!).
Decorate: Finish with grated white chocolate and fresh raspberries before serving.
Top Tip
For the creamiest texture and perfect consistency, make sure all your ingredients are at room temperature before you start mixing - cold ingredients can cause lumps!
Recipe Tips
- Use a spring-form tin for easy removal - run a knife around the edge before unclipping.
- Cool the gelatine and chocolate before adding, so they don't seize or melt the mixture.
- Don't use low-fat products - they won't set properly and the texture won't be creamy.
- Make ahead: This cheesecake can be made up to 24 hours in advance - ideal for entertaining.
- Clean slices: Dip your knife in hot water and wipe between cuts for picture-perfect slices.
- Storage: Store in an airtight container in the fridge for up to 4-5 days.
- Freezing: Freeze whole or sliced portions (well wrapped) for up to 3 months. Thaw in the fridge overnight before serving.
White Chocolate Cheesecake FAQs
Gelatine helps the cheesecake set properly. You can skip it, but the filling will be softer and won't slice as neatly.
Always bring your cream cheese to room temperature before beating - cold cream cheese is the number one cause of lumps.
You can, but I recommend using white chocolate melts or a block of good-quality cooking chocolate instead. They melt more smoothly and give a creamier texture, while many white chocolate chips contain stabilisers that can make the mixture grainy or thick.
Absolutely! Divide the mixture between muffin tins lined with paper cases and chill for 2-3 hours. Perfect for parties or portion control!
More No-Bake Cheesecake Recipes
If you love this white chocolate cheesecake, try these other irresistible cheesecake recipes next:

WANT EVEN MORE DELICIOUS RECIPES? Subscribe to my newsletter or follow along on Facebook or Instagram. And if you love baking, then please come and join my Facebook cooking club group or subscribe to my YouTube channel.
White Chocolate Cheesecake
Ingredients
- 250 g plain sweet biscuits like Arnotts Scotch Finger or Nice
- 125 g butter melted
- 240 g (1 cup) cream lightly whipped
- 200 g white chocolate
- 2 teaspoon gelatine dissolved in ¼ cup boiling water, cooled
- 500 g cream cheese softened
- 1 teaspoon vanilla bean paste optional, or vanilla extract
- 150 g (¾ cup) caster sugar superfine
- 50 g white chocolate grated, to decorate (optional)
- fresh raspberries to serve (optional)
Instructions
Conventional Method
- To ensure a smooth cheesecake, ensure all ingredients are at room temperature before starting.
- Grease and line the base and sides of a 23cm spring-form pan with baking paper and set aside.
- Finely crush the biscuits in a food processor and place into a bowl.
- Add the melted butter and mix until well combined.
- Press the mixture firmly into the base of the pan and place into the fridge.
- Whip cream and set aside.
- Melt the white chocolate in a microwave at 50% power in 30 second bursts, and then set aside to cool slightly.
- Pour ¼ cup of boiling water into a cup, sprinkle over the gelatine and stir until dissolved. Allow to cool.
- Beat the cream cheese, vanilla bean paste and caster sugar until smooth and creamy.
- Add the cooled, dissolved gelatine to the mix and beat until well combined.
- Fold through the melted white chocolate and the whipped cream.
- Spoon the mixture into the prepared tin. Spread out evenly with a spoon.
- Place the cheesecake into the fridge to set for a minimum of 4 hours (for best results, leave in the fridge overnight before cutting).
- Decorate with grated white chocolate and fresh raspberries.
Thermomix Method
- To ensure a smooth cheesecake, ensure all ingredients are at room temperature before starting.
- Grease and line the base and sides of a 23cm spring-form pan with baking paper and set aside.
- Melt butter in the TM bowl for 2 minutes, 100 degrees, Speed 1. Add the biscuits and crush for 10 seconds, Speed 10. Scrape down the sides of the bowl and repeat until well combined.
- Press the mixture firmly into the base of the pan and place into the fridge.
- Whip cream in a clean, dry TM bowl on Speed 3.5 until lightly whipped (the time it takes will depend on the freshness of the cream - it can be anywhere between 10 seconds and 2 minutes!!) Set the cream aside in a separate bowl.
- Place the white chocolate into the TM bowl and melt for 3 minutes on 50 degrees, Speed 2. Set aside in a bowl to cool slightly.
- Pour ¼ cup of boiling water into a cup, sprinkle over the gelatine and stir until dissolved. Allow to cool.
- Beat the cream cheese, vanilla bean paste and caster sugar in a clean and dry TM bowl for 30 seconds on Speed 5. Scrape down the sides with a spatula and repeat until smooth and creamy.
- Add the cooled, dissolved gelatine to the mix and mix for 30 seconds on Speed 5.
- Fold through the melted white chocolate and the whipped cream with the spatula.
- Spoon the mixture into the prepared tin. Spread out evenly with a spoon.
- Place the cheesecake into the fridge to set for a minimum of 4 hours (for best results, leave in the fridge overnight before cutting).
- Decorate with grated white chocolate and fresh raspberries.
Notes
- Use a spring-form tin for easy removal - run a knife around the edge before unclipping.
- For the creamiest texture, make sure all your ingredients are at room temperature before you start mixing - cold ingredients can cause lumps!
- Cool the gelatine and chocolate before adding, so they don't seize or melt the mixture.
- Don't use low-fat products - they won't set properly and the texture won't be creamy.
- Make ahead: This cheesecake can be made up to 24 hours in advance - ideal for entertaining.
- Clean slices: Dip your knife in hot water and wipe between cuts for picture-perfect slices.
- Storage: Store in an airtight container in the fridge for up to 4-5 days.
- Freezing: Freeze whole or sliced portions (well wrapped) for up to 3 months. Thaw in the fridge overnight before serving.


Janet says
Made this white chocolate cheese cake a couple time absolutely beautiful best one iv made yet
Thankyou for your receipe
Janet
Lucy says
Thank you so much!