

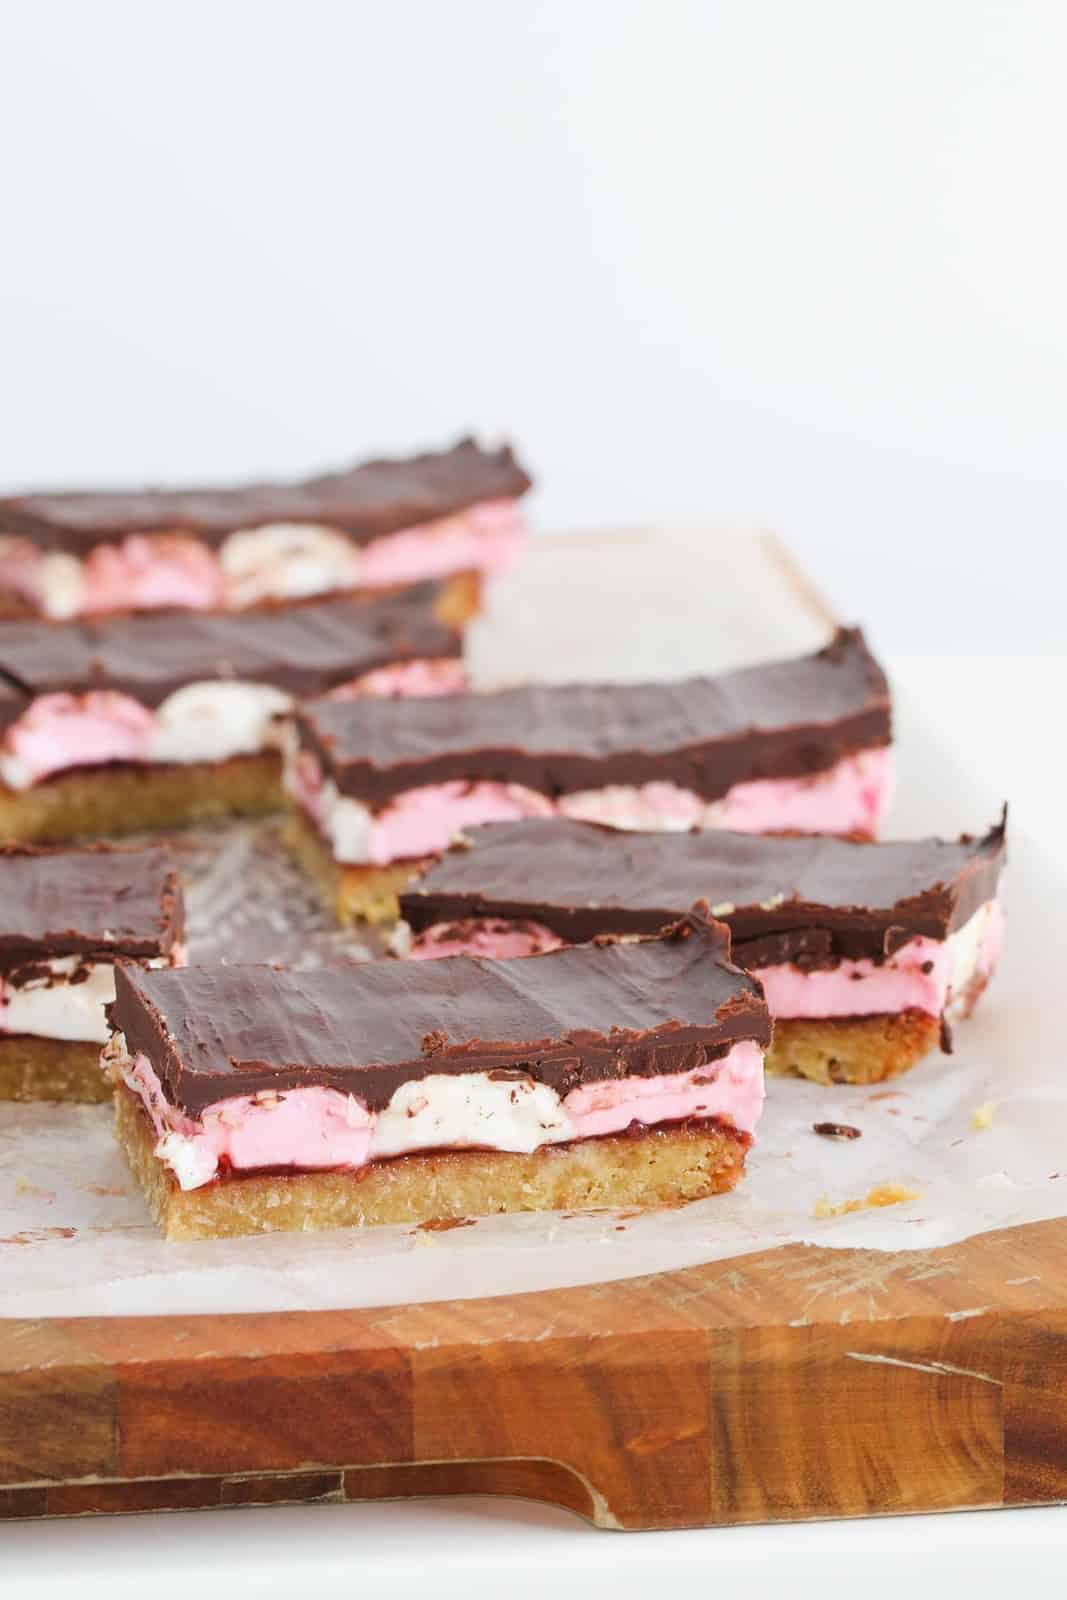
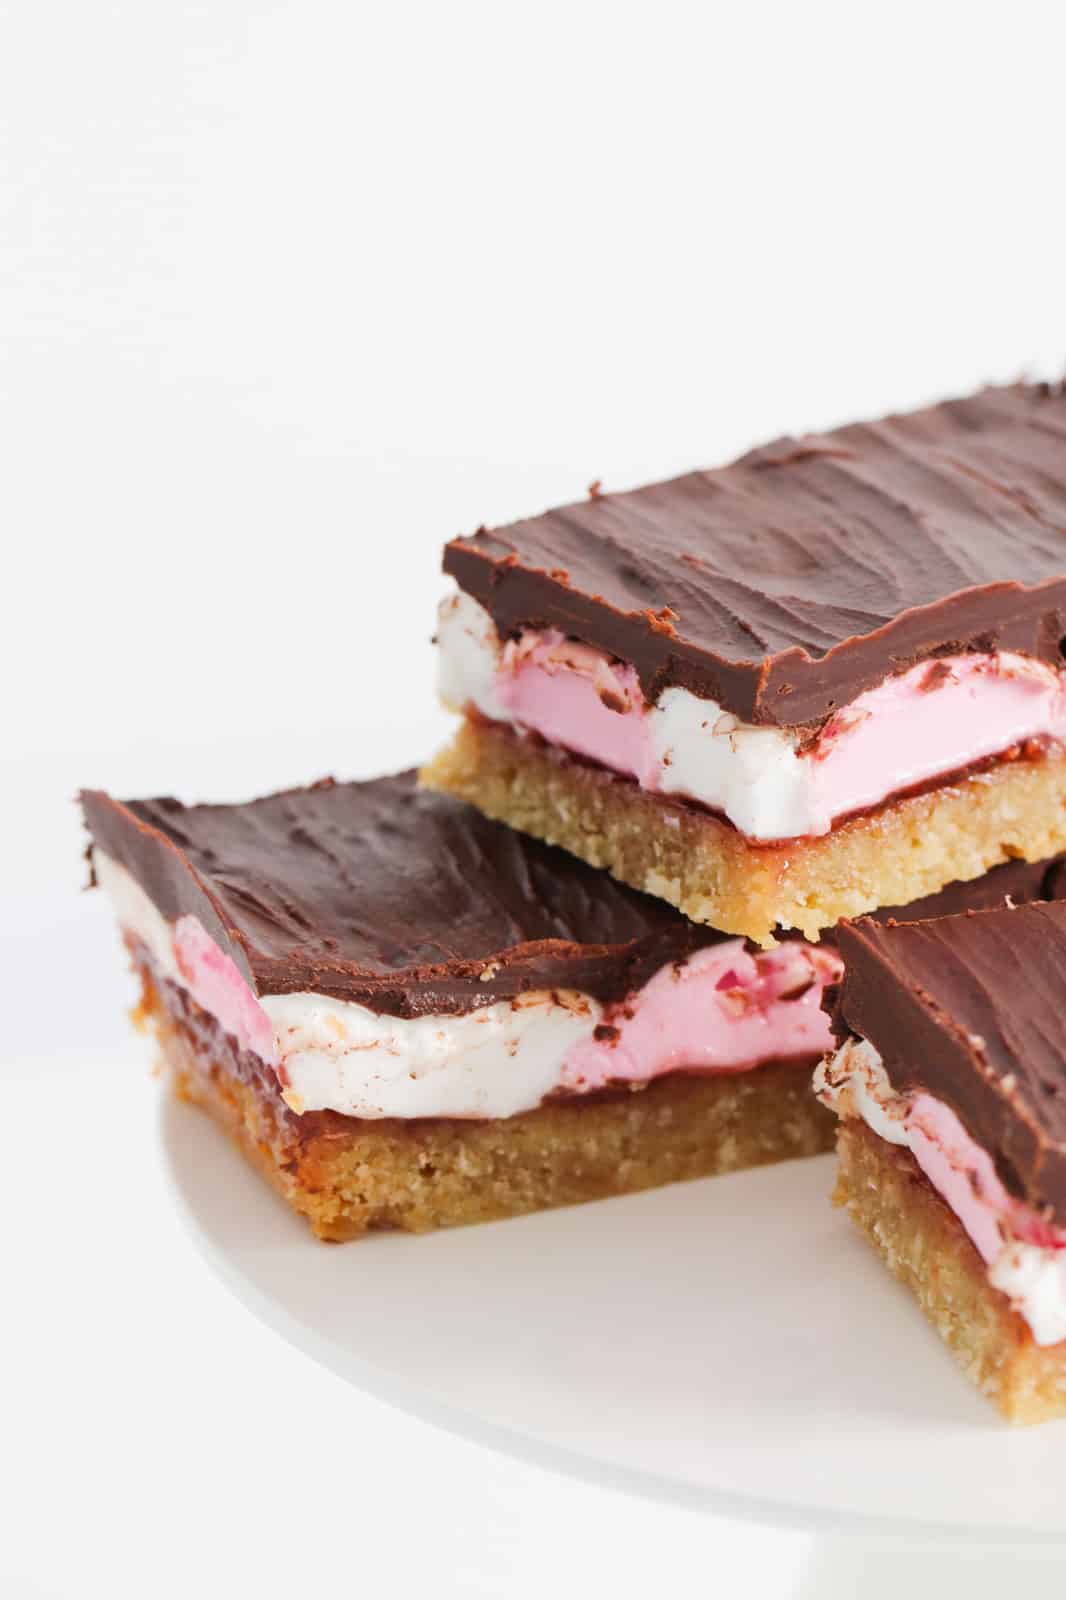
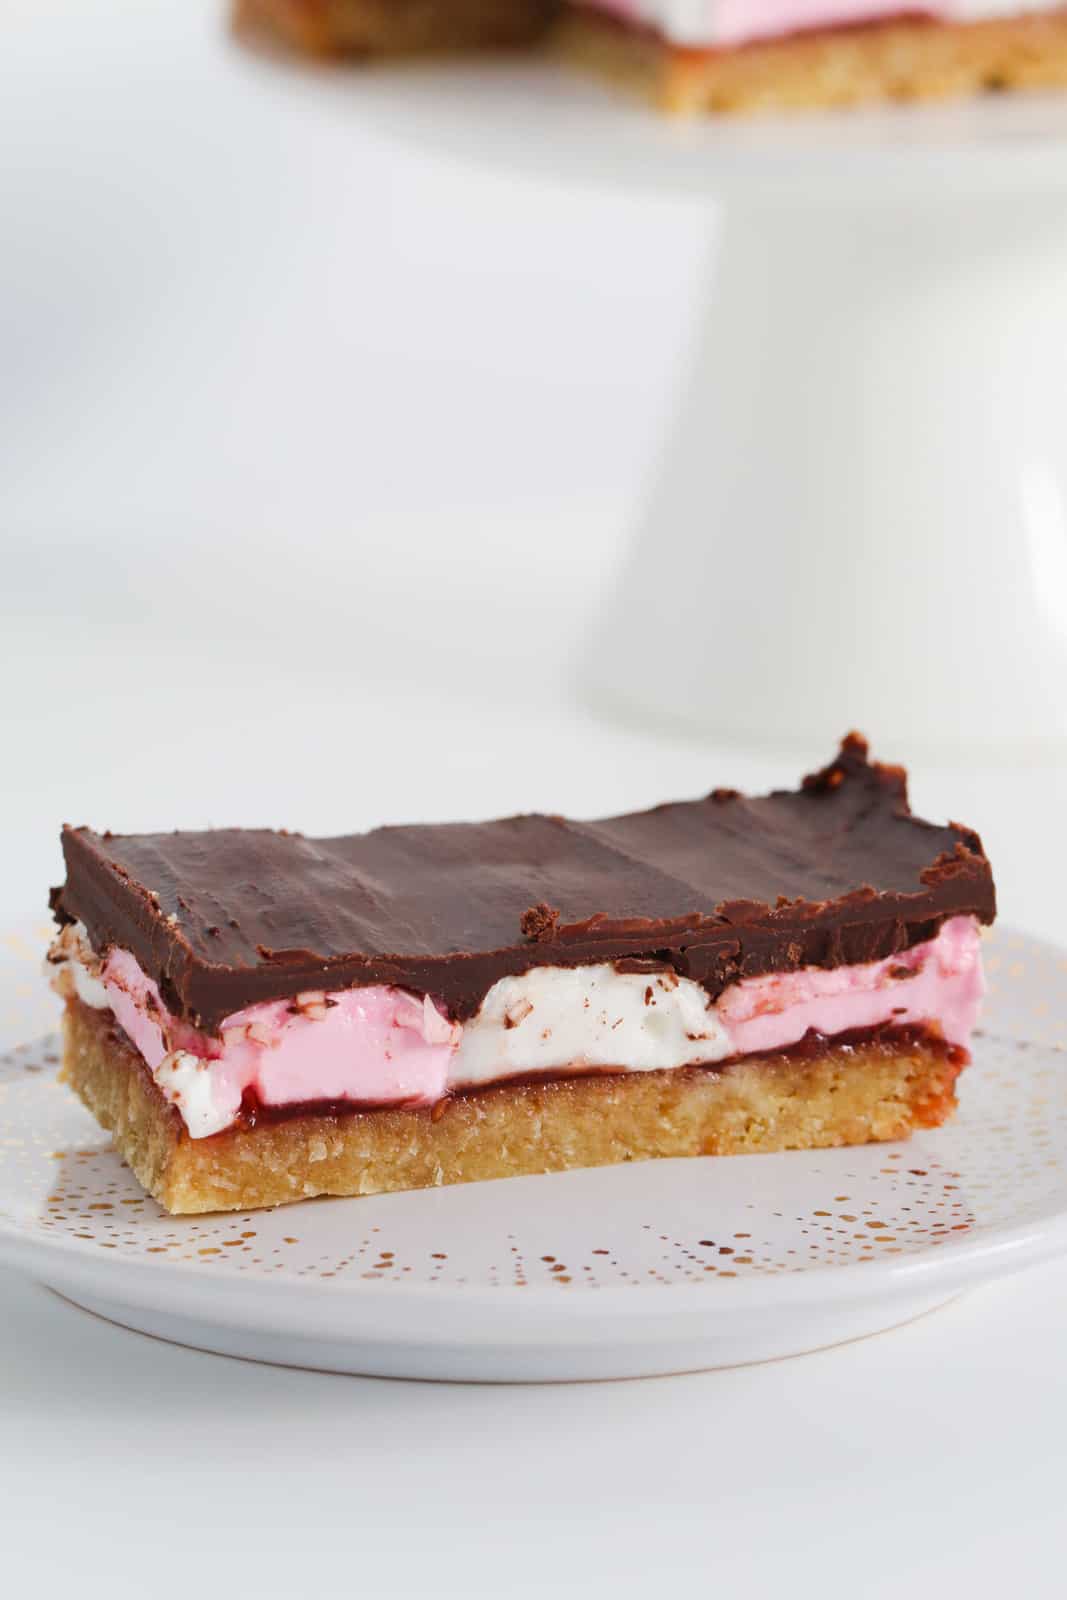
This simple Marshmallow Slice tastes just like a classic Australian Wagon Wheel biscuit… but as a whole delicious slice! A crunchy biscuit base topped with raspberry jam, marshmallows and chocolate, makes this sweet slice a favourite at birthday parties, bake sales and fetes.

There's nothing I love more than recreating iconic Australian foods in my baking recipes.
Just like my Iced Vovo Tarts, Microwave Tim Tam and Milo Fudge or White Chocolate Tim Tam Balls, this marshmallow slice recipe stays true to the classic Australian biscuit flavours, but changes things up with a fun slice twist!
Wagon Wheels - A Classic Australian Treat
Wagon Wheels are a classic Australian snack that were first made in 1948. Now produced by Arnott's they are made up of marshmallow and raspberry jam, sandwiched between two biscuits and covered in chocolate!
They are shaped a little like the wheel of an old fashioned wagon... hence the name!

Why You Will Love This Slice
- A simple base: Forget making an extra trip to the supermarket, this recipe uses pantry staples like flour, butter, brown sugar and coconut.
- Quick and easy: Probably the only thing you need to purchase is store bought marshmallows - perfect for whipping up an impressive looking slice in no time!
- Flavour Packed - The layers of biscuit, raspberry jam, sweet marshmallows and chocolate are a classic combination and absolutely bursting with deliciousness!
What You Need
This marshmallow slice is made almost entirely from pantry staples, making it a budget-friendly option that everyone will love (especially the kids!)
Note: Scroll to the recipe card at the bottom for the ingredients quantities and full detailed method.
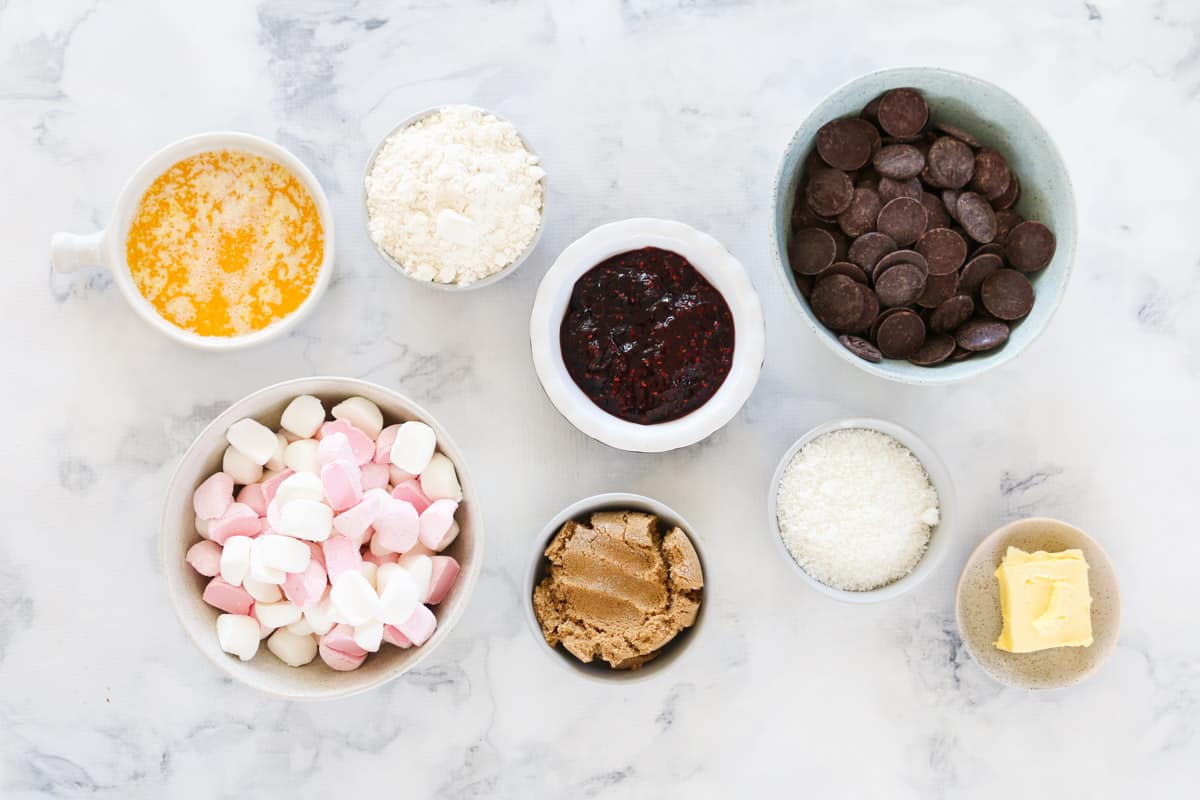
For The Base
Plain Flour - Also known as 'All Purpose Flour'.
Brown Sugar - Either light or dark brown sugar are fine to use.
Desiccated Coconut - This is a fine dry coconut (not shredded or moistened).
Butter - Either salted or unsalted butter can be used.
For The Layers
Store bought marshmallows - Here in Australia we have classic pink and white marshmallows made by Pascall's. These regular sized marshmallows can be alternated on the base to make a pretty pattern. If you can't find Pascall's marshmallows, you can use any brand of regular sized marshmallows you like (not mini or large sized though).
Raspberry Jam - or substitute with any of your favourite varieties of jam (strawberry is also very yummy!)
Dark Chocolate - I use at least a 50% cocoa chocolate in this recipe to cut through the sweetness of the other ingredients, but you could go darker if you wish. Alternatively, if you prefer milk chocolate or white chocolate, then go right ahead! I like to use either Cadbury or Nestle cooking melts in this recipe, but any chocolate melts will work.
Butter - If you add this to your chocolate it softens it to help when cutting the slice.
Step By Step Instructions:
20 minutes prep time is all it takes to make this sweet and colourful slice.
Note: Scroll to the recipe card at the bottom for the ingredients quantities and full detailed method.
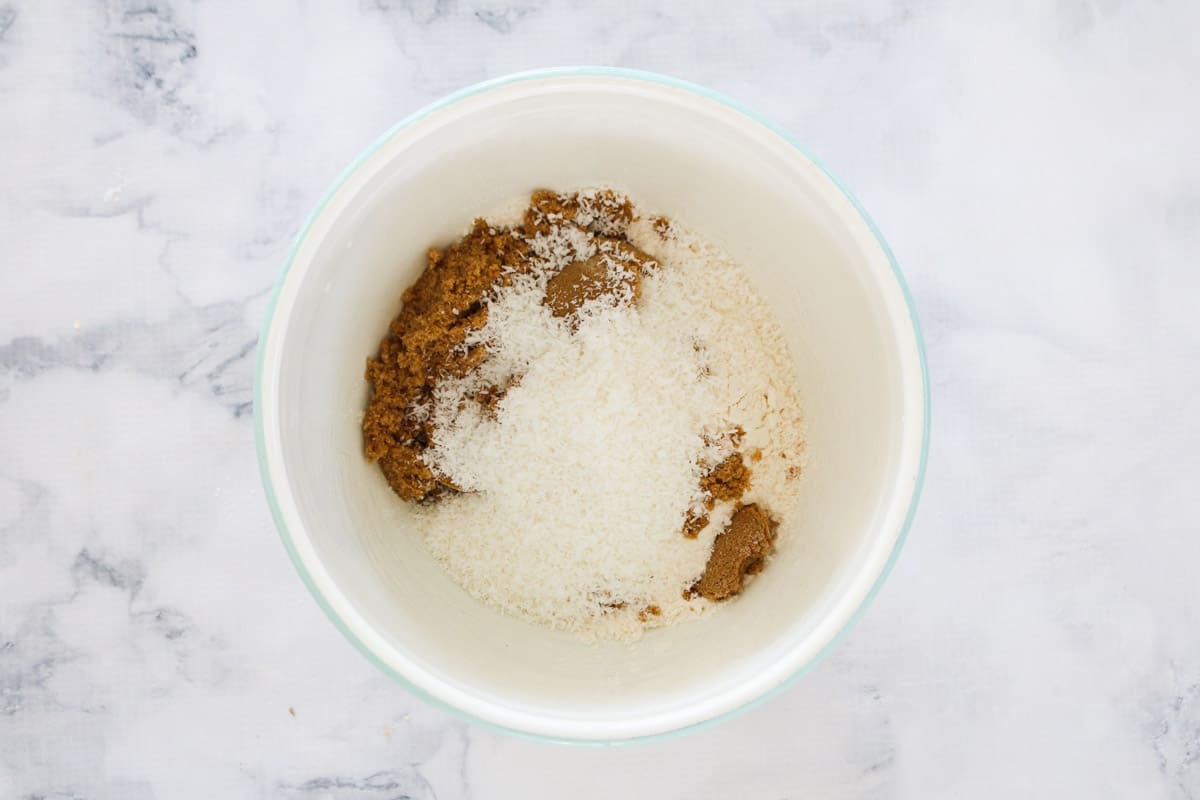
Step 1 - Combine Dry Ingredients
Combine your dry ingredients (flour, brown sugar, desiccated coconut).
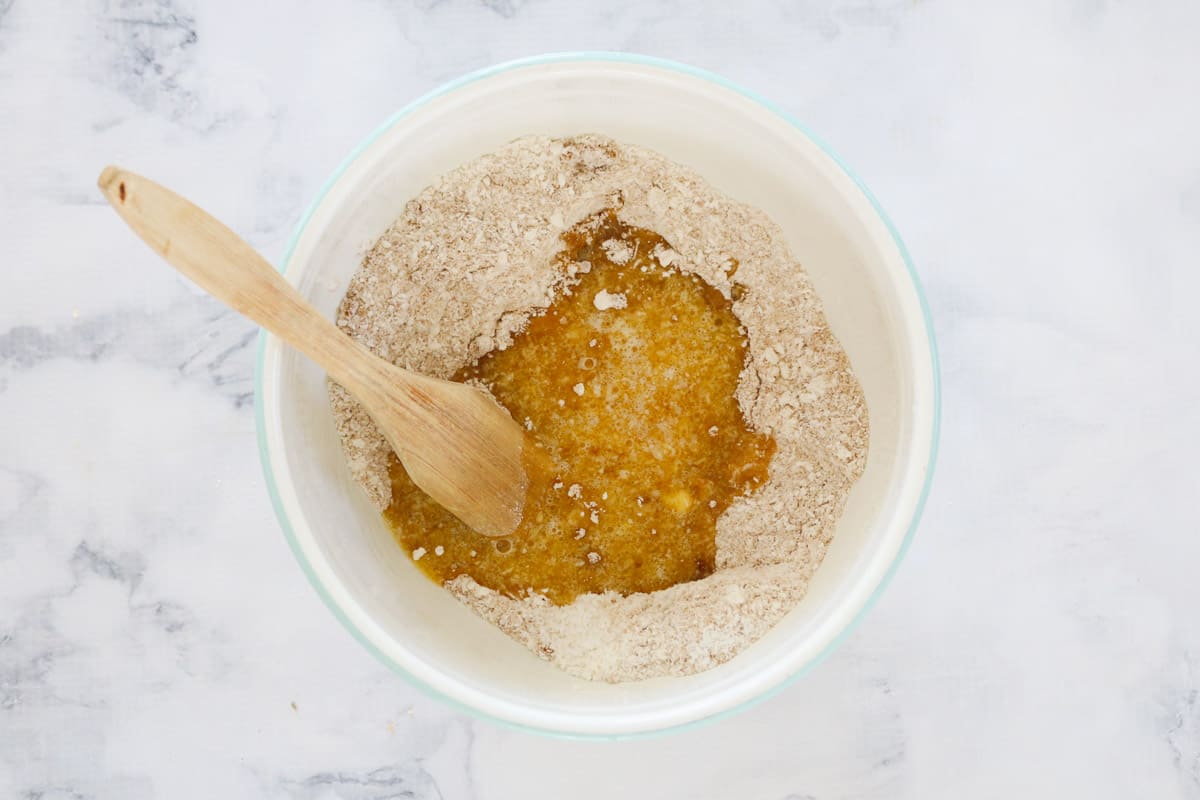
Step 2 - Add Melted Butter
Add melted butter and stir to combine.
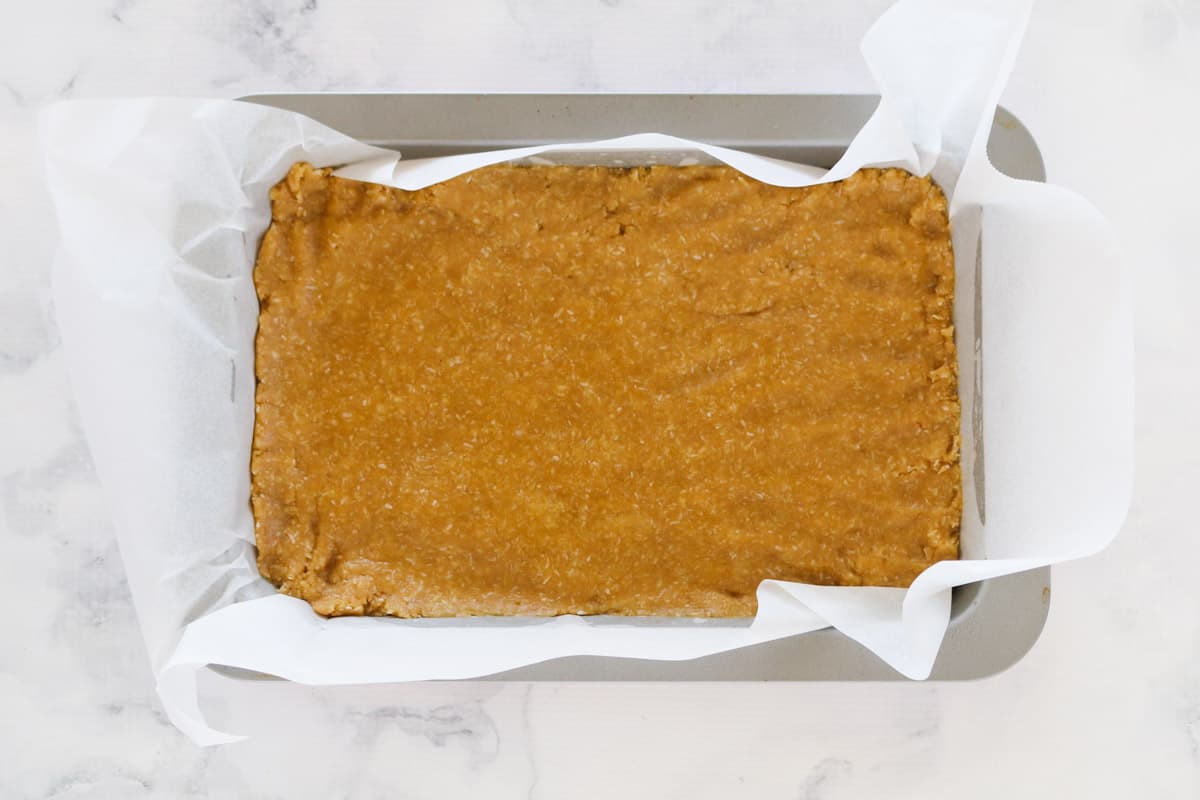
Step 3 - Press Into Prepared Tin
Press into your prepared tin. Use a spoon to press it down and get it nice and smooth. This helps to stop it crumbling when cutting.
Step 4 - Bake
Bake for 15 minutes.
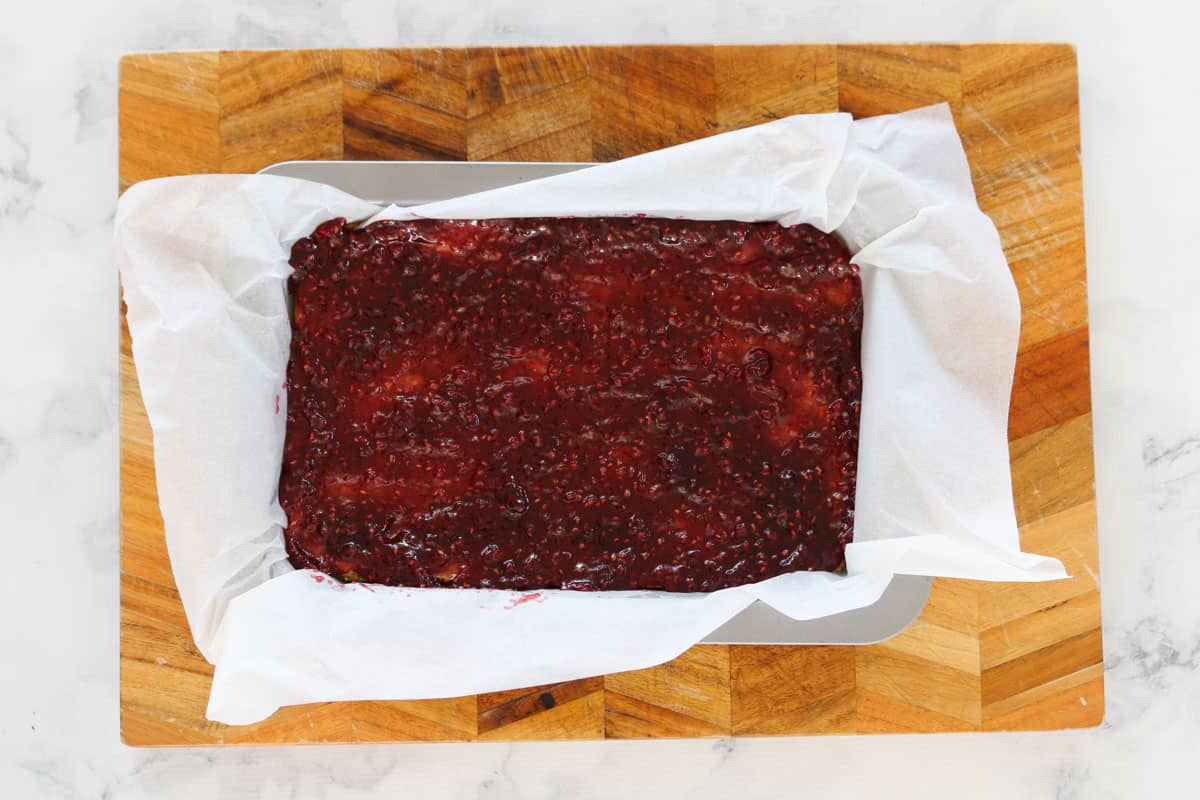
Step 5 - Spread Jam Over Base
While the base is still warm, spread jam over the top.
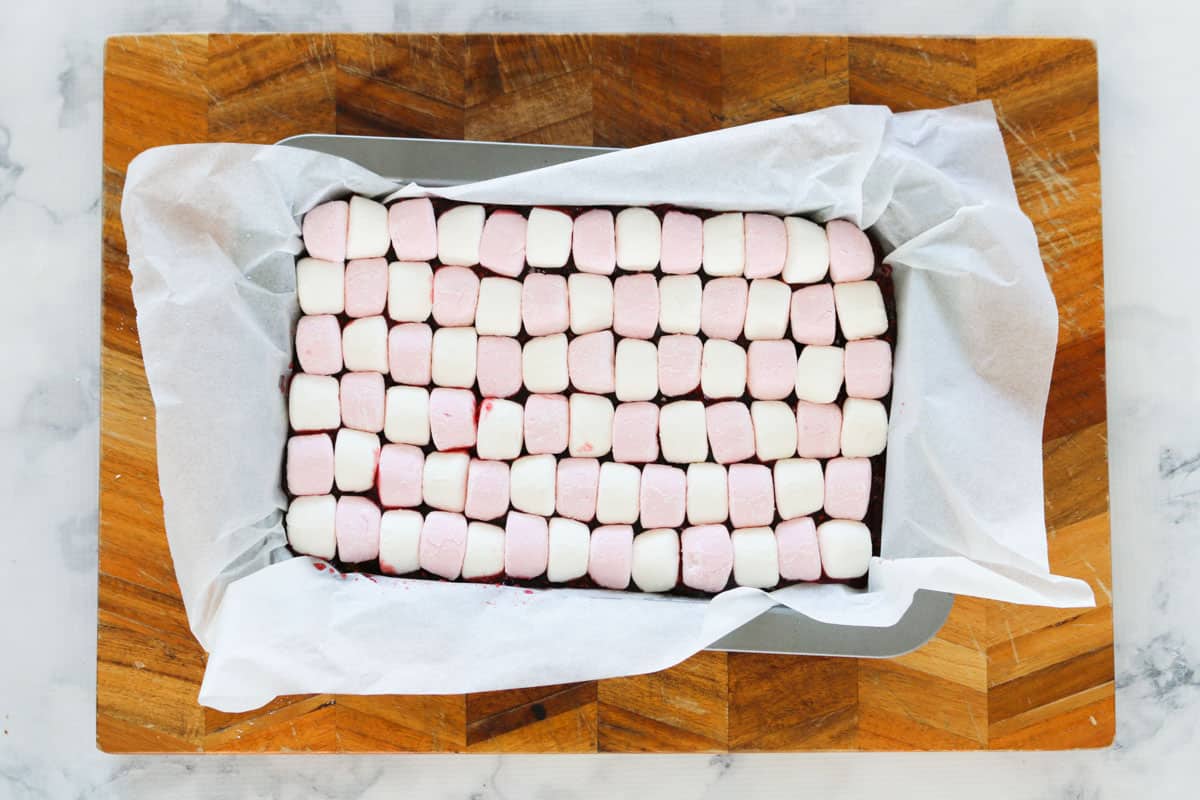
Step 6 - Add Marshmallows
Cut your marshmallows in half ( I use scissors to cut the marshmallows) and place them cut side down on top of the jam. I like to alternate the pink and white colours for a nice effect when cut - but this is completely optional!
Step 7 - Place Back In Oven
Place back in the oven for a couple of minutes to soften the marshmallows. Use a spoon to press them down until they are even. Allow to cool completely.
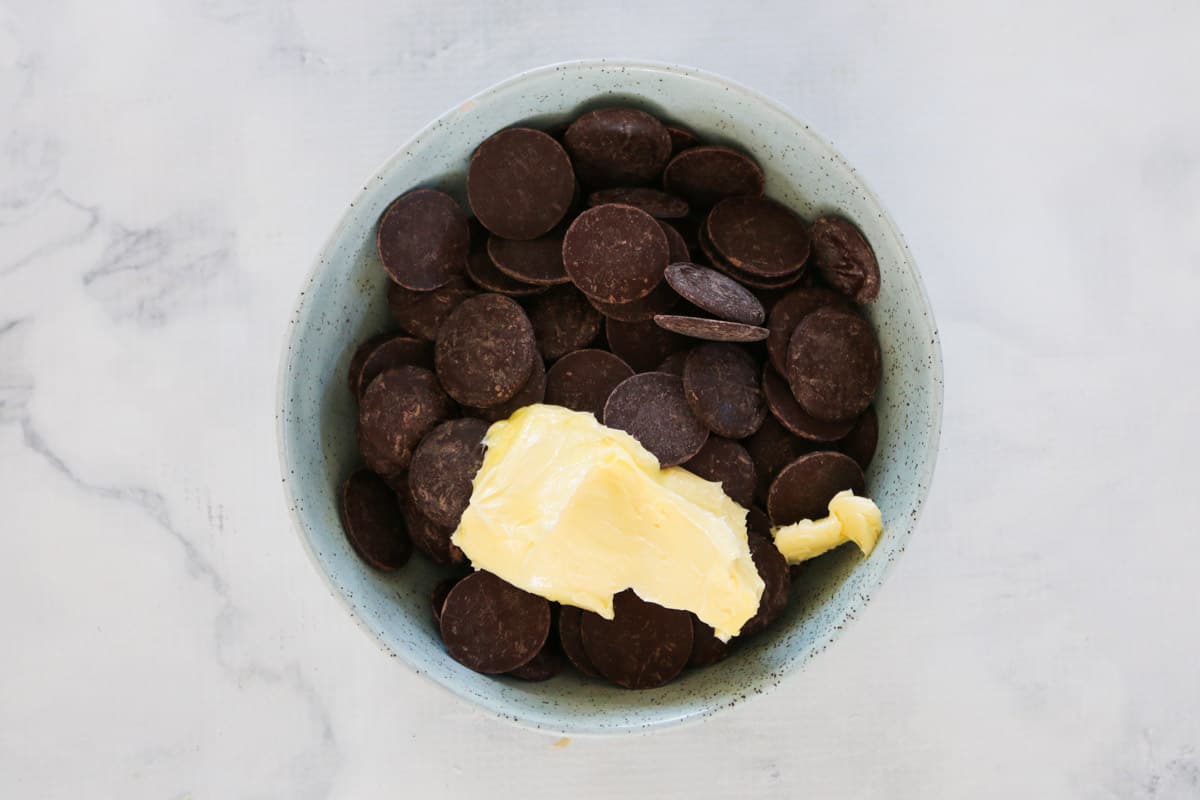
Step 8 - Melt Chocolate
Melt the chocolate and butter together
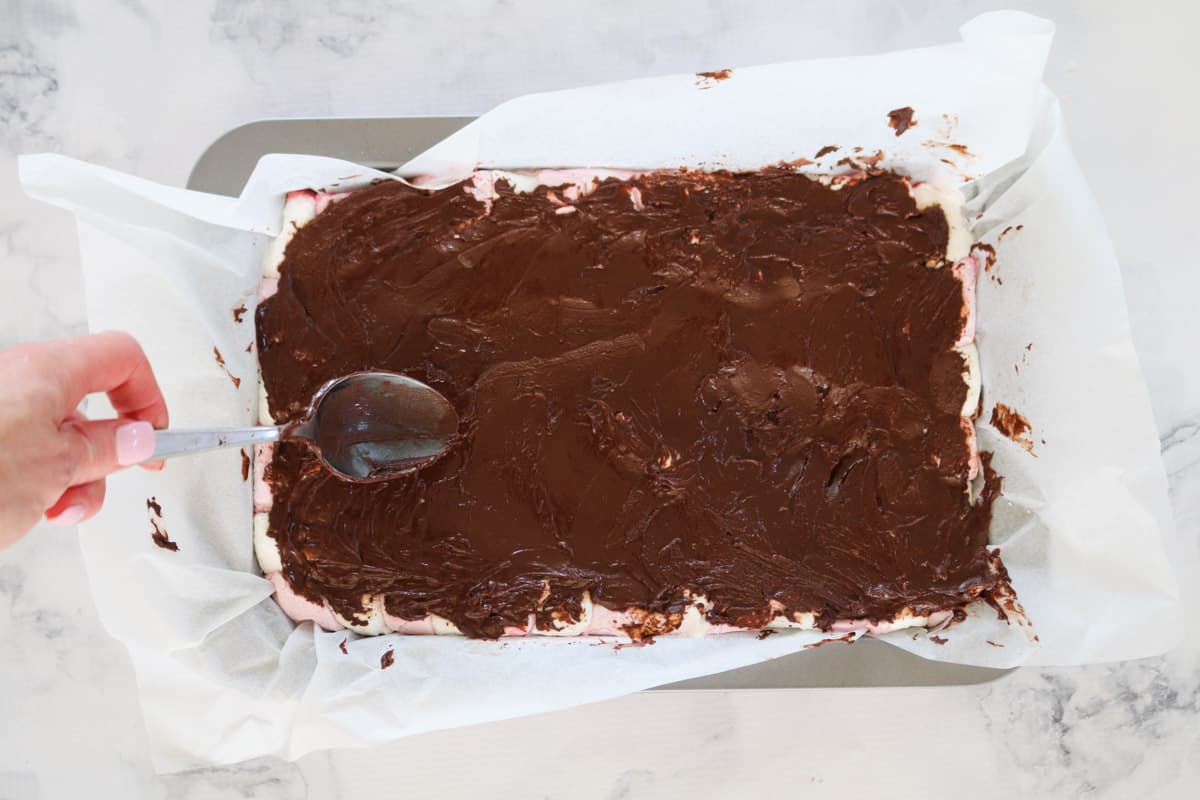
Step 9 - Spread Chocolate Over Marshmallow
Carefully spread the chocolate mixture over the marshmallows and place in the fridge to cool completely before slicing.
Step 10 - Cut Slice
Allow the slice to come to room temperature before slicing (this makes the slice much easier to cut and helps prevent the chocolate from cracking - keeping it nice and neat!
Expert Tips And FAQ's
It's important to press the base mixture firmly in to your baking tin. I use a spoon to do this as it helps keep the top smooth. This helps the base from crumbling when being sliced.
Avoid sticky hands and uneven marshmallows by using scissors to cut the marshmallows in half. I find this much easier and less fiddly than using a knife.
Make sure the marshmallows have cooled and slice is completely set before spreading the chocolate over the top. It's important to then wait until the chocolate has set completely before slicing.
Allow the slice to come to room temperature before slicing. This helps to prevent the chocolate from cracking and the slice from crumbling when you cut it.
Homemade marshmallow is too soft and not recommended for this recipe. However, the lightly dusted store-bought marshmallows have the perfect texture.
Store the slice in an airtight container in the fridge for up to 5 days.
Unfortunately, because of the marshmallow, this slice is not suitable for freezing
Related Recipes
Once you have enjoyed Wagon Wheel Marshmallow Slice, how about you try one of these other classic Australian treats!
3 Ingredient Caramel Tim Tam Balls: - Simple and delicious Tim Tam Cheesecake Balls made from only 3 ingredients - Tim Tams, cream cheese and melted chocolate!
Milo Mousse Chocolate Slice - Delicious Milo Mousse Chocolate Slice made with a chewy, rich chocolate base and a soft and creamy mousse topping.
No Bake Double Layer Tim Tam Cheesecake - With a Tim Tam base, milk and white chocolate layers sprinkled with Tim Tam chunks and extra Tim Tams on top, this really is a chocoholics dream.
5 Ingredient Iced Vovo Tarts are a yummy twist on the classic Arnott's biscuit! Think sweet pastry shells filled with jam, marshmallow mixture and sprinkled with coconut... and ready in just 10 minutes!
Lamington Icecream Cake A deliciously layered Lamington Ice-Cream Cake inspired by everyone's favourite treat! Strawberry ice-cream, chocolate lamington fingers, vanilla ice-cream and raspberry topping make this no-bake dessert a total winner!
WANT EVEN MORE DELICIOUS RECIPES? Subscribe to my newsletter or follow along on Facebook or Instagram. And if you love baking, then please come and join my Facebook cooking club group or subscribe to my YouTube channel.

Wagon Wheel Marshmallow Slice
Ingredients
- 1 cup (150g) plain flour
- ½ cup (100g) brown sugar
- ½ cup (45g) coconut
- 125 g butter melted
- ⅔ cup (160g) raspberry jam
- 250 g marshmallows regular pink and white
- 200 g dark chocolate melts
- 50 g butter
Instructions
Conventional Method
- Preheat oven to 160 degrees celsius fan forced (180 degrees if conventional).
- Grease and line a rectangular slice tray (approx 16cm x 26cm) with baking paper - allowing it to hang over the edges.
- To make the base, sift the plain flour into a bowl.
- Add the brown sugar and coconut and stir to combine.
- Add the melted butter and mix well until crumbly and completely combined.
- Press the mixture firmly into the base of the prepared tin and smooth with a spoon.
- Bake for 15 minutes or until lightly golden.
- While the slice is still warm, spread the jam over the top.
- Cut each marshmallow in half (using scissors is easiest).
- Place the marshmallow halves (cut-side down) onto the jam.
- Place back into the oven for 2 minutes.
- Use a spoon or spatula to gently press the marshmallows down so that you have a flat surface.
- Leave in the tin to cool completely so that the marshmallows can start to firm up again.
- Place the dark chocolate melts and butter into a microwave-safe bowl. Heat in 30 second bursts (50% power) until the chocolate has just melted - stir at each interval.
- Very gently spread the chocolate over the marshmallows.
- Place into the fridge to set completely (approx 3 hours).
- Allow the slice to come to room temperature before cutting into slices.
Thermomix Method
- Preheat oven to 160 degrees celsius fan forced (180 degrees if using conventional). Grease and line a rectangular slice tray (approx 16cm x 26cm) with baking paper - allowing it to hang over the edges.
- Melt the butter in the Thermomix bowl for 3 minutes, 100 degrees, Speed 2. Add the plain flour, brown sugar and coconut and mix for 15 seconds, Reverse, Speed 4. Scrape down the sides of the bowl and repeat for a further 15 seconds or until completely combined (use the spatula to help mix). Press the mixture firmly into the base of the prepared tin and smooth with a spoon.
- Bake for 15 minutes or until lightly golden. While the slice is still warm, spread the jam over the top.
- Cut each marshmallow in half (using scissors is easiest). Place the marshmallow halves (cut-side down) onto the jam. Place back into the oven for 2 minutes. Use a spoon or spatula to gently press the marshmallows down so that you have a flat surface. Leave in the tin to cool completely so that the marshmallows can start to firm up again.
- Place the dark chocolate melts and butter into a clean Thermomix bowl. Melt for 3 minutes, 80 degrees, Speed 2. Very gently spread the chocolate over the marshmallows.
- Place into the fridge to set completely (approx 3 hours). Allow the slice to come to room temperature before cutting into slices.


Jodie says
I make this Gluten free by doing a straight swap to gluten free flour, my family and everyone that I have made this for absolutely love it. ⭐⭐⭐⭐⭐
Don't over cook the base just cook until the corners are lightly golden yes the base will look quite liquid but let it cool and it will harden up then continue with the rest of the recipe. If you do cook it too long you'll end up with a rock hard base......trust me 😁
#GFPEEPS
Jodie says
Just a follow up, this freezes and defrosts well. Oh and I used milk chocolate for the top ⭐⭐⭐⭐⭐
Samantha Caporn says
Mad this today and it’s absolutely delicious!!
Will make it again and again 🫶🏼
Melissa Gillanders says
Everyone loves this slice. I use milk chocolate and just do a thin layer. I also just do a thin covering of the jam and use slightly less sugar in the base.
Lucy says
Fantastic!
Bec H says
I've made this twice now and it has rapidly become a household favourite! My husband has becomes very protective of it