

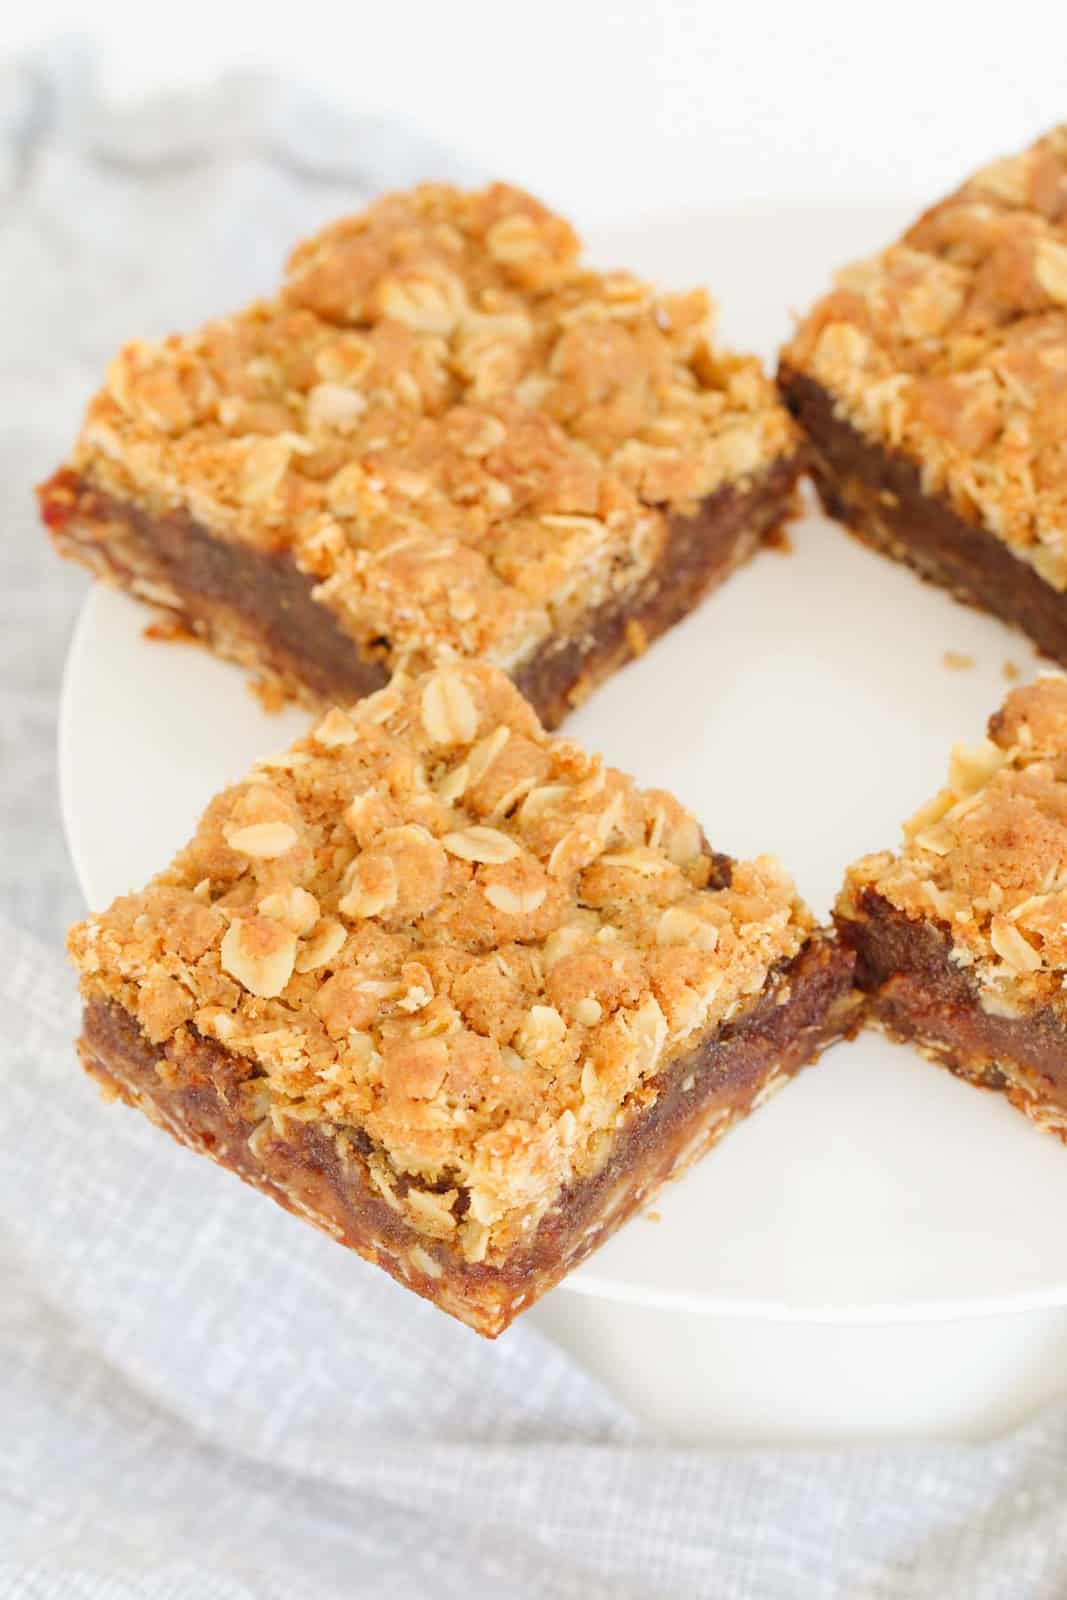
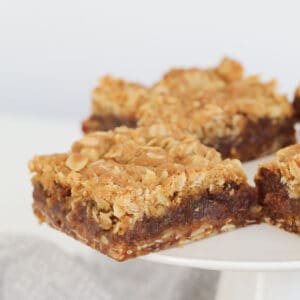
This Date Crumble Slice is the ultimate old-fashioned slice, featuring a buttery oat crumble layered with a rich, jammy date filling - they're the perfect mix of chewy, crunchy and just sweet enough!
Think of it as a cosy cross between a crumble and a slice - and yes, it's perfect with a cuppa, just like my creamy Lemon Crumble Bars or a batch of Apple Crumble Muffins.
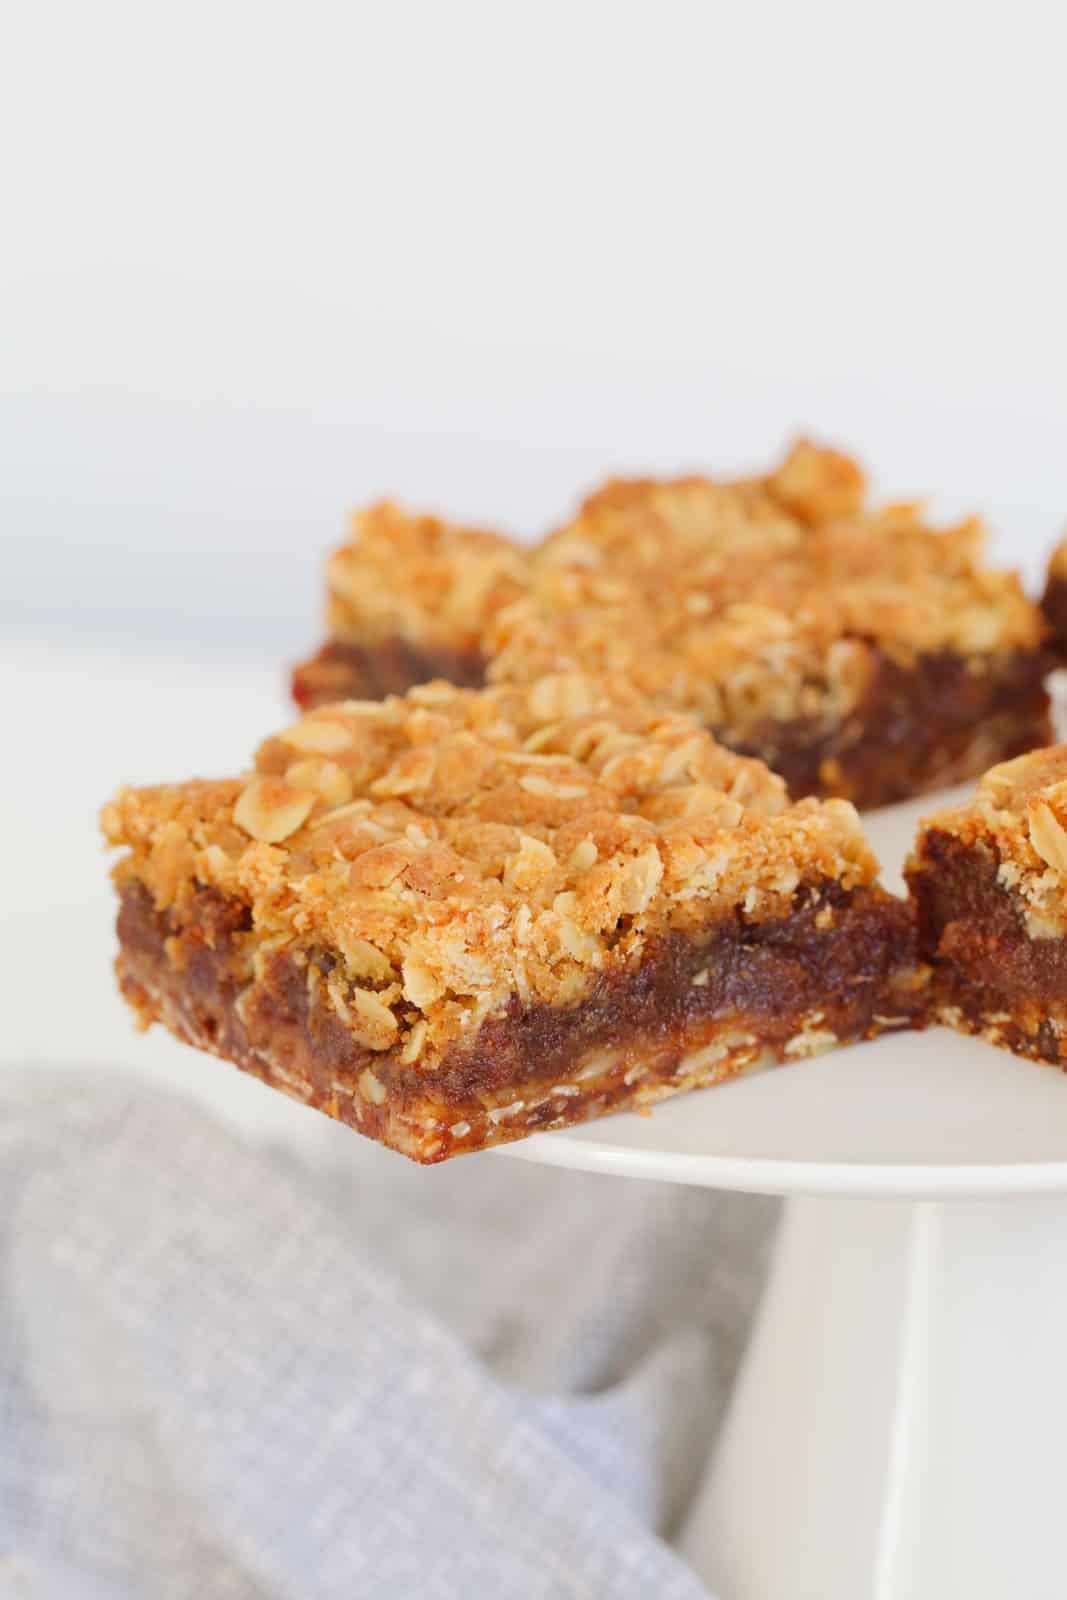
This Date Crumble Slice is a modern take on the traditional date square - but with a thicker, softer filling and a beautifully crisp oat topping that holds its shape. Unlike some recipes that can turn dry or overly crumbly, this one stays perfectly balanced with a buttery base and a moist luscious centre.
If you're already a fan of nostalgic bakes like my Raspberry Coconut Slice or quick and easy Anzac Slice, you're going to adore this one too. It's simple, freezer-friendly, and just the kind of recipe that works for school lunches, afternoon tea or a little something sweet after dinner.
Everyone in my house really enjoyed it, simply delicious! Thank you.
- Kay
Why You're Going To Love This Recipe
This sweet and crunchy slice is always popular for morning or afternoon tea.
- Perfect texture combo - crunchy oat crumble with a soft, gooey date centre.
- Easy, no-fuss method - simple ingredients and straightforward steps, including Thermomix instructions.
- Great for lunchboxes - sturdy, sliceable and full of oats.
- Freezer-friendly - ideal for making ahead.
- Versatile - perfect served with a cuppa or as a sweet dessert - warm it up and add a scoop of vanilla ice-cream or a dollop of thick cream.
- Old-fashioned favourite - with a modern, foolproof twist - somethings just never go out of style!
Jump to:
Date Squares Ingredients
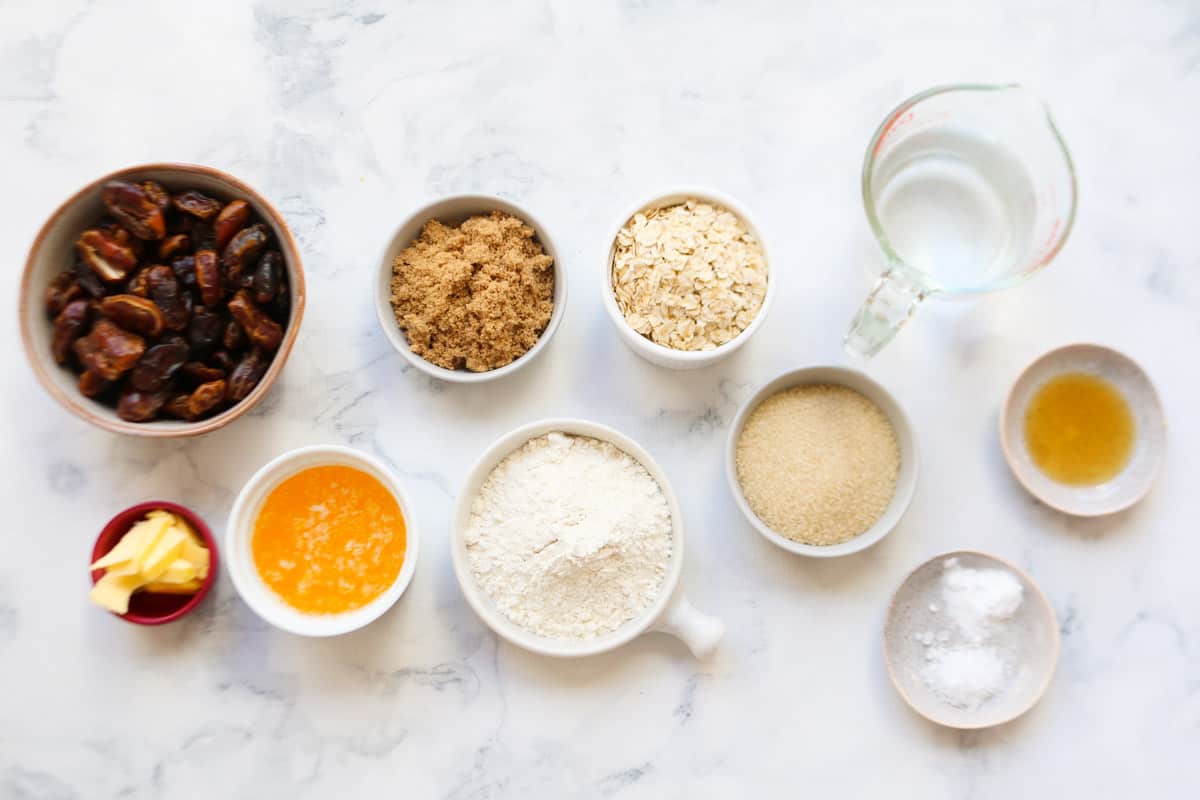
Just a few basic ingredients are needed to make this old fashioned date squares recipe.
Note: Scroll to the recipe card at the bottom for the ingredients quantities and full detailed method.
- Rolled oats - use traditional rolled oats (not quick oats) for the best chewy texture.
- Brown sugar - adds moisture and a deeper caramel flavour to the crumble.
- Dried pitted dates - the star of the filling; use fresh pitted dates (not old or dried out) so they break down into a smooth, jammy texture.
- Bicarbonate of soda - helps create a lighter crumble texture.
- Butter - for the best flavour, use real butter rather than a substitute; if you're using salted butter, simply leave out the added ½ teaspoon of salt.
Variations
- Gluten-Free Option - swap plain flour for a good-quality gluten-free flour blend and ensure your oats are certified GF.
- Add Nuts - stir chopped walnuts or pecans into the crumble for extra crunch and flavour.
- Spiced Version - add a pinch of cinnamon or nutmeg to the crumble mixture.
- Coconut Twist - replace part of the oats with desiccated coconut for a slightly tropical vibe.
How To Make Date Crumble Slice
An easy melt-and-mix recipe that's perfect for beginners and loved by experienced bakers alike.
Note: Scroll to the recipe card at the bottom for the ingredients quantities and full detailed method.
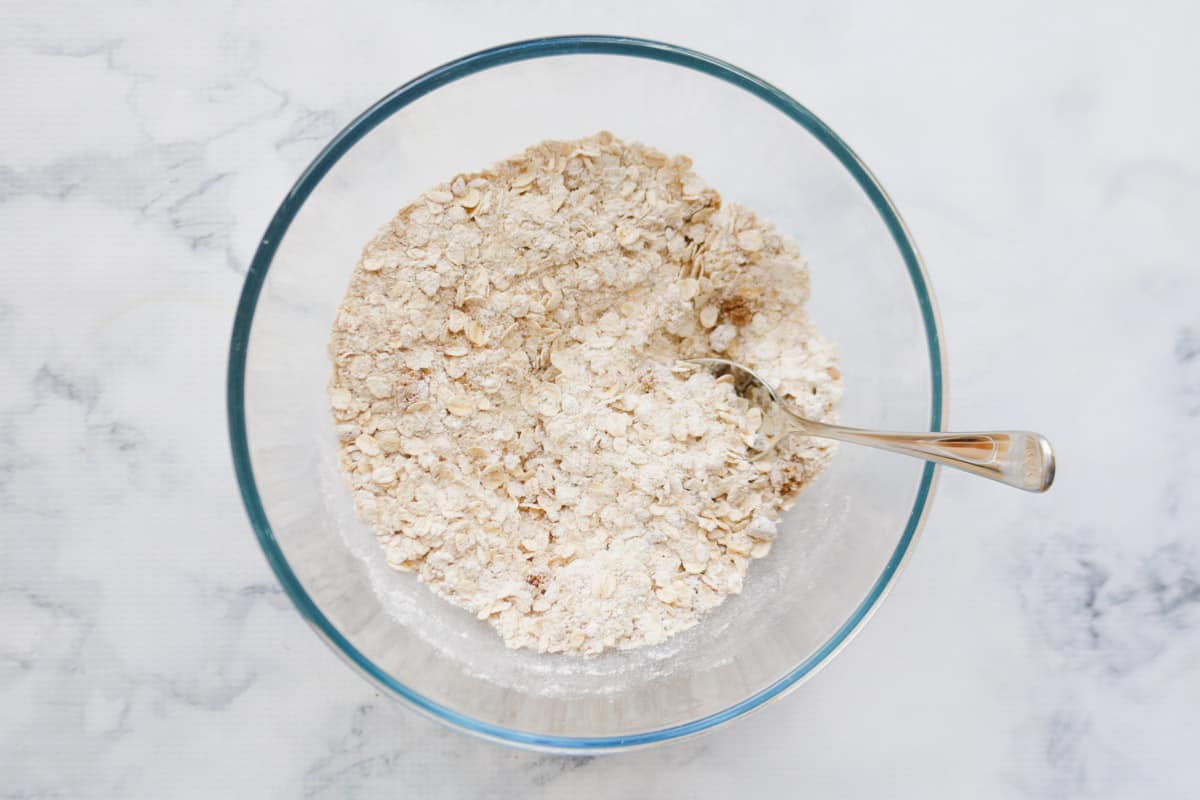
- Mix dry ingredients - Combine flour, oats, sugars, bi-carb soda and salt.
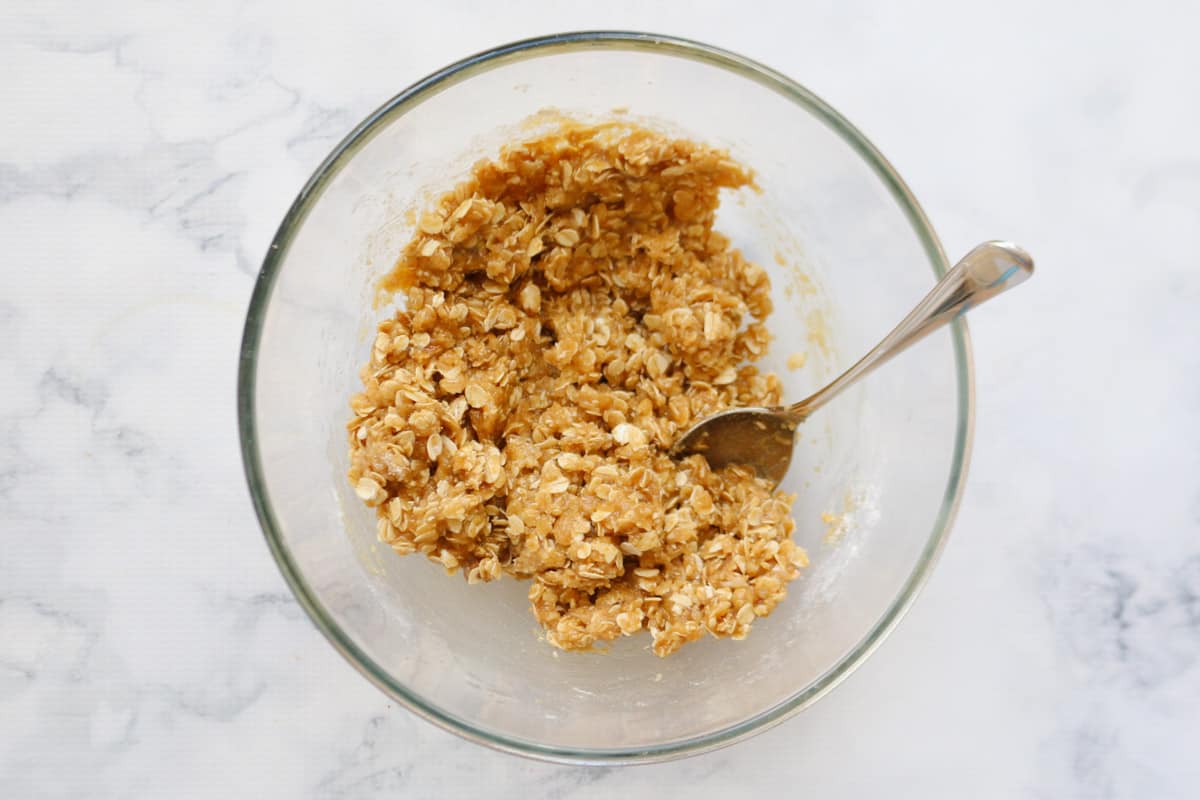
- Add the butter: Gently mix through melted butter and vanilla extract until crumbly.
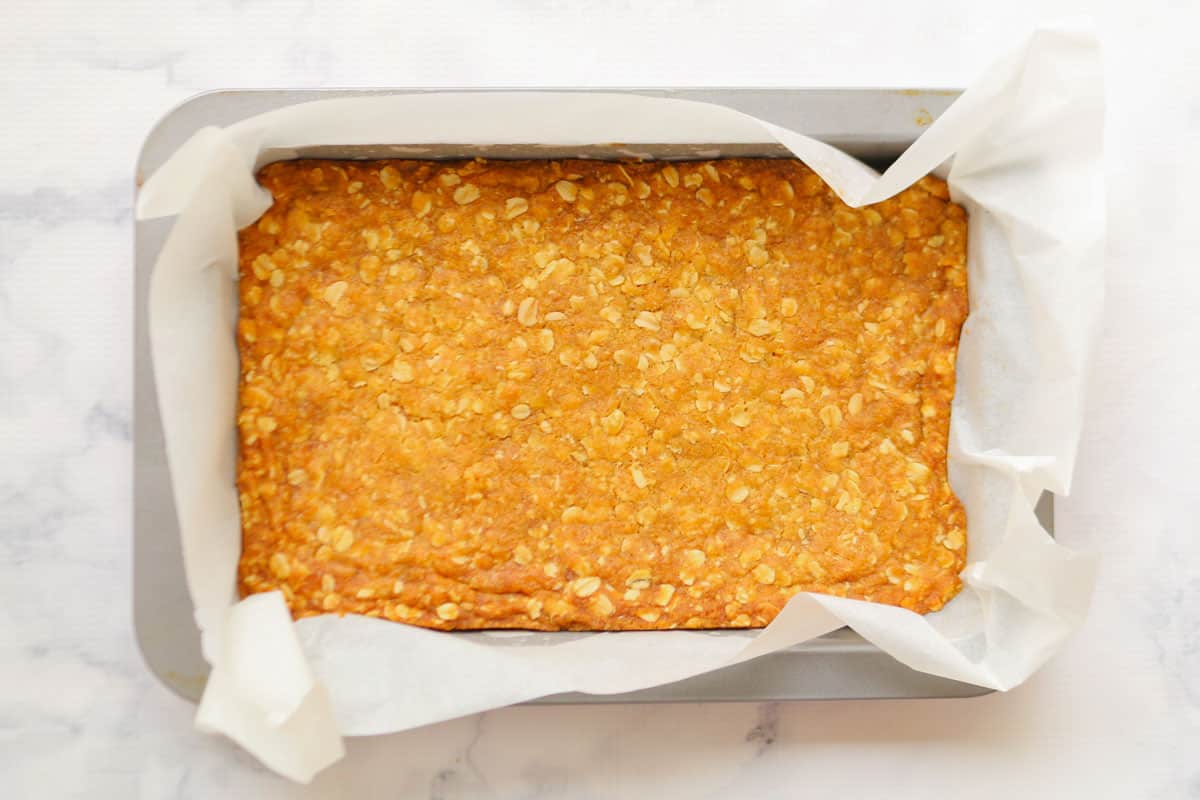
- Bake the base - Press half the mixture firmly into the prepared tin and bake until lightly golden.
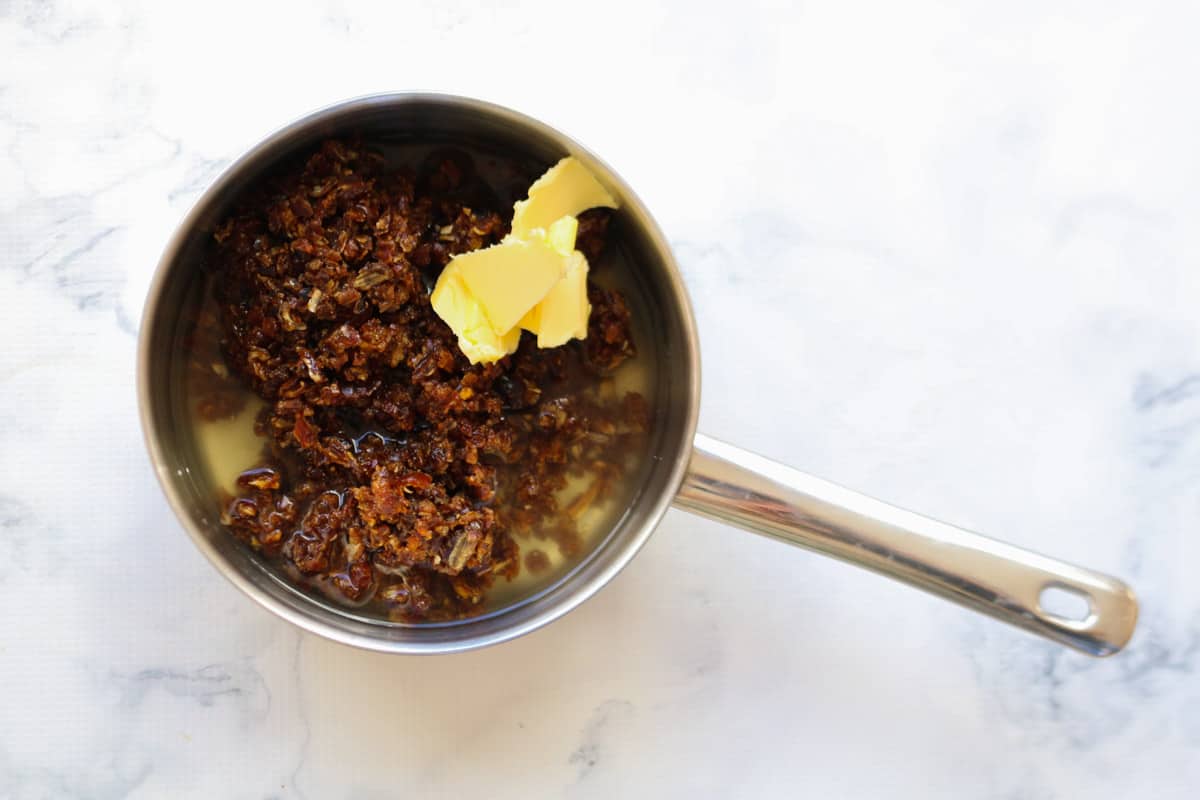
- Cook the date filling - Simmer chopped dates with water, butter and vanilla until thick, soft and jam-like. Cool slightly.
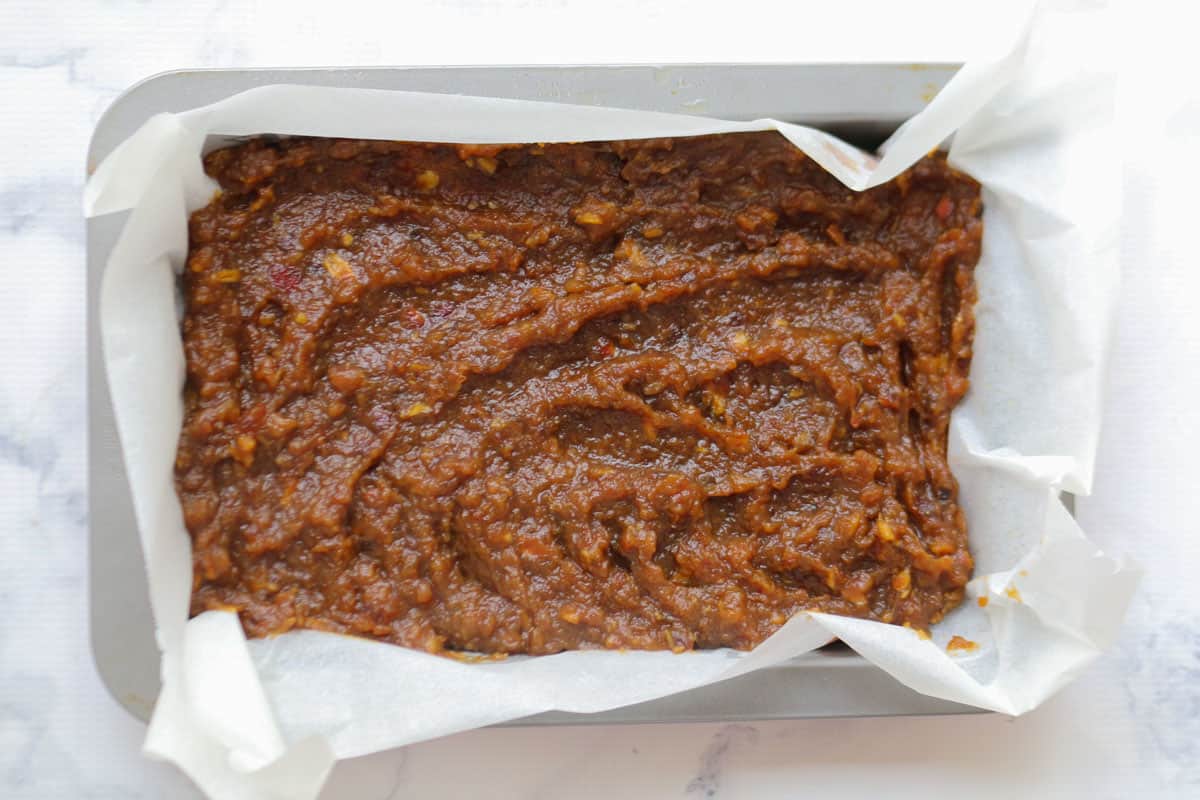
- Assemble - Spread the warm date mixture evenly over the base.
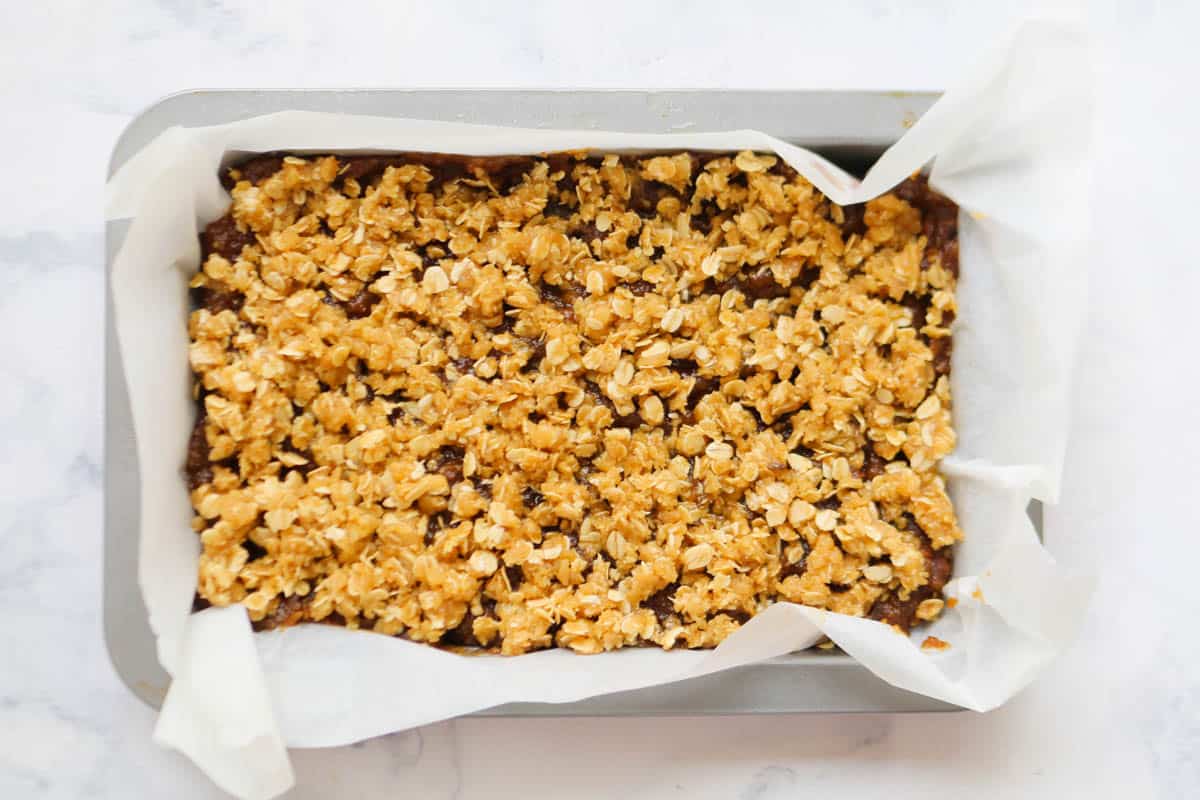
- Top and bake - Sprinkle over the remaining crumble and bake until golden.
Recipe Tips
- Use fresh pitted dates - avoid older dates that have dried out, as they won't soften properly or give that rich, jammy filling.
- Don't skip pre-baking the base - it ensures a firm, chewy layer that holds together perfectly.
- Press the mixture firmly and evenly into the tin to avoid a crumbly base.
- Let the date mixture cool slightly before spreading over the baked base.
- Chill for at least 2 hours (or overnight) to make it easier to cut neat slices.
- Store in an airtight container at room temp or in the fridge for up to 1 week.
- Freeze in individual portions for up to 3 months - perfect for lunchboxes.
- For a dessert twist, warm slightly and serve with cream or ice cream.
Date Crumble Slice FAQS
Pitted dried dates are best for this recipe as they create that thick, jammy texture. Fresh dates can be too soft and won't set the same way - and they're way more expensive too!
This usually means there's not enough butter in the mixture - if it's too crumbly, add a little more melted butter. The mixture should hold together slightly when pressed.
Yes! You can slightly reduce the quantity of the sugar in the crumble.
Also, by using half to two-thirds of the date filling ingredients (dates, water and butter), this creates a thinner date layer, reducing the sweetness of this slice.
Yes - chilling is key for neat, clean slices; without it, the filling will be too soft and difficult to cut.
Absolutely. These date squares are even better the next day, making them perfect for prepping in advance.
You can also freeze portions for up to 3 months.
More Old Fashioned Slice Recipes
There's nothing quite like a classic old-fashioned baked slice - simple, nostalgic and always a hit with the whole family.
WANT EVEN MORE DELICIOUS RECIPES? Subscribe to my newsletter or follow along on Facebook or Instagram. And if you love baking, then please come and join my Facebook cooking club group or subscribe to my YouTube channel.
Date Crumble Slice
Ingredients
- 115 g (1¼ cups) plain flour
- 110 g (1¼ cups) rolled oats
- ½ teaspoon salt
- ½ teaspoon bi-carb soda
- 100 g (½ cup) raw sugar
- 80 g (½ cup) brown sugar packed
- 170 g (¾ cup) unsalted butter melted
- 1 teaspoon vanilla extract
For the date filling
- 400 g (ml) water
- 400 g dried pitted dates
- 1 teaspoon vanilla extract
- 30 g butter
Instructions
Conventional Method
- Preheat oven to 160 degrees fan forced. Grease and line a 17cm x 28cm slice tray with baking paper, allowing the edges to overhang.
- In a large bowl, mix together flour, rolled oats, salt and bi-carb soda. Stir in the raw sugar and brown sugar and mix until all combined.
- Pour melted butter and vanilla extract over the dry ingredients. Stir mixture until well combined.
- Spread half of the crumb mixture into the bottom of the prepared tin and press into an even layer. Bake in preheated oven for 15 minutes. Remove from oven and put aside (leave the oven turned on).
- Meanwhile, chop the pitted dates and place them into a saucepan along with the water, butter and vanilla extract.
- Stir over medium heat until the dates have softened and the mixture has thickened (approx 10 minutes). Allow to cool slightly.
- Pour the date mixture over the cooked oat base and spread out evenly.
- Sprinkle the remaining crumble mixture over the top of the date layer.
- Bake in oven for 23 - 26 minutes or until lightly golden. Remove from oven and allow to cool.
- Cover and refrigerate for at least 2 hours (preferably overnight) then take it out and cut into squares.
- Store in airtight container in refrigerator or at room temperature for up to 1 week.
Thermomix Method
- Preheat oven to 160 degrees fan forced. Grease and line a 17cm x 28cm slice tray with baking paper, allowing the edges to overhang.
- Melt the butter and vanilla in the Thermomix bowl for 3 minutes, Speed 2, 50 degrees.
- Add the plain flour, rolled oats, salt, bi-carb soda, brown sugar and raw sugar. Mix for 20 seconds on Reverse, Speed 2. Scrape down the sides. Mix for a further 20 seconds on Reverse, Speed 2.
- Spread half of the crumb mixture into the bottom of the prepared tray and press firmly into an even layer. Bake in preheated oven for 15 minutes or until lightly golden. Remove from oven and put aside (leave the oven turned on).
- Place the dates into a clean Thermomix bowl. Chop for 10 seconds, Speed 9. Scrape down the sides of the bowl. Add the water, vanilla and butter and mix for 6 minutes, Reverse, Speed 3, 90 degrees. Pour into a bowl and allow to cool slightly.
- Pour the date mixture over the cooked oat base and spread out evenly.
- Sprinkle the remaining crumble mixture over the top of the date layer. Bake in oven for 23 - 26 minutes or until lightly golden. Remove from oven and allow to cool.
- Cover and refrigerate for at least 2 hours (preferably overnight) then take it out and cut into squares.
- Store in airtight container in refrigerator or at room temperature for up to 1 week.
Notes
- Check freshness of pitted dates - avoid older dates that have dried out, as they won't soften properly or give that rich, jammy filling.
- If you prefer less sweetness, use half to two-thirds of the date filling ingredients; this creates a thinner date layer.
- Don't skip pre-baking the base - it ensures a firm, chewy layer that holds together perfectly.
- Press the mixture firmly and evenly into the tin to avoid a crumbly base.
- Let the date mixture cool slightly before spreading over the baked base.
- Chill for at least 2 hours (or overnight) to make it easier to cut neat slices.
- Store in an airtight container at room temp or in the fridge for up to 1 week.
- Freeze in individual portions for up to 3 months - perfect for lunchboxes.
- For a dessert twist, warm slightly and serve with cream or ice cream.


Sonya McKay says
Great recipe and easy to follow instructions.
Lucy says
Thank you!
Danielle says
Hey Lucy! The 1 tspn vanilla that’s stated in ingredients below dates etc does that go into date mixture? Thanks
Lucy says
Yes it does sorry! I'll update that now to make it clearer!
Kay says
Delicious! I made it with the stated amount of dates and left out the raw sugar in the biscuit part. I think it would be just as good with maybe half to two-thirds of the date mixture but oh my gosh, it's just so good! Everyone in my house really enjoyed it with only the 9 year old saying just 'it's ok'. Simply delicious. Thank you Lucy.
Lucy says
Fantastic!!
Amy says
Easy to follow and reminded me of my childhood!
I used half the amount of dates and it was still plenty.
Lucy says
That's so great to hear Amy!