

Whether it's the class Christmas party, kindy breakup or a lazy December afternoon with the kids, Christmas Reindeer Brownies are the cutest way to turn a simple slice of chocolate brownie into something a bit magical.
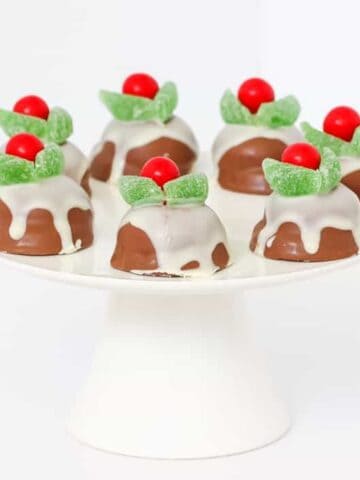
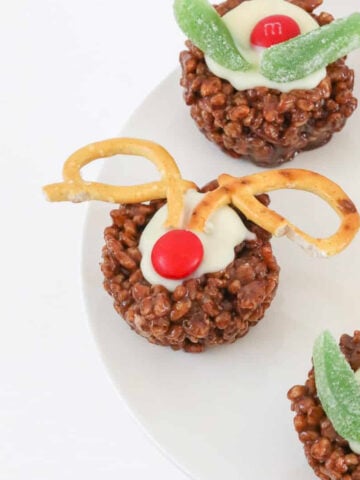
They're fun to decorate, easy enough for little helpers, and make a brilliant homemade gift alongside treats like my Chocolate Christmas Puddings or Christmas Crackles - Reindeers & Puddings.

These are so adorable! Something that will add that Christmas spirit to the desserts of our festive family dinner.
- Felicity
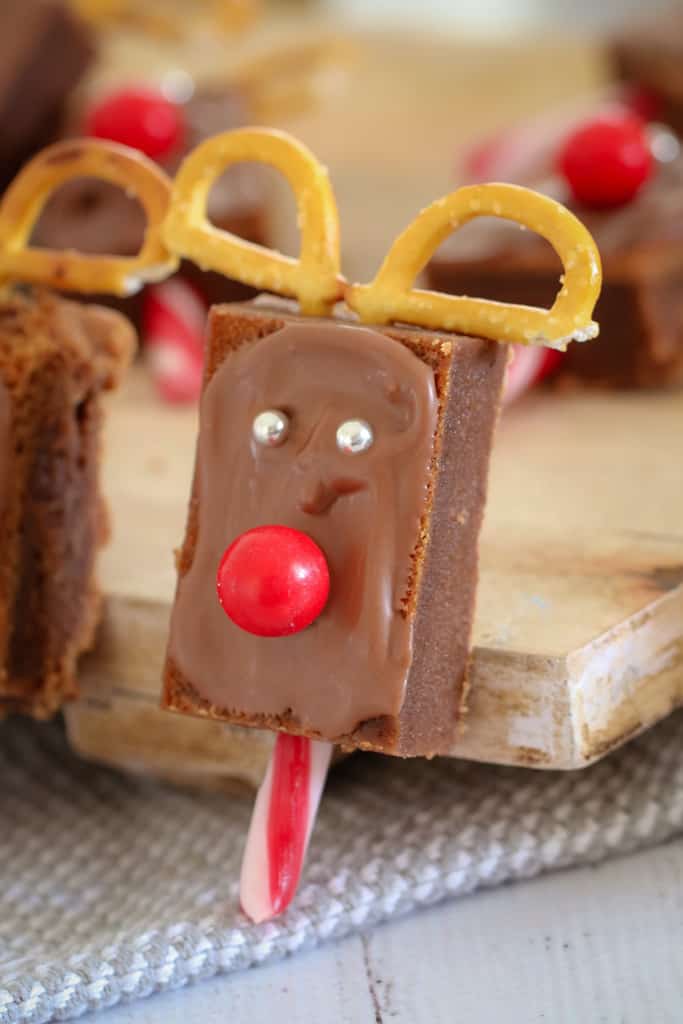
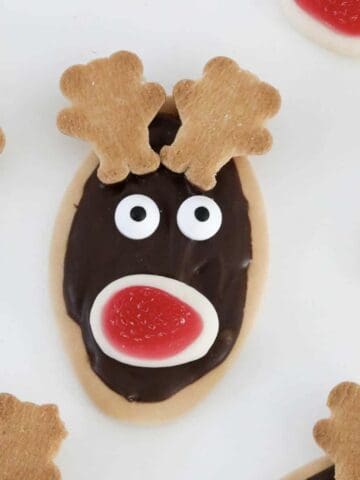
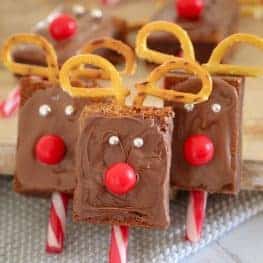
These Rudolph reindeer brownies start with a rich, fudgy base that's sturdy enough to hold pretzel antlers and a candy cane "handle", so you can pick them up like a little brownie lollipop. They sit perfectly on a Christmas dessert platter next to Reindeer Biscuits and Christmas Lamington Reindeers, and they always disappear first - kids and adults both go straight for Rudolph!
So if you're after easy class gifts, a cute little Christmas party surprise, or a fun activity to do with the kids before the big day, these reindeer brownies are a seriously yummy way to kick off the holiday season.
Why You're Going To Love This Recipe
- Great for gifts - super cute reindeer are perfect for gifting to friends, neighbours, and family.
- So easy, yet impressive - one brownie tray + melted chocolate = instant reindeer magic.
- School and kindy friendly - nut-free, no fiddly piping, and they travel well in lunchboxes or party tubs.
- Kid-friendly activity - this is such an easy recipe... little helpers can stir, sprinkle and stick on noses and eyes (have a few extras ready for snacking!). So much fun!
- Make-ahead winner - bake and freeze the brownie, then thaw and decorate later.
- Flexible base - use the homemade brownie or a packet mix when you're short on time.
Jump to:
Christmas Brownie Ingredients
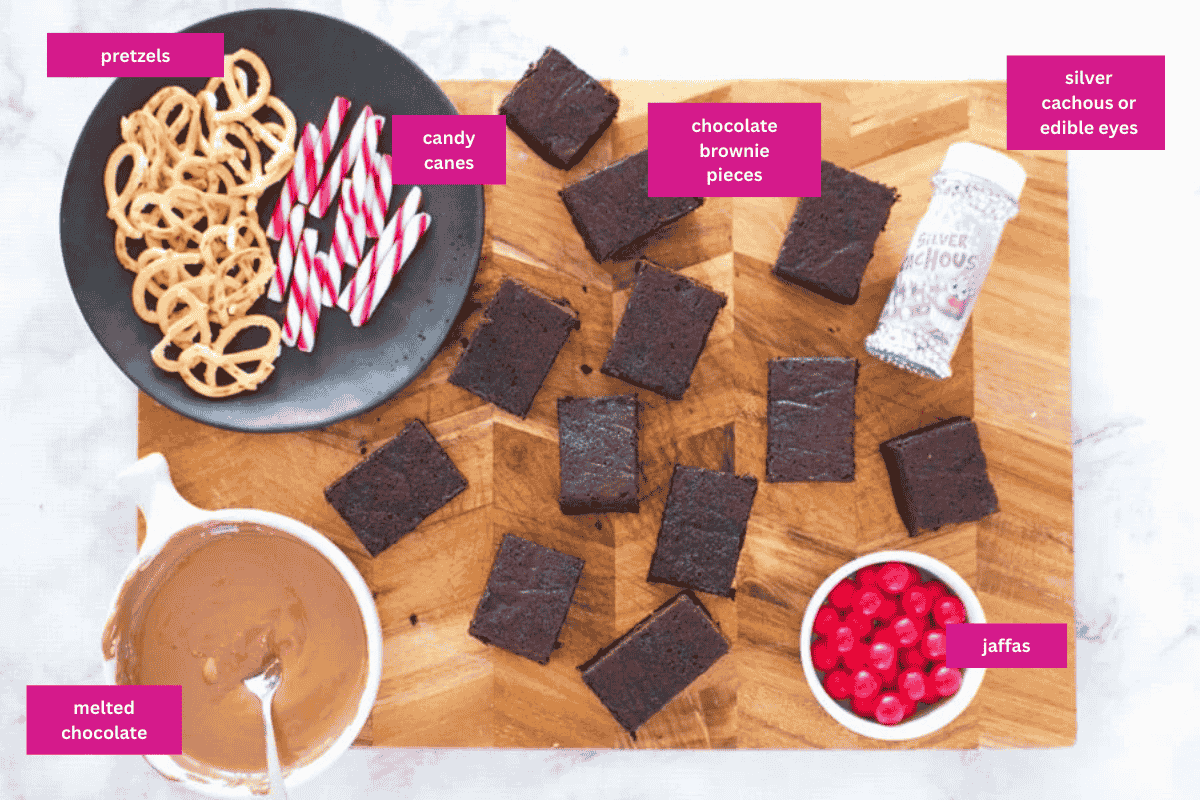
You can either make your own fudgy chocolate brownie (highly recommended!), use a packet mix when you're short on time, or even buy a pre-made brownie slab and jump straight to the fun decorating part!
- Pretzels - regular pretzels give the perfect "antler" shape and stay crisp. You can use mini pretzels if you prefer.
- Jaffas or red-coated lollies - these become the noses; any round red lolly or red M&M works.
- Silver cachous or edible eyes - hard edible balls that make the eyes; swap for soft candy eyes or sprinkles for younger kids.
- Mini candy canes - trim into small straight pieces to create the little reindeer "handles."
Variations
- Brownie shortcut - bake your favourite packet brownie mix, or purchase a pre-baked brownie for convenience.
- Nut-free friendly - naturally nut-free, check decorations for "may contain" warnings.
- No-candy-cane version - skip the handles and serve as simple bite-sized brownie reindeer.
- Gluten-free option - use GF plain flour, plus gluten-free pretzels and candy canes.
Need To Substitute An Ingredient?
Ask ChatGPT for suggestions on how to substitute the particular ingredient:
How To Make Reindeer Brownies
Making Christmas Reindeer Brownies is super simple - just bake, slice and decorate your way to the cutest little festive treats.
Note: Scroll to the recipe card at the bottom for the ingredients quantities and full detailed method.
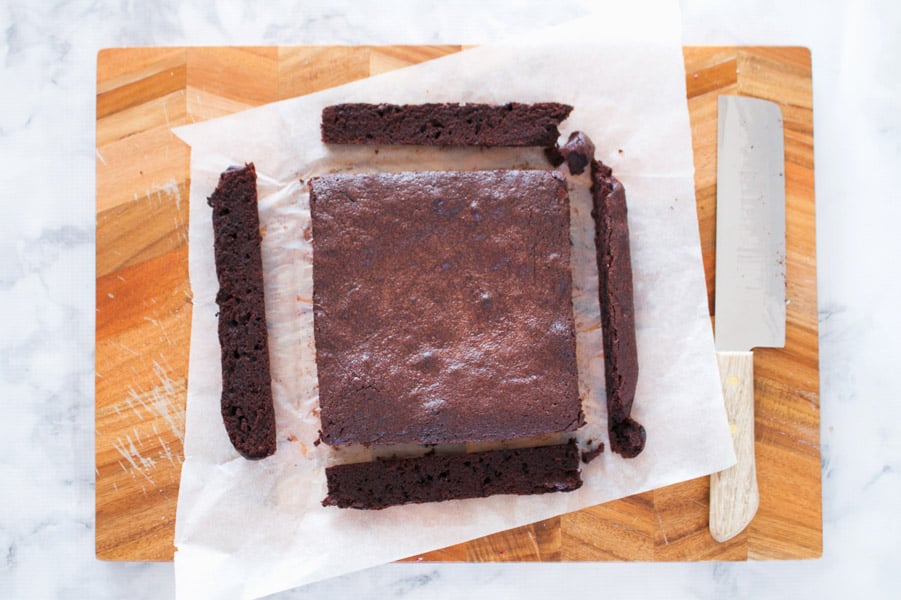
- Trim brownie: Turn the brownie slab upside down so the flat base is facing up. Trim off any raised or crisp edges so you have a neat square.
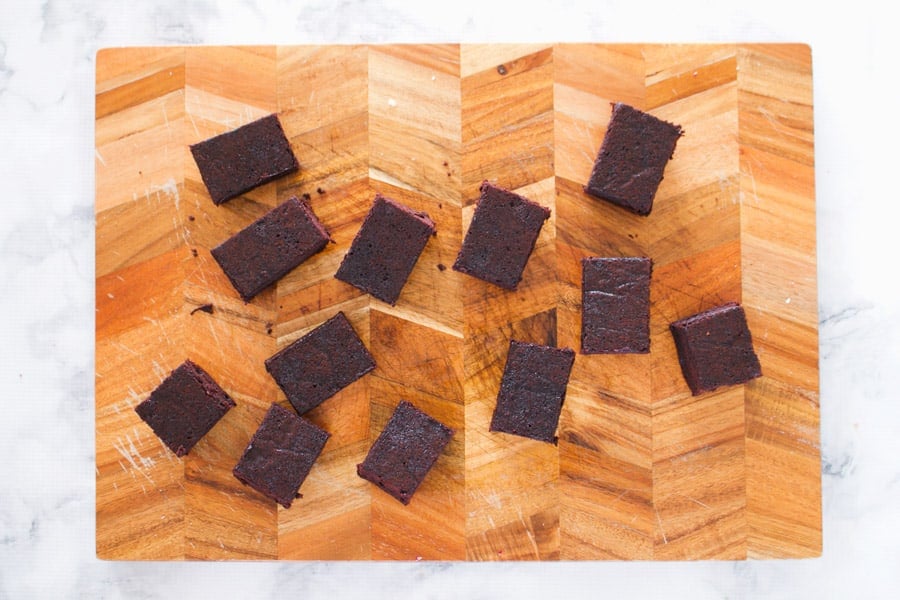
- Slice brownie: Cut the brownie into 16 even rectangles, wiping the knife between cuts for clean edges.
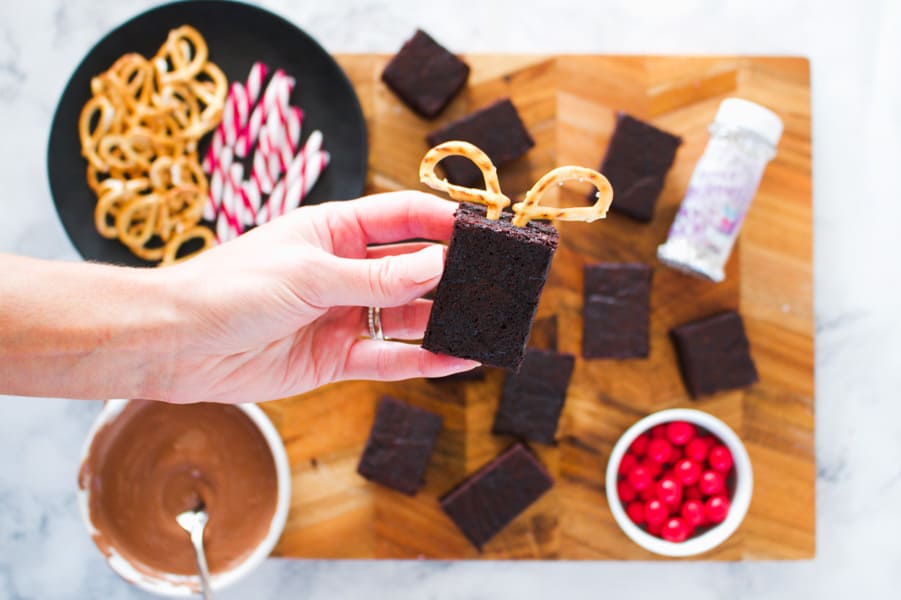
- Place antlers: Cut the pretzels in half, then press two pretzel halves into the top for "antlers".
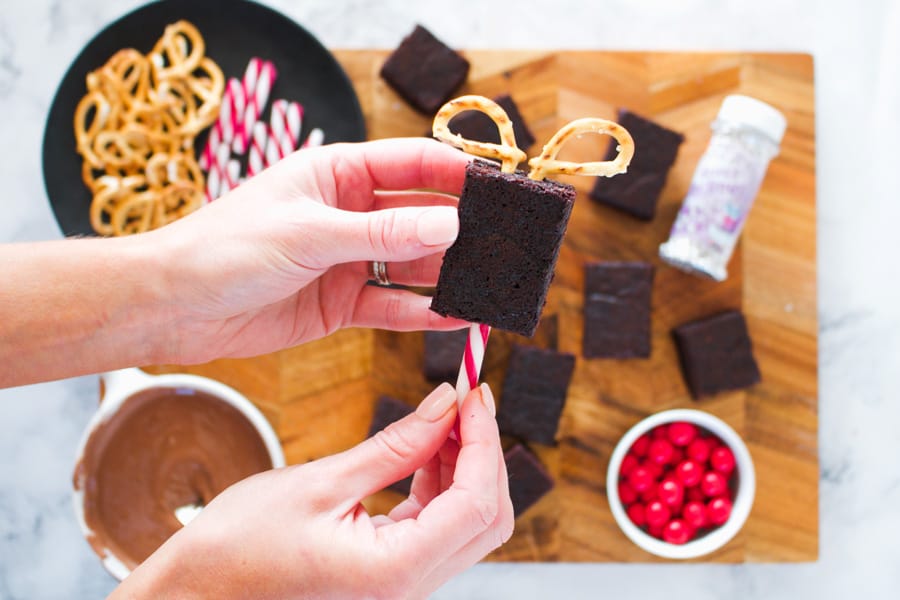
- Add the candy cane: Trim the curved ends off the candy canes so you have straight pieces around 6cm long, then gently push one into the base of each brownie to form a firm handle.
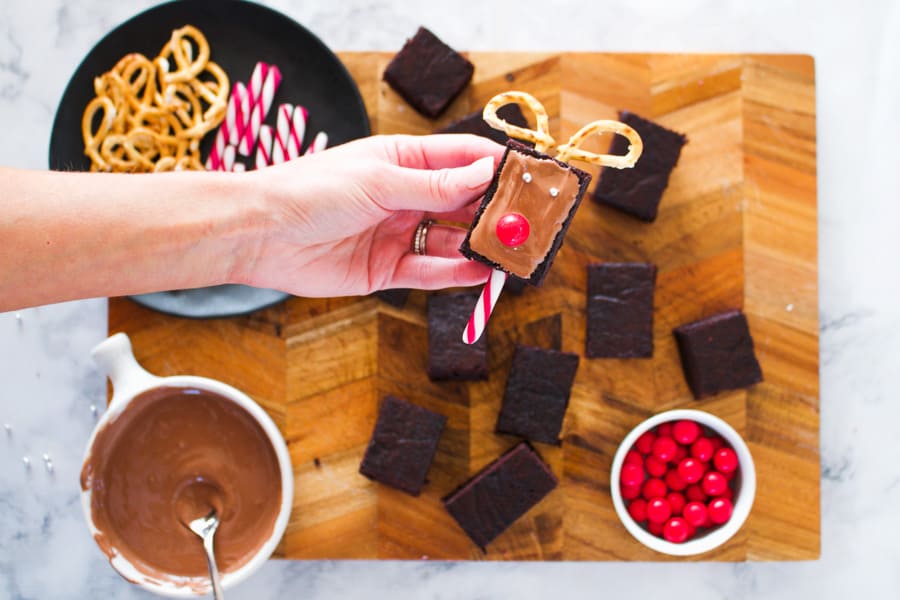
- Add chocolate 'glue': Melt the milk chocolate and spread a thin layer over the front of a brownie rectangle - work with 2-3 pieces at a time so the chocolate doesn't firm too quickly.
- Make the face: Add a Jaffa for the nose and two silver cachous for the eyes before the chocolate sets.
Recipe Tips
- Bake your own fudgy chocolate brownie, use a packet mix, or buy a slab of ready-made brownie.
- Use a fudgy brownie so the antlers and candy cane sticks stay in place.
- Cool completely before decorating, or the chocolate won't set properly.
- Flip the brownie slab to create a perfectly flat surface for decorating.
- Cut with a sharp knife, wiping between slices for clean edges.
- Add pretzels on the day to keep them crunchy.
- Store at room temperature in an airtight container for up to a week.
- Freeze the undecorated brownie for up to 3 months, then thaw at room temperature, trim, slice and decorate.
- Perfect for gifting - once decorated and set, pop the brownies into cellophane bags or small boxes, then tie with ribbon.
Christmas Reindeer Brownies FAQs
Use rich, dense brownies so you can easily insert the candy cane base and pretzel antlers. I recommend using this homemade brownies recipe as it is perfect for decorating.
Yes! Bake a family-sized box brownie mix, let it cool completely, then follow the trimming, slicing and decorating instructions.
Choose a fudgy mix rather than a cake mix.
Alternatively, you can use a store-bought brownie slab.
Yes, you can bake the brownie up to 3 days ahead and store it undecorated at room temperature, then decorate closer to serving so the pretzels stay crisp and the candy canes don't get sticky.
For the nose, any round red lolly or chocolate works well - red M&Ms, Smarties or similar. For the eyes, you can use mini chocolate chips, soft candy eyes, or even small dots of white chocolate with a chocolate chip or sprinkles pushed into the centre.
Use gluten-free flour, plus GF pretzels and candy canes, and always check lolly labels for allergy warnings. For younger kids, swap hard cachous for soft candy eyes or choc chips.
More Christmas Recipes To Make With The Kids
If you're after more easy, hands-on Christmas recipes the kids will love, try these ideas too...
WANT EVEN MORE DELICIOUS RECIPES? Subscribe to my newsletter or follow along on Facebook or Instagram. And if you love baking, then please come and join my Facebook cooking club group or subscribe to my YouTube channel.
Reindeer Brownies
Ingredients
- 150 g butter
- 275 g (1 ¼cups) caster sugar
- 75 g (¾ cup) cocoa powder
- 2 teaspoon vanilla extract
- 3 eggs room temperature
- 75 g (½ cup) plain flour
Decorations
- 200 g pretzels
- 250 g milk chocolate melted
- 200 g packet Jaffas (or any red coated chocolate or lolly)
- 130 g silver cachous (edible balls)
- 16 mini candy canes
Instructions
Conventional Method
- Preheat oven to 160 degrees celsius and line a 20cm square tin with baking paper. Set aside.
- Place the butter into a microwave-safe bowl. Heat for 1 minute.
- Add the caster sugar and cocoa powder and stir.
- Heat in the microwave on 30 second bursts (50% power) until melted and combined - stirring each time.
- Allow to cool slightly.
- Add the vanilla extract and the eggs and whisk until combined.
- Sift the plain flour into the bowl and mix gently.
- Pour the brownie mixture into the prepared tin and bake for 30 minutes or until just cooked through (do not overcook).
- Leave in the tin to cool completely.
- Trim any raised edges off the brownie so you have a completely flat square brownie.
- Turn the brownie over onto a flat board.
- Cut the brownie into 16 equal rectangles.
- Cut the pretzels in half using a sharp knife.
- Press the pretzels into the top of the brownie pieces for 'antlers'.
- Spread melted milk chocolate over the front of the brownie pieces (do a couple at a time so that the chocolate doesn't set too quickly).
- Add a Jaffa for the nose and 2 silver cachous for the eyes.
- Trim the candy canes with a knife so that you have small straight pieces (approx 6 cm in length). Insert the candy cane into the base of the brownie pieces.
Thermomix Method
- Preheat oven to 160 degrees celsius and line a 20cm square tin with baking paper. Set aside.
- Place the butter into the Thermomix bowl. Melt for 3 minutes, 80 degrees, Speed 2.
- Add the caster sugar and cocoa powder and mix for 10 seconds, Speed 4. Scrape down the sides of the bowl and repeat for a further 10 seconds. Allow to cool slightly.
- Add the vanilla extract and the eggs and mix for 10 seconds, Reverse, Speed 4. Scrape down the sides and repeat.
- Add the plain flour and mix for 5 seconds, Speed 4. Scrape the sides of the bowl and repeat.
- Pour the brownie mixture into the prepared tin and bake for 30 minutes or until cooked through. Leave in the tin to cool completely.
- Trim any raised edges off the brownie so you have a completely flat square brownie. Turn the brownie over onto a flat board. Cut the brownie into 16 equal rectangles.
- Cut the pretzels in half using a sharp knife. Press the pretzels into the top of the brownie pieces for 'antlers'.
- Spread melted milk chocolate over the front of the brownie pieces (do a couple at a time so that the chocolate doesn't set too quickly).
- Add a Jaffa for the nose and 2 silver cachous for the eyes.
- Trim the candy canes with a knife so that you have small straight pieces (approx 6 cm in length).
- Insert the candy cane into the base of the brownie pieces.
Notes
- Use a fudgy brownie so the antlers and candy cane sticks stay in place.
- Bake your own fudgy chocolate brownie, use a packet mix, or buy a slab of ready-made brownie.
- Cool completely before decorating or the chocolate won't set properly.
- Flip the brownie slab for a perfectly flat surface to trim and decorate.
- Cut with a sharp knife, wiping between slices for clean edges.
- Add pretzels on the day to keep them crunchy.
- Silver cachous can be purchased in the baking section of most large supermarkets.
- Use Jaffa's or any red coated chocolates or lollies (red M&Ms) for the nose.
- Store at room temp in an airtight container for up to a week.
- Freeze the undecorated brownie for up to 3 months, then thaw at room temperature, trim, slice and decorate.
- Perfect for gifting - once decorated and set, pop the brownies into cellophane bags or small boxes, then tie with ribbon.


Food Shot says
These are so adorable! Something that will add that Christmas spirit to the desserts of our festive family dinner.
Lucy Mathieson says
Thank you so much!