

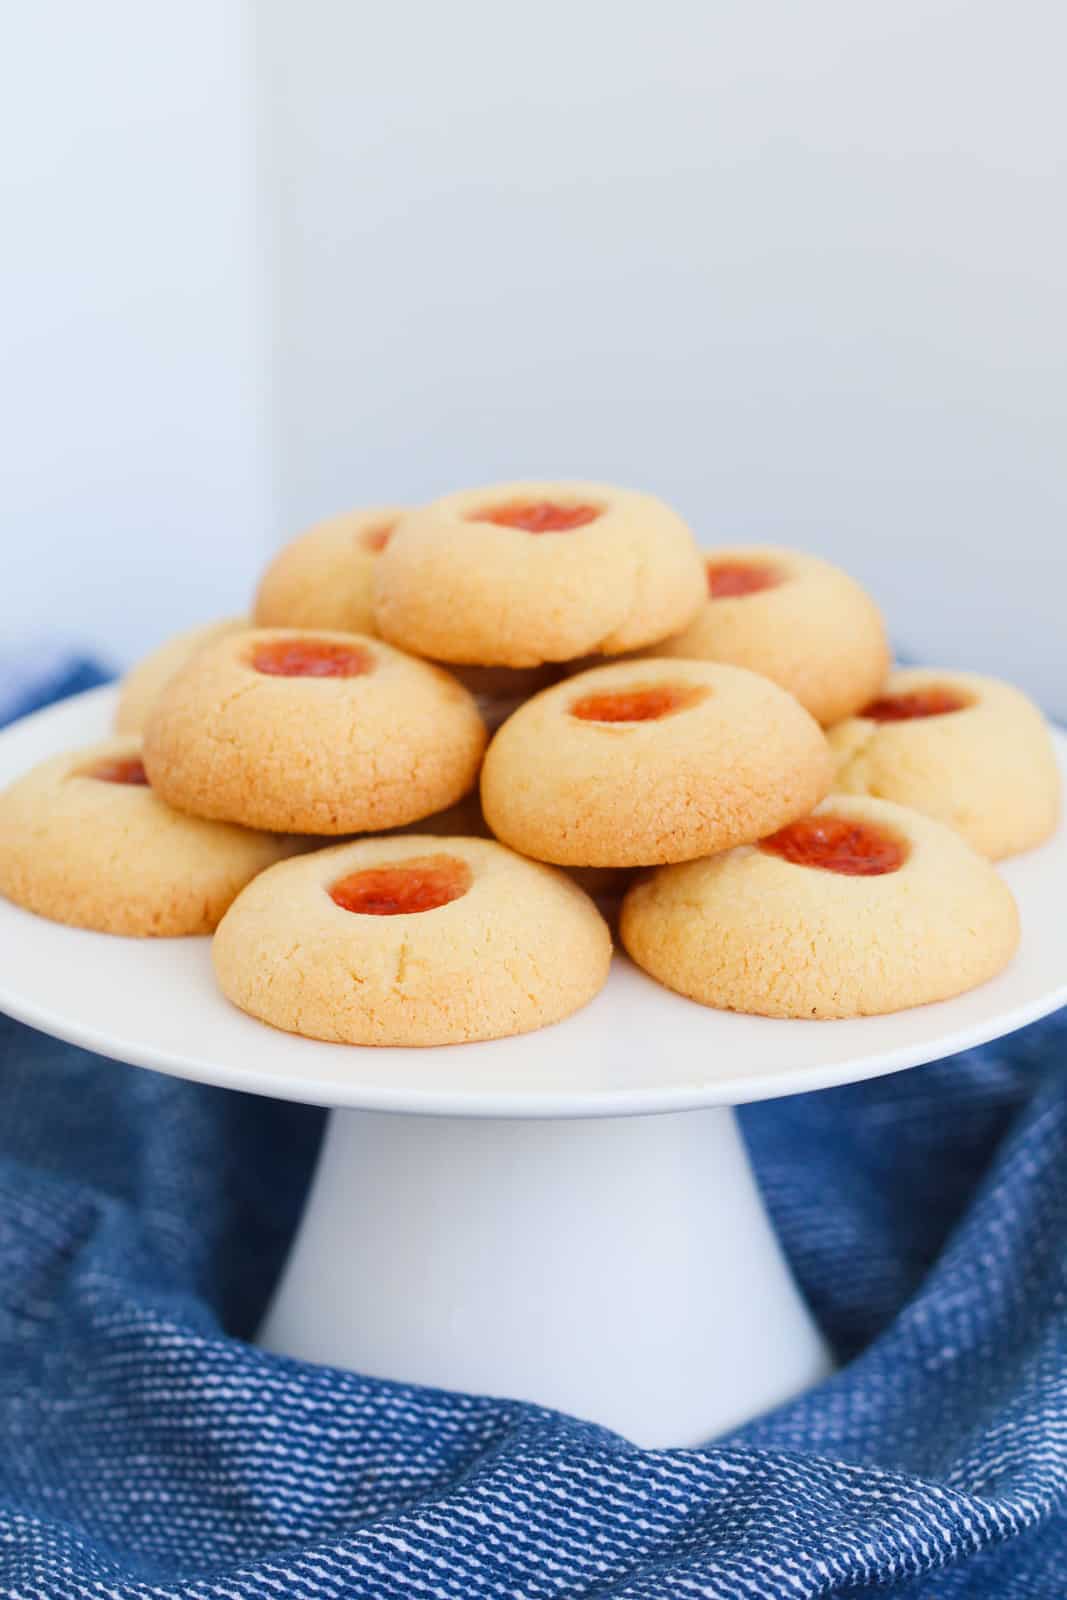
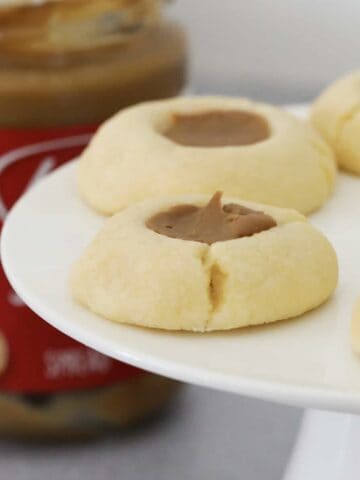
In need of a quick, kid-approved treat? These jam drops are the ultimate lunchbox winner - buttery, soft, and filled with fruity jam! Made with pantry staples (no fancy ingredients needed), they're a classic favourite that busy mums can whip up in minutes.
Love easy Aussie bakes? Don't miss my Milo and Oat Slice or Chocolate Chip, Sultana and Cornflake Biscuits - perfect for snack time too!
Absolutely BEAUTIFUL! Simple ingredients. Beautifully written recipe. Incredible results. Extremely difficult stopping at two lol. YUMMMMMM! Thank you for your delicious recipe ❤️
- Irene
These jam drops have been a staple in Aussie kitchens for generations - and with good reason! Whether you're whipping them up for school lunchboxes, a weekend treat, or filling the biscuit jar for visitors, they're a guaranteed hit with kids and grown-ups alike.
The best part? You only need 6 ingredients and about 10 minutes to get them in the oven (plus chilling time - don't skip it!).
If you're looking for more easy lunchbox-friendly ideas, check out these Easy Banana Muffins, Chocolate Marshmallow Cookies or my go-to ANZAC Biscuits.
Why You're Going To Love This Recipe
- Super quick to make - 10 minutes of prep time, that's it!
- Freezer-friendly - stash a batch away for lunchboxes or unexpected visitors.
- Customisable - use any jam you've got on hand.
- Kid-approved - soft, buttery, and the perfect little bite.
- No fancy ingredients - just pantry staples and a bit of jam.
- Thermomix or conventional - you will find both the Thermomix and conventional methods in the recipe card below.
Jump to:
Biscuit Ingredients
These simple jam drops are made from just six basic ingredients.
Please scroll to the recipe card at the bottom for ingredient quantities and the full detailed method.

- Butter - Softened to room temp so it creams easily. You can use salted or unsalted.
- Caster sugar - Also called superfine sugar. It dissolves quickly and gives that perfect biscuit texture.
- Plain flour - Known as all-purpose flour in some places.
- Baking powder - Just ½ teaspoon is needed! Too much and they'll puff too much and spread.
Variations
- Gluten-Free Jam Drops - Swap plain flour for a high-quality gluten-free flour blend.
- Egg-Free Jam Drops - Replace the egg with 1 tablespoon of milk or use a store-bought egg replacer for a similar result.
- Lemon Curd Drops - Replace jam with lemon curd for a tangy twist.
- Choc-Hazelnut Drops - Nutella or hazelnut spread works beautifully here too!
- Jam + Coconut - Add a sprinkle of shredded coconut over the jam before baking for an old-school Aussie twist.
How To Make Jam Drops
Please scroll to the recipe card at the bottom for ingredient quantities and the full detailed method.
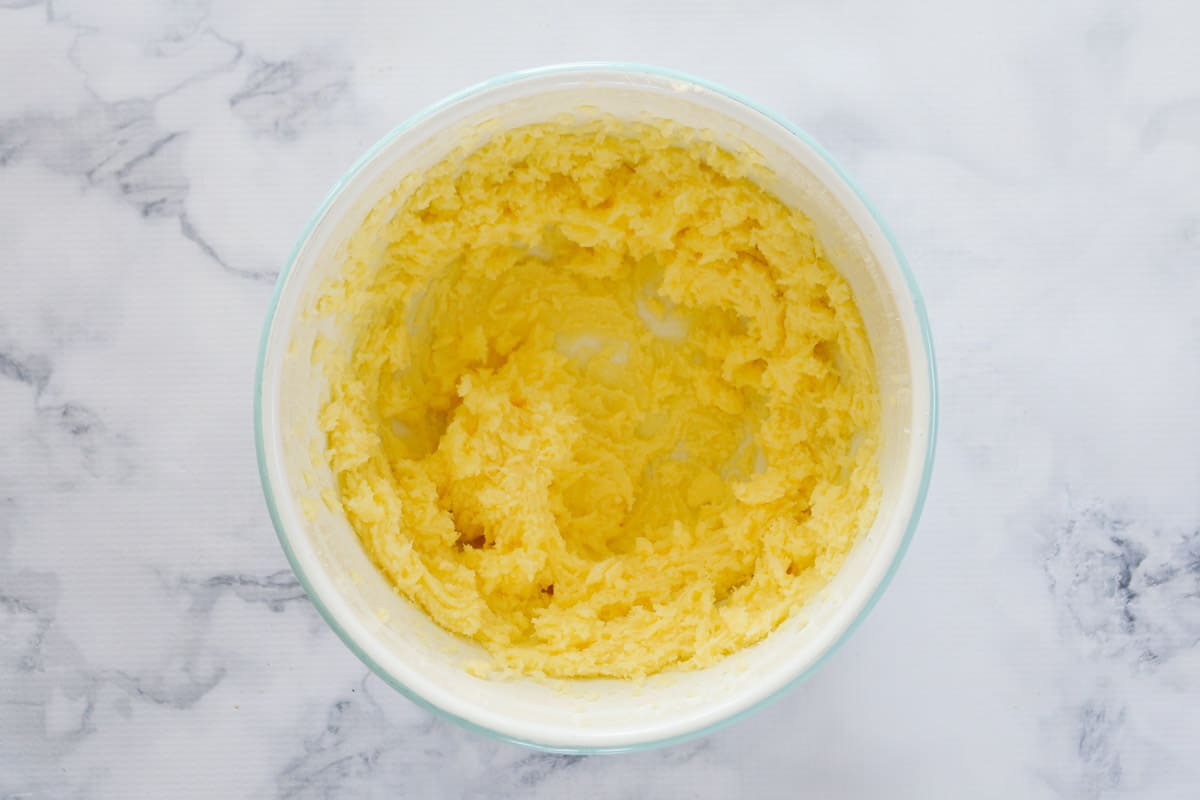
- Step 1: Beat butter and sugar until light and fluffy.
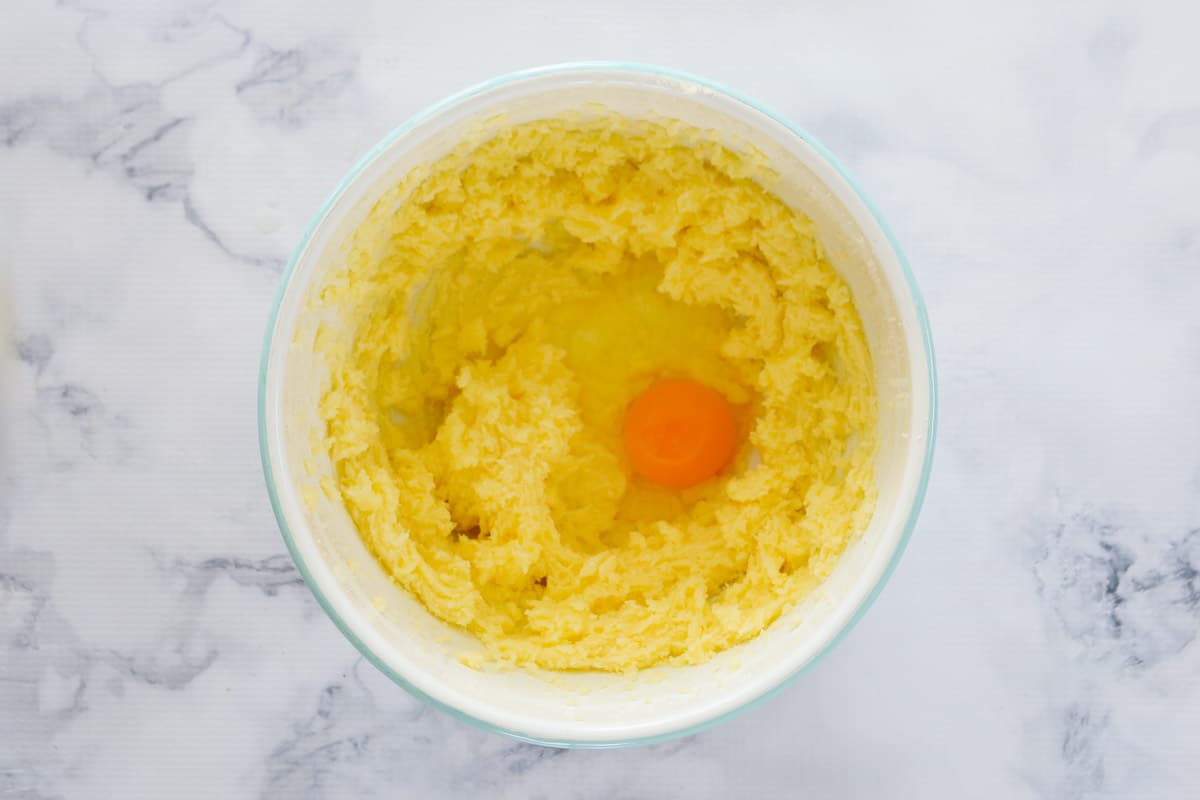
- Step 2: Add egg and mix until well combined.
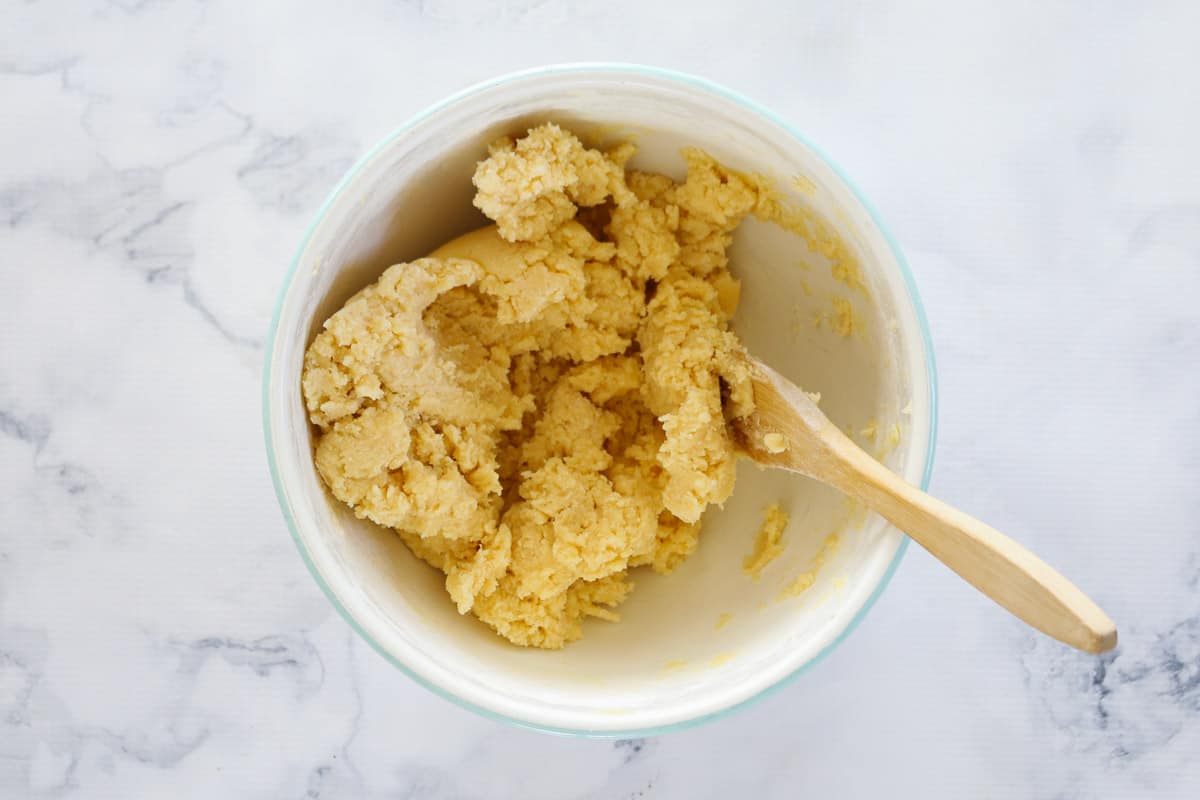
- Step 3: Sift in the flour and baking powder. Gently mix until a soft dough forms.
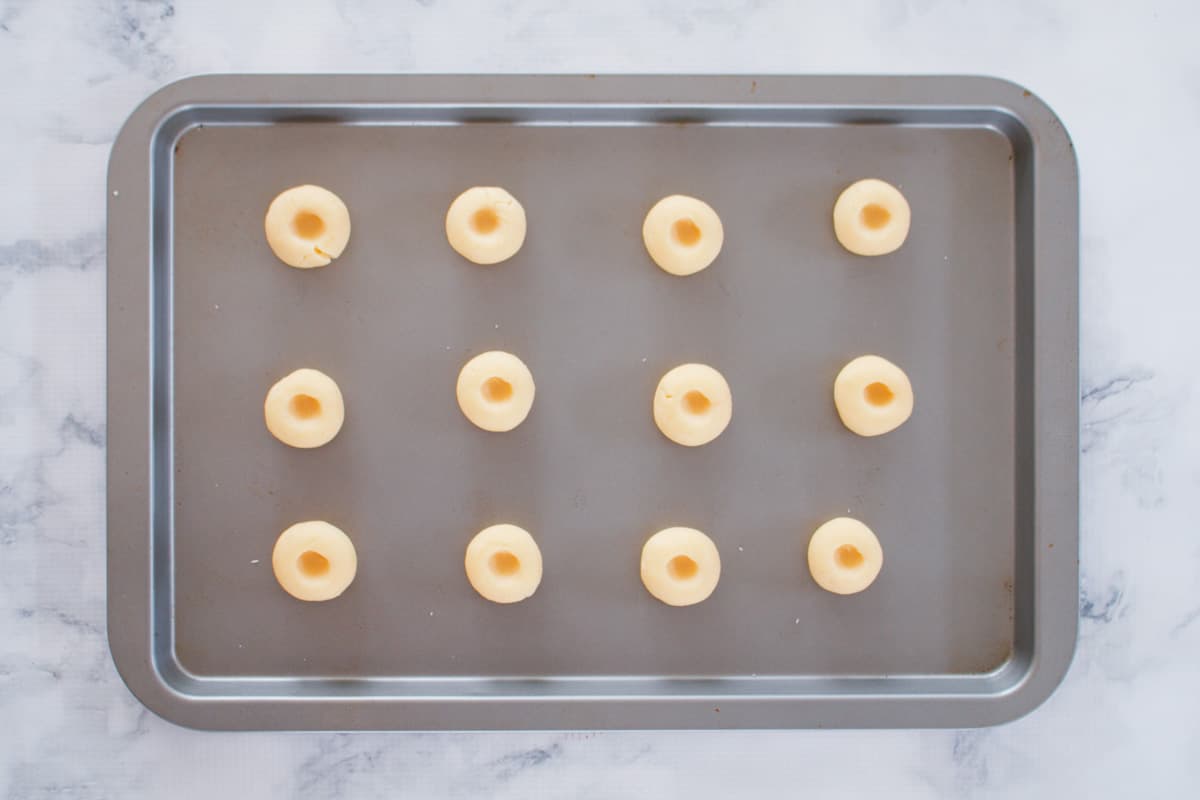
- Step 4: Roll 2-teaspoon portions into balls and place on trays, spaced well apart.
Use your little finger to press a small indent into the centre of each ball.
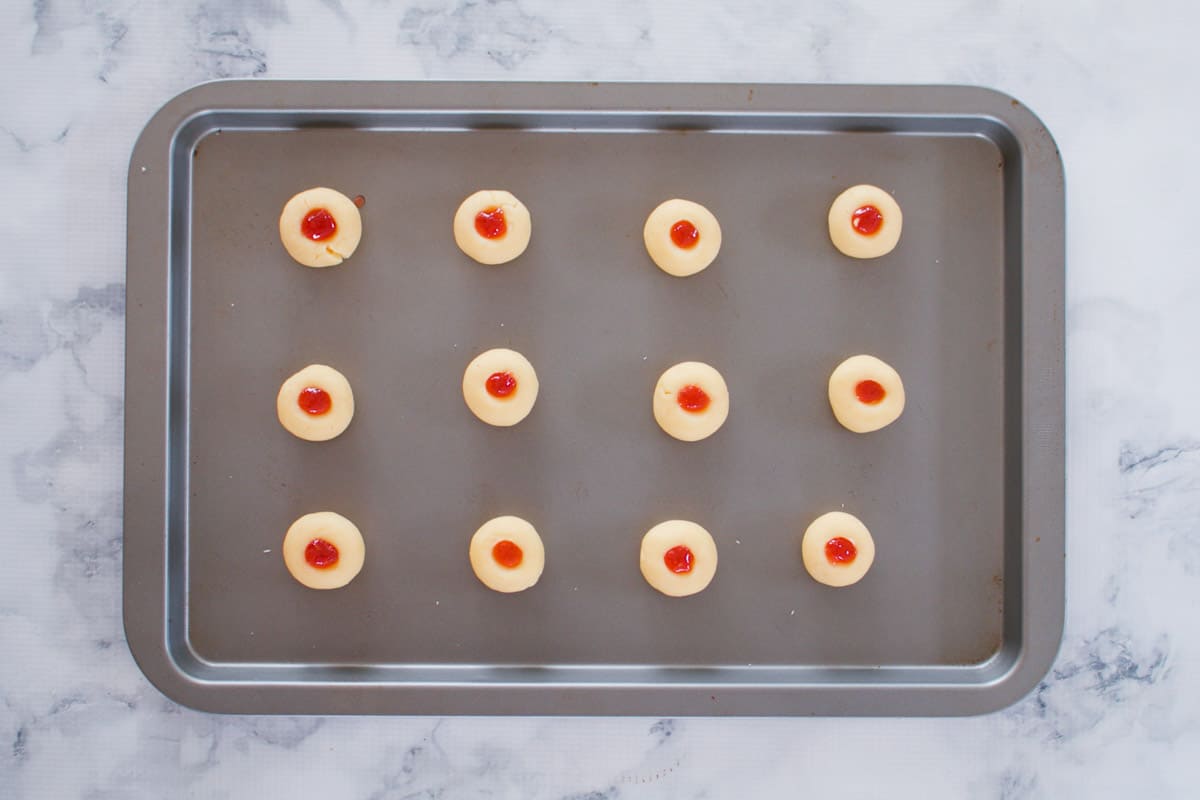
- Step 5: Fill each indent with a tiny amount of jam (less is more!).
Chill the trays in the fridge for 30 minutes (this step is key to prevent spreading).
Bake for 10-12 minutes or until just lightly golden.
Top Tip
Don't skip the chilling step! Popping the dough balls in the fridge for 30 minutes before baking helps the butter firm up, which stops the cookies from spreading too much and keeps that perfect thumbprint shape.
Recipe Tips
- Chill the dough balls before baking - this stops the cookies from spreading.
- Use just 2 teaspoons of dough per cookie - they'll spread to the perfect size.
- Don't overfill with jam - a small amount is best to stop it from oozing out.
- Rotate your trays halfway through baking for even colour.
- Leave space between cookies - they need room to spread slightly.
- Let the cookies cool on the tray for 10 minutes before moving them.
- Store in an airtight container at room temp for up to 1 week.
- Freeze baked jam drops for up to 3 months. Layer with baking paper in a container and defrost at room temp.

Jam Drops FAQs
Absolutely! Raspberry, strawberry, plum, apricot - use whatever you love (or have open in the fridge!).
Yes! I have included both the conventional method for making jam drops and the Thermomix jam drops recipe in the recipe card below.
Make sure you chilled the cookie dough before baking, and measure your baking powder carefully - just ½ teaspoon is perfect.
Yes! Roll the balls and freeze them raw (without jam). When ready to bake, indent and fill with jam, then bake from frozen - just add 1-2 minutes to the bake time.
Use a thick jam - thinner ones tend to run too much. A spoonful of homemade or supermarket "fruit spread" style jam is perfect.
More Classic Biscuit Recipes
If you love old-fashioned jam drops, then I think you'll enjoy these recipes too!


WANT EVEN MORE DELICIOUS RECIPES? Subscribe to my newsletter or follow along on Facebook or Instagram. And if you love baking, then please come and join my Facebook cooking club group or subscribe to my YouTube channel.

Jam Drops
Ingredients
- 180 g butter softened to room temperature
- 220 g (1 cup) caster sugar
- 1 egg
- 300 g (2 cups) plain flour all-purpose flour, sifted
- ½ teaspoon baking powder
- jam any flavour
Instructions
- Preheat oven to 170 degrees celsius (fan-forced). Grease and line two baking trays with baking paper.
- Beat the sugar and softened butter with electric beaters or a stand mixer until light and fluffy.If using a Thermomix: Cream the butter and sugar for 20 seconds, Speed 4. Scrape down the sides of the bowl and repeat for a further 20 seconds, Speed 4.
- Add the egg and continue to mix until combined.If using a Thermomix: Add egg and mix for 10 seconds, Speed 4.
- Sift in the plain flour and baking powder. Stir gently to combine.If using a Thermomix: Add flour and baking powder and mix for 20 seconds, Speed 5.
- Roll the mixture into small balls (2 teaspoons of mixture per ball).
- Place the cookie balls onto the baking trays and use the tip of your little finger to create an indent in the middle that goes apprximately one-third to one-half of the way down).
- Place a very small (TINY!) amount of jam into each indent.
- Place the trays into the fridge and chill for 30 minutes (ESSENTIAL!).
- Bake the cookies for approximately 10 minutes or until just lightly golden.
- Leave the cookies on the baking trays for 10 minutes and then transfer to a wire rack to cool completely.
Notes
- Gluten-Free Jam Drops - Swap plain flour for a high-quality gluten-free flour blend.
- Egg-Free Jam Drops - Replace the egg with 1 tablespoon of milk or use a store-bought egg replacer for a similar result.
- Lemon Curd Drops - Replace jam with lemon curd for a tangy twist.
- Choc-Hazelnut Drops - Nutella or hazelnut spread works beautifully here too!
- Jam + Coconut - Add a sprinkle of shredded coconut over the jam before baking for an old-school Aussie twist.
- Chilling the dough balls before baking is ESSENTIAL - this stops the cookies from spreading.
- Use just 2 teaspoons of dough per cookie - they'll spread to the perfect size.
- Don't overfill with jam - a small amount is best to stop it from oozing out.
- Rotate your trays halfway through baking for even colour.
- Leave space between cookies - they need room to spread slightly.
- Let the cookies cool on the tray for 10 minutes before moving them.
- Store in an airtight container at room temp for up to 1 week.
- Freeze baked jam drops for up to 3 months. Layer with baking paper in a container and defrost at room temp.
Nutrition


Alyx says
These cookies are just too yummy. I'm eating way too many.
Not going to stop though.
My little one helped me make them. They are very simple to make. And very good to eat.