
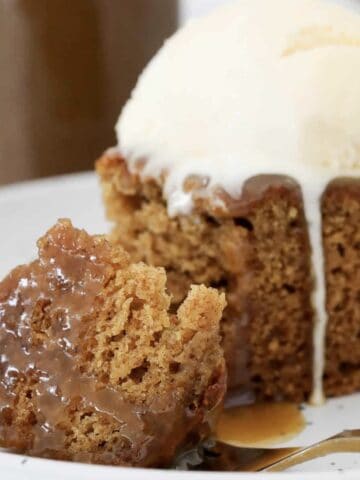
There's nothing quite like a warm bowl of chocolate self-saucing pudding on a cold night. This old-fashioned favourite bakes into a soft, spongy chocolate cake that magically creates its own rich sauce underneath. With just a handful of pantry staples and only 10 minutes of prep, this pudding is the ultimate no-fuss dessert that everyone will love!
If you love simple desserts like this, try my golden syrup dumplings or my apple sponge pudding - they're just as delicious.
Keeper recipe, simple and turned out exactly as I was expecting. I have tried several different online chocolate pudding recipes lately, and this one is the clear winner on taste, texture and the generous amount of sauce.
- Lissy
This dessert is a true Aussie classic. The magic lies in the way it's assembled - a quick chocolate batter is topped with a mixture of cocoa and sugar, then gently doused in boiling water before baking. As it cooks, the cake rises to the top while the sauce forms underneath.
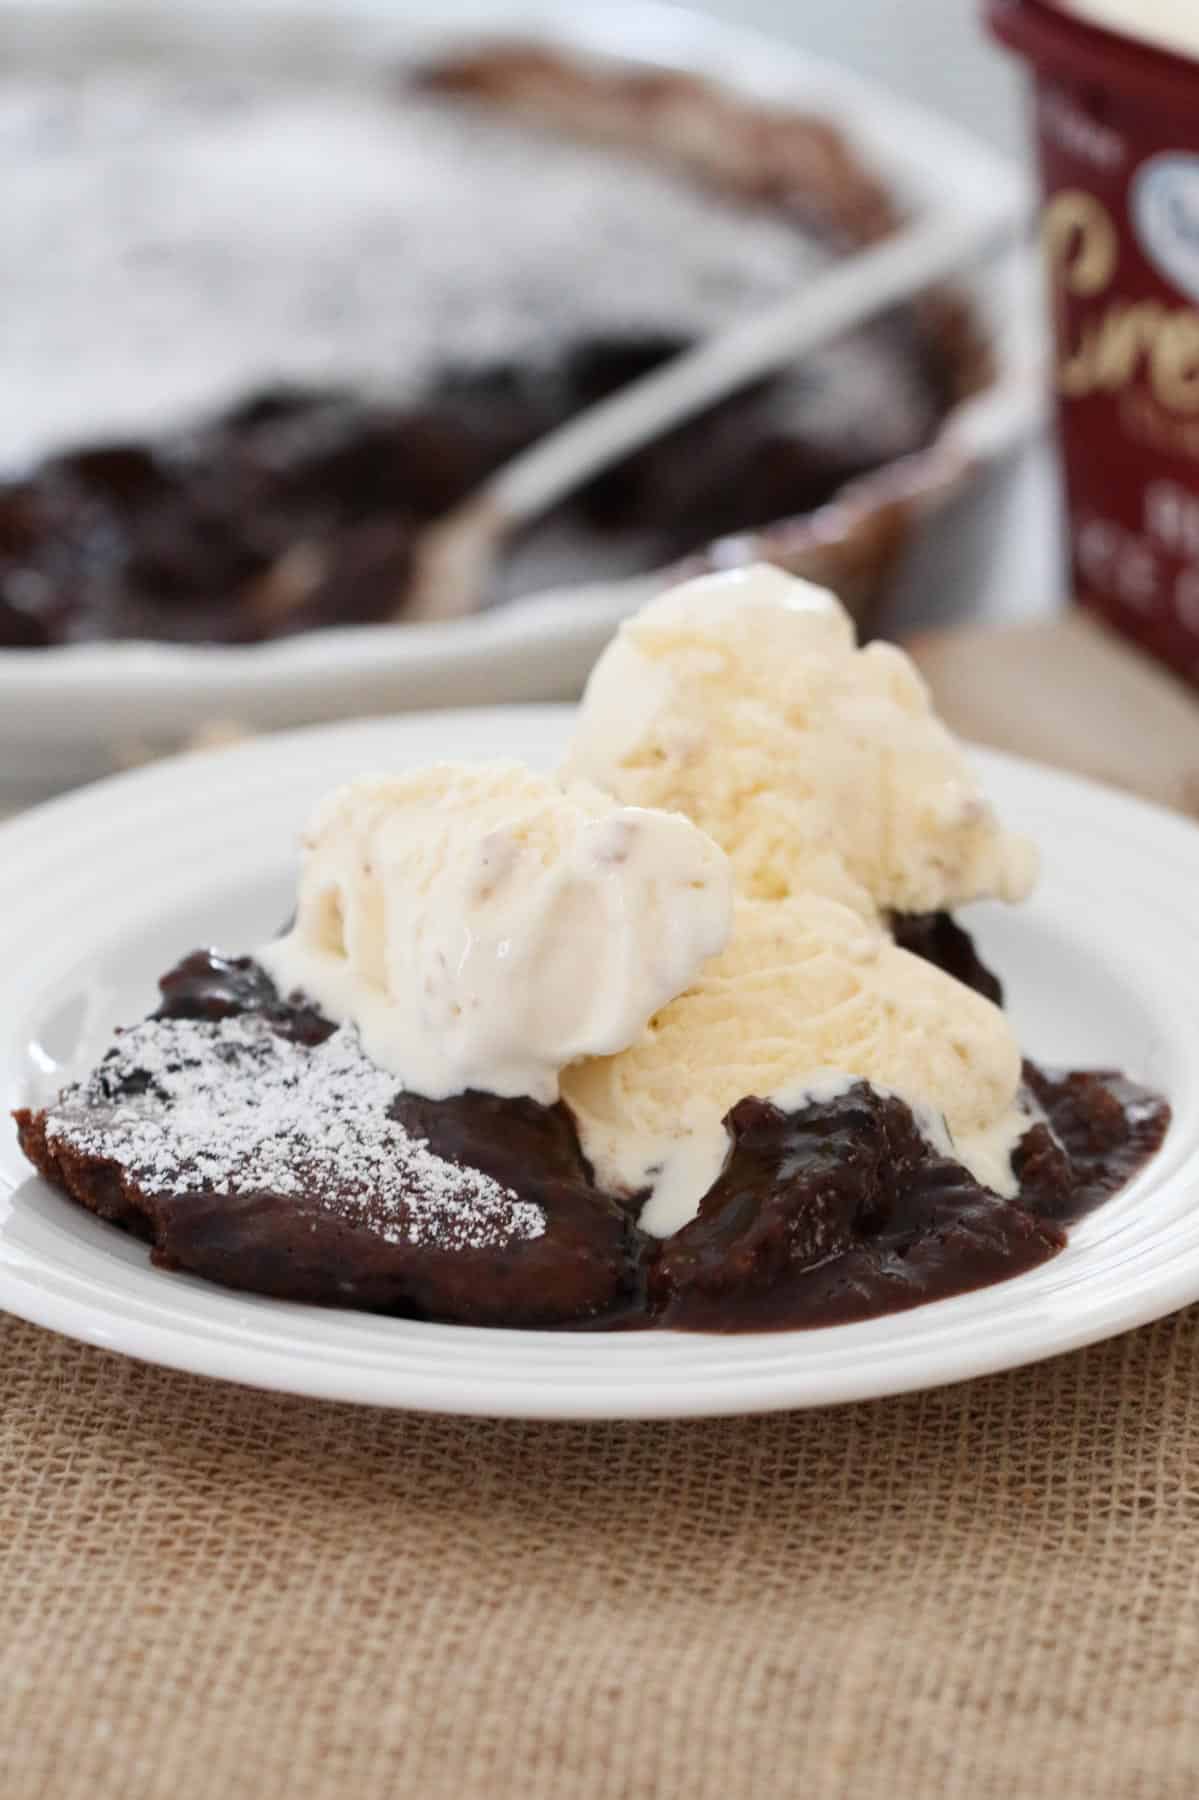
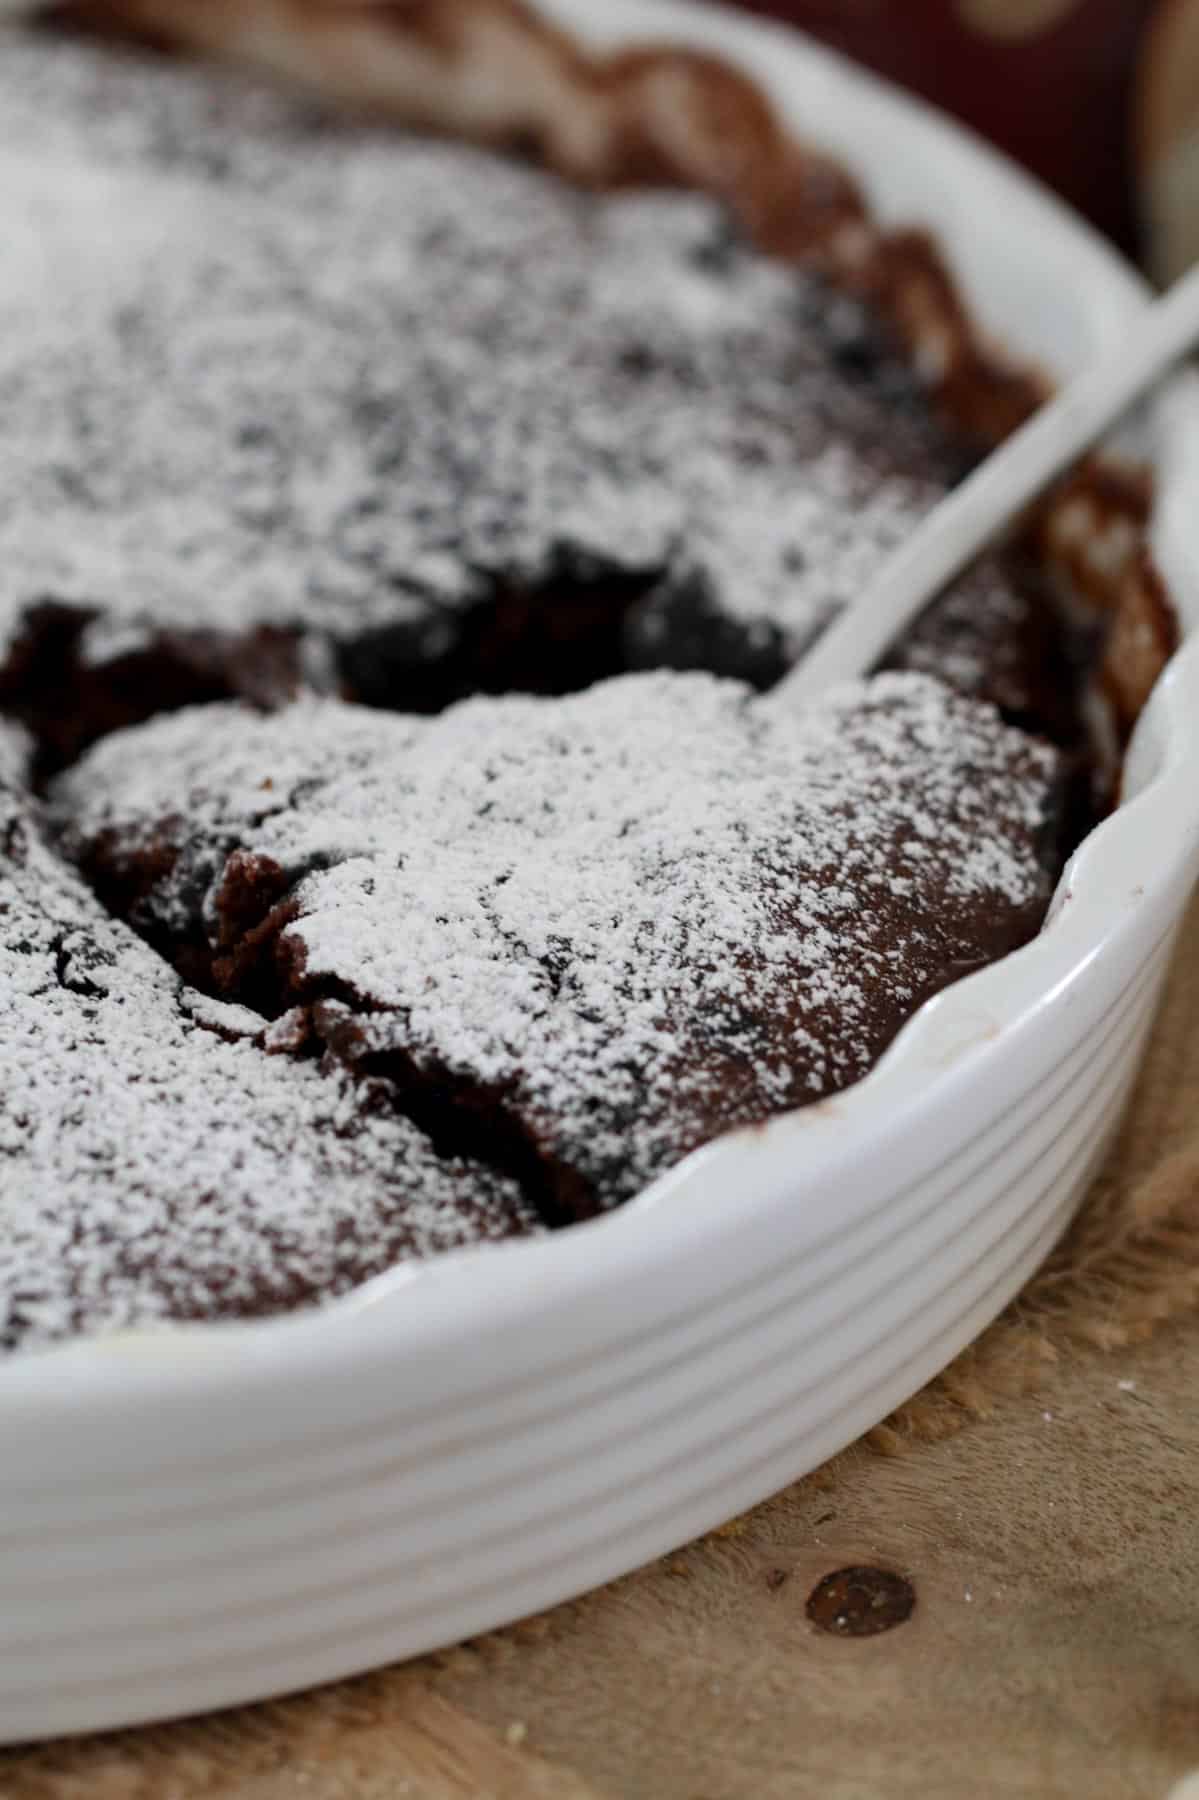
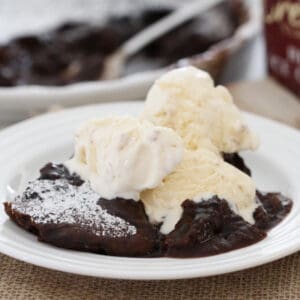
The result? A fluffy chocolate cake sitting on a pool of silky sauce that's perfect for scooping straight into bowls with a dollop of cream or a scoop of ice cream. Like my butterscotch self-saucing pudding, caramel pudding, easy apple pie and lemon delicious pudding, it's simple, nostalgic, and always a winner.
Why You're Going To Love This Recipe
- Magic sauce layer - one batter, one dish, and it creates its own sauce!
- Quick and easy - only 10 minutes to prep, then the oven does the rest.
- Pantry-friendly - made with simple ingredients you probably already have.
- Two methods - conventional and Thermomix instructions included.
- Family favourite - serve with ice cream, custard or cream for the ultimate winter dessert.
Jump to:
Pudding Ingredients
You only need basic pantry staples, but here are a few to note:
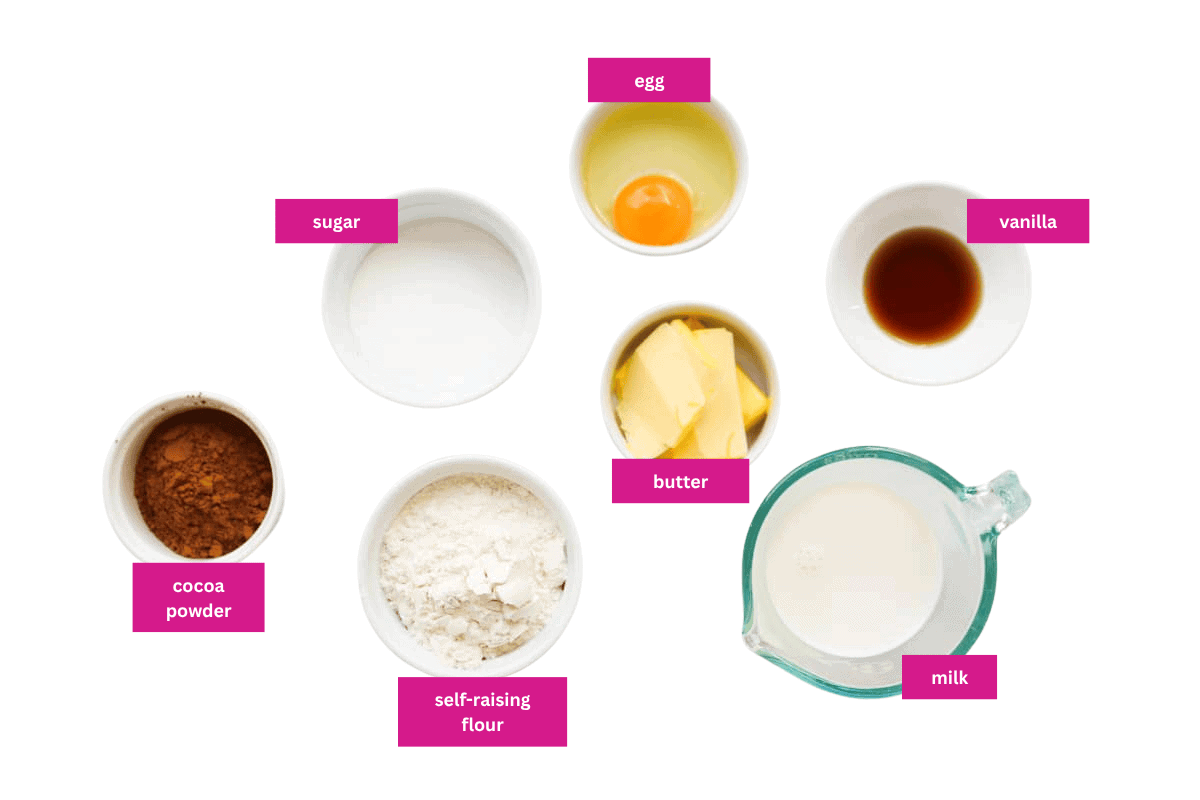
- Boiling water - this is the key to creating the sauce, so make sure it's freshly boiled.
- Self-raising flour - gives the pudding its light, fluffy texture.
- Cocoa powder - use a good quality cocoa for a rich chocolate flavour.
Variations
- Gluten-free - swap self-raising flour for a gluten-free blend with added baking powder.
- Extra chocolatey - stir through a handful of chocolate chips into the batter.
- Mocha twist - replace half the boiling water with strong brewed coffee.
- Individual serves - bake in 6-8 small ramekins instead of one dish (reduce baking time slightly).
- Dairy-free alternative - swap the regular milk for almond milk, oat milk, or soy milk. Use a dairy-free margarine or coconut oil in place of butter.
How To Make Chocolate Self-Saucing Pudding
This recipe couldn't be easier - here's how to do it:
Note: Scroll to the recipe card at the bottom for the ingredients quantities and full detailed method.
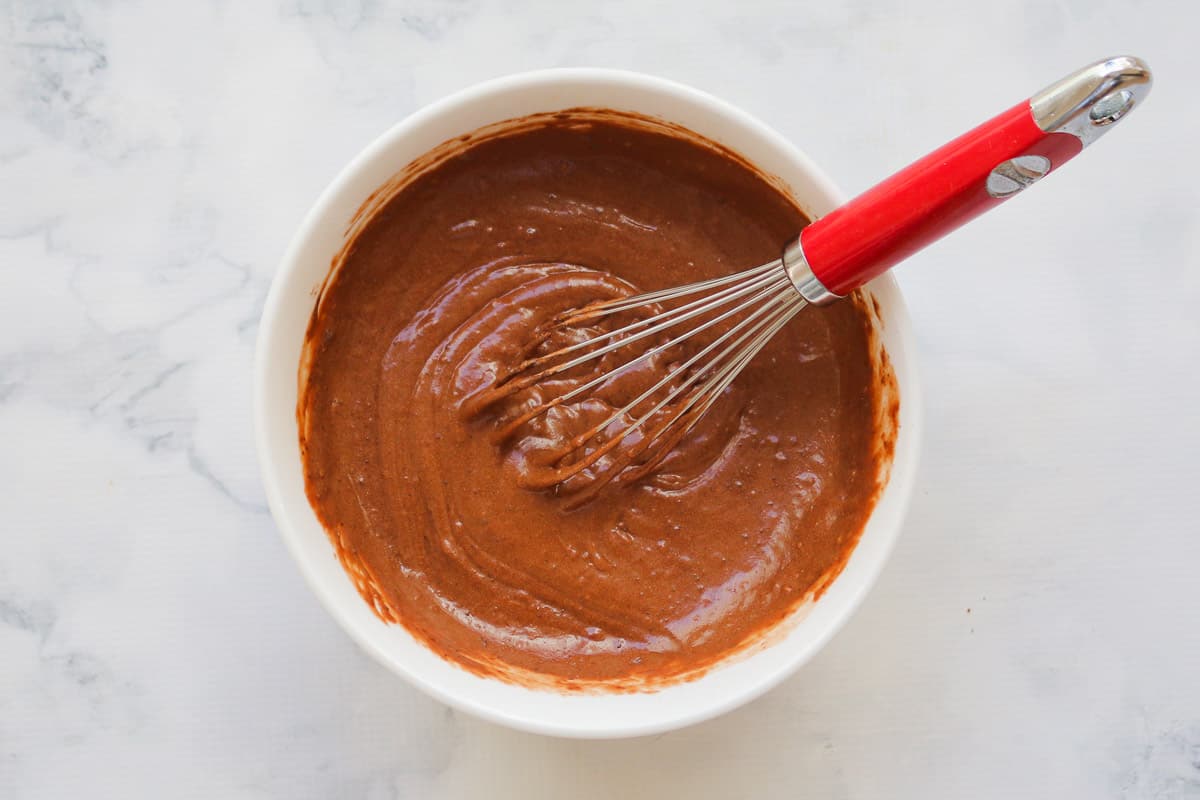
- Step 1: Mix the batter - combine the melted butter, milk, vanilla, and egg in a large bowl. Whisk in sifted flour, cocoa, and sugar until smooth.
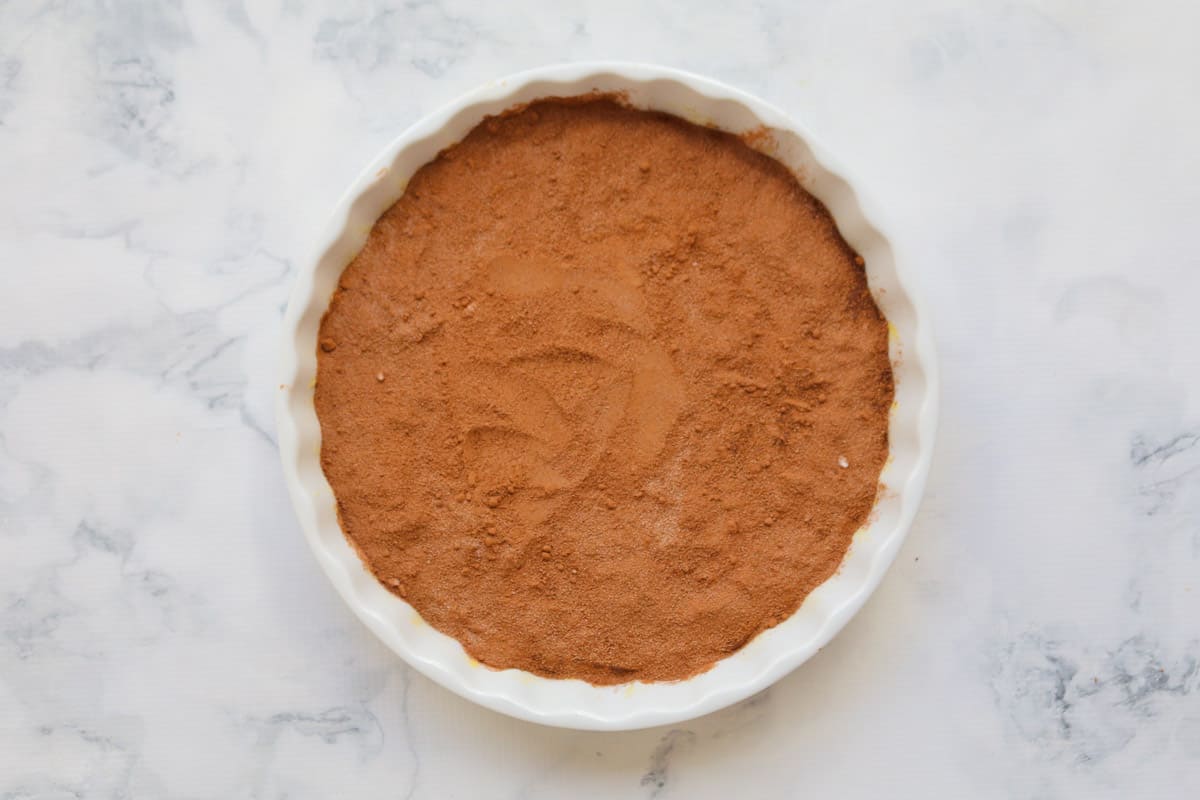
- Step 2: Assemble - pour batter into the dish. Mix extra cocoa and sugar together, sprinkle evenly over the top of the batter.
Top Tip
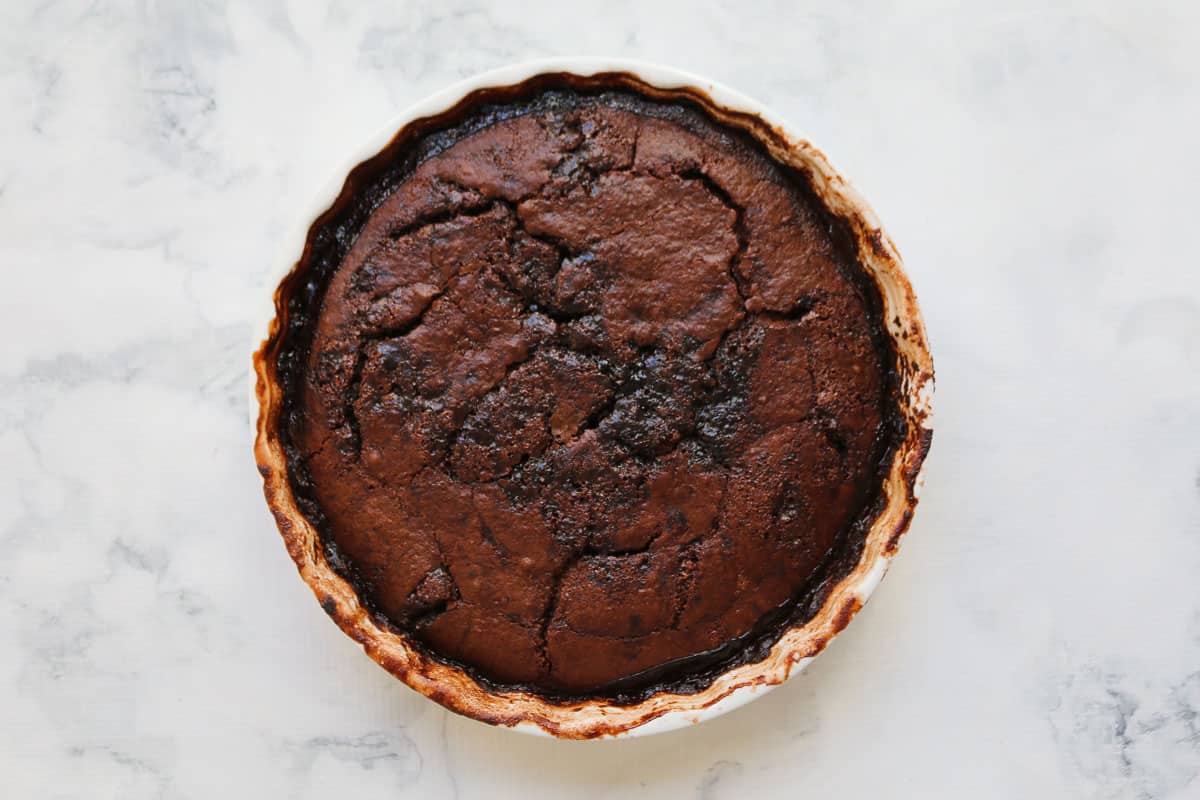
Don't over-bake! You want the top set but the sauce still runny underneath - that's where the magic happens.
Recipe Tips
- Grease the baking dish well to prevent sticking.
- Mix the extra cocoa and sugar together before sprinkling to avoid clumps.
- Pour boiling water very gently to keep the batter intact.
- Bake only until the top feels cooked - the pudding should still wobble.
- Place the dish on a tray to catch any overflow.
- Best eaten straight from the oven, but leftovers can be stored in the fridge for 2 days and reheated.
- Freezing isn't recommended - the sauce texture changes when thawed.
Chocolate Self-Saucing Pudding FAQs
It's probably over-baked. Check at 25 minutes and remove as soon as the top is set.
It's best served immediately, but you can prep the dry and wet ingredients separately, then assemble and bake when needed.
Yes - use a larger dish and extend the baking time slightly.
Straight from the oven with vanilla ice cream, custard, or whipped cream.
More Pudding Dessert Recipes
When it comes to winter desserts, it doesn't get any more delicious than my comfort food collection!
So grab a blanket, snuggle up on the couch with a movie and enjoy ALL of the yummy desserts this winter.


Chocolate Self-Saucing Pudding
Ingredients
- 60 g butter
- 125 g (½ cup) milk
- 2 teaspoon vanilla extract or vanilla essence
- 1 egg lightly beaten, room temperature
- 150 g (1 cup) self-raising flour
- 25 g (¼ cup) cocoa powder
- 110 g (½ cup) caster sugar
For the sauce
- 25 g (¼ cup) cocoa powder extra
- 110 g (½ cup) caster sugar extra
- 450 ml water boiling
Instructions
Conventional Method
- Preheat oven to 160 degrees celsius (fan-forced).
- Grease a large (6 cup capacity) baking dish and set aside.
- Melt the butter in the microwave and allow to cool slightly.
- Add the milk, vanilla extract and egg and whisk together.
- Sift the self-raising flour and cocoa powder over the liquid mixture. Add the caster sugar and whisk together until combined.
- Pour the mixture into the prepared baking dish.
- Sprinkle the extra cocoa powder and caster sugar over the pudding mixture.
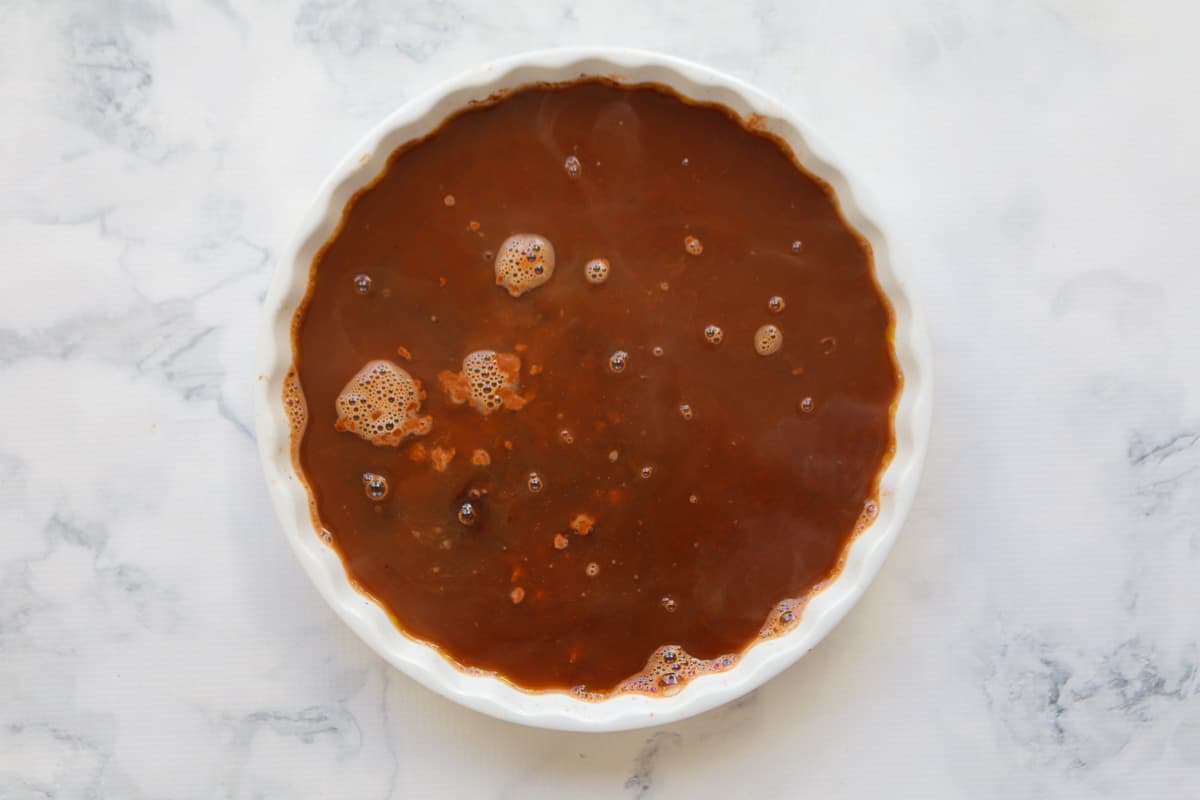
- Carefully pour over the boiling water.
- Bake for 30 minutes or until firm on the top (but VERY wobbly underneath - as this is the sauce).
- Allow to cool slightly, then dust with icing sugar. Serve immediately.
Thermomix Method
- Preheat oven to 160 degrees celsius (fan-forced). Grease a large oven baking dish (6 cup capacity) and set aside.
- Sift the self-raising flour and cocoa by pressing Turbo 5-10 times. Set aside in a separate bowl.
- Place butter into the Thermomix bowl and melt for 2 minutes, 100 degrees, Speed 1. Allow to cool slightly.
- Add the milk, vanilla extract and egg and mix for 20 seconds, Speed 4.
- Add the self-raising flour, cocoa powder and caster sugar and mix for 5 seconds on Speed 4. Scrape down the sides of the bowl and mix for a further 10 seconds or until smooth.
- Pour the mixture into the prepared dish.
- Sprinkle the extra cocoa powder and caster sugar over the pudding mixture.
- Carefully pour over the boiling water.
- Bake for 30 minutes or until firm on the top (but VERY wobbly underneath - as this is the sauce).
- Allow to cool slightly, then dust with icing sugar. Serve immediately.
Notes
- Don't over-bake! You want the top set but the sauce still runny underneath - that's where the magic happens.
- Grease the baking dish well to prevent sticking.
- Mix the extra cocoa and sugar together before sprinkling to avoid clumps.
- Pour boiling water very gently to keep the batter intact.
- Bake only until the top feels cooked - the pudding should still wobble.
- Place the dish on a tray to catch any overflow.
- Best eaten straight from the oven, but leftovers can be stored in the fridge for 2 days and reheated.
- Freezing isn't recommended - the sauce texture changes when thawed.


john says
This is listed as a top ten thermomix dessert, but there are no thermomix instructions, and its a completely non-thermomix recipe. Finding recipes for thermomix is very difficult, other than the disappointedly limited set which which comes with cookidoo. I have hand created thermomix instructions from non thermomix recipes in the past, but its tedious and time consuming. I am surprised none is doing this.
Lucy says
Hi John, thank you for for taking the time to comment, however, I think you are confused! There are both the conventional AND the Thermomix instructions in the recipe card at the bottom of the post (or you can just click the jump to recipe button). Almost all of my recipe cards contain both sets of methods. Please let me know if I can assist you further.
Lissy says
Keeper recipe, simple and turned out exactly as I was expecting. I have tried several different online choc pudding recipies lately, and this one is the clear winner on taste, texture and the generous amount of sauce.
Lucy says
Yay! I'm so glad to hear that!
Tina says
How far advance can I made a self saucing pudding.
Many thanks
Lucy says
Hi Tina, you can prepare the batter ahead of time but dont add the extra cocoa, sugar and boiling water until just before you're ready to bake it. Serve immediately (or the sauce will disappear!)
Jo says
Can you make these as individuals serves?
Lucy says
Absolutely! Just make sure you reduce the cooking time.