

My mum is a proud Kiwi, and these Chocolate Cornflake Biscuits - known in every New Zealand home as Afghans - were a total staple of my childhood. She'd pull out her battered old Edmonds Cookbook and whip up a batch, and they'd be gone before they'd barely cooled. To this day, one bite takes me straight back to her kitchen.
If you love a proper old-school biscuit, these belong right alongside ANZAC Biscuits and my buttery Yo Yo's - classic, nostalgic and always a crowd-pleaser.
A Quick Look At The Recipe
✅ Recipe Name: Chocolate Cornflake Biscuits (Afghans)
🕒 Total Time: 45 minutes (including chilling)
🍪 Makes: approx. 20 biscuits
🥣 Main Ingredients: butter, sugar, flour, cocoa powder, cornflakes, chocolate icing, walnuts
📖 Dietary Info: Easily made gluten-free and nut-free
⭐ Why You'll Love It: The original Edmonds Cookbook recipe - crunchy, chocolatey, totally nostalgic and foolproof.
SUMMARIZE & SAVE THIS CONTENT ON
Perfect recipe!! Thank you for providing a recipe that didn't leave us with flat melted biscuits. Have printed this and will use for years to come!
- Kirsty
Afghans (or Chocolate Cornflake Biscuits, if you want to sound fancy) are a proper New Zealand icon. The recipe has been in the Edmonds Cookbook since the 1940s - and if you don't know the Edmonds Cookbook, it's New Zealand's best-selling cookbook of all time, with over 3 million copies sold. Basically, every Kiwi household has one. Mum's copy was well-used, to say the least.
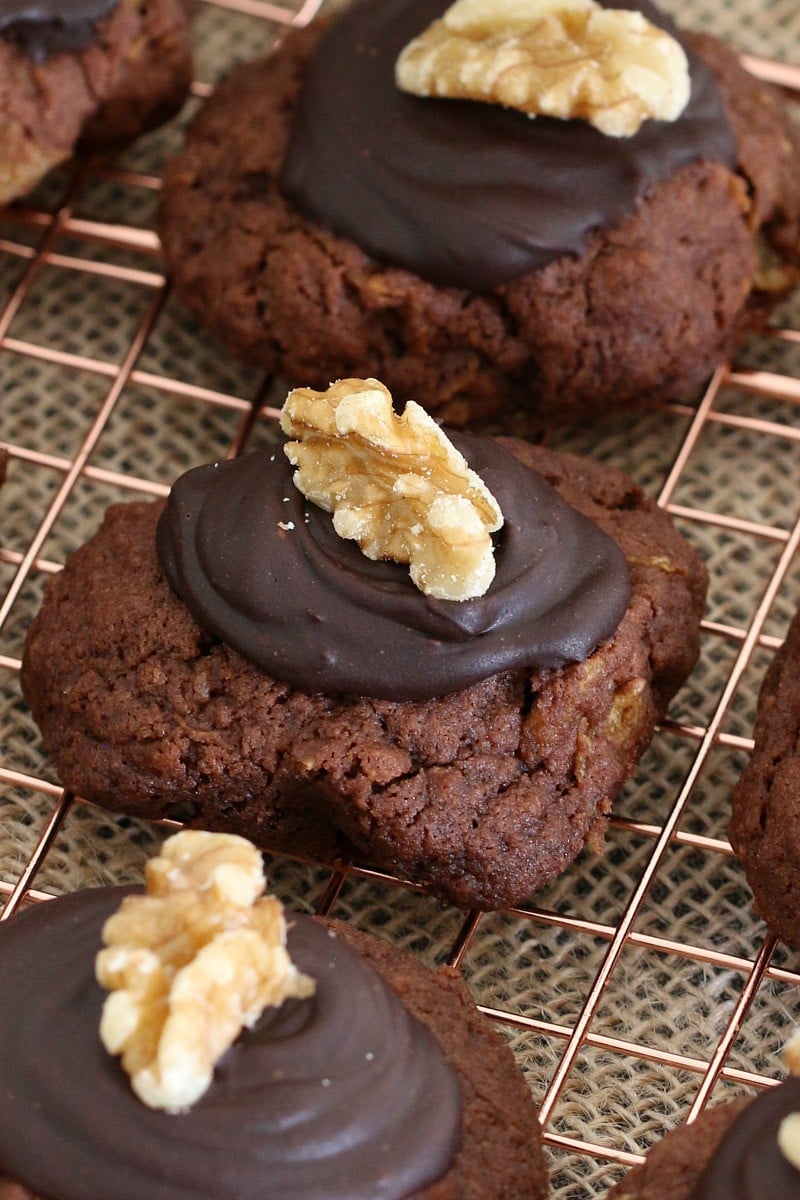
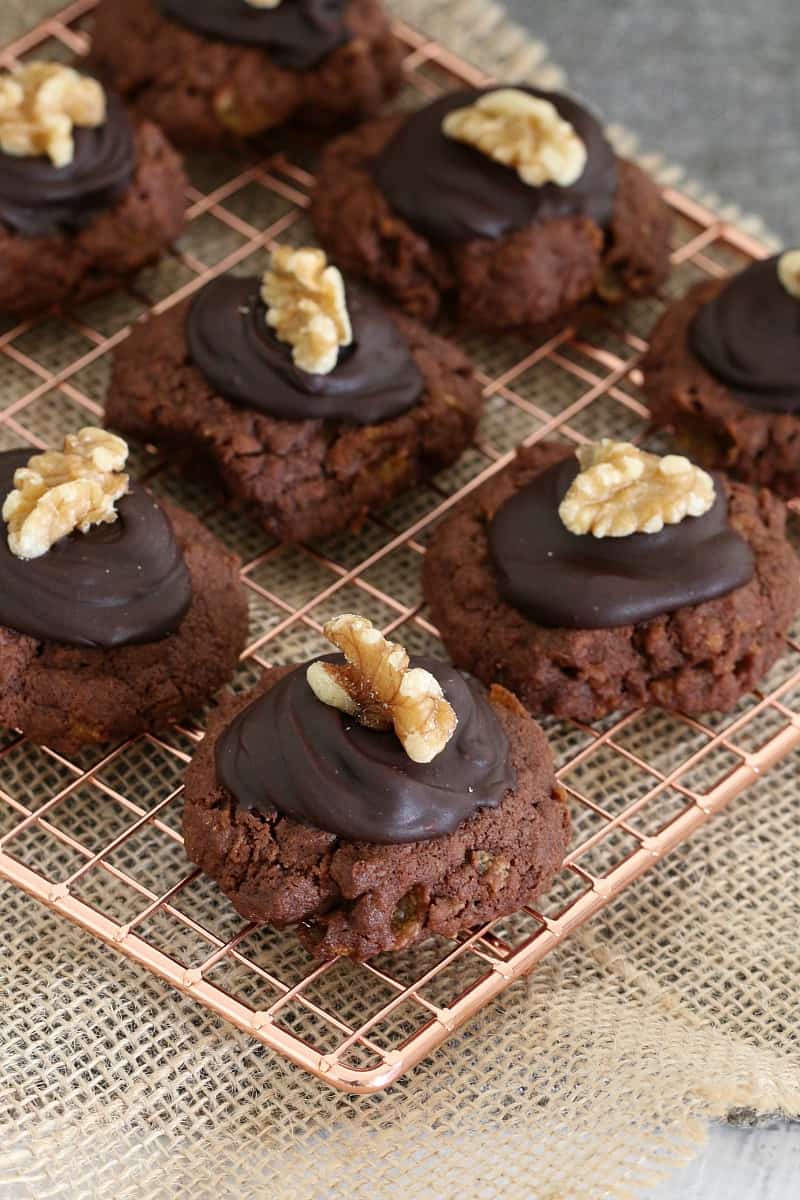
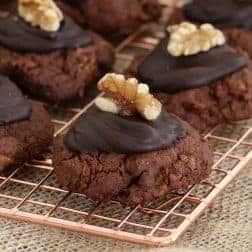
Unlike soft cookies, these biscuits are intentionally firm and crunchy - the crushed cornflakes give them that signature texture. Finished with rich chocolate icing and a walnut on top, they're irresistible. Perfect for lunchboxes, biscuit tins or just scoffing straight off the tray. If you love classic old-school baking, check out my Milo Biscuits and Hokey Pokey Biscuits.
Why You're Going To Love This Recipe
- Super quick and easy - just a handful of pantry staples and minimal prep.
- That perfect crunch - the cornflakes give these their iconic thick, crunchy texture.
- Classic nostalgic flavour - straight from the Edmonds Cookbook, just like Kiwi nans have been making for decades.
- Freezer-friendly - make a big batch, freeze half and you've always got something good in the tin.
- Kid-approved - fun to decorate with the icing and walnut, and even better to eat.
- Thermomix-friendly - easy steps included. More Thermomix cookie and biscuit recipes here!
Jump to:
Biscuit Ingredients

You'll likely have most of these in the pantry already. A few things worth noting:
Note: Scroll to the recipe card at the bottom for the ingredients quantities and full detailed method.
- Cornflakes - use any brand, but make sure they're super fresh and crisp. Stale cornflakes = sad biscuits.
- Icing sugar - pure icing sugar gives a firmer set icing (my preference), while soft icing sugar mixture gives a slightly softer finish. Your call!
- Walnuts - the classic Edmonds topping. Totally optional, but they look gorgeous and add a lovely crunch. See Variations for substitutes.
Variations
- Gluten-free - use a gluten-free plain flour and make sure your cornflakes are GF-certified (most regular cornflakes contain malt).
- Nut-free - skip the walnuts entirely, or top with sprinkles or a few chocolate chips instead.
- Extra chocolatey - fold a handful of chocolate chips into the dough along with the cornflakes.
- Mini Afghans - roll into smaller portions for lunchboxes or a party platter. Reduce baking time slightly.
How To Make Chocolate Cornflake Biscuits
Six steps to a biscuit tin full of absolute legends. Here's how:
Note: Scroll to the recipe card at the bottom for the ingredients quantities and full detailed method.
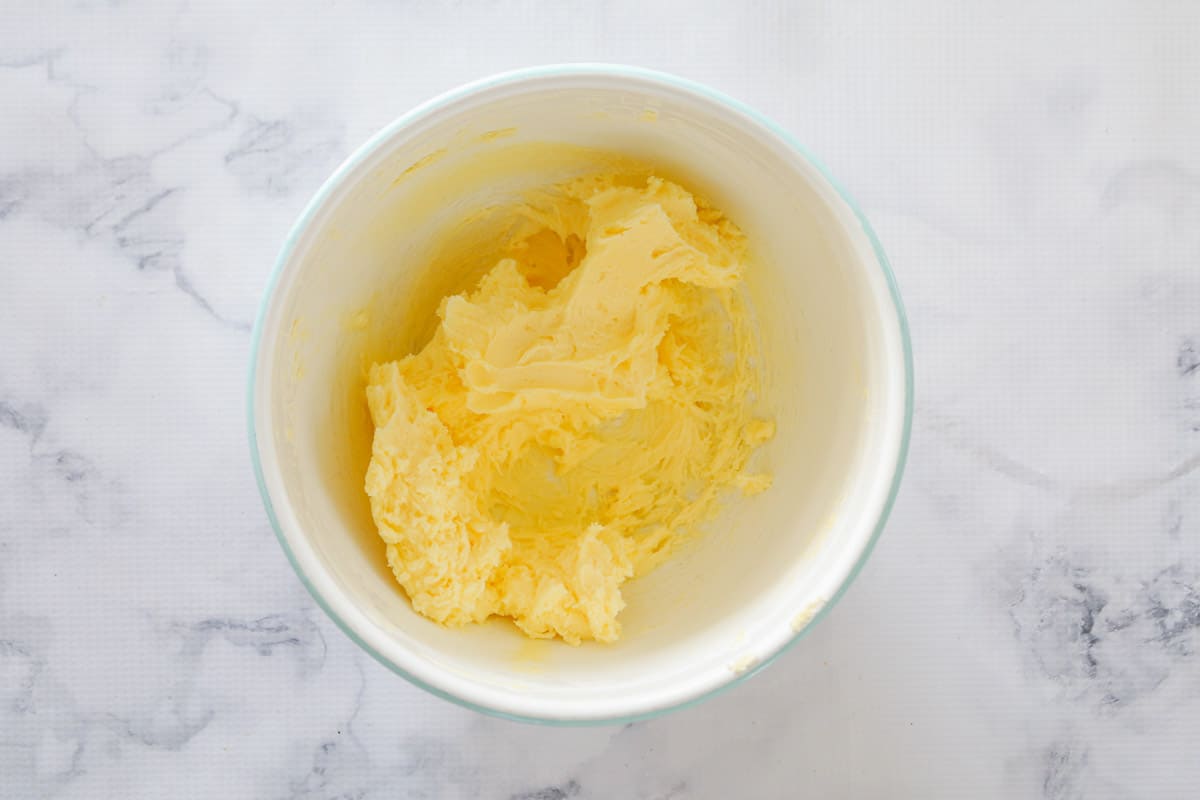
- Cream the butter and sugar until pale and fluffy. This is the base of a smooth dough, so take your time here.
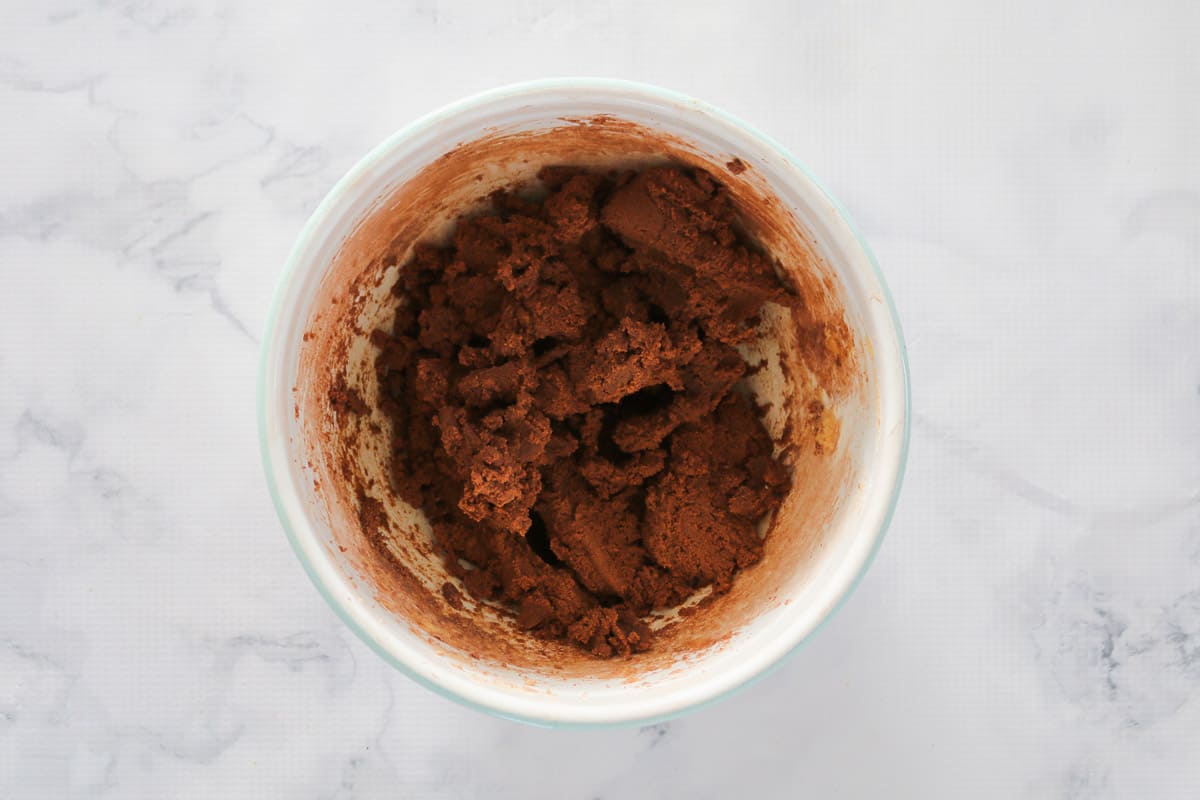
- Add the dry ingredients: Stir in the sifted flour and cocoa powder until just combined.
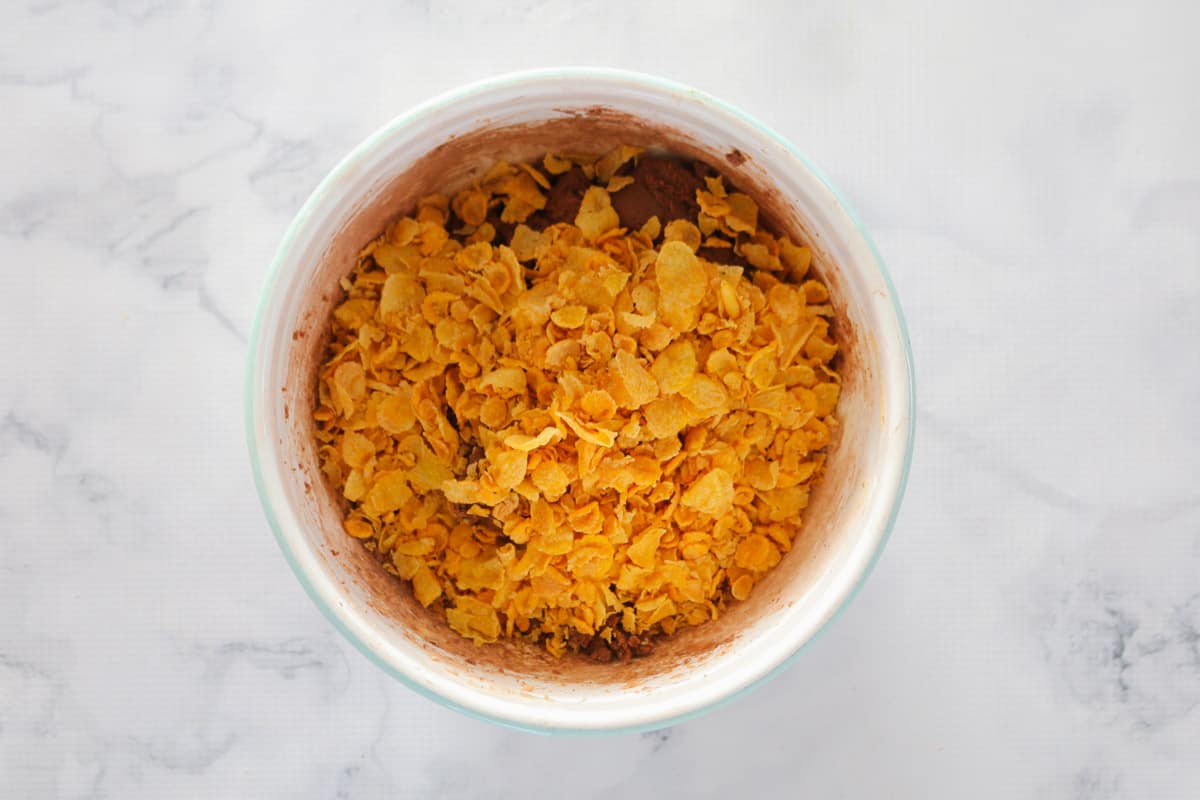
- Fold through the cornflakes gently - you want to keep as much of that crunch intact as possible. Don't go at it like you're stirring cement.
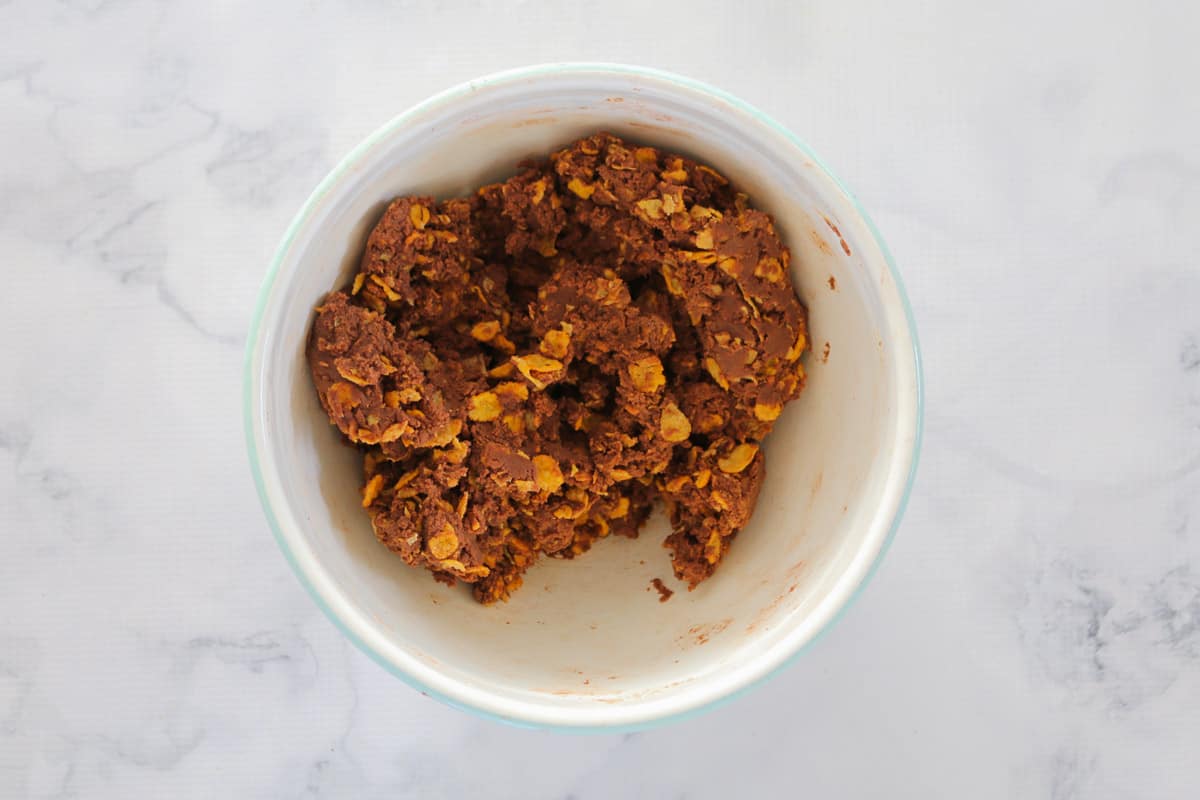
- Chill the dough for 30 minutes. This is the secret to thick, chunky biscuits that hold their shape in the oven.
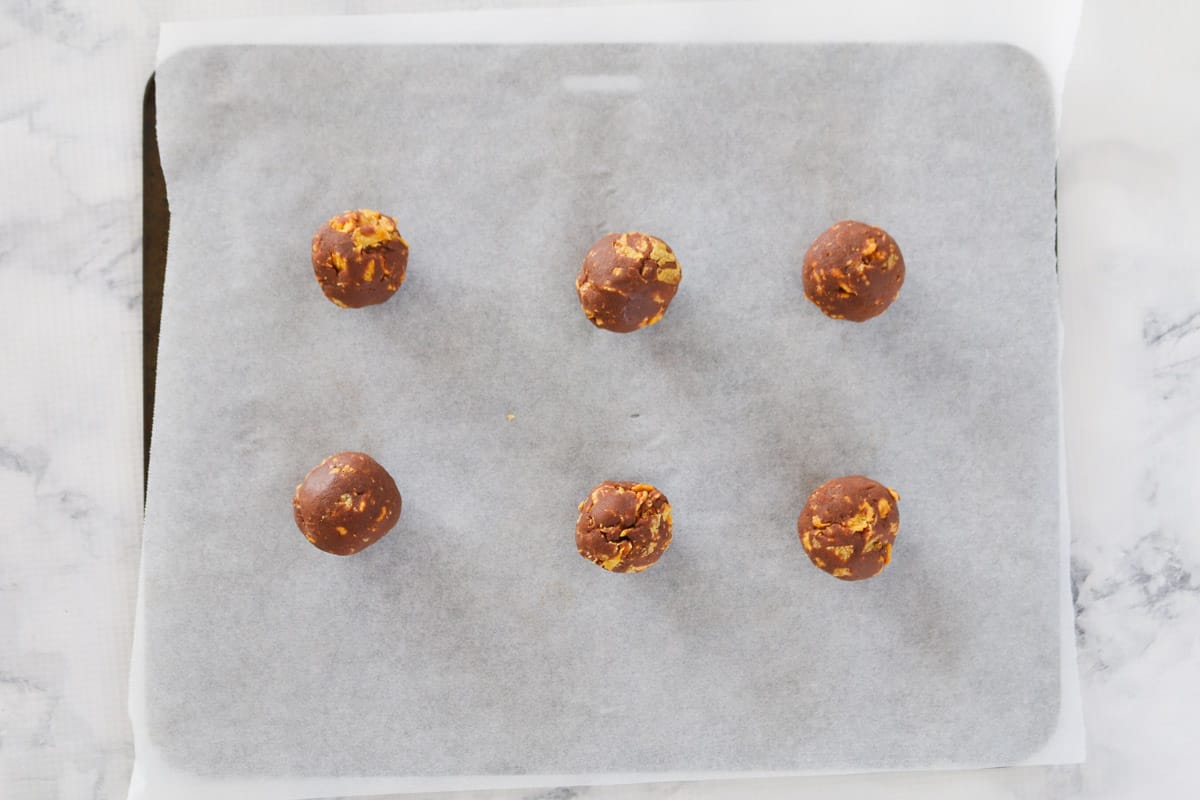
- Shape and bake: Roll tablespoon-sized portions and place on lined trays. Bake until firm (they won't spread much - that's normal!). Cool completely before icing.
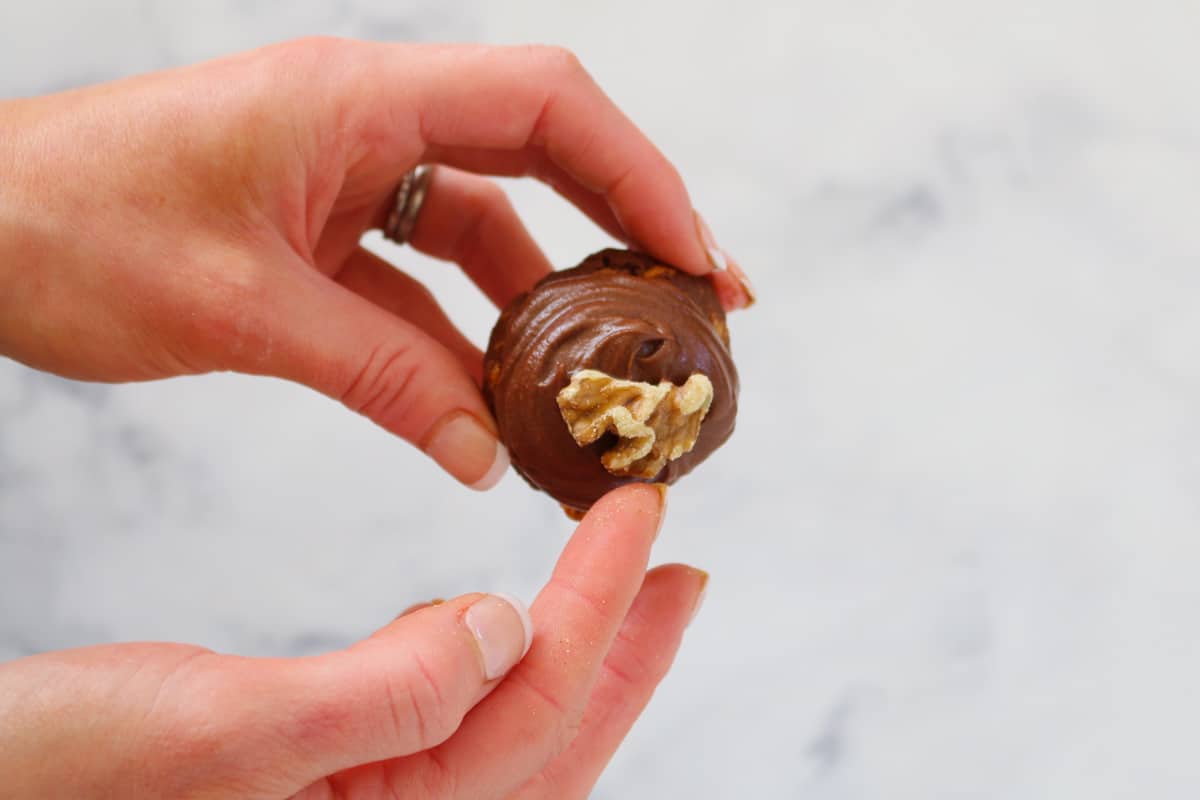
- Ice and top: Sift the cocoa and icing sugar, add the butter and boiling water and mix until smooth. Spread a little on each biscuit and top with a walnut. Try not to eat them before the icing sets.
Recipe Tips
- Don't over-crush the cornflakes when folding them through - you want chunky pieces for texture, not fine crumbs.
- Use good-quality cocoa for the richest chocolate flavour in both the dough and the icing.
- Don't skip chilling the dough - this is what keeps the biscuits thick and chunky rather than flat and sad.
- These biscuits don't spread - there's no raising agent, so they're meant to stay dense, firm and crunchy. Don't panic, it's by design!
- Cool completely before icing - if they're even slightly warm, the icing will melt and slide right off.
- Icing too thick? Add a little more boiling water, a teaspoon at a time, until it's spreadable.
- Store in an airtight container at room temperature for up to 1 week.
- Freeze un-iced biscuits for up to 3 months - thaw and ice once ready to serve.
Chocolate Cornflake Biscuits FAQs
Nobody knows for certain! The name has been around since at least the 1930s, but the Edmonds Cookbook never explained it. Theories include the biscuit's rugged appearance resembling Afghanistan's landscape, or a nod to the Afghan cameleers who came to New Zealand in the 19th century. Whatever the origin, they've been a beloved Kiwi classic ever since.
They're not supposed to! There's no raising agent in the mixture - Afghan biscuits are designed to stay thick, firm and slightly dense with that signature crunchy texture. If your biscuits are spreading, the dough may not have been chilled long enough before baking.
Technically yes, but they may spread a little and lose that classic chunky shape. The 30-minute chill is a quick step that makes a real difference - it's worth it.
Yes! Freeze the biscuits un-iced in an airtight container for up to 3 months. Thaw at room temperature and then add the icing and walnut once they're fully thawed. Iced biscuits can technically be frozen but the icing texture can change, so it's much better to ice fresh.
More Classic Australian & New Zealand Recipes
Love a good old-school biscuit? Here are a few more classics that deserve a spot in your tin.


WANT EVEN MORE DELICIOUS RECIPES? Subscribe to my newsletter or follow along on Facebook or Instagram. And if you love baking, then please come and join my Facebook cooking club group or subscribe to my YouTube channel.
Chocolate Cornflake Biscuits
Ingredients
- 200 g butter softened
- 110 g (½ cup) caster sugar
- 160 g (1 ¼ cups) plain flour
- 25 g (¼ cup) cocoa powder
- 70 g (2 cups) cornflakes
For the icing
- 125 g (1 cup) icing sugar see notes
- 2 tbs cocoa powder
- 50 g butter softened
- 2-3 tbs water boiling
- 24 walnut halves (optional)
Instructions
Conventional Method
- Preheat oven to 180 degrees celsius. Line two baking trays with baking paper and set aside.
- Use an electric mixer to beat the butter and sugar until creamy and pale.
- Sift the plain flour and cocoa powder into the bowl and mix well.
- Add the cornflakes and mix through.
- Chill the dough in the fridge for 30 minutes.
- Shape tablespoonfuls of the mixture together and place onto the baking trays.
- Cook for 10-15 minutes. Remove from the oven and allow to cool for 10 minutes on the trays before transferring to a wire rack to cool completely.
- To make the chocolate icing, sift the icing sugar and cocoa powder into a bowl. Add the softened butter and 2 tbs of hot water. Mix together until well combined. Add a little extra hot water if the icing is too thick to spread.
- Place a small spoonful of chocolate icing onto the top of each biscuit and top with a walnut.
Thermomix Method
- Preheat oven to 180 degrees celsius. Line two baking trays with baking paper and set aside.
- Cream butter and sugar fro 30 seconds on Speed 4. Scrape and repeat 2 more times or until pale and creamy.
- Add the plain flour and cocoa powder and mix for 20 secnds on Interval (kneading function). Scrape down the sides and repeat.
- Add the cornflakes and mix for 5 seconds on Reverse, Speed 3, (use the spatula to help mix).
- Chill the dough in the fridge for 30 minutes.
- Shape tablespoonfuls of the mixture together and place onto the baking trays. Cook for 10-15 minutes.
- Remove from the oven and allow to cool for 10 minutes on the trays before transferring to a wire rack to cool completely.
- To make the chocolate icing, place all of the icing ingredients into the Thermomix bowl (using 2 tablespoons hot water). Mix for 15 seconds on Speed 5.
- Scrape down the sides of the bowl and repeat for a further 10 seconds or until smooth.
- Add a little extra hot water if the icing is too thick to spread.
- Place a small spoonful of chocolate icing onto the top of each biscuit and top with a walnut.
Notes
- Don't over-crush the cornflakes when mixing through - you want texture, not crumbs.
- Use good-quality cocoa for a richer chocolate flavour.
- Chill the dough - this step is essential for keeping the biscuits thick and chunky.
- These biscuits don't rise - there's no raising agent used as these biscuits are meant to be dense and crunchy.
- Let biscuits cool fully before icing or the icing will melt.
- For a firm chocolate icing, use pure icing sugar. For a softer chocolate icing, use icing sugar mixture.
- If icing is too thick, add a little more hot water, a teaspoon at a time.
- Store biscuits in an airtight container at room temp for up to 1 week.
- Freeze un-iced biscuits for up to 3 months - ice after thawing.


Kate says
Very nice flavour, but how do I get cornflakes to stay crunchy, mine always go soft and chewy
Lucy says
Hi Kate, they will go soft and chewy once stored in an airtight container. You could try keeping them in the fridge?
Sandra says
1 tsp vanilla essence in the biscuit dough ( during the creaming process ) makes all the difference.
janine says
they look nice