
If I close my eyes, I can still picture this old fashioned peppermint slice on my mum's kitchen bench. I still make it on repeat, and it disappears just as fast. Some recipes never go out of style. 💚🍫
If you grew up loving classic Aussie slices, this one belongs right alongside Chocolate Caramel Slice and Raspberry Coconut Slice - nostalgic, reliable, and always a crowd-pleaser.
A Quick Look At The Recipe
✅ Recipe Name: Old Fashioned Peppermint Slice
🕒 Active Time: 20 minutes + chilling
🍫 Makes: approx. 20 squares
🥣 Main Ingredients: flour, coconut, butter, copha, icing sugar, peppermint extract, chocolate
📖 Dietary Info: Easily made gluten-free
⭐ Why You'll Love It: A proper Aussie classic - three perfect layers, CWA-approved recipe, foolproof steps and it freezes beautifully.
SUMMARIZE & SAVE THIS CONTENT ON
Love this recipe! Have made it many times and it never fails, easy and delicious. I adore the little pop of minty green too - very fun! Thank you.
- Michelle
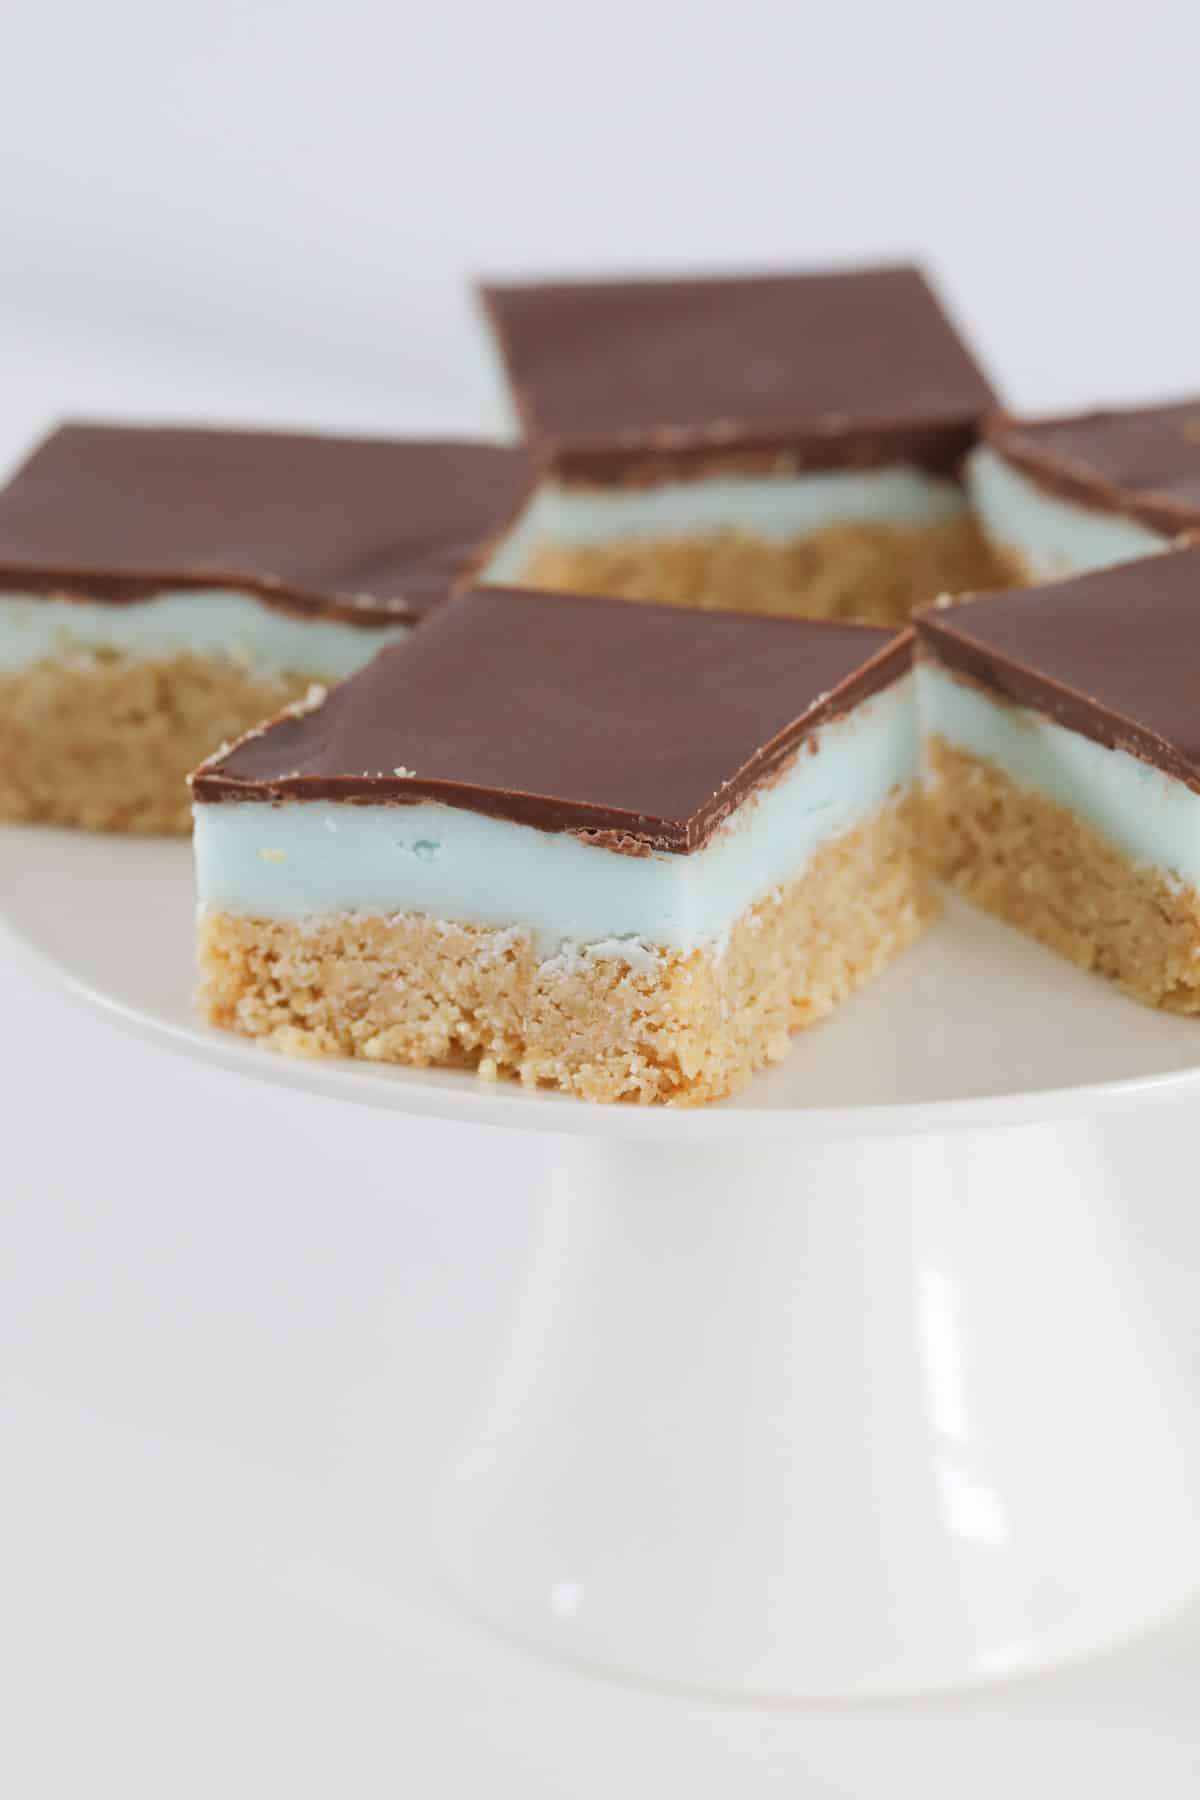
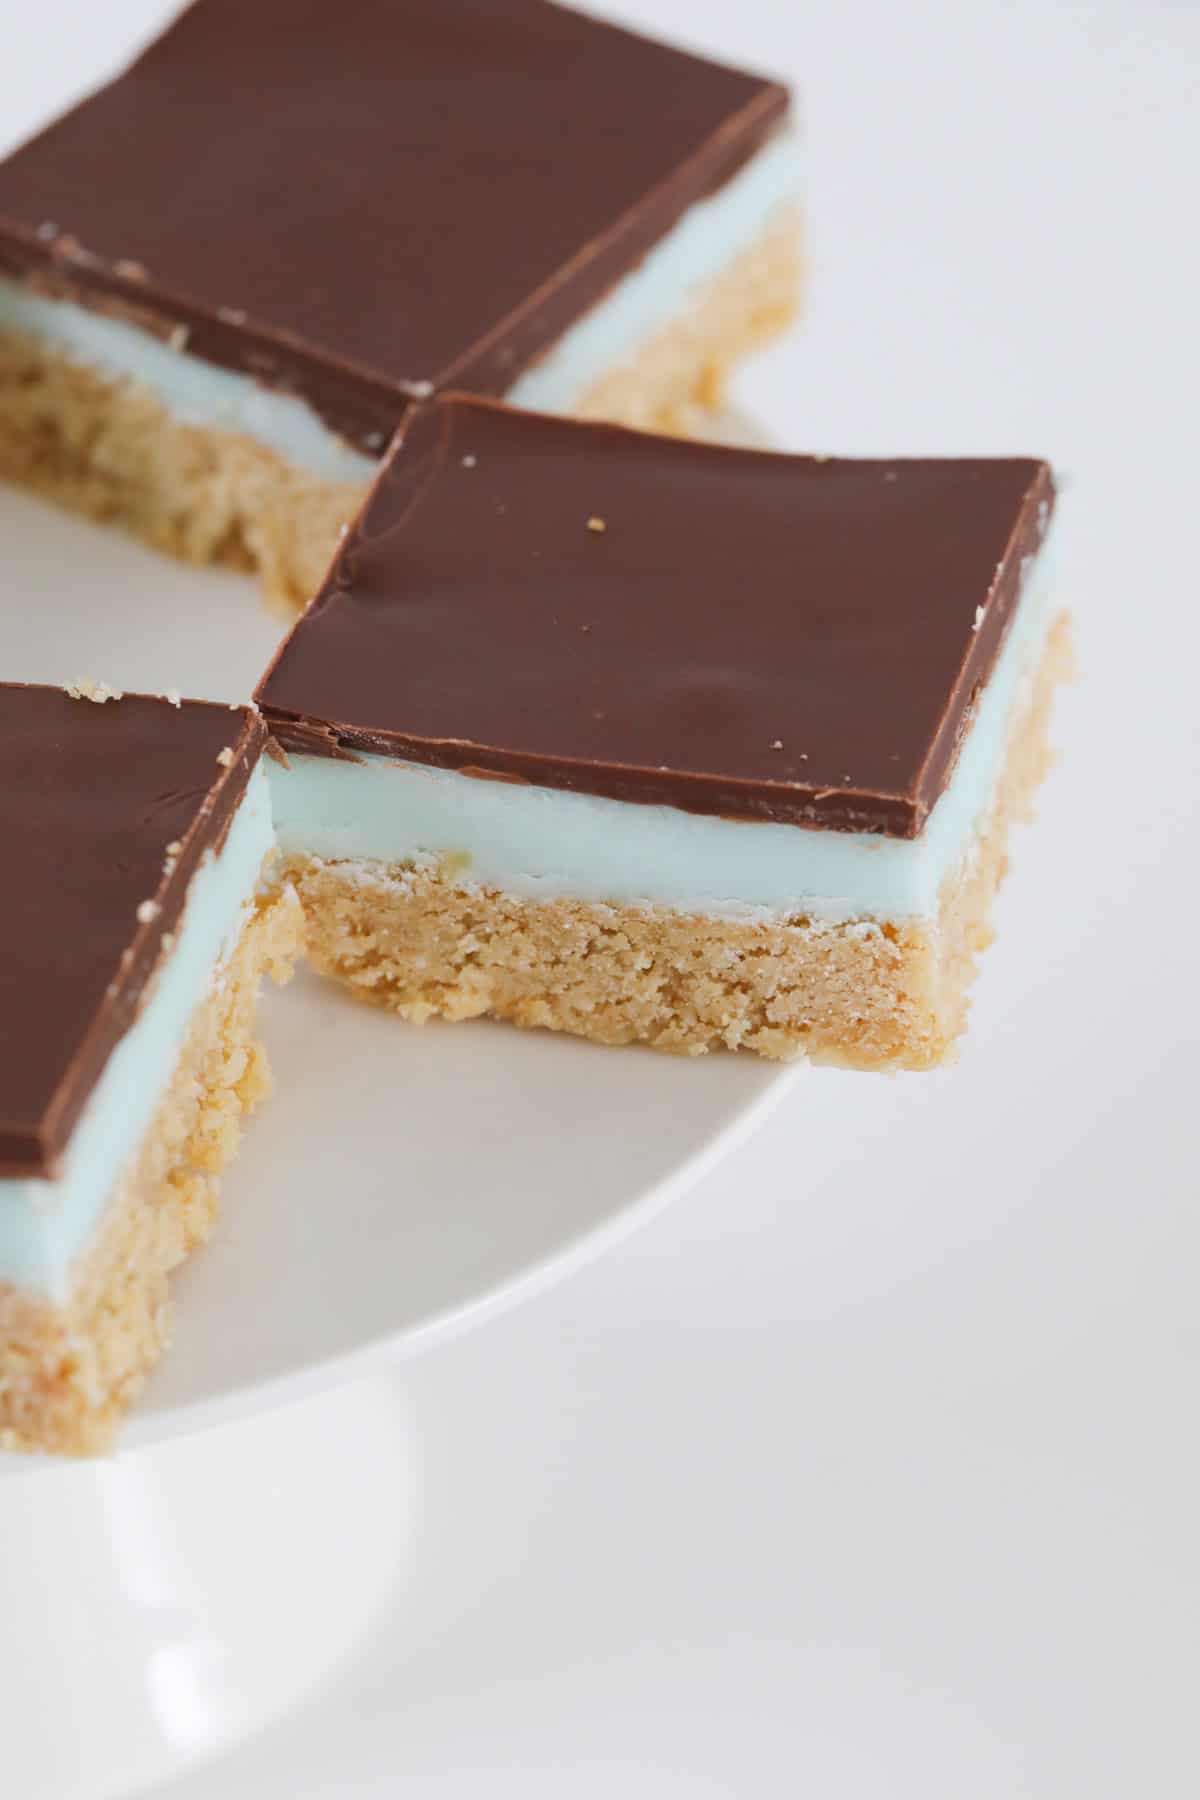
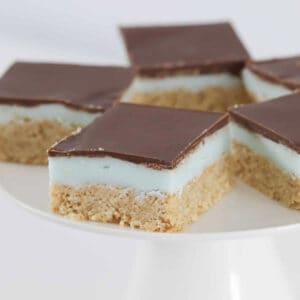
A traditional peppermint slice is a layered baked slice with a slightly crunchy coconut base, a sweet creamy peppermint centre and a firm chocolate topping. It's an iconic Aussie bakery classic that's been loved for decades - and this recipe comes straight from an old Country Women's Association cookbook, so you know it's the real deal.
It's perfect for lunchboxes, bake sales, or an afternoon treat with a cuppa. If you love these classic bakes, my Baked Lemon Slice and ANZAC Slice are both cut from the same cloth - simple, old-fashioned, and utterly delicious.
Why You're Going To Love This Recipe
- Easy to make - basic pantry ingredients and simple steps, great for beginners.
- Three perfect layers - buttery base, smooth peppermint filling and rich chocolate topping. Classic.
- Bake sale superstar - always one of the first to sell out. Looks irresistible, tastes incredible.
- CWA approved - this recipe comes from a very old Country Women's Association cookbook. That says it all.
- Thermomix-friendly - easy steps included. Check out my favourite Thermomix slice recipes for more!
Jump to:
Slice Ingredients
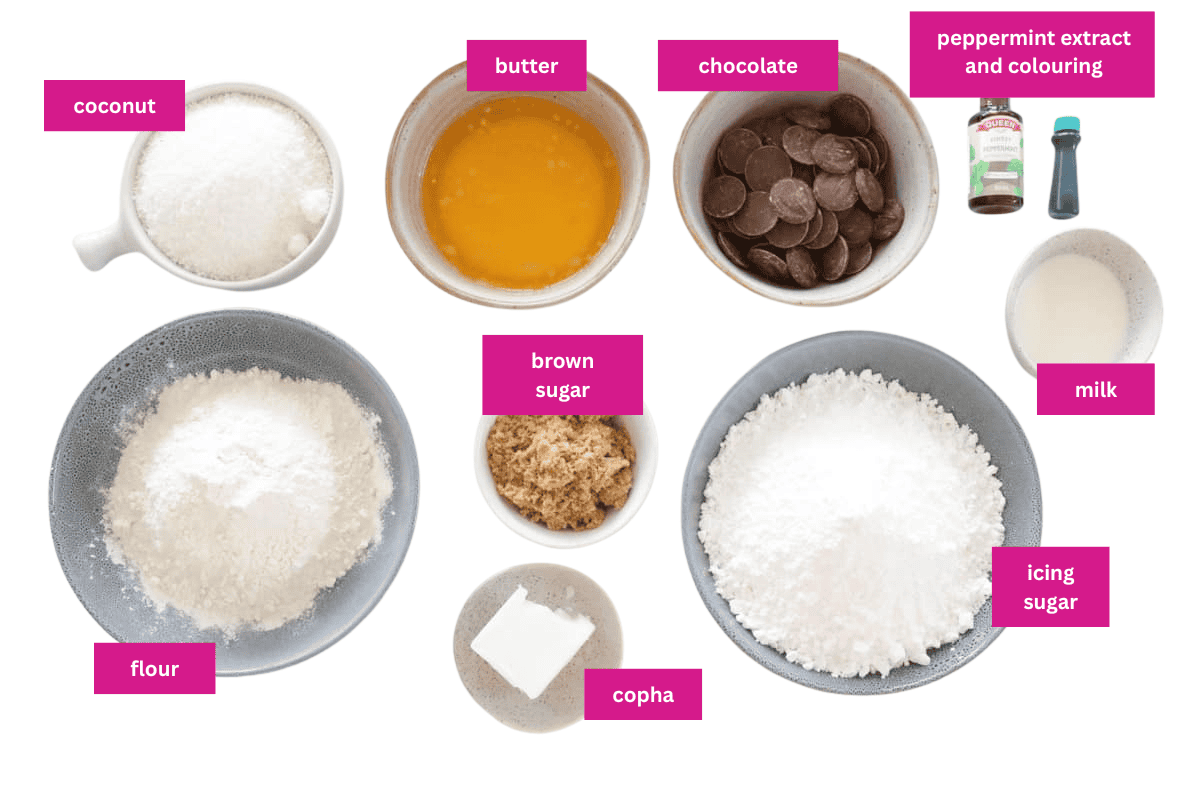
You've probably got most of this in the pantry already - the extract and food colouring last ages since you only need a tiny amount.
Note: Scroll to the recipe card at the bottom for the ingredients quantities and full detailed method.
- Copha - this is the key ingredient for the filling. Copha is a solid white vegetable shortening made from hydrogenated coconut oil. It has a higher melting point than regular coconut oil (around 36-40°C vs. coconut oil's ~24°C), which means it sets much firmer at room temperature and holds its shape even in warm weather. The filling stays solid, the layers stay distinct, and the slice slices beautifully. Can I use coconut oil instead? Yes, but it will give a softer filling that may feel slightly greasy and will need to be kept in the fridge - especially in summer. Regular coconut oil also has a noticeable coconut flavour, whereas Copha is neutral, letting the peppermint shine. If Copha is hard to find, it's worth seeking out - Woolies and Coles both stock it, usually near the butter.
- Pure icing sugar - not soft icing mixture. Soft icing mixture contains cornflour, which can affect the texture and stop the filling setting properly. Pure icing sugar only.
- Peppermint extract and green food colouring - both are quite strong and concentrated. Start with a small amount and add more gradually. The colouring is purely optional - skip it for a more natural look with zero impact on flavour.
- Chocolate melts + oil - use a good quality brand of chocolate melts. Adding a small amount of oil keeps the topping smooth and flexible, which is what prevents that annoying cracking when you slice it.
Variations
- Gluten-free - swap the self-raising flour for a gluten-free SR flour blend (with xanthan gum included).
- No Copha version - use coconut oil instead, but keep in mind the filling will be softer and the slice will need to be stored in the fridge at all times.
- Dark chocolate topping - use dark chocolate instead of milk for a less sweet, more grown-up version. The bitterness of dark chocolate pairs beautifully with peppermint.
- No colouring - skip the green food colouring entirely. The filling will be white, the flavour is identical and it still looks gorgeous.
How To Make Old Fashioned Peppermint Slice
Seven steps, three gorgeous layers, one very happy kitchen. Here's how it all comes together:
Note: Scroll to the recipe card at the bottom for the ingredients quantities and full detailed method.
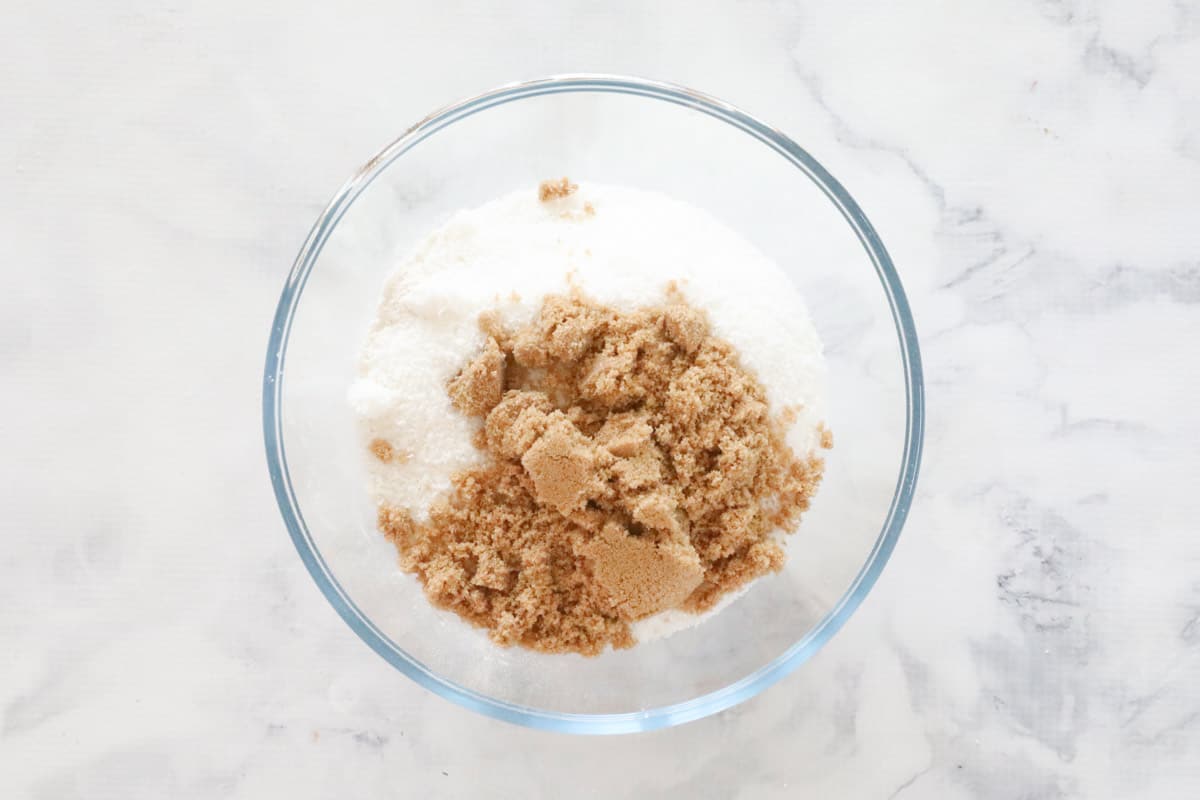
- Mix the dry base ingredients: Combine flour, desiccated coconut and brown sugar in a bowl and stir together.
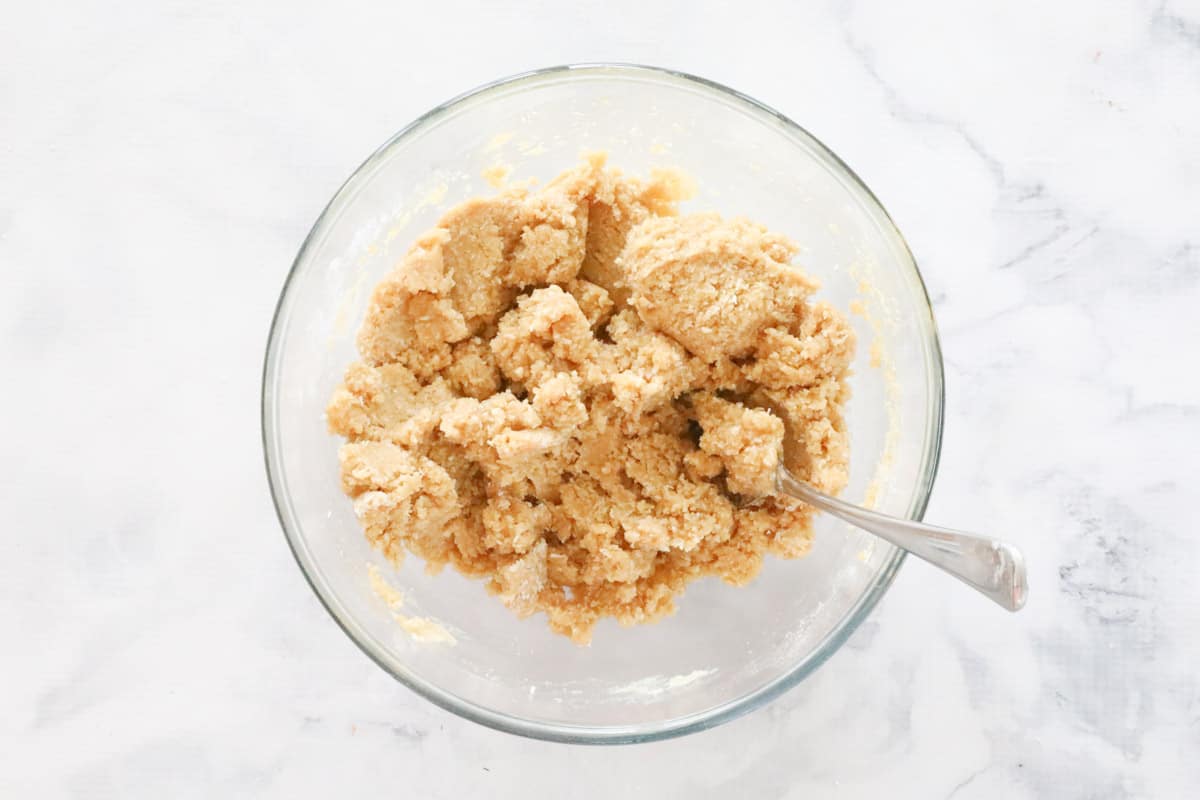
- Add the butter: Stir through the melted butter until you have a crumbly mixture that just holds together when pressed.
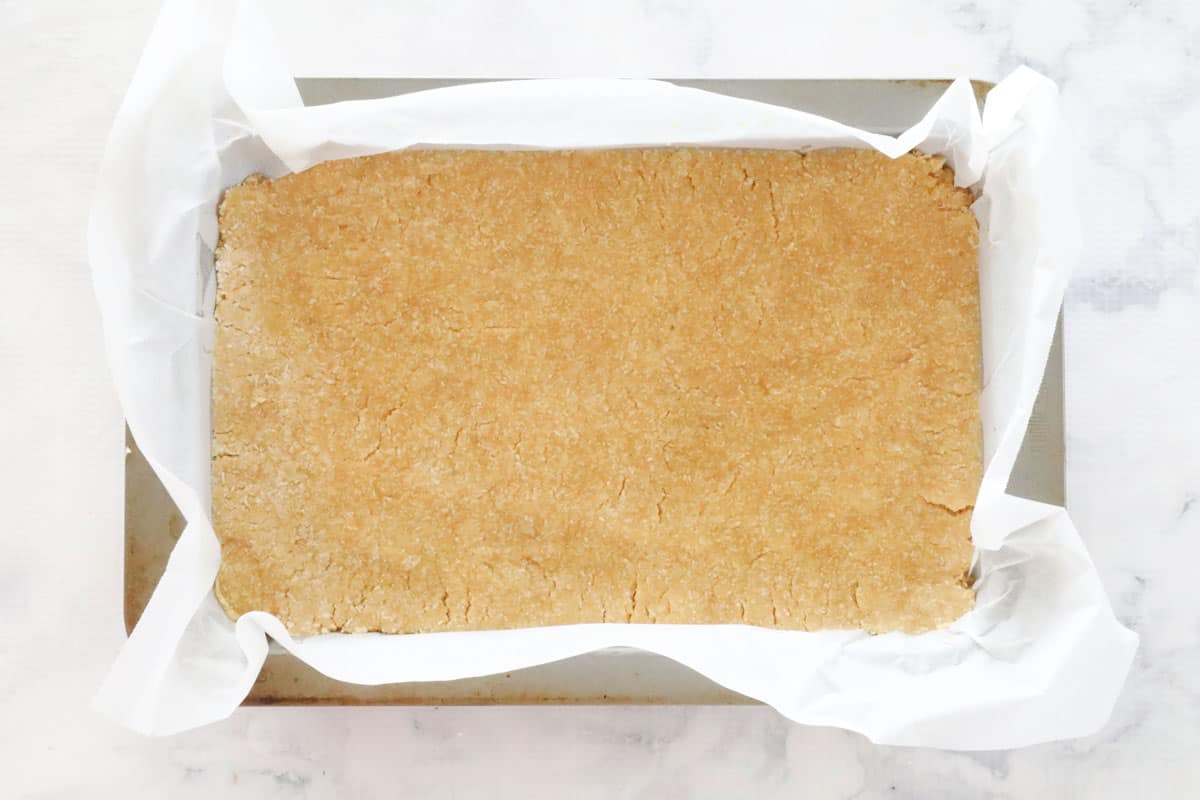
- Press and bake: Press the mixture firmly and evenly into a lined slice tin. Bake until lightly golden, then set aside to cool slightly - not completely.
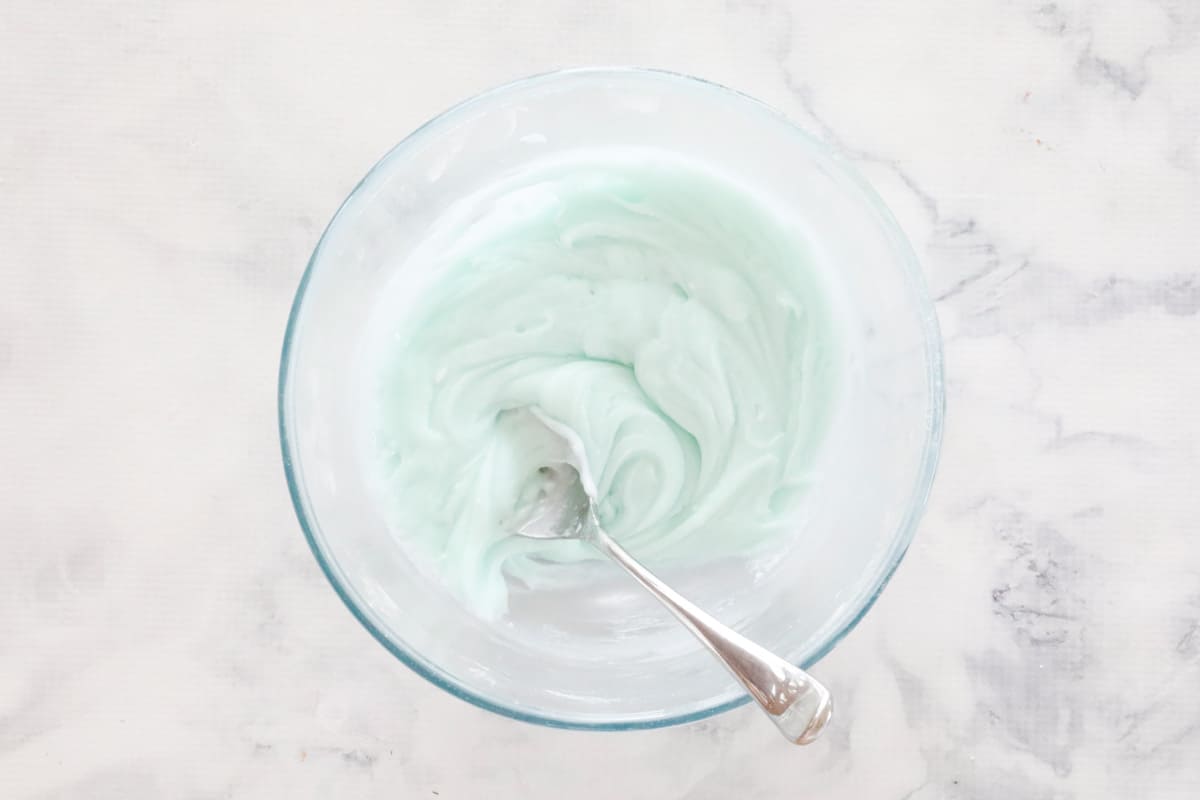
- Make the peppermint filling: Melt the Copha, then stir in the sifted icing sugar, milk and peppermint extract until smooth and creamy. Add a drop or two of green food colouring if using.
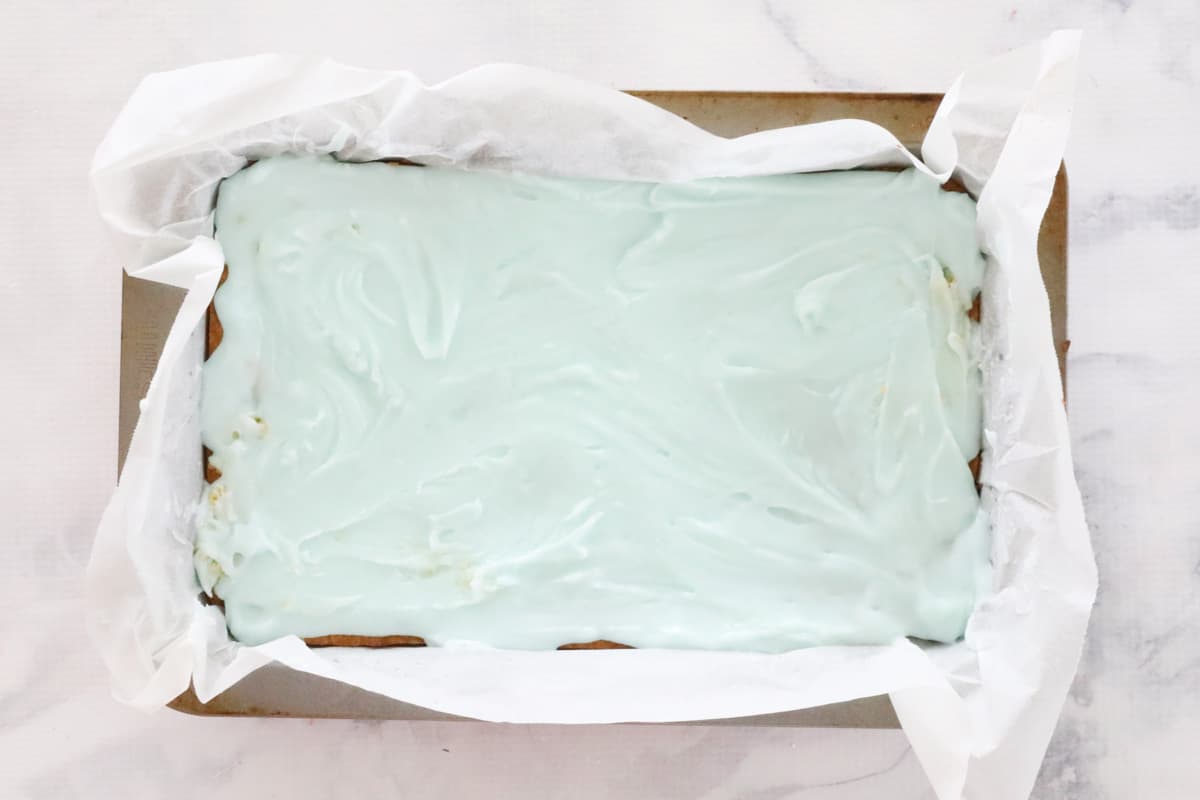
- Spread the mint layer: Pour the peppermint filling over the slightly warm base (this makes it easier to spread). Smooth the top and refrigerate until completely firm - about 2 hours.
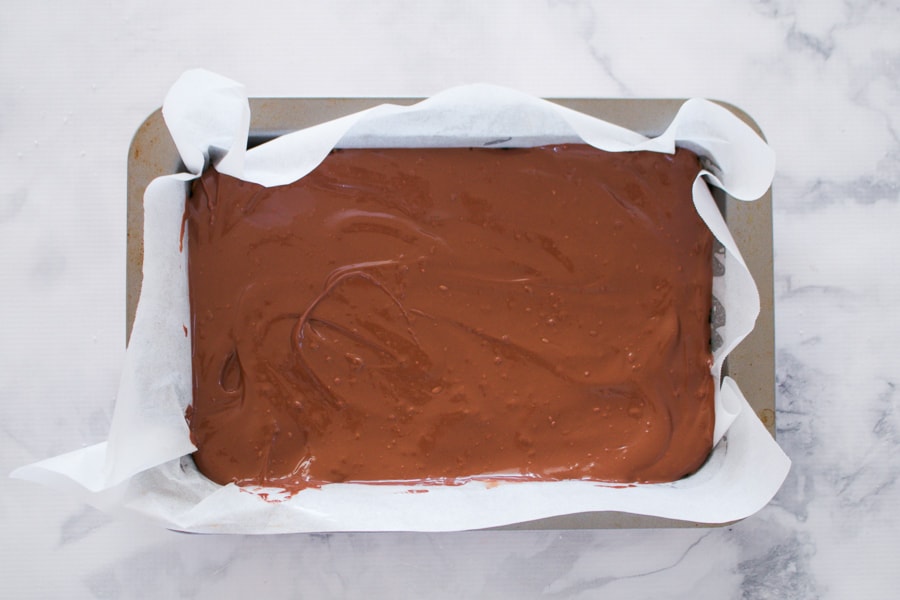
- Add the chocolate topping: Melt the chocolate with a little oil, stirring until smooth. Pour over the set peppermint layer and spread evenly to the edges.
- Chill then slice: Refrigerate until the chocolate is just set - firm but not fully hard. Slice with a warm sharp knife for clean, crack-free edges.
Recipe Tips
- Use pure icing sugar - soft icing mixture won't set the filling properly. Check the packet before you buy.
- Don't overdo the peppermint extract - it's very concentrated. Start with less than you think you need and taste as you go.
- Spread the filling while the base is slightly warm - not hot, not cold. Warm makes it glide on beautifully. A warm knife helps too.
- Chill the mint layer completely before adding the chocolate - if the filling isn't fully set, the chocolate will mix into it.
- Add oil to the chocolate - this is the key to a topping that doesn't crack when you slice it. Don't skip it.
- Slice while just set - not fully hard. Use a warm, sharp knife and wipe between cuts for super clean edges.
- Store in an airtight container at room temperature for up to 5 days. Refrigerate in warm weather to keep the layers firm.
- Freeze well-wrapped slices for up to 3 months. Thaw in the fridge overnight.
Old Fashioned Peppermint Slice FAQs
Usually it comes down to two things: the wrong icing sugar, or not enough chilling time. Make sure you use pure icing sugar (not soft icing mixture, which contains cornflour) and Copha rather than coconut oil. Copha sets much firmer at room temperature because of its higher melting point. Give it the full 2 hours in the fridge before adding the chocolate layer.
You can, but the results will be noticeably different. Copha is a hydrogenated coconut oil with a melting point of around 36-40°C, which means it sets rock solid at room temperature and holds its shape even on a warm day. Regular coconut oil melts at around 24°C, so the filling stays soft, can feel greasy, and will definitely need to stay refrigerated. Copha also has a neutral flavour, while virgin coconut oil has a strong coconut taste that will compete with the peppermint. If at all possible, use Copha - it's available at Woolies and Coles near the butter and makes a big difference to the final result.
The chocolate has set too hard. Two things fix this: add a small amount of oil when melting the chocolate (this keeps it slightly flexible), and slice the slice while the chocolate is just set - not fully hardened. A sharp warm knife also helps you glide through cleanly without cracking.
Absolutely - it's actually better the next day once all the layers have fully set and the flavours have had time to develop. Make it 1-2 days ahead and store in an airtight container. It also freezes brilliantly for up to 3 months, so it's a great one to batch bake.
More Peppermint Inspired Recipes
Can't get enough of that minty chocolate combo? Here are a few more peppermint favourites to add to the list.

WANT EVEN MORE DELICIOUS RECIPES? Subscribe to my newsletter or follow along on Facebook or Instagram. And if you love baking, then please come and join my Facebook cooking club group or subscribe to my YouTube channel.
Peppermint Slice
Ingredients
- 200 g (1 ½ cups) self raising flour
- 90 g (1 cup) coconut
- 100 g (½ cup) brown sugar
- 185 g butter melted
- 375 g (3 cups) icing sugar pure, not soft icing mixture
- 60 g Copha
- 3 tbs milk
- 2 teaspoon peppermint extract
- 1-2 drops green food colouring optional
- 200 g chocolate melts milk or dark
- 4 teaspoon vegetable oil or coconut oil
Instructions
Conventional Method
- Preheat oven to 170 degrees celsius (fan-forced).
- Line an 18cm x 28cm rectangular slice tin with baking paper and set aside.
- To make the base, sift the self raising flour into a bowl. Add the coconut and brown sugar and stir to combine.
- Add the melted butter and mix well until crumbly and completely combined.
- Press the mixture firmly into the base of the prepared tin and smooth with a spoon.
- Bake for 20 minutes or until lightly golden. Set aside to cool slightly.
- Meanwhile, melt the Copha in the microwave. Sift over the icing sugar and add the milk, peppermint extract and green food colouring. Mix until smooth. If the mixture is too thick, add an extra tablespoon of milk and mix through.
- Spread the peppermint mixture over the top of the slightly warm slice base, then place tin into the fridge until completely cold (approximately 2 hours).
- Melt the chocolate and vegetable oil (or coconut oil) in the microwave on 50% power for 3-4 minutes, stirring every 30 seconds with a dry metal spoon.
- Pour the chocolate topping over the peppermint layer and chill for 30 minutes or until set. Cut into squares when the chocolate has hardened but not completely set.
Thermomix Method
- Preheat oven to 170 degrees celsius (fan-forced).Line an 18cm x 28cm rectangular slice tin with baking paper and set aside.
- Melt the butter in the Thermomix bowl for 3 minutes, Speed 2, 100 degrees.
- Add the self raising flour, coconut and brown sugar and mix for 15 seconds, Reverse, Speed 4. Scrape down the sides of the bowl and repeat for a further 15 seconds or until completely combined (use the spatula to help mix).
- Press the mixture firmly into the base of the prepared tin and smooth with a spoon. Bake for 20 minutes or until lightly golden. Set aside to cool slightly.
- Meanwhile, place the icing sugar into the Thermomix bowl and sift by mixing for 8 seconds, Speed 8. Pour the icing sugar into a separate bowl and set aside.
- Melt the Copha in the Thermomix bowl for 4 minutes, 100 degrees, Speed 2. Add the sifted icing sugar, milk, peppermint extract and green food colouring. Mix for 10 seconds, Speed 4. Scrape down the sides of the bowl and repeat 2-3 times or until smooth. Note: If the mixture is too thick, add an extra tablespoon of milk.
- Spread the peppermint mixture over the top of the slightly warm slice base and place into the fridge to cool completely (approximately 2 hours).
- Place the chocolate melts into a clean Thermomix bowl. Grate for 10 seconds, Speed 8. Scrape down the sides of the bowl, add the vegetable oil (or coconut oil) and melt for 4 minutes, 80 degrees, Speed 2.
- Pour the chocolate topping over the peppermint layer and chill for 30 minutes or until set. Cut into squares when the chocolate has hardened but not completely set.
Notes
- Use pure icing sugar - soft icing mixture will not set as firmly as pure.
- Spread the filling easily by using a warm knife.
- Don't overdo the peppermint essence - it is very concentrated and can quickly become overpowering.
- Let the base cool slightly, but not completely, before adding the filling. This makes the peppermint layer spread easier.
- Slice once the chocolate has just set for neat, clean edges.
- Store in an airtight container at room temp for up to 5 days, although refrigerate in warm weather to keep layers firm.
- Freeze slices (wrapped well) for up to 3 months.
Shell says
Mine turned out with a very thick base and only a fine layer of peppermint. I followed the recipe to a tee and made sure the pan was the right size so not sure where I went wrong. Hubby still likes it but I think I'll cut the base in half next time.
Erin says
Me too!
Jan Hardy says
I don't have an oven so I will turn this into a no-bake by using a crushed biscuit and melted butter base.
Bake Play Smile says
YUM!!
Jake Tyler says
Yummy! This looks amazing. Thanks for sharing the recipe!
Sharon Madeley says
Can this be made without coconut?
Bake Play Smile says
Yes 🙂
Wanda Wheelans says
Copha and Icing Sugar that is not Icing Mixture, are two ingredients I am sure of, maybe a different name in U K Thank you for some lovely recipes will be trying some for Flower Show competitions(Scotland0
Bake Play Smile says
Hi Wanda, I'm not sure what copha would be called in Scotland - sorry!! Also, icing sugar sets hard, whereas icing mixture stays soft. Hope that helps!! xx