

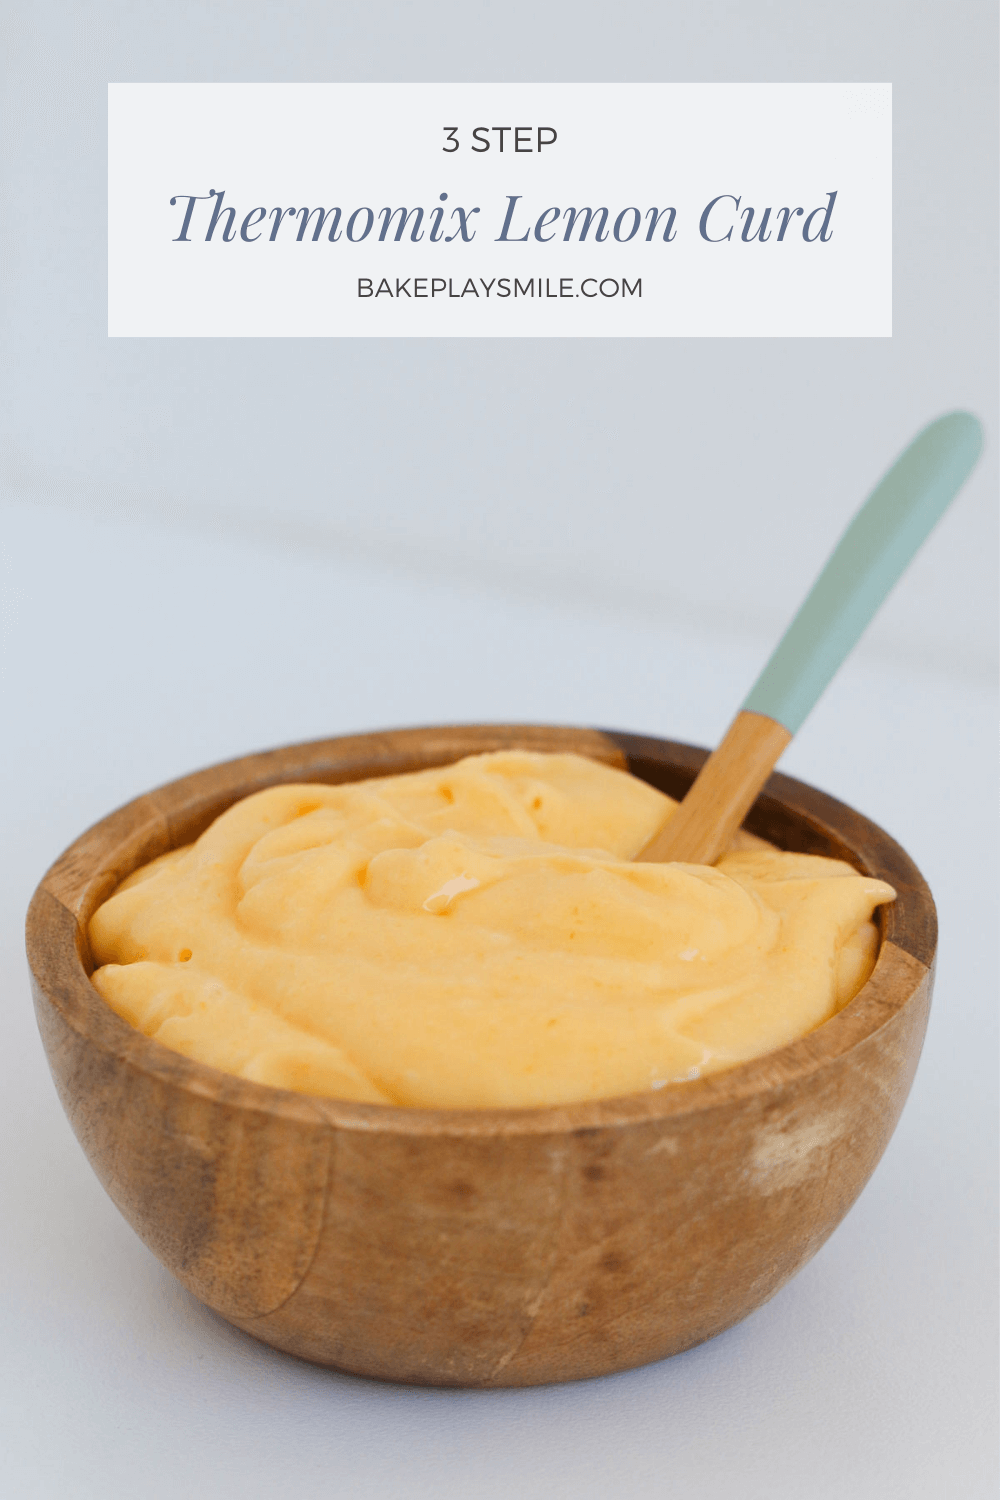
The most delicious sweet, creamy and tart Thermomix Lemon Curd recipe that takes just 3 simple steps to prepare... and will be ready in less than 20 minutes!
When you have extra lemons lying around, there's nothing better to do than bake!
Whether it's a lemon delicious pudding, lemon meringue pie, flourless lemon cake or a lemon crumble slice... or this simple lemon curd - there's delicious lemon recipes for everyone!
What is Lemon Curd?
Lemon curd is a buttery and sweet dessert topping or spread.
It's rich and sweet with a tart lemon flavour (I grew up eating it spread on toast... almost like a sweet lemon jam!).
Lemon curd is made from just a few basic ingredients and is made in just 3 simple steps in the Thermomix.
This recipe is perfect for all of the lemon lovers out there!
Why You're Going To Love This Thermomix Lemon Curd Recipe
- Perfect for using up lemons - when your lemon tree (or in my case... my neighbours lemon tree) is overflowing, this is the recipe you need! Make a double or triple batch if you've got lots of lemons to use up.
- Classic recipe - it doesn't get much more old fashioned than lemon curd! My grandma was famous for her lemon curd and her passionfruit butter - I still remember slathering them onto my toast as a kid... AMAZING!!!
- Budget-friendly - buying lemon curd from the supermarket can be $$$... but making your own from scratch is a great way to save money as it's made entirely from basic ingredients that you probably already have at home.
- Fool-proof - making lemon curd on the stove-top can be tricky! It can so easily be overcooked or the eggs may scramble. However, making lemon curd in your Thermomix completely eliminates those issues, leaving you with a simple and foolproof recipe.
- 3 step recipe - yep! Making lemon curd in your Thermomix takes just 3 super easy steps.
- Make ahead of time - this lemon curd recipe can be stored in an unopened sterilised jar in the fridge for up to 3 months. Once opened, it should be consumed within 2 weeks.
- Freezer-friendly - you can freeze lemon curd in a sterilised jar for up to 1 year. Place it in the fridge for 24 hours to thaw and then consume within 2 weeks.
- Versatile recipe - this Thermomix lemon curd is AMAZING on it's own (literally eaten from the jar with a spoon) or you can serve it with any of your favourite desserts, including: lemonade scones or on top of a baked lemon cheesecake.

What You Need
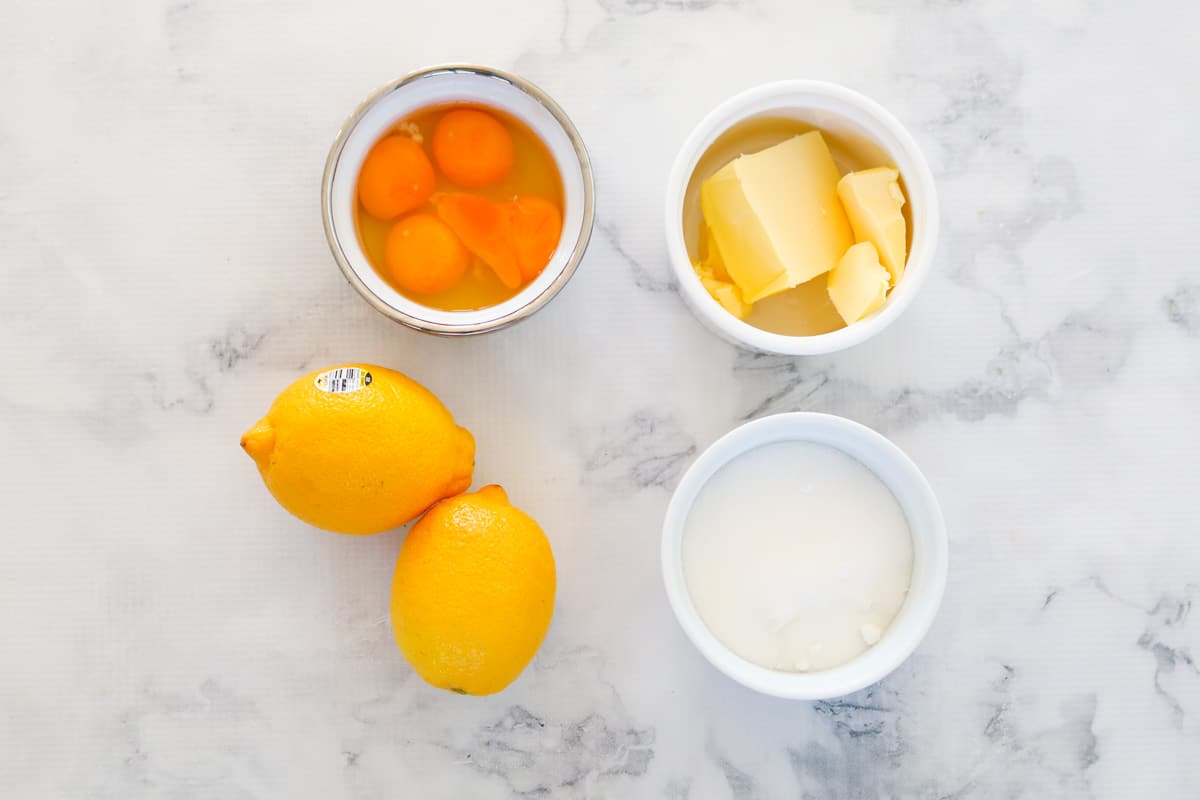
This super easy lemon curd recipe can be made in the Thermomix with just 4 basic ingredients:
- lemons - I use both the zest and juice of the lemons in this simple curd recipe.
- eggs - I use 2 eggs plus 2 extra egg yolks in this recipe. The extra egg yolks help to thicken the curd while adding an amazing flavour. This is also a great recipe for using up extra egg yolks (perfect for when you've made a recipe using only egg whites)
- caster sugar - also known as superfine sugar.
- butter - you can use either salted or unsalted butter in this recipe.
How To Make Lemon Curd In A Thermomix
You will not believe how simple it is to make lemon curd in your Thermomix!
Introducing my super simple 3 step recipe:
Note: please scroll to the recipe card at the bottom for ingredient quantities and the full detailed method.
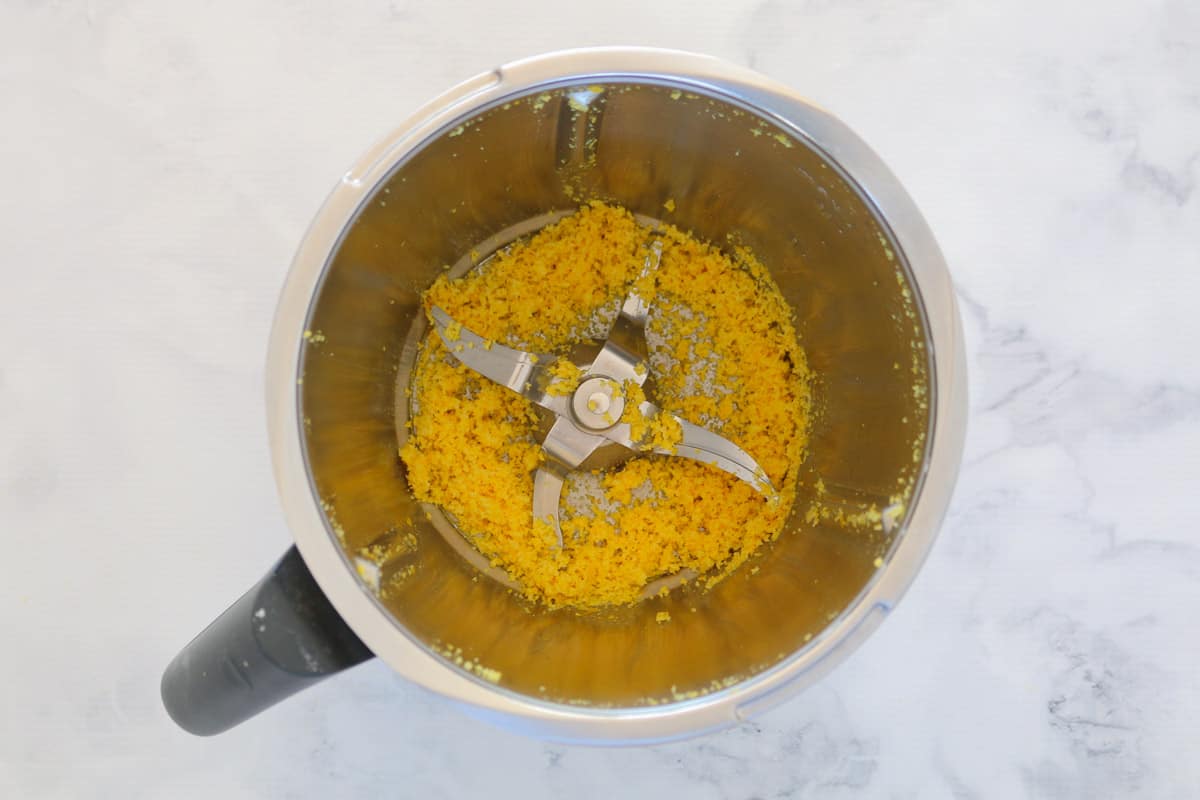
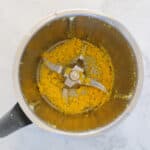
Step 1 - Grate Lemon Zest
Place peeled lemon zest (without the white pith) into the Thermomix bowl and mix until finely grated.
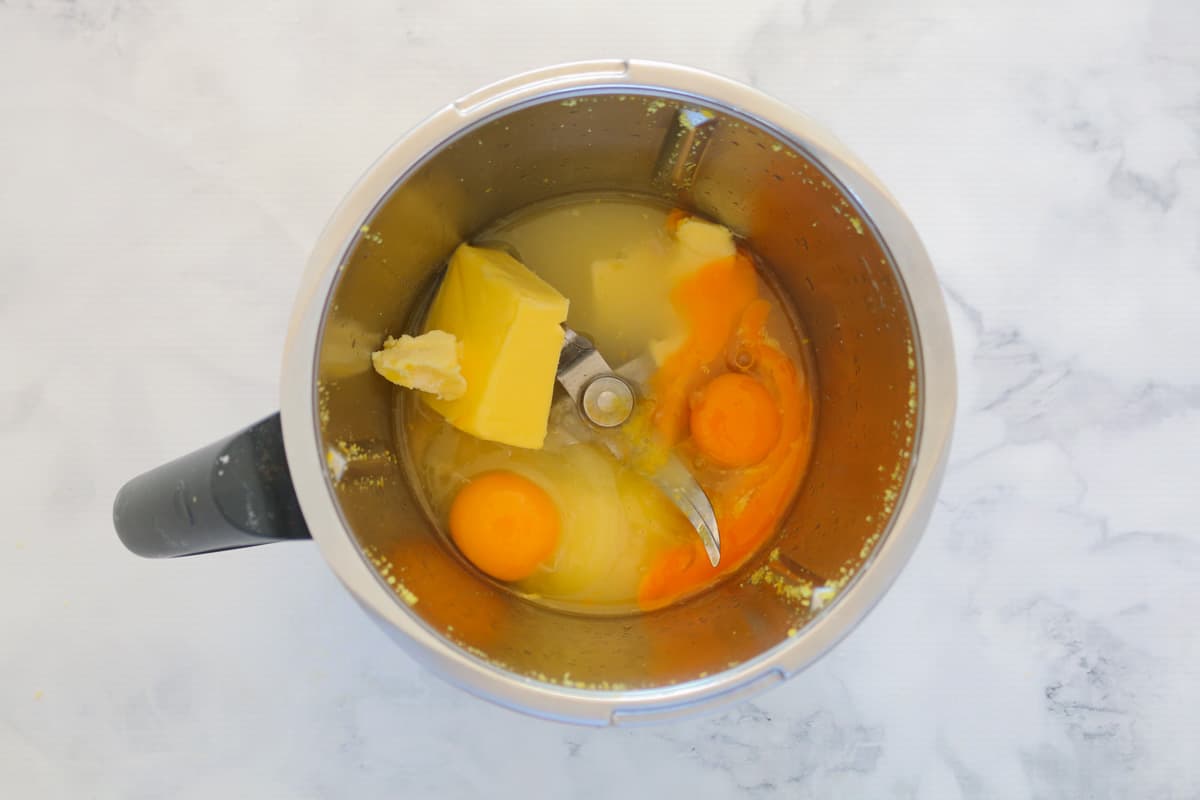
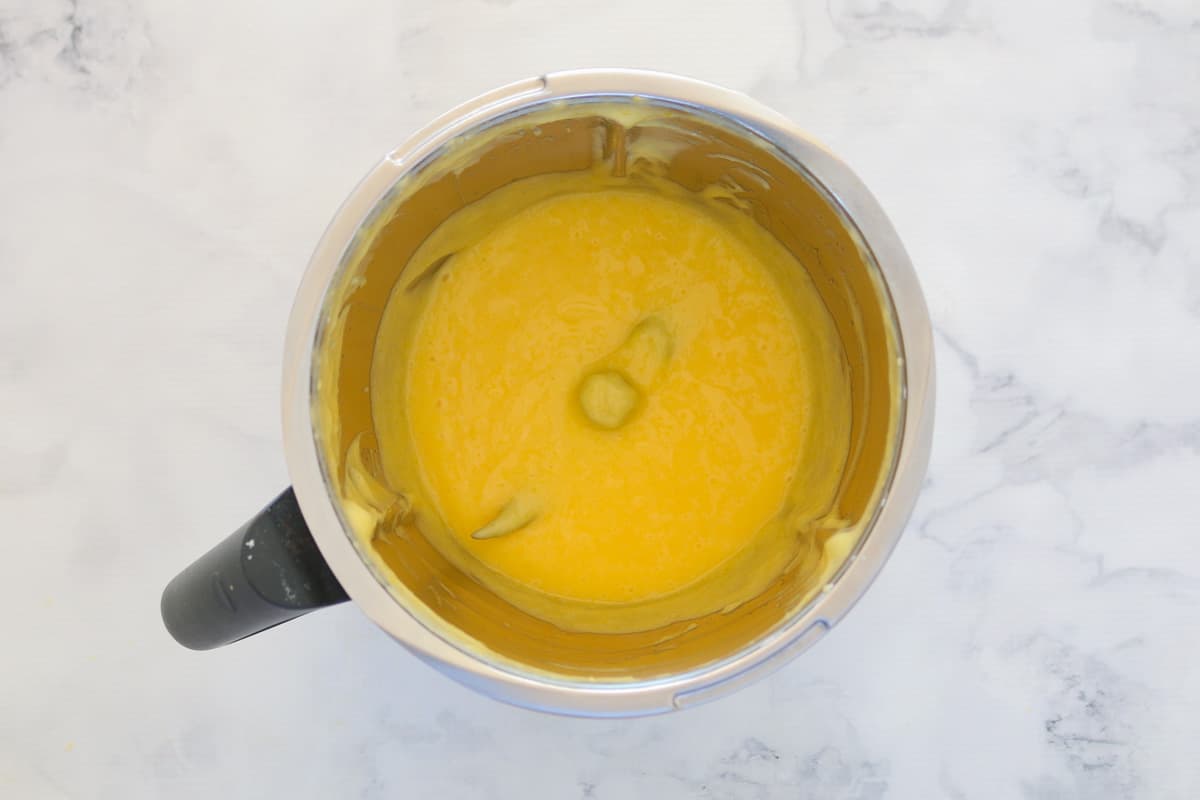
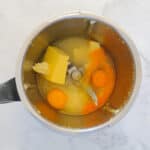
Step 2 - Add The Remaining Ingredients
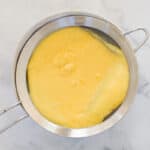
Place the remaining ingredients into the Thermomix and cook until your desired consistency (see notes).
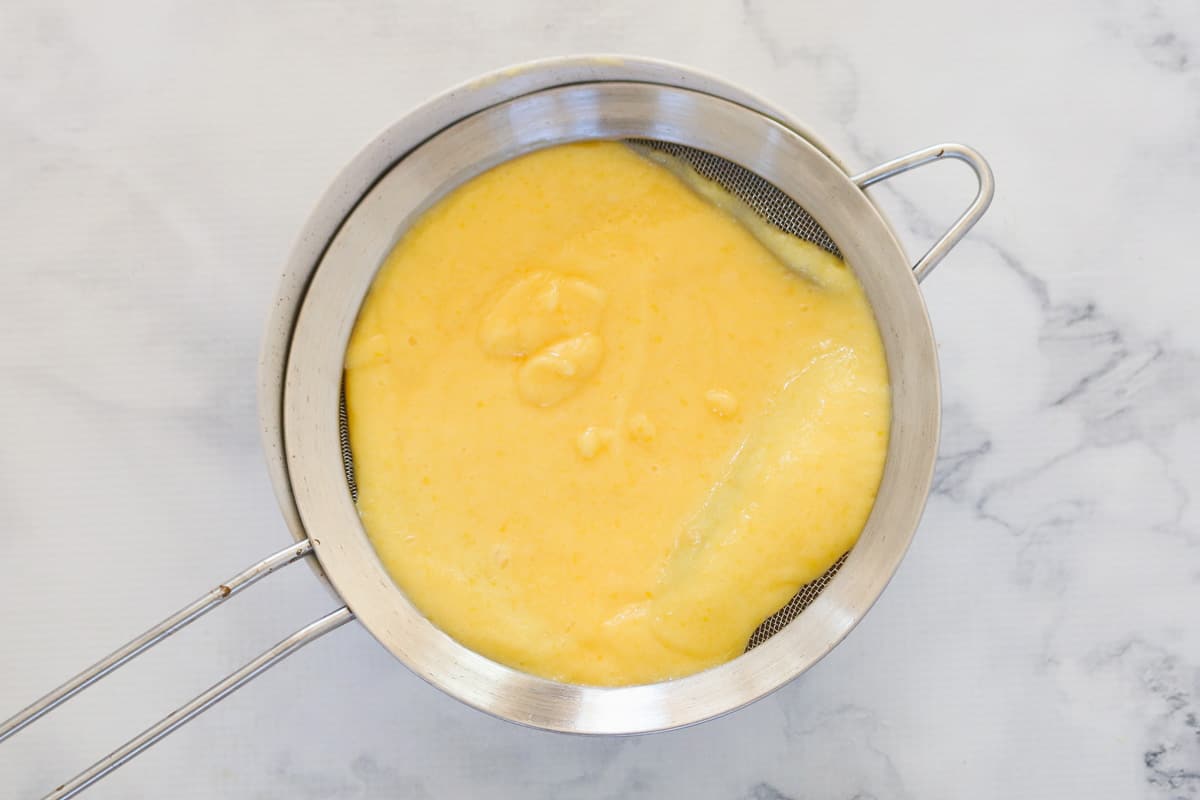
Step 3 - Strain The Curd
Pour the lemon curd through a fine strainer or sieve which will remove any remaining lemon zest.
Recipe Tips & FAQ
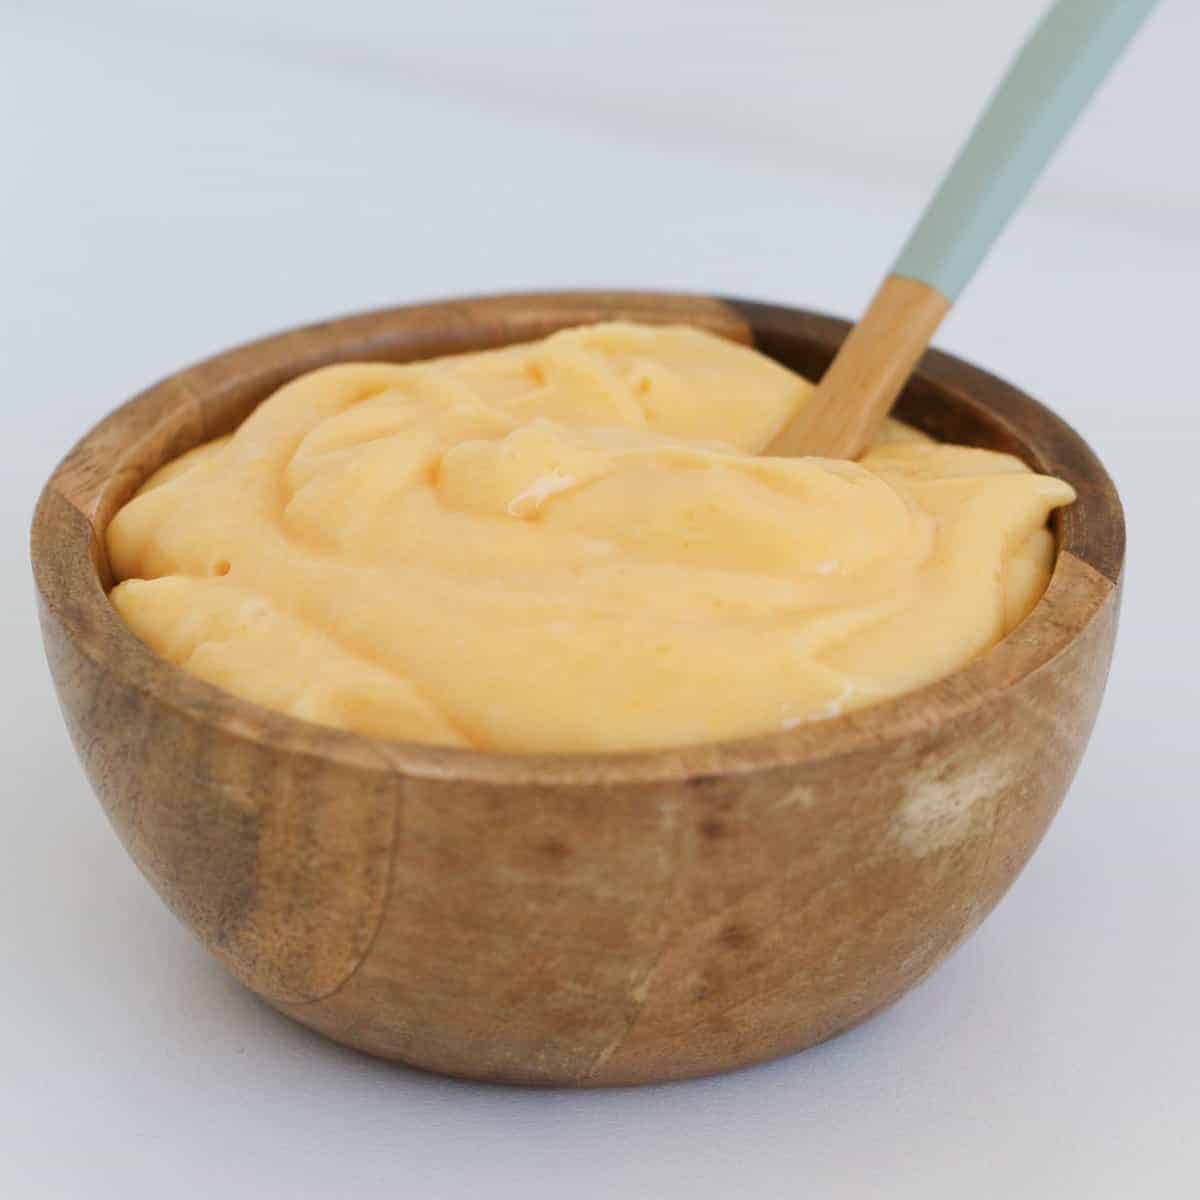
Yes, absolutely! It's completely normal for your lemon curd to be runny and sauce-like when it finishes cooking. Once chilled in the fridge, it will thicken to a beautiful curd.
Lemon curd can be used in SO many ways. Here's a few of my favourites:
- served on top of fresh scones, pancakes or waffles
- as a filling in lemon cupcakes or butterfly cakes
- on top of a baked lemon cheesecake
- as a topping for classic pavlova
- as a spread on toast, croissants or English muffins
- as a topping poured over ice-cream or creamy yoghurt
You don't 'have' to strain the curd through a fine sieve, however, doing so will give you the smoothest lemon curd as it removes any remaining lemon zest (and it's definitely my preferred option).
Some of my readers prefer not to strain the lemon curd - so it's really your personal choice.
This Thermomix lemon curd recipe can be stored in a sterilised jar in the fridge for up to 3 months. Once opened, it should be consumed within 2 weeks.
You can freeze lemon curd in a sterilised jar for up to 1 year. Place it in the fridge for 24 hours to thaw and then consume within 2 weeks once opened.

More Thermomix Lemon Recipes
If you've been visiting Bake Play Smile for a while, you'll know that I LOVE my Thermomix! All of my recipes have both conventional (beaters, stove-top, stand-mixer) instructions as well as Thermomix instructions.
Here's a few more of my favourite Thermomix recipes using lemons:
- Creamy Lemon Slice - the easiest and creamiest lemon slice you'll ever make. A super popular recipe with my readers!
- Classic Lemon Tart - it doesn't get any better than this old fashioned recipe using homemade Thermomix shortcrust pastry!
- Lemon & Coconut Slice - this no-bake slice recipe is the most delicious recipe ever. It's an all-time favourite in our house.
- Lemon & Yoghurt Loaf - this simple sweet loaf is a great option for lunch boxes or afternoon tea.
WANT EVEN MORE DELICIOUS RECIPES? Subscribe to my newsletter or follow along on Facebook or Instagram. And if you love baking, then please come and join my Facebook cooking club group or subscribe to my YouTube channel.

Thermomix Lemon Curd
Ingredients
- zest of 2 lemons
- 2 eggs
- 2 extra egg yolks
- 165 g caster sugar
- 80 g butter
- 90 g lemon juice
Instructions
- Peel the lemons with a peeler and place the zest (without any white pith) into the Thermomix bowl. Grate for 5 seconds, Speed 10. Scrape down the sides of the bowl and repeat until finely grated.

- Add the eggs, extra egg yolks, caster sugar, butter and lemon juice and cook for 10 minutes, 80 degrees, Speed 4.
- If the lemon curd is still very runny, cook for a further 1-2 minutes, 90 degrees, Speed 4. Note: the lemon curd will continue to thicken on cooling.
- Pour lemon curd through a strainer (to remove any remaining zest) and into a sterilised jar.

Notes
- lemons - I use both the zest and juice of the lemons in this simple curd recipe.
- eggs - I use 2 eggs plus 2 extra egg yolks in this recipe. The extra egg yolks help to thicken the curd while adding an amazing flavour. This is also a great recipe for using up extra egg yolks (perfect for when you've made a recipe using only egg whites)
- caster sugar - also known as superfine sugar.
- butter - you can use either salted or unsalted butter in this recipe.
- Thickens on cooling - it's completely normal for your lemon curd to be runny and sauce-like when it finishes cooking. Once chilled in the fridge, it will thicken to a beautiful curd.
- Straining - you don't 'have' to strain the curd through a fine sieve, however, doing so will give you the smoothest lemon curd as it removes any remaining lemon zest (and it's definitely my preferred option).
- Storing - this lemon curd can be stored in a sterilised jar in the fridge for up to 3 months. Once opened, it should be consumed within 2 weeks.
- Freezing - you can freeze lemon curd in a sterilised jar for up to 1 year. Place it in the fridge for 24 hours to thaw and then consume within 2 weeks once opened.


Jo says
Do you put the lemon curd in fridge straight away or let it cool first.
Thank you
Lucy says
Hi Jo, I allow it to cool for a while before popping it in the fridge.