

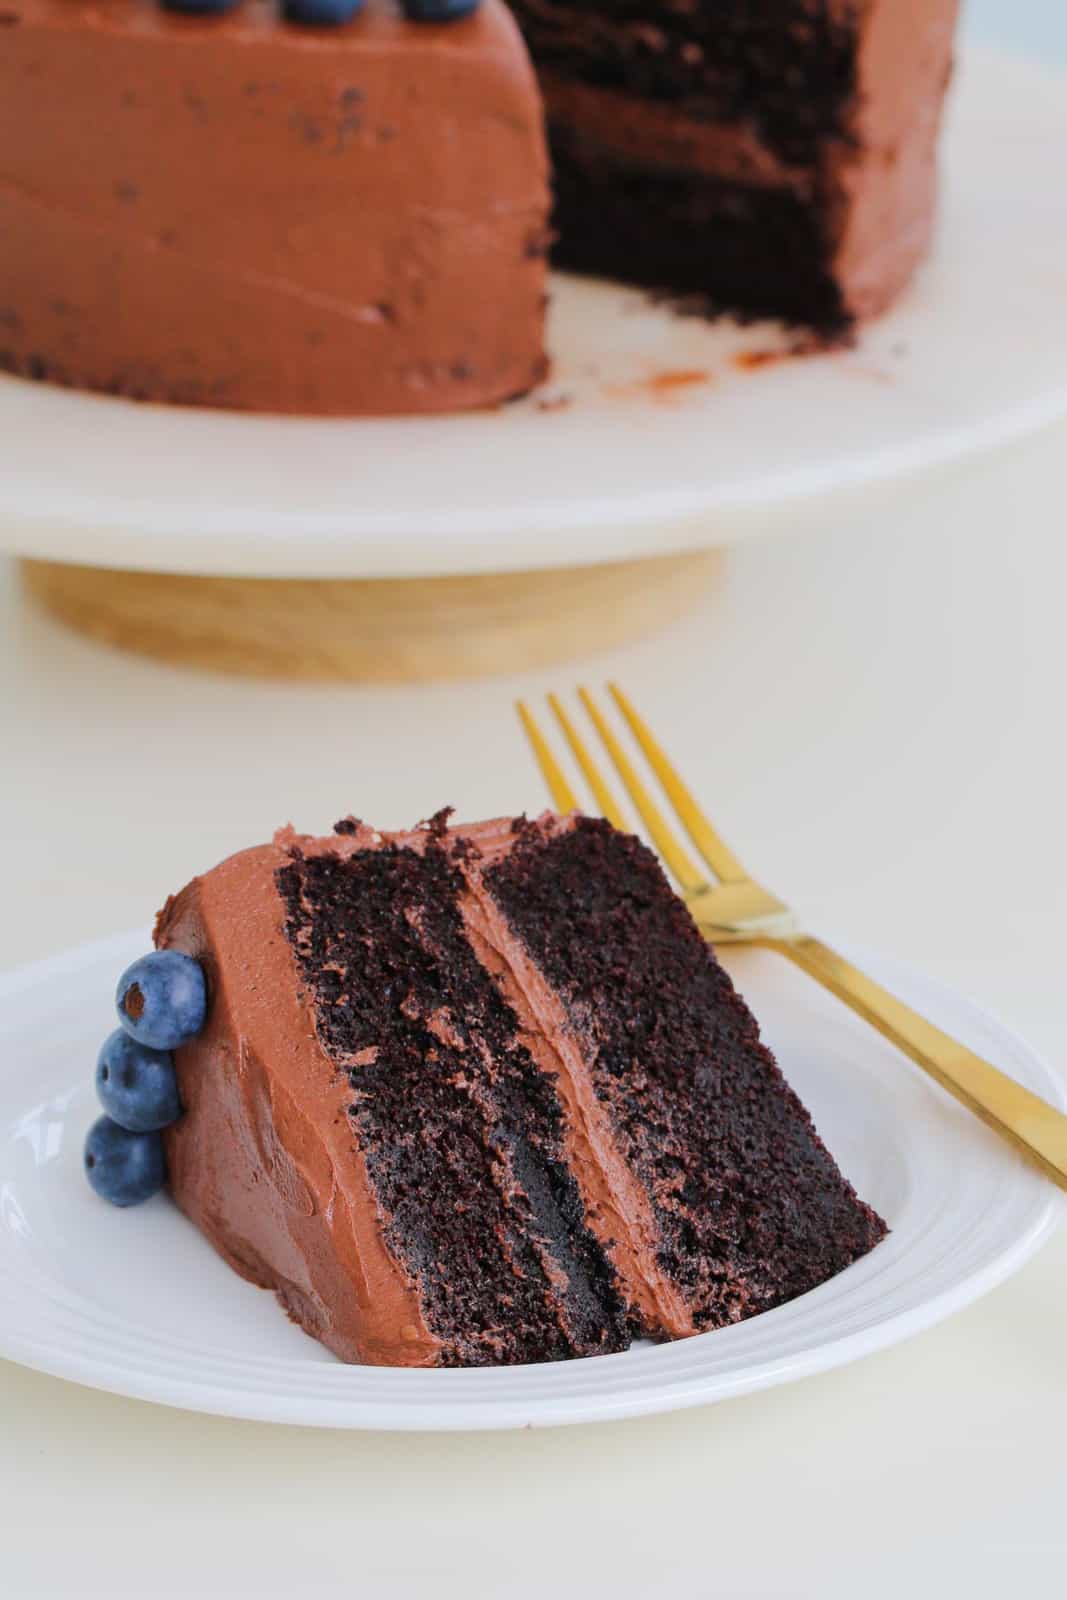
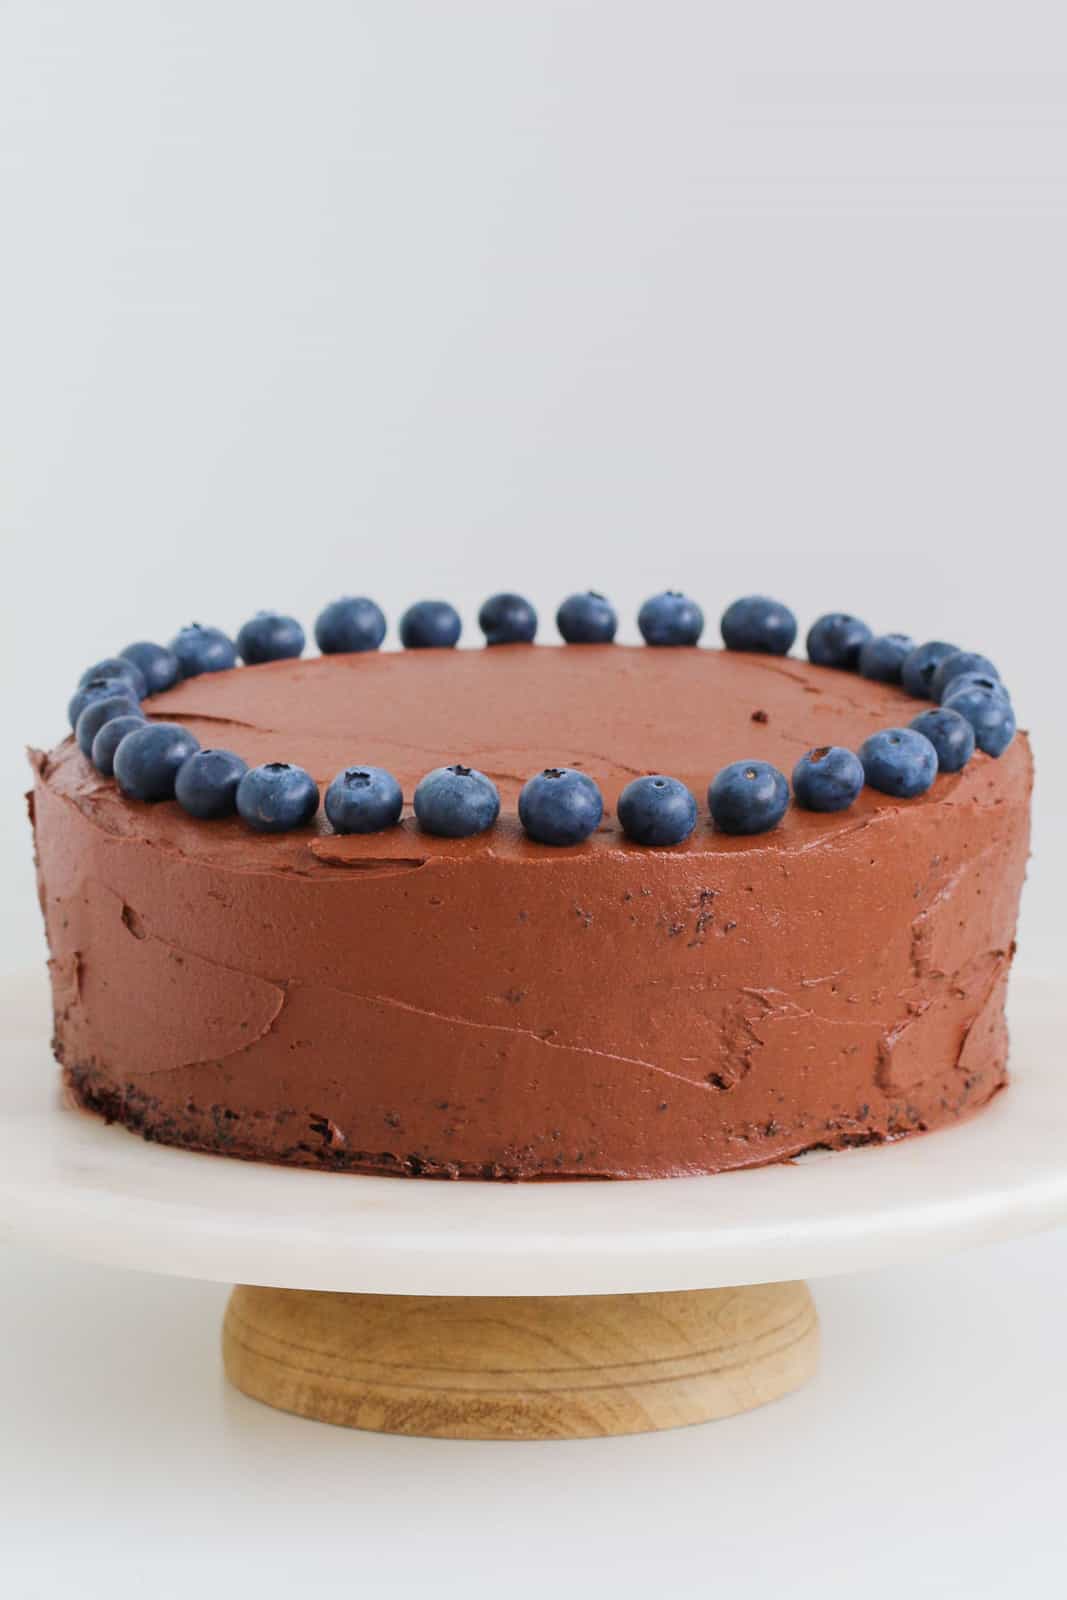
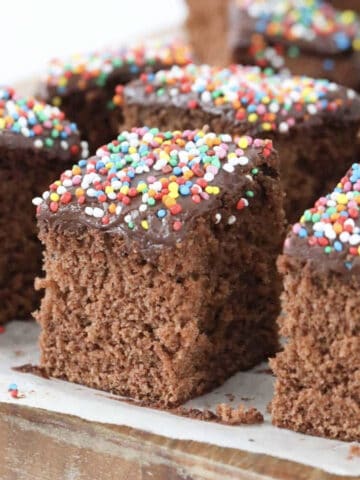
When it comes to celebrating a birthday, spoiling the kids, or just baking something indulgent for the weekend, nothing beats a rich, fudgy chocolate mud cake. Dense, moist, and smothered in creamy frosting, this cake is guaranteed to be the showstopper at your next celebration. If you're a chocolate lover, you'll also want to try my Chocolate Chip Cookies or my reader-favourite Chocolate Hedgehog Slice for even more chocolatey inspiration.
I have been making this cake for my kids' birthdays for a couple of years. It really, truly is the BEST choc mud cake recipe. Thank you so much!
- Jodie
There's a reason why this recipe has been one of the most baked and loved cakes on Bake Play Smile for over a decade. A good mud cake should be dense without being dry, moist without being overly heavy, and rich enough to satisfy chocoholics without leaving you overwhelmed.
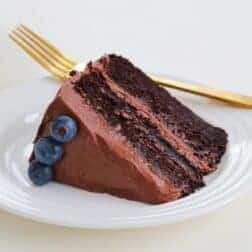
Unlike a simple chocolate sponge, a mud cake has a tight crumb and fudge-like texture, making it ideal for birthdays, weddings, and celebrations where you need a cake that slices neatly and holds up well under decorations. I often bake this cake as a double-layer birthday cake, but it's just as delicious served plain with cream or berries. If you're looking for other celebration-worthy bakes, you'll love my Butter Cake with Buttercream Frosting or my Carrot Cake with Cream Cheese Frosting.
Why You're Going To Love This Recipe
- Dense, rich & fudgy - everything a true mud cake should be.
- Perfect for birthdays & parties - sturdy enough to layer, decorate, and feed a crowd.
- Easy to make - no complicated steps, just simple pantry ingredients.
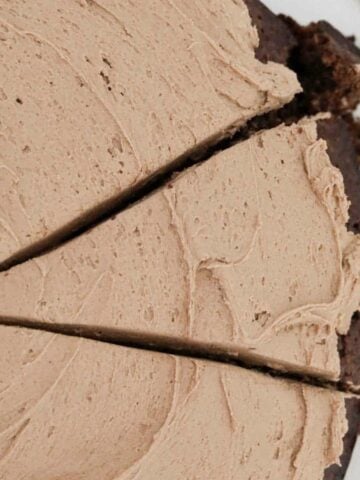
- Two frosting options - my favourite creamy buttercream or a classic ganache.
- Make-ahead friendly - keeps beautifully for days and freezes well.
Jump to:
Cake Ingredients
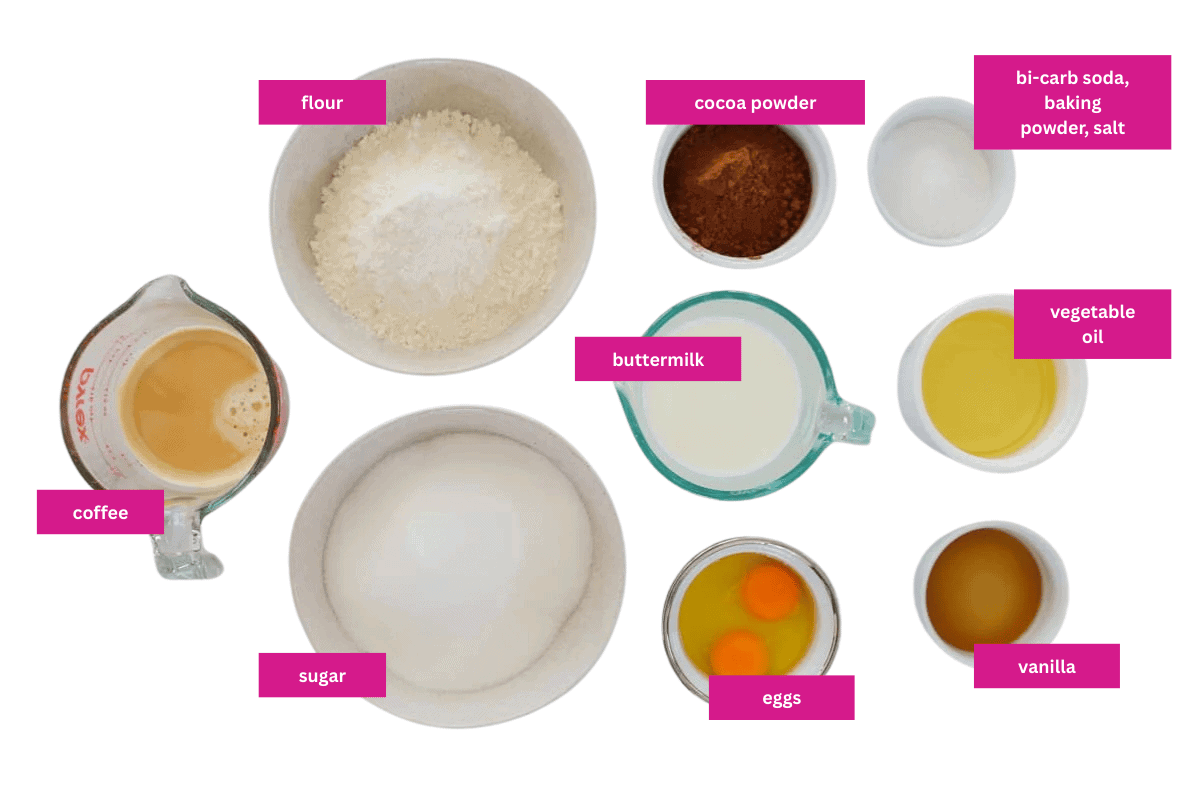
Here's what you'll need to make this fudgy chocolate mud cake:
- Buttermilk - the secret to a moist, dense crumb. If you don't have any, simply stir 1 tablespoon of lemon juice or vinegar into 1 cup of milk and let it sit for 5 minutes.
- Vegetable oil - this keeps the cake extra moist compared to using just butter.
- Coffee - don't worry, it won't taste like coffee! It simply deepens the chocolate flavour. If you prefer, you can substitute with hot chocolate or Milo.
- Good quality cocoa powder - use unsweetened cocoa (not drinking chocolate) for the best flavour.
Variations
- Gluten-Free Chocolate Mud Cake - swap the plain flour for a gluten-free flour blend.
- Chocolate Ganache Frosting - for a classic finish, top with rich ganache instead of buttercream.
- Mini Mud Cakes - bake the batter in muffin tins for individual serves (reduce baking time).
- Celebration Layer Cake - split into three layers, fill with frosting, and decorate with sprinkles, fruit, or lollies for a party.
Need To Substitute An Ingredient?
Ask ChatGPT for suggestions on how to substitute the particular ingredient:
How To Make Chocolate Mud Cake
Making a mud cake is simple! Just follow these easy steps (full recipe card below for both conventional and Thermomix methods).
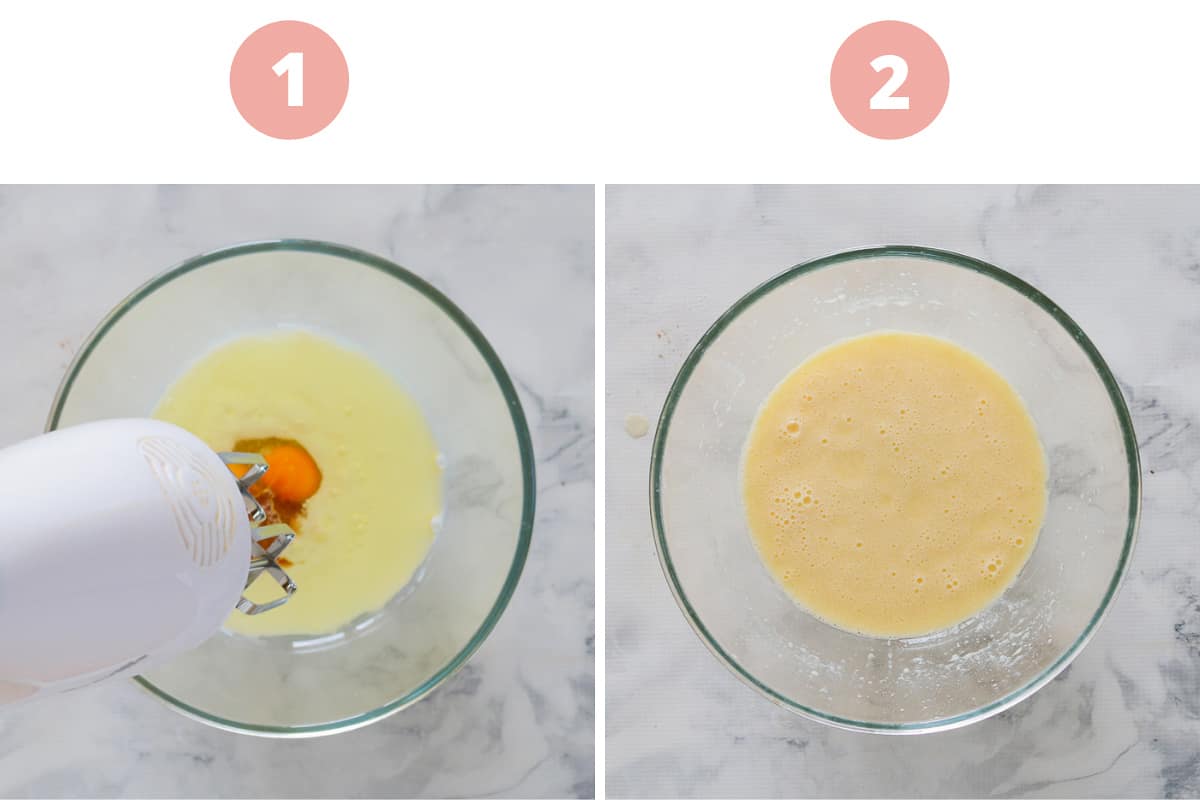
- Step 1: Mix wet ingredients - beat together buttermilk, oil, eggs, and vanilla.
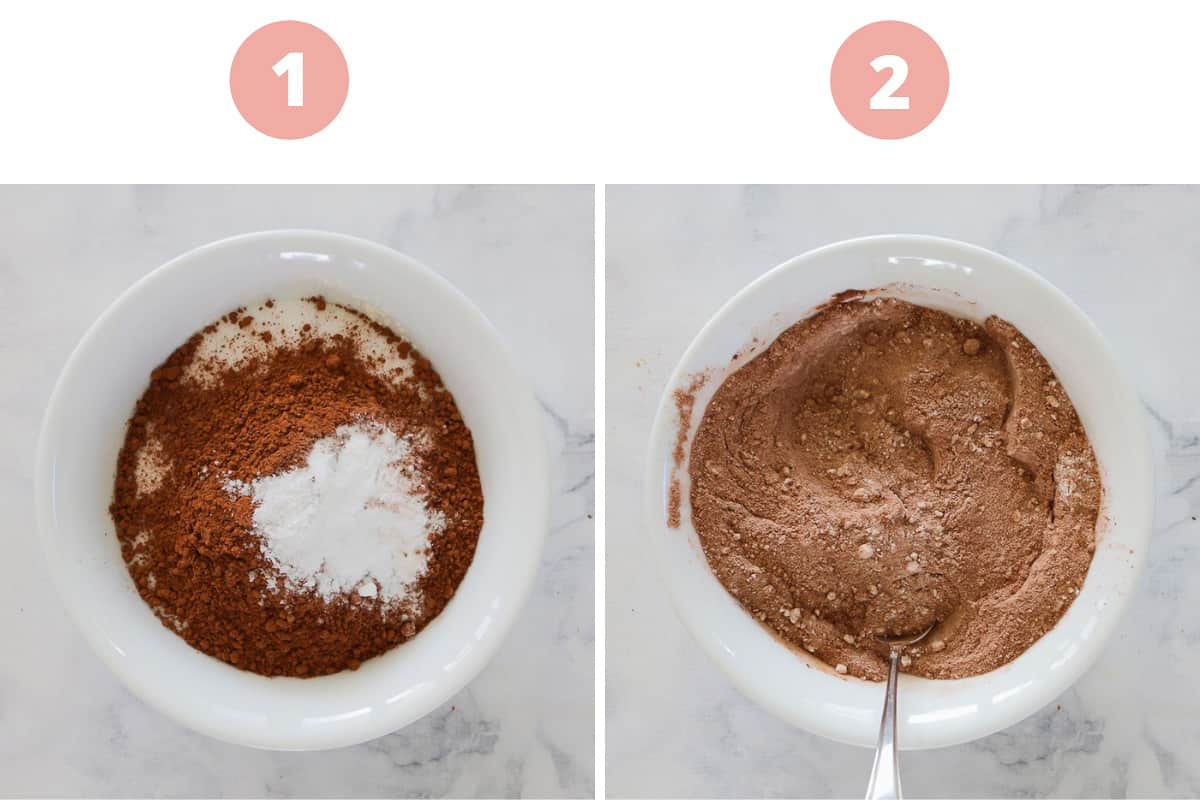
- Step 2: Add dry ingredients - sift flour, sugar, cocoa, baking powder, bicarb, and salt, then add gradually to the wet mix.
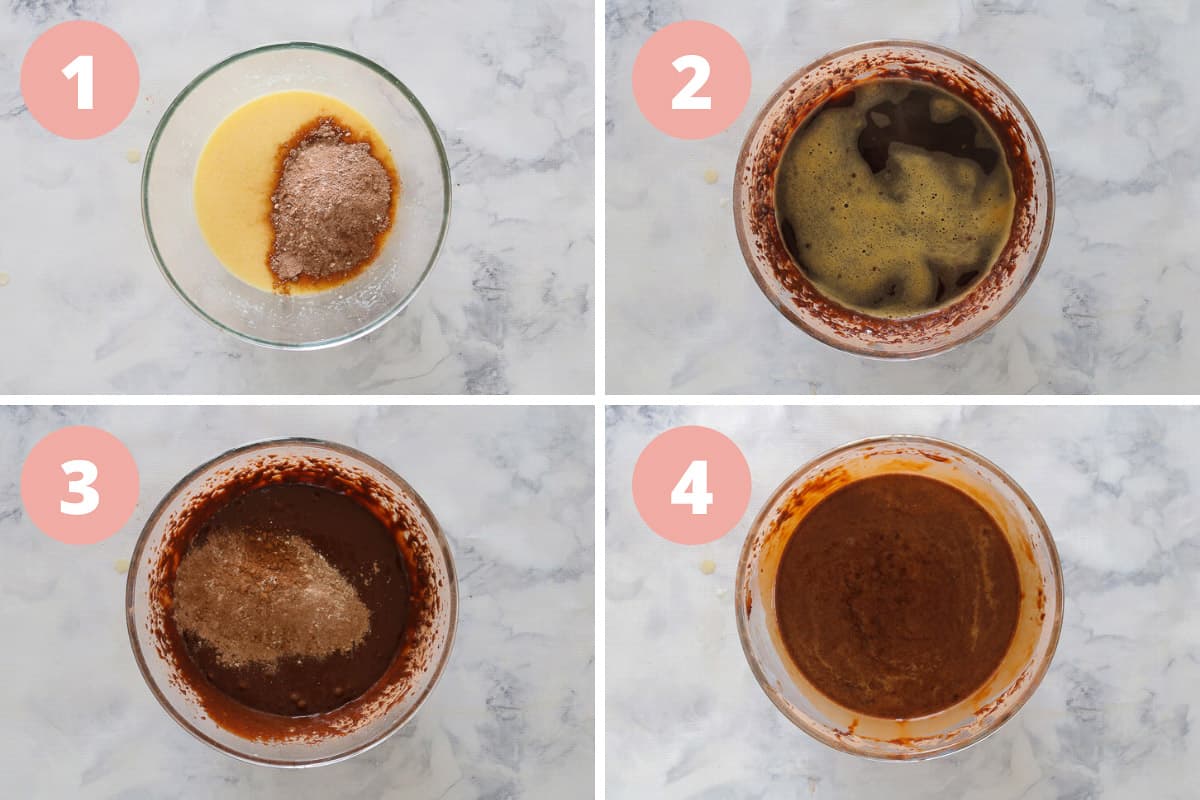
- Step 3: Whisk through coffee - this creates a smooth, runny mixture (don't panic, it's meant to be thin!).
- Step 4: Bake - pour the cake batter into tins and bake until a skewer comes out with just a few moist crumbs.
Allow the cakes to cool completely on a wire rack.
Frost - whip up the creamy chocolate buttercream (or ganache if you prefer) and decorate as you like.
Top Tip
Your batter should be very runny before baking - that's what gives the cake its signature moist, dense texture.
Recipe Tips
- Don't overbake - mud cakes are meant to be fudgy. Take it out as soon as a skewer comes out mostly clean.
- Coffee substitute - if you're not a coffee fan, use hot chocolate or even Milo.
- Serving suggestion - serve at room temperature for the best flavour and texture.
- Storing - Keep in an airtight container at room temperature for up to 4 days, or in the fridge for up to 6 days (bring to room temperature before serving).
- Freezing unfrosted cakes - wrap well in foil and freeze for up to 3 months. Defrost overnight in the fridge.
- Freezing frosted cake - leftovers can be stored in an airtight container for up to 1 month.
- Double or single layer - you can bake this as one tall cake or two smaller layers. Adjust baking time accordingly.
- Thermomix option - see recipe card below for step-by-step Thermomix instructions.
Chocolate Mud Cake FAQs
It's believed to have originated in the US, where the dense, fudge-like texture and deep colour resembled the Mississippi River's muddy banks.
Mud cake is denser with a tighter crumb and brownie-like texture, while fudge cake is lighter and more cake-like but still moist.
Yes! Mud cakes are sturdy and hold their shape well, making them perfect for stacking, carving, and decorating.
Not at all - it simply enhances the chocolate flavour. If you'd prefer not to use coffee, swap it for hot chocolate or boiling water.
Opening the oven too early, out-of-date baking powder, or under-mixing can cause sinking. Be patient and keep the oven closed until the last 10 minutes of baking.
More Chocolate Cake Recipes
If you love this recipe, here are four more chocolatey favourites to try next:
WANT EVEN MORE DELICIOUS RECIPES? Subscribe to my newsletter or follow along on Facebook or Instagram. And if you love baking, then please come and join my Facebook cooking club group or subscribe to my YouTube channel.
Chocolate Mud Cake
Ingredients
For the mud cake
- 1 ¾ cup (220g) plain flour
- 1 ¾ cup (350g) caster sugar
- ¾ cup (65g) cocoa powder
- 1 teaspoon baking powder
- 2 tsps bi-carb soda
- 1 teaspoon salt
- 1 cup (250ml) buttermilk see tips
- ½ cup (125ml) vegetable oil
- 2 large eggs at room temperature
- 1 teaspoon vanilla extract
- 1 cup (250ml) coffee hot and strong
For the milk chocolate frosting
- 290 g unsalted butter softened to room temperature
- 3-4 cups (360-480g) icing sugar
- ¾ cup (65g) cocoa powder
- 3-5 tbs (45-75ml) milk
- 1 teaspoon vanilla extract
- ¼ teaspoon salt optional
Instructions
Conventional Method
- Preheat oven to 170 degrees celsius.
- Grease two 9 inch round cake pans and line with baking paper.
- Sift the flour, sugar, cocoa powder, baking powder, bi-carb soda and salt into a bowl and set aside.
- Using beaters or a stand mixer, mix the buttermilk, oil, eggs and vanilla in a large bowl until well combined.
- Slowly add all of the dry ingredients to the wet ingredients with the mixer on low.
- Pour in the coffee and mix.
- Divide the batter equally between the baking pans and bake for approximately 25 minutes or until a toothpick inserted in the center comes out clean (don't overcook the cake - you want it to be nice and fudge-like!)
- Allow to cool completely.
- To make the frosting beat the butter on high speed until smooth and creamy (this will take a couple of minutes).
- Reduce the speed to low and slowly add in 3 ½ cups of icing sugar as well as the cocoa powder.
- Beat until the icing sugar and cocoa have been completely mixed into the butter (again this will take a couple of minutes).
- Turn the mixer up to medium speed and add in the vanilla and the milk.
- Beat on high speed for 1 minute.
- If your frosting isn't thick enough, feel free to add in the remaining ½ cup of icing sugar.
- Add a tiny bit of salt to taste (optional).
- Spread a little frosting onto a serving cake plate (this will hold the cake in place).
- Carefully place one of the cakes on top of the icing (make sure the flat side is facing up).
- Using a spatula or flat knife, spread the top of the cake with frosting.
- Place the second cake on top (this time with the rounded side up) and spread the frosting evenly onto the top and the sides of the cake.
- Decorate with fresh strawberries or any preferred toppings.
- Store in an airtight container at room temperature for 3-4 days or in the fridge for 5-6 days. Please note that keeping the cake at room temperature will result in a beautiful, moist texture.
Thermomix Method
- Preheat oven to 170 degrees celsius (fan-forced). Grease two 9 inch round cake pans and line with baking paper.
- Measure the flour, sugar, cocoa powder, baking powder, bi-carb soda and salt into the TM bowl and sift for 5 seconds, Speed 8. Set aside in a separate bowl.
- Place the the buttermilk, oil, eggs and vanilla in the Thermomix bowl and mix on Speed 3 until well combined.
- With the blades on speed 2, slowly add the dry ingredients to the wet ingredients and mix until combined.
- Pour in the coffee and mix on Speed 2 until combined.
- Divide the batter equally between the baking pans and bake for approximately 25 minutes or until a toothpick inserted in the center comes out clean (don't overcook the cake - you want it to be nice and fudge-like!). Allow to cool completely.
- To make the frosting add the icing sugar to the Thermomix bowl and mix for 10 seconds, Speed 9, then add all of the remaining ingredients and mix for 30 seconds, Speed 4, or until light and fluffy.
- Spread a little frosting onto a serving cake plate (this will hold the cake in place). Carefully place one of the cakes on top of the icing (make sure the flat side is facing up).
- Using a spatula or flat knife, spread the top of the cake with frosting. Place the second cake on top (this time with the rounded side up) and spread the frosting evenly onto the top and the sides of the cake.
- Decorate with fresh strawberries or any preferred toppings.
- Store in an airtight container at room temperature for 3-4 days, or in the fridge for 5-6 days.
Notes
- Don't overbake - mud cakes are meant to be fudgy. Take it out as soon as a skewer comes out mostly clean.
- Your batter should be very runny before baking - that's what gives the cake its signature moist, dense texture.
- Coffee substitute - if you're not a coffee fan, use hot chocolate or even Milo.
- Serving suggestion - serve at room temperature for the best flavour and texture.
- Storing - keep in an airtight container at room temp for up to 4 days, or in the fridge for up to 6 (bring to room temp before serving).
- Freezing unfrosted cakes - wrap well and freeze for up to 3 months. Defrost overnight in the fridge.
- Freezing frosted cake - leftovers can be frozen in an airtight container for 1 month.
- Double or single layer - you can bake this as one tall cake or two smaller layers. Adjust baking time accordingly.
- Thermomix option - see recipe card below for step-by-step Thermomix instructions.


Ange Roche says
The BEST cake I’ve ever eaten!!
Thank you so much for sharing your recipe.❤️ 10/10
Lucy Mathieson says
Thank you so much!