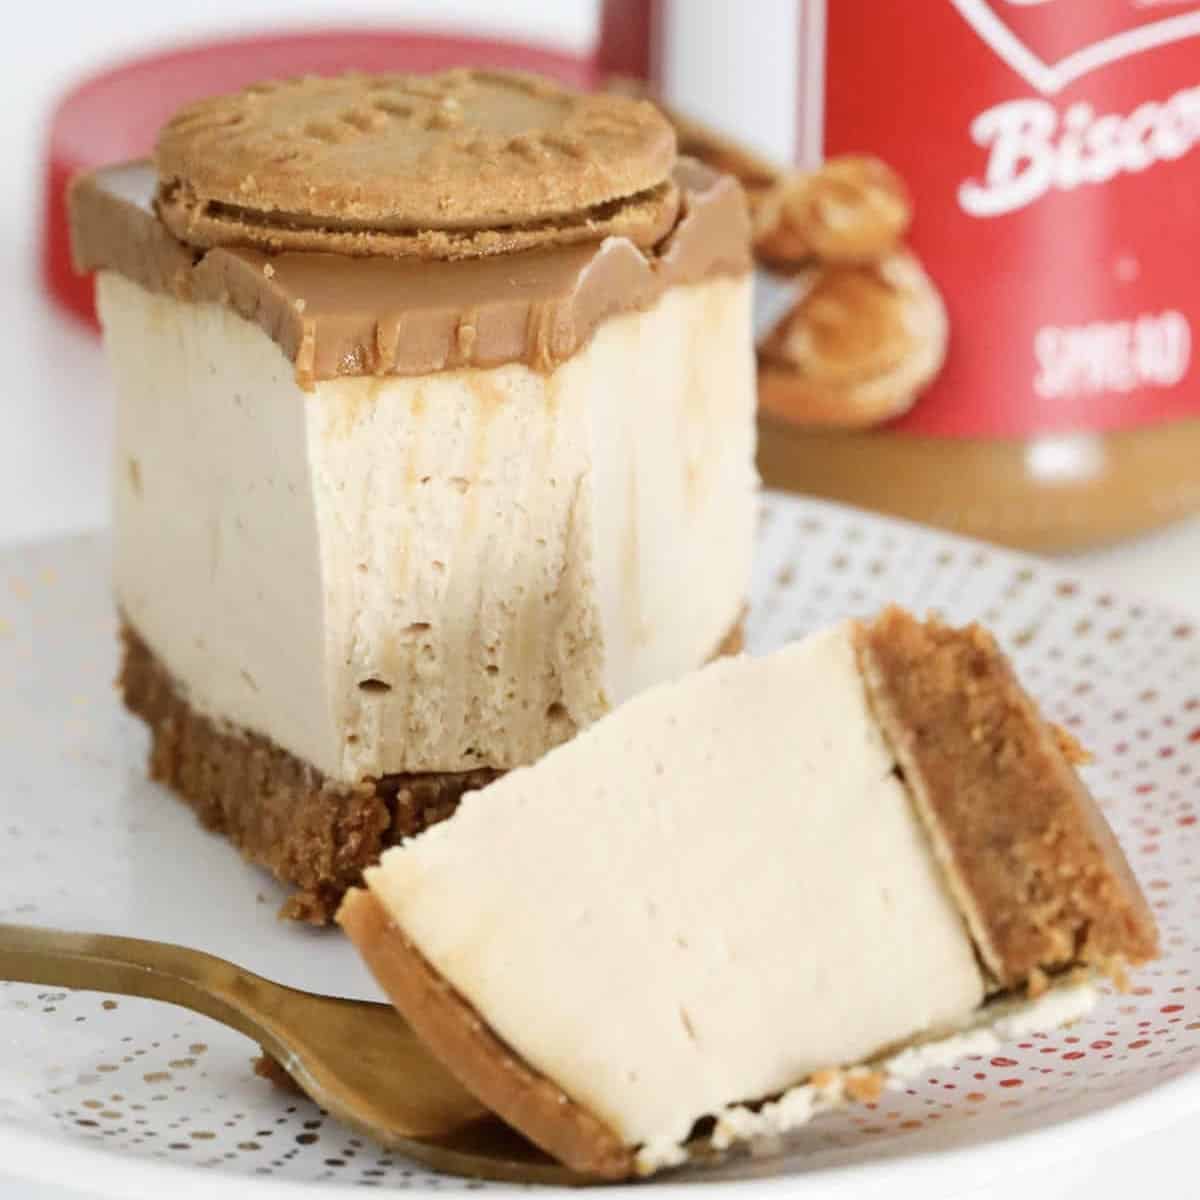
Biscoff Cheesecake
Introducing the perfect dessert for Biscoff lovers.... a RICH, CREAMY & LUSCIOUS no-bake Biscoff Cheesecake made with a crunchy Biscoff biscuit base and a smooth caramelised Biscoff cream cheese filling, decorated with extra biscuits and spread.
Print
Pin
Servings: 16 serves
Calories: 403kcal
Cost: $15
Equipment
- Food processor or Thermomix
- Beaters, stand-mixer or Thermomix
- Microwave
Ingredients
For The Base
- 250 g Biscoff biscuits
- 85 g butter melted
For The Filling
- 225 g (1 cup) cream thickened or heavy
- 3 teaspoon gelatine dissolved in ¼ cup boiling water, cooled
- 500 g cream cheese room temperaure
- 50 g (½ cup) icing sugar
- 200 g (1 cup) Biscoff spread
For The Topping
- 100 g (½ cup) Biscoff spread
- Biscoff biscuits to decorate (optional)
Instructions
Conventional Method
- To ensure a smooth cheesecake, ensure all ingredients are at room temperature before starting.
- Grease and line the base and sides of a 20cm spring-form pan with baking paper and set aside.
- Finely crush the Biscoff biscuits in a food processor and place into a bowl.
- Add the melted butter and mix until well combined.
- Press the mixture firmly into the base of the pan and place into the fridge.
- Whip cream and set aside.
- Pour ¼ cup of boiling water into a cup, sprinkle over the gelatine and stir until dissolved. Allow to cool.
- Beat the cream cheese, icing sugar and Biscoff spread until smooth and creamy.
- Add the cooled, dissolved gelatine to the mix and beat until well combined.
- Gently fold through the whipped cream until well combined.
- Spoon the mixture into the prepared tin. Spread out evenly with a spoon.
- Place the cheesecake into the fridge for 1 hour or until set.
- Melt the Biscoff spread and pour over the top of the chilled cheesecake. Spread out with a spoon and decorate with extra Biscoff biscuits (optional). Place back into the fridge for 3 hours or until set.
Thermomix Method
- To ensure a smooth cheesecake, ensure all ingredients are at room temperature before starting.
- Grease and line the base and sides of a 20cm spring-form pan with baking paper and set aside.
- Melt butter in the Thermomix bowl for 2 minutes, 100 degrees, Speed 1. Add the Biscoff biscuits and crush for 10 seconds, Speed 10. Scrape down the sides of the bowl and repeat until well combined.
- Press the mixture firmly into the base of the pan and place into the fridge.
- Whip cream in a clean, dry Thermomix bowl on Speed 3.5 until lightly whipped (the time it takes will depend on the freshness of the cream - it can be anywhere between 10 seconds and 2 minutes!!) Set the cream aside in a separate bowl.
- Pour ¼ cup of boiling water into a cup, sprinkle over the gelatine and stir until dissolved. Allow to cool.
- Beat the cream cheese, icing sugar and Biscoff spread in a clean and dry Thermomix bowl for 30 seconds, Speed 5. Scrape down the sides with a spatula and repeat until smooth and creamy.
- Add the cooled, dissolved gelatine to the mix and mix for 30 seconds on Speed 5.
- Fold through the whipped cream with the spatula.
- Spoon the mixture into the prepared tin. Spread out evenly with a spoon.
- Place the cheesecake into the fridge for 1 hour or until set.
- Melt the Biscoff spread and pour over the top of the chilled cheesecake. Spread out with a spoon and decorate with extra Biscoff biscuits (optional). Place back into the fridge for 3 hours or until set.
Notes
RECIPE NOTES & TIPS
- For the smoothest, lump-free cheesecake, ensure all of your ingredients are at room temperature before using.
- If you don't have time to wait for the cream cheese to soften to room temperature, place it in the microwave for 30-60 seconds or until soft.
- Biscoff - you can buy Biscoff spread, Biscoff cookies and Biscoff sandwich cookies from any major supermarket.
- Cream cheese - for best results, use full fat (not light) cream cheese.
- If you don't have a food processor, you can crush the biscuits by placing them in a ziplock bag and crushing them with a rolling pin.
- Use a greased and lined (with baking paper) springform tin with a removable base for easy removal of the cheesecake.
- Chill Biscoff cheesecake overnight (or for a minimum of 4 hours).
- Store cheesecake in the fridge and consume within 3 days.
- Freeze - you can freeze Biscoff cheesecake, either as a whole or in individual portions. Wrap in a layer of plastic wrap and then a layer of foil and freeze for up to 1 month.
Nutrition
Calories: 403kcal | Carbohydrates: 25g | Protein: 5g | Fat: 32g | Saturated Fat: 15g | Polyunsaturated Fat: 2g | Monounsaturated Fat: 6g | Trans Fat: 0.2g | Cholesterol: 59mg | Sodium: 193mg | Potassium: 70mg | Fiber: 0.2g | Sugar: 14g | Vitamin A: 773IU | Vitamin C: 0.1mg | Calcium: 43mg | Iron: 1mg
